

TrevorOutlaw
-
Posts
635 -
Joined
-
Last visited
-
Days Won
4
Posts posted by TrevorOutlaw
-
-
3 hours ago, lynxster4 said:
That's a bit mind-bending @TrevorOutlaw.
 Nice job, my head is still tilting... 🤪
Here are the steps. First, I duplicated the original layer, flipped it horizontally, rotated it 90 degree, and moved it until it lined up with bottom and right side.

Then, on a new layer, I drew a right angle triangle and clicked outside the triangle, went to the duplicated/rotated layer and deleted.

The result is what you see on page 1.
Here's another example.

-
 3
3
-
 1
1
-
-
Right-click on the file and click on "Open With..."?
-
Another Inception-style photomanipulation. Finally figured out to achieve this effect within PDN and it was easier than I thought.
-
2
-
-
On 7/29/2019 at 7:10 AM, lynxster4 said:
And I was laughing because I had already started 'Thumper'. Here's a companion piece to 'Flower'.
Thumper to Bambi: "Do not bite into this clover. It is pysch..."
Mother: "Thumper!"
Thumper, looking at Mother apprehensively: "Yes, Mama?"
Mother: "What did your father tell you this morning?"
Thumper, looking at the ground and kicking the sod: "If you have nothing nice to say, don't say anything at all."
To Bambi and whispering: "The clover is psychedelic. Why do you think I have so many brothers and sisters?"
")
-
1
-
-
I just used Microsoft Edge to copy and paste a cutout PNG file.
What I had to do was tell Edge to filter for Transparent by clicking on the Filter icon and then on the drop down list of All...Transparent (third menu choice from left). If this is not the way you wish to go, I have a YouTube video that helps you workaround it.
-
On 7/26/2019 at 12:14 AM, Joe P. said:
Open the .pdn file and it reverts to original DPI.
I think by default the DPI sticks to 96 DPI.
What I would do is create a blank template file by going to File > New. Establish your parameter you want in dimension, and then change DPI to, say, 300 for printing, and then use Save As ... PDN. I named the file as template.pdn.
I just tried this way and double check by going to Image > Canvas Size and found that it retained 300 DPI setting.
-
@Seerose, @lynxster4, and @LionsDragon ... thank you fine ladies for your kind words on the orb.
---------------
New on page 1, a 15-minutes knock-up of Inception-style photomanipulation. Stocks used: levitating man, hallway, and clouds.
-
3
-
-
Throwing in my own thoughts. There's also Color Flip/Rotate, part of Ed Harvey's plug-in pack.
If you want to make different part of the image with different color, I would individually select them (elliptical selection for example), copy, and paste onto a new transparent layer, then run the Color Flip/Rotate.
On 7/24/2019 at 11:48 AM, welshblue said:Cats and skinning again
But of course, there's always more than one way to skin a cat.
-
-
11 hours ago, merarischroeder said:
It might just be a matter of mastering levels,
There are other tricks. You could use Curves, Hue and Saturation, Color Balance (look for BoltBait's plug-in pack inside the Plug-In Section of the Forums), and using layer blending modes.
I have watched quite a few photo manipulation tutorials on YouTube and I have observed those artists tend to use what I just suggested. Paint.NET is not one trick pony software. It requires effort and learning by experience.
Edit: I looked at your "tutorial" and to be honest, I have no idea what you are trying to do.
-
2 hours ago, welshblue said:
Thanks for the link to unsplash @TrevorOutlaw endless resources there
You are welcome. Another good site to go for stock photos is pexels.com.
-
3 hours ago, dipstick said:
Anyway, I think that site uses some type of AI to guess the person from the background.
I think they do use AI and I could have swore they had that message on their website, but I also think they are capitalizing on a proposal that was written back in 2004 and the technology GrabCut was born. They are also making money off people who do not want to work around the workarounds.
23 hours ago, dipstick said:Amazing how well remove.bg site works on people
That is true, however, there were instances where I have seen the cutout inadvertently removing, say, a piece of jewel. If the stock photo is someone in a studio with a dark background, the website is hit or miss on it. I have also tried running it on separating car from background, and it also is hit or miss. It works well on solid object, e.g. old fashioned camera, as long as there is a clear contrast between the foreground and background.
My suggestion would be is to find stock photo that are well lit with clear distinction between the foreground and background.
-
3 hours ago, welshblue said:
I never realised I needed Switch Grey to Alpha so much
To be honest, I had no idea this was a thing until I tried to code something and inquired for help, but BoltBait had already developed it and released it. The whole time that plug-in was in my Effects folder and I was kicking myself for not knowing I had it. Live and learn...live and learn.
No, I didn't curse you for that comment in the orb tutorial. To be honest, I didn't realize barbieq25 made a tutorial and I must have completely forgotten about it.
2 hours ago, Seerose said:Thank you very much for the video.
Thank you. @dipstick deserves ton of credit for the link to the website and giving tips on how to workaround the size limitation.
-
1
-
-
1 hour ago, welshblue said:
I thought @barbieq25's was sticky'ed but very similar ?
She did the whole thing. I just focused on the fretwork only.
-
Credit goes to @dipstick for the remove.bg link and giving me a tip on how to work around the size limitation for masking object in Paint.NET.
In this video, I used this website, unsplash.com, which is a nice stock photo site, and have already picked a stock photo for this purpose. I utilize this website for nearly all of my photomanipulations and using remove.bg is an awesome site to use.
Plug-in used in this video:
-
5
-
1
-
-
This tutorial is available as a PDF. Click here to view or download it
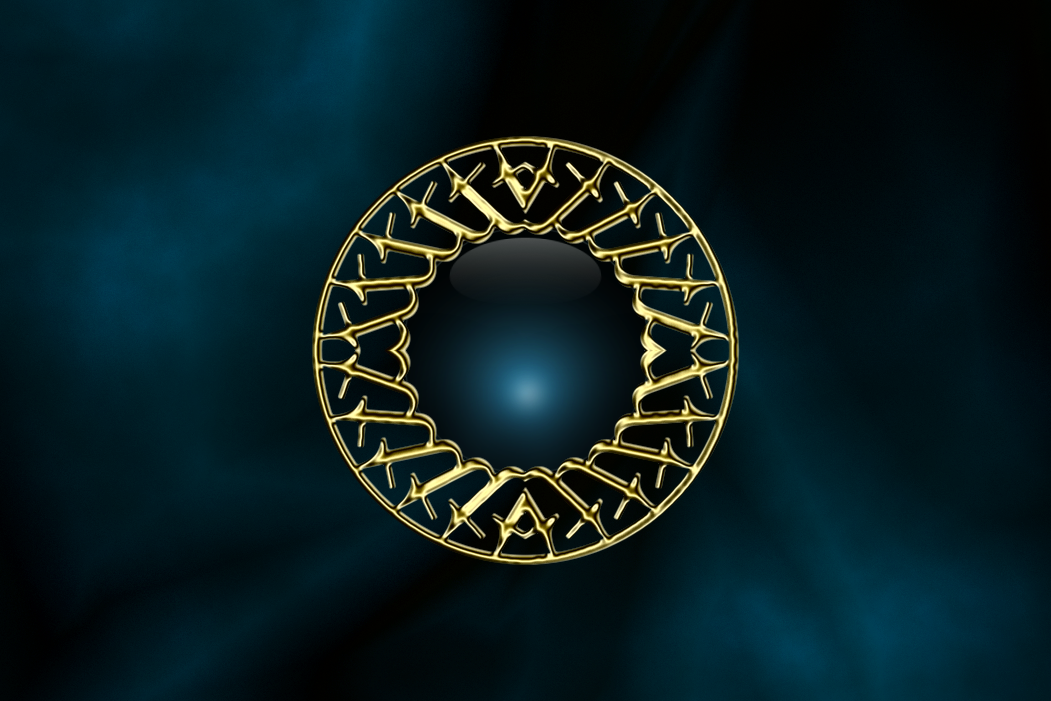
This tutorial show you a technique I used to create a fretwork in my latest Orb design. A fretwork, according to Internet search, is a pattern that is created by utilizing tools such as fretsaw, jigsaw, and if you have the money, laser cutter. It is used to create patterns in wood or metal, and in this case, it is part of the orb design.
Plug-in required:
@dpy Circle Text and Metallize, part of his plugin pack.
@BoltBait Bevel, part of his plugin pack.
Note: If the font I am using isn't found on your system, try something else. The main thing is to find a font that will give you a metal feel. Without further ado...
Step 1) Set background to black (or another color of your choice).
Step 2) Set primary color to yellow-gold (Hex #7F6A00).
Step 3) Go to Effects > Text Formations > Circle Text.
Step 4)

I am going to break down what you can do with this plugin. In the Text box, this is where you enter the letter(s) of your choice. Here, I will enter lower case 't' repeatedly. However, depending on the Font Size I choose, I may have to delete extra 't' to create a perfect circle of the text.
The Font drop down list display all the fonts installed on your machine. Go through each one and pick the one you like most. Here, I picked a font called Century and set the Font Size to 88.
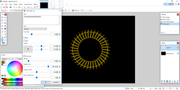
My goal, so far within this plug-in, is to create a fretwork where this is no noticeable gap between the letters, so I repeated the 't' until it was almost overlapping with each other.
You can take a step further. The finer adjustment creates an interesting shape. Play with it and see how it influence the shape. You can increase the radius, but if you do, add more letter until there are no gap in between. You can play with the angle of arc and angle of start. Your choice.
I will go ahead and render the base of the fretwork.
Step 5) Duplicate the base of the fretwork to a new layer. I will hide the first base layer and rename the duplicated layer as Bevel.
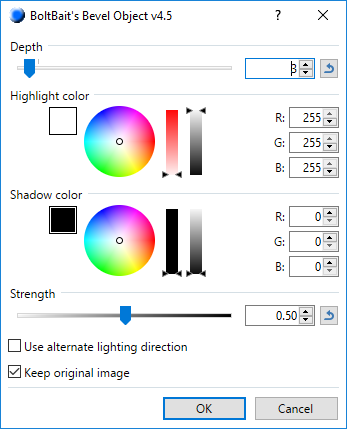
Step 6) On the Bevel Layer, run Bevel (Effects > Objects > Bevel Object). The only change was I decreased Depth to 3, and left everything to its default value.
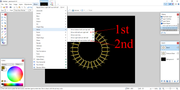
Step 7) Here, we will turn this into an actual fretwork. First, use Mirror right half over left half (Effects > Mirror > Mirror right half over left half). Then, Mirror top half over bottom half (Effects > Mirror > Mirror top half over bottom half).
Step 8 ) Run Metallize (Effects > Color > Metallize). I set Type to 1 and unticked Gray Scale.

At this point, you are pretty much done.
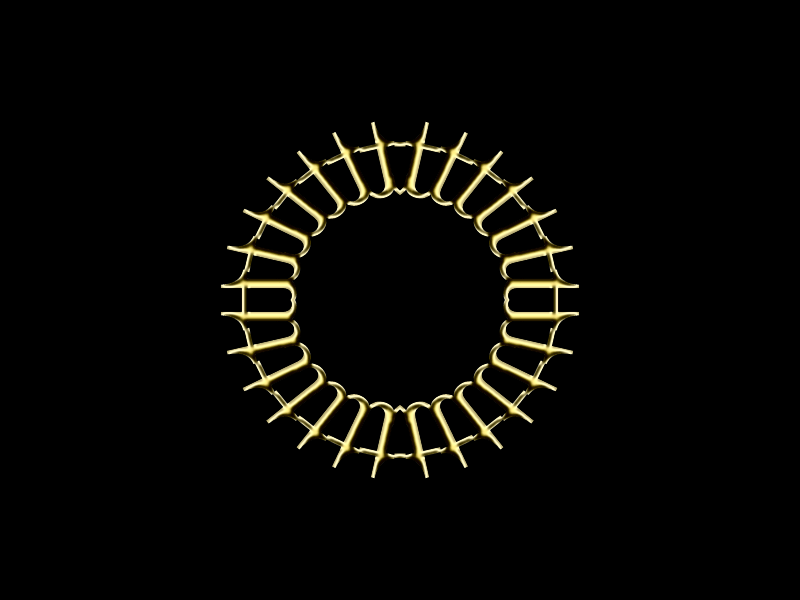
A possibility with this approach... In the example below, I used this letter pattern, vW, repeatedly, increased the radius. Then used the same steps as outlined above.

-
2
-
1
-
-
@JulioCoolio I think I will give you some critique. I think a lot of effort went into the Desert Landscape, I think there is a need to make distinctions; for example, I was confused by the green, and I realized what you were trying to do. Basing my comment on watching many of Bob Ross' painting, he would probably tell you to make your foreground object's color slightly dark and the background objects slightly lighter to create depth, and I think once you nail that, you will definitely take off.
-
1
-
-
@lynxster4 wow, wow, and wow! What an outstanding piece! When I saw the title, I was thinking, "Disney Flower? Huh?" And when I saw the image, I sheepishly realized you were referring to the skunk that Bambi mistakenly called Flower. I can hear Thumper laughing hysterically at me.
-
1
-
-
5 hours ago, welshblue said:
There's something very calming about teal blue
Indeed, according to color psychology, blue invoke a sense of calmness. It is probably why most of my art work, including photo manipulation are either warm or cool, depending on what I am aiming for. When I use Gradient Mapping, I almost default to orange-to-purple scheme, and overlay it at the final stage because I like how it create an ethereal, fantasy feel to it.
5 hours ago, welshblue said:I think I've only ever used Metallize a handful of times
Metallize is basically Curves on steroid and very useful, for me at least, in making object appear metal. I would love to master your metal work technique you use in your artwork.
5 hours ago, welshblue said:Congrats on the USA women and the World Cup
Here's the thing, man. I have not watched one second of the World Cup, and in my unpopular opinion, it is vastly overrated. More and more, I am pulling away from professional sports as they come across as never-ending divas. With that said, there is something to be said about the USWNT winning its fourth Cup, and being the standard bearer for women around the world, and I believe I have read that Europe is now focusing their effort to bring professional women club up to par. Now, if the USMNT would get up to their European and Brazilian counterparts, then they won't be a laughing stock anymore. Unfortunately, the power-that-be successfully ran off Jurgen who was trying to rebuild the pipeline to the men national team to be on equal footing as say the Barclay League. I think the tides are shifting in favor of soccer (to use American parlay) because more parents are becoming concerned with concussion syndrome from repeated violent blows to the head in football (using American parlay again). I would not be surprised if the next decade see America reaching prominence to be on par with Europe and Brazil. Right now, in America, football is king, followed by baseball, basketball, and then hockey. Soccer is becoming more popular thanks to the success of Major League Soccer that is trading with football clubs like Chelsea, Manchester United, etc.
19 hours ago, lynxster4 said:Great 'metal' work and the choice of blues. A home run!
Thank you!
3 hours ago, Seerose said:"Orb1" your neue creations are beautiful. Thank you for sharing this with us!
Thank you!
-
It has been several months since I have posted something new.
First, for those who have commented on "The Call," I am surprised none of you saw a person that was standing inside the person. When I saw that stock, I knew where I wanted to go, and hence, "The Call." It was the person inside a cave issuing a call to the man with the glasses.
@welshblue's Dragon Eye inspired me to go back to my root and I present an orb on page 1. I used @dpy Circle Text plugin to make the jewel pattern, mirror over line (left half over right half, and then top half over bottom half), and @dpy's Metallize (still one of my favorite plugins). The background was created by going crazy with two colors gradient set to difference mode (an adaption from one of Photoshop's million tutorials). Enjoy!
-
4
-
1
-
-
13 hours ago, Lynn King said:
Do you know of any other post/plugin/etc. that could help me with this? I've been trying the minute you gave me the link, and I still can't seem to get the right color.
I would look into Color Balance either by BoltBait or dpy.
1 hour ago, Lynn King said:I also tried using the eraser at 10%, and for some reason it was erasing the same as it would on 100%
I'm not sure if you are using PDN 4.1.6, but the eraser set at 10% makes the edge softer than it would at 100%. My default setting for the eraser is at 0% so I can make the edge disappear when I can.
-
1
-
-
You will have to clarify what you mean by "unwanted material".
-
1 hour ago, AsgardTM said:
Hello again !
After the last beta update paint.net is acting very weird ! For some reason the colors change and fading
For example black become red, white slowly become gray and so on. Is very important for me to fix this because I loose a lot of details..
Thanx.
Any chance you are saving your drawings in JPG format?
-
Maybe this is what you need.
Make sure you pay attention to these statements, "Do not make any changes to that layer apart from layer properties and editing the text with this plugin."
 Nice job, my head is still tilting...

Pixey's Gallery ~ A Pumpkin ~ New on 5/12/24.
in The Pictorium
Posted
Very nice job and I think @Ash would approve, however, I feel there's something weird going on with the red block.