

TrevorOutlaw
-
Posts
635 -
Joined
-
Last visited
-
Days Won
4
Content Type
Events
Profiles
Forums
Blogs
Gallery
Downloads
Posts posted by TrevorOutlaw
-
-
You did a nice job, but I am wondering if you followed a tutorial.
-
Here's another possibility. I mean, it just seem endless. It's mind-boggling. I tried a different approach, and this time, I used the Specular plug-in and used a different approach.
-
In this tutorial, I will be showing you the accidental discovery of a really nifty texture I posted in my gallery called "Stumbled Upon:"
http://i.imgur.com/bqlC5IJ.png
Required plug-ins:
The steps
1) With Paint.NET open, make sure colors are set to default (black and white).
2) Make a new layer.
3) Run Gradient bars (Effects>Render>Gradient Bars) and enter value as shown in screen shot:

4) Gaussian blur at 2. Then run Splinter Blurs and use value as shown:

5) Duplicate the layer. Flip the image horiztonally (Layers>Flip Horizontal). Set blending mode to Darken. Merge down. See screenshot if you are confused.

6) Here comes the tricky part: duplicate layer. Flip image vertically (Layers>Flip Vertical). Set the gradient to transparency and use screenshot as guide. When you have it, merge down.

7) Before we move on, we need to set the colors in the Color Palette window to light grey and dark grey. I used the default color. Again, refer to the screenshot for clarification.

8) Duplicate the layer and run Diffuse. See screenshots for what I did. After running Diffuse, Gaussian blur to 2 to soften the roughness, and set blending mode to Glow.

9) At this point, I leave the tutorial to a close, but I strongly encourage you to keep on playing. Merge down the Diffuse layer, and then duplicate and play with blending modes, or utilize Curves, or whatever! At this point, you are free to go on and try something different! Maybe you want to leave the Diffuse layer intact, and duplicate the original layer, and play with blending modes. Or better yet, try to run the Diffuse layer on the duplication of the original layer, and enable Flip Color. Have fun!
10) In "Stumbled Upon" I used Rotate/Zoom to zoom into the texture. It's really nifty.
This was something I created in writing this tutorial:
-
 2
2
-
-
Very nice texture, Trevor. It kinda looks like an old tin ceiling. Nice work!
That's an interesting concept. I haven't thought about it that way, but at first blush, it does, but I think it is just interesting because the patterns looks so different.
@Helen, thanks! The lights is actually the result of blending modes.
Tutorial is coming up... along with an interesting pattern I just added to the 1st page. -
Would be interesting for me to know which kind of blend modes people are missing.
Just to say "I like to get more" does not really help to get an idea.
As I said above, we have the official PDN blending modes which is built into the PDN's current build (as of 3.5.11, not the beta releases), and the plug-in, which again I mentioned, has an expansive list of other blending modes such as pin light, soft light, hard light, hard mix, so forth. The plug-in also has the current blending modes built into the software such as multiply, overlay, color dodge, etc.
-
Sorry for the double-post, but thought I would add a texture creation I stumbled upon using gradient bars and diffuse.
-
Are there any plan in the pipeline for the future project to expand the current layer blending modes? Right now, we have the official PDN default blending mode, and AP Shredder's excellent expansive blending mode plug-in.
I had hoped at some point v4.0+ would have more blending modes available.
I'm not sure if this has been discussed before, and I did check the Feature Request thread to see if this has been addressed. The closest thing I saw was the Layer Adjustment request.
-
Well, I'm not sure what everyone's skill or knowledge of Blender, so I may have to break it down into two parts, one to introduce user to Blender and then creating the abstract piece, and the second part to create the artwork in PDN.
I'm on spring break starting Friday, so after I get off work, and doing some chores around the house, I think I'll have a sit down and try to knock up the tutorial.
-
1
-
-
I've tried everything mate. Blurred away to distraction. I think it's the shape of the font that doesn't play nice with Negation after Displacement after Bevel Selection. A learning curve about using a curve so to speak

Hmm. I have played with a similar approach you did and was able to successfully get the distraction away by using alpha-mask every time I used Gaussian blur. Maybe it's because we are taking two different approach? I dunno.
-
Welsh, have you tried to run Gaussian blur on the "N" and then hit Alpha mask to maintain the crisp edge again?
-
1
-
-
@Barbieq25 and Helen, thanks for your comments, however overdue they are.
@everyone else, I am considering writing a tutorial on how I made one of my wallpapers using Blender and PDN. Would anybody be interested? More than 5 ayes would give me an incentive to write one up.
-
I just tested the update as you asked. Well done.
The photograph I use is quite large, 4608x3072, which was taken with a Nikon D3100 DSLR camera, and that's probably why it does not automatically zoom out to "Window" size as it does in the PDN enivornment. However, using the zoom slider, I was able to zoom in and out. I think that was an issue, because I cannot recall if I was able to use the slider to zoom out. I think you have fixed it.
The pan, I think, was actually my own fault. The pen, when touching the drawing tablet's surface, acts like a left click, and when I use the "right-click" button of the pen, I would actually be dragging and clicking the points on the image I was trying to mask. I figured that if I hover the pen slighty above the drawing tablet's surface, and use right-click, I was able to pan accordingly.
The plug in does behave slow, but I suspect this is due to the size of the photograph itself, and the fact the computer is working hard calculating everything as I am tracing the object I am trying to mask.
Edit: I can confirm that size indeed does play a factor. When I reduced the size of the photograph by 40% the speed was noticably faster.
Edit 2: WOW. I love this plug-in. I love I can click "Enable Mask" to see if I have missed an edge, and fine tune the edge. Marvelous plug-in!
-
For the most part...it does its job. There's some edges I will have to clean up, naturally.
Hmm...would it be possible to add the ability to automatically zoom out instead of being zoomed all the way in? Edit: The only way I was able to get a "zoomed out" view was to resize my photograph.
Also, I noticed when panning using the stylus' "right-click" function, it would add points instead of just panning around. Maybe it's the stylus and me doing it. If you need to know, I have a Wacom Bamboo drawing tablet.
-
I have downloaded and played with this plug-in. I think out of the plug-ins you have wrote, this one has the most potential to be unleashed, so kudos for writing and publishing it.
However, there's one thing I don't like about this plug-in, and that's using the angle to draw the edge around an object I wish to mask. Is it possible for you to create a plug-in where I could draw the edge directly on the plug-in's canvas (similar to using pryochild's smudge and lquidify plug-ins)? I think, coupling this ability with using CTRL key to lock the edge, this plug-in would be right up there with smudge and liquidfy.
-
The Queen of Glossy strikes again. One thing I noted in my experimentation with Fur Blur is how it can create abstract-y patterns. Have you given that a try?
-
Two new "experimental" pieces added to first page.
First piece is an attempt to create a texture-like creation using FurBlur (which is suprisingly fun to play with), and utilizing some techniques I have seen, especially one done by Welshblue, and Pyrochild's gradient bars. A lot of steps went into this, so please do not ask for me to try to recreate it.
The second piece is a demostration of what a faux bokeh effect is supposed to look like. It utilized the same piece I create but with a twist, using simply the "unfocus" blur plug-in.
-
Trevor - great example - thanks for posting!
I think you may have used a very slightly different setting for Furblur which gives the impression of the waves moving from left to right - great idea - works really well!

Yeah, I used a slightly different settings, and I also used a bit of displacement to create depth.
-
My first serious play around with Red O's Cobweb plugin ... trying for ice but don't think I quite cracked it.
Still liking the effect tho' ... pretty cool and the versatility of the plugin ... how many plugin authors can we vote for ??
http://fc05.deviantart.net/fs71/f/2014/002/6/5/red_ice_by_pdnwelsh-d70jd0g.png
May I offer my two cents?
Add a bit of tiny air bubbles here and there to pull off the cracked ice effect. It looks good as it is now, but I think if you were to add some air bubbles, and maybe a bit of shadow, I think you got it nailed.
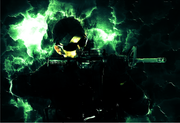
Requesting an evaluation of my current sig...the blur is entirely intentional.
-
-
I downloaded the alpha on Friday and played around with it for a bit. I did not see any appreciable bug or glitch, then again, I am not a beta tester so I wouldn't know what exactly to look for. As a precautionary measure, I took out all the plug-ins and moved them to a temporary folder on the hard drive.
Additionally, I am running the alpha on Windows 8 Pro, and everything is running smoothly as can be. I would say one thing, when running Gaussian blur at 200 pixels, it isn't a chore for my laptop to render the blur. Well done, Rick. Keep it up.
-
Hello, this is a brief post to let you all know I am not dead!
I have been spending the last few months taking a night class at a local community college. Whatever free time I have, I spend doing my homework, helping around the house, things of that nature, and making art have taking a dramatic backseat.
I appreciate all the positive comments I have received, and do apologizes for not thanking each one of you.
I have signed up for a summer class that runs for 10 weeks and I seriously doubt I will have the time to make more art. Perhaps during a hiatus in between summer and fall semester, I will make a wallpaper or two, if I have the desire.
Keep making art for the joy of it!
-Trevor
-
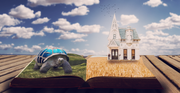
Hi everyone. I don't like to double post, but since the rules states it is ok to bump a gallery if I have not received a response in 24 hours, so I made another wallpaper using Blender and then created the rest in Paint.NET. I hope you enjoy it and have a nice weekend.
-
 1
1
-
-
Thank you all for the kind and warm welcome. I may not post as much due to time constraint between a full time job, taking night class, and life in general. I do have a work in the pipeline, but I have no ETA.
Again, thank you all for the kind words.
-
1
-
-
- Popular Post
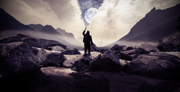
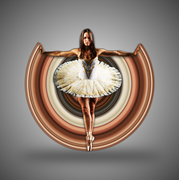
Welcome to the sandbox where I use Paint.NET to execute an idea or to show attempt that what Photoshop can do, Paint.NET can do as well, or try.
Software I typically use - Paint.NET and Blender
 Spoiler


 Spoiler
Previous manipulation


 Spoiler
Selected Older Works


 Spoiler
Selected 2018 Works

 Spoiler
Selected Older Art Work


-
7
-
9


paint.net 4.0 beta build 5168
in Preview Center
Posted · Edited by TrevorOutlaw
Hello, Rick.
I'm not sure if this has been addressed before, but I noticed an unexpected behavior in transparent gradient.
I tried to reverse the gradient by right clicking on one of the nub, and I should expect to see a flip, meaning the image should have sepia tone on the left side, and the original color on the right side. It never happened, in spite of repeated right-clicking.