


Ego Eram Reputo
-
Posts
14,589 -
Joined
-
Last visited
-
Days Won
267
Posts posted by Ego Eram Reputo
-
-
Hiya @MadDoctorTolliver - welcome to the forum.
Necro-posting isn't a problem in plugin threads, as users might have problems years after the plugin release (like you did).
If a plugin is genuinely DEAD then the thread will be locked by a Mod and a reason for locking posted.
-
10 hours ago, Tactilis said:
This is not really a v5.x specific question and would have been better in a separate thread,
I split this out into its own thread
")
-
 1
1
-
-
Try either of these plugins: Basic AntiAlias or Alias. Both plugins require the object be on a transparent layer (i.e. not part of a composite image with a solid background)
-
I can heartily recommend this plugin: Content Aware Fill
-
Drop Shadow Opacity: Cannot set values with Up/Down arrows on keyboard. The values toggle between 0 and 1.
-
1
-
-
I'm seeing an odd result with the Brush with these settings: Hardness 0, Spacing 1%, AA enabled. Basically I'm seeing thin echoes which extend outside of the brush tip
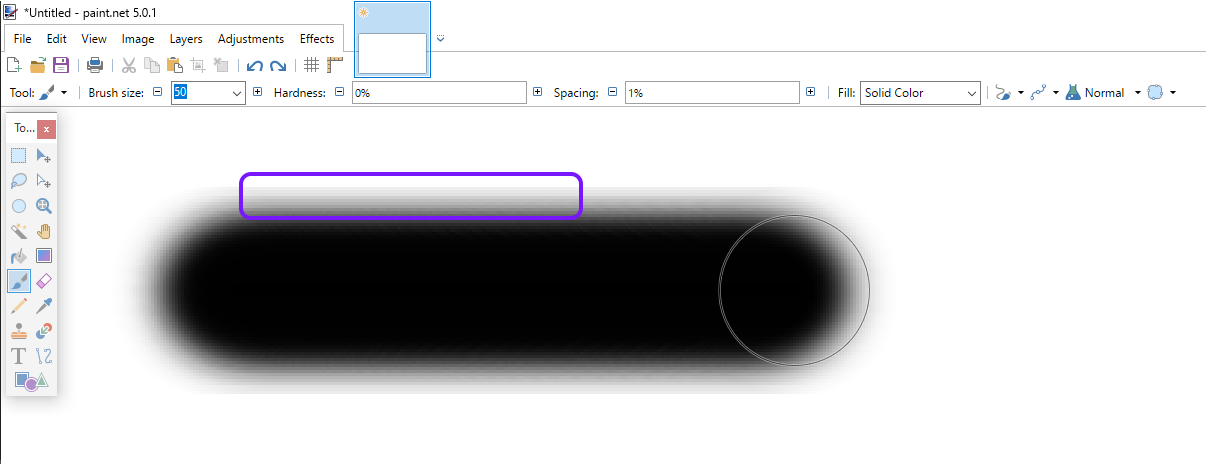
These echoes reduce in severity as the Spacing increases. Changing the Hardness doesn't seem to change the effect.
-
1
-
-
3 hours ago, varna said:
sure, thanks..in the mean time do not know how to turn off the notification for upddate
Look in the Settings dialog under Updates
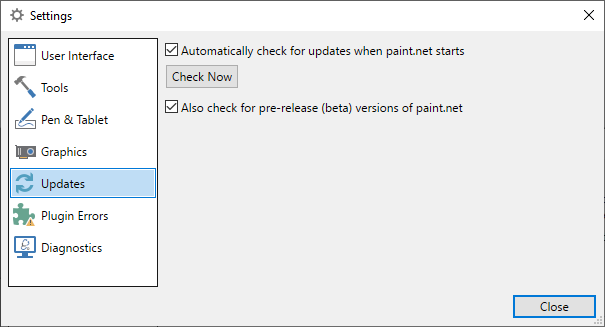
REF: https://www.getpaint.net/doc/latest/SettingsDialog.html#5
-
1
-
-
I'd have gone for this:

Followed by a little Effects > Blurs > Bokeh at a really small Radius.
-
9 hours ago, Rick Brewster said:
@Ego Eram Reputo might have a link
The image is 800x600 pixels. Here it is in all its glory.

I created it by running @Red ochre's Cuboids plugin over a duplicate of the source layer (which can be seen in the background).
@xaml - you are quite correct. The source layer was created using @MadJik's Generate 96 Colors plugin (available in MadJik's Plugin Pack).
-
 1
1
-
-
2 hours ago, rzvo said:
Any workaround without downgrading to a later version yet?
Try increasing the size or hardness by a few points.
2 hours ago, rzvo said:I've read something about using 2.3 as a size.
Correct. In PDN 5 the Brush Size will accept decimals like 2.3 and 8.4.
-
4 hours ago, Shahdo said:
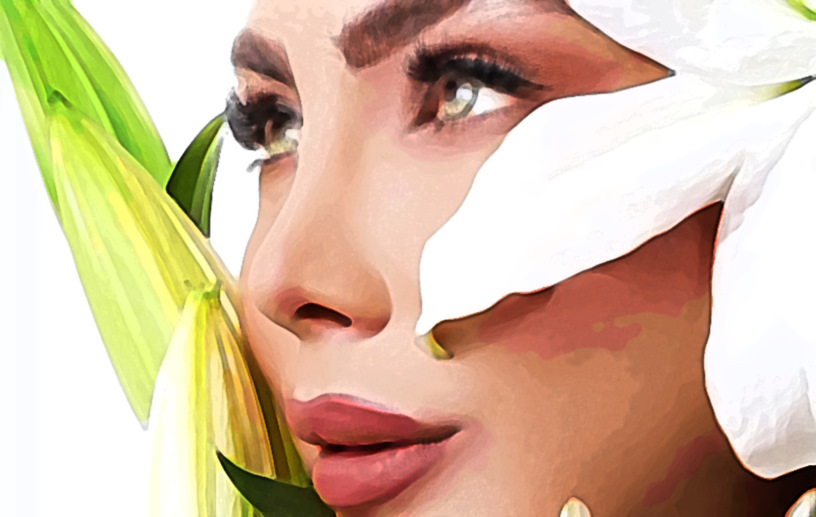
Question I have is WHY do the colors look totally unlike what I originally posted? I did not use those colors.
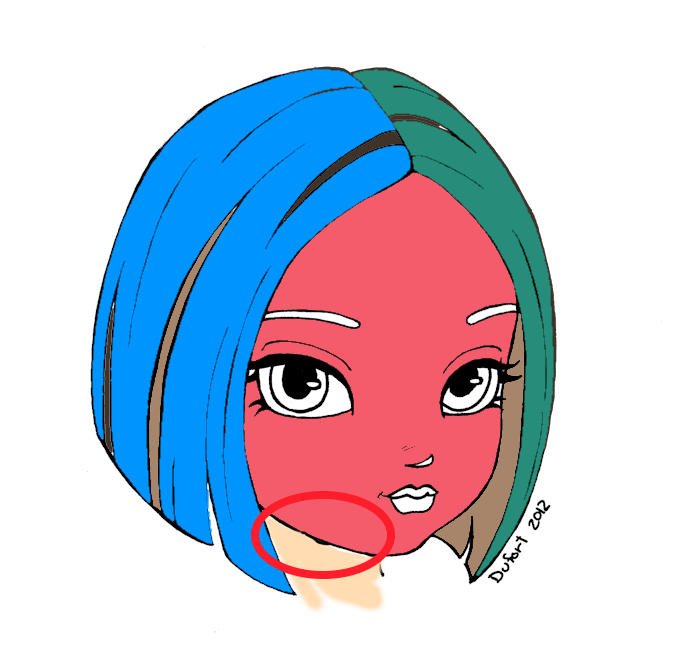
I was testing color fill on various regions of the model. I didn't particulalry care what colors I used. When I tried to fill the face the fill leaked out into the background. That was your problem.
-
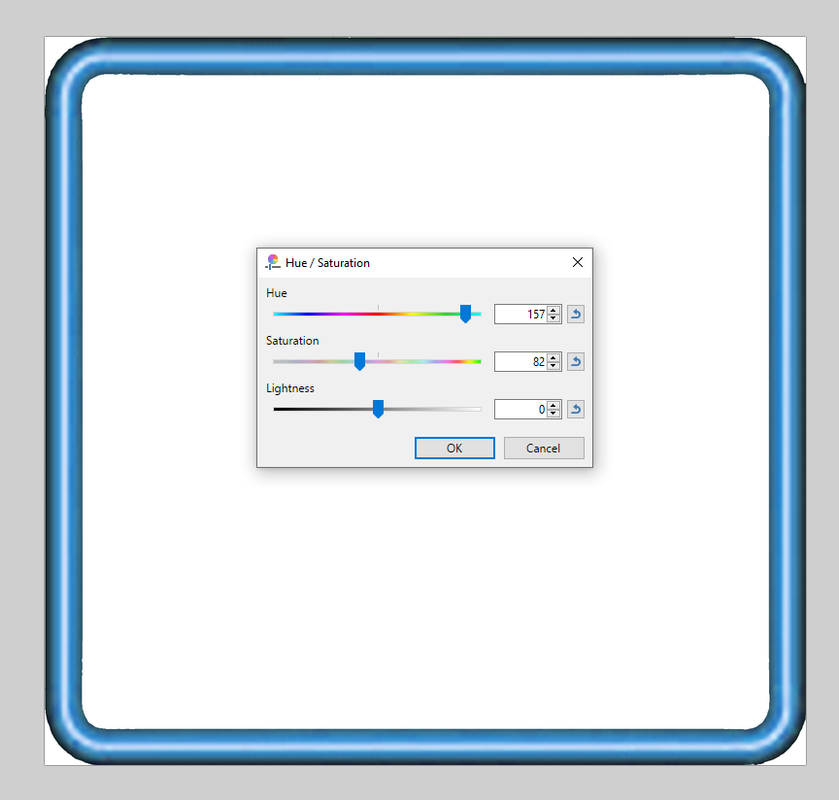
PS I had excellent success with Hue/Saturation when I tried. If you found it too extreme, try lowering the Saturation and/or Lightness
Pro-Tip: Use the keyboard arrows (up & Down) to make small adjustments to the numeric values
")
-
 1
1
-
-
-
Use the color picker tool
 + Right click to set the Secondary color to a mid-yellow from the image.
- Choose the replacement color as the Primary color.
-
Activate the Recoloring tool

-
In the toolbar, set the Sampling to the Secondary color.

- Increase the size of the brush to something like 100
- "Paint" the new shade over the old.
Here I've replaced the yellow with blue
-
Use the color picker tool
-
Thanks @ReMake, but that plugin hasn't made it's way into my pack yet. Because....Goblins!
I've released it it the Plugin Developer's forum. Here's a link Relief Map Generator
-
1
-
-
The Text Tool has had this for quite a while. See https://www.getpaint.net/doc/latest/TextTool.html#4
I'll file a note to update the docs.
-
1
-
-
I'm not sure if this is the problem, but the DLL is misnamed: ErrorDiffusion - Copy.dll
It should be called ErrorDiffusionDithering.dll. Try renaming it and restarting PDN.
-
The model has gaps in her chin line. This lets the fill leak out.
Go over the chin and thicken up the chin line and you'll be good to go.
-
9 hours ago, Rick Brewster said:
I think I know what's happening here. This is not a change or new bug in 5.0 (or technically even a bug at all), but rather unexpected behavior for your scenario. When something is pasted, where it goes depends on the zoom and scroll position. Paint.NET will generally try to position it relative to the top-left of the current viewport.
Imagine you've copied something small, and then you scroll somewhere else and do a paste: it will be pasted into the newly scrolled-to area, not to the original location it was copied from. Otherwise you'd be yanked back to the scroll location where you copied from, and it would be frustrating, especially if you're copy/pasting many times.
Understood. I assumed paste in to new layer with Ctrl + Shift + V would respect top left and was surprised when things weren't aligned.
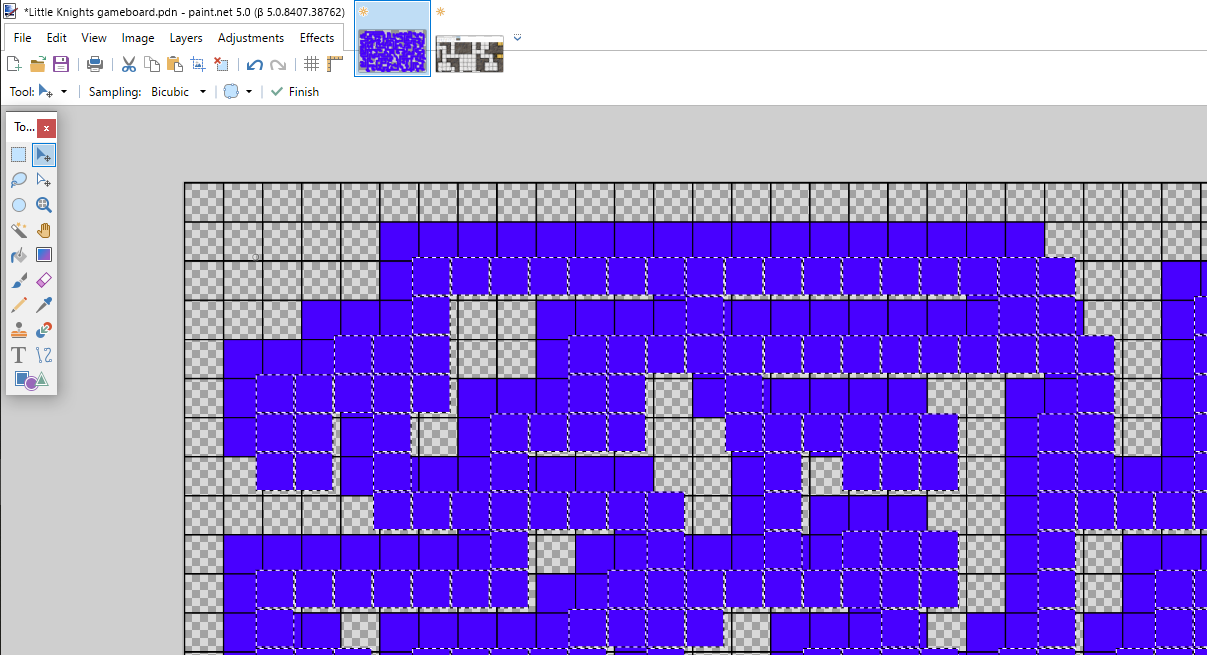
I've just repo'd this with the attached image, steps:
- Open the single layer image
- Zoom in a bit using Ctrl + Mousewheel (e.g. 22%)
- Shift-select the purple squares with Magic Wand
- Ctrl + C
- Ctrl + Shift + V
-
I have a large-ish with less than 20 layers. Image 7655 x 4848px.
I make a complex selection using the magic wand + Global.
Paste into new layer offsets the selection from the source
 .
.
-
1
-
-
Wait...Prince Harry is moonlighting as a fitness trainer???


-
 2
2
-
-
Seen these?
I'm not sure if @toe_head2001 is maintaining them, but they are a great starting point to creating effects with a custom UI.
-
 1
1
-
-
Can you show us a before/after of part of the image?
-
Belated congrats @Pixey. Your Kingdom map was a worthy winner

-
1
-
1
-
-
Hi @Minitruck , welcome to the forum
Yes you can monetize your own work using plugins. You cannot release, repackage or recompile the plugin itself without permission. See here:
I'll move this thread into the General section.
-
1
-


 + Right click to set the Secondary color to a mid-yellow from the image.


eraser tool (and others) size adjustment using only mouse scroll wheel on image, as opposed to manually selecting cursor size in tool bar menu
in Paint.NET Discussion and Questions
Posted
...once you've upgraded to the latest version, hovering over the Brush size + and - will show you a tool tip, which tells you how to change the Brush size using keyboard input.