-
Posts
2,690 -
Joined
-
Last visited
-
Days Won
68
Posts posted by MadJik
-
-
I've published a version without dark theme. If anyone could confirm it's working...
Here is the zip without dark theme.
 Here is the DLL http://jcljay.free.fr/pdn/LensFlare419.zip
-
Posted with working final blur
Visual Studio Sources updated
-
 1
1
-
-
-
Lens Flare
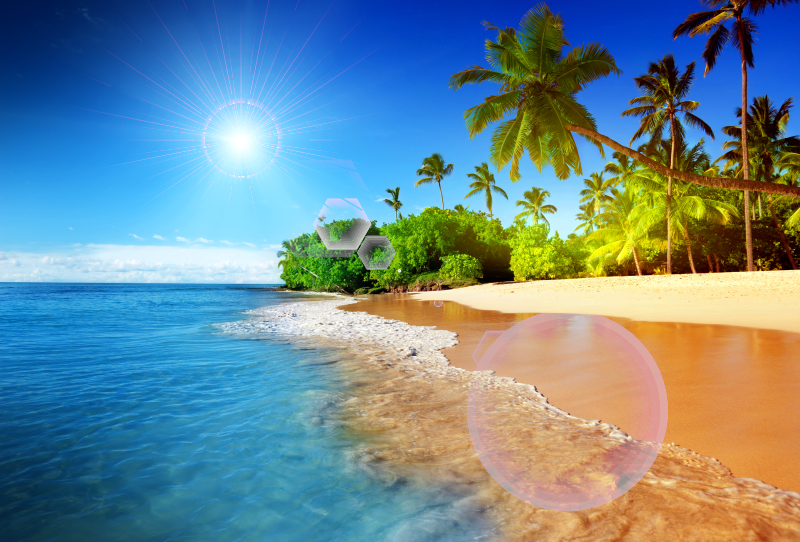
What's this?
“Lens flare is created when non-image forming light enters the lens and subsequently hits the camera's film or digital sensor. This often appears as a characteristic polygonal shape, with sides which depend on the shape of the lens diaphragm…”
Text from https://www.cambridgeincolour.com/tutorials/lens-flare.htm
For more information about this, please read https://en.wikipedia.org/wiki/Lens_flare
Download it!
Plugin LensFlare.dll
 Here is the DLL http://jcljay.free.fr/pdn/LensFlare.zip
The MadJik's All plugins package is available!
http://forums.getpaint.net/index.php?showtopic=7186
 This plugin is compatible with the dark theme available since version 4.20 of paint.net and may cause error with lower version.
Here is the zip without dark theme.
 Here is the DLL http://jcljay.free.fr/pdn/LensFlare419.zip
How to install
Close Paint.net
Classic version of Paint.net
Unzip and (re)place the DLL in your Effect folder usually:
C:/Program Files/Paint.NET/Effects (please reverse / for correct path)
Microsoft Store version of Paint.net
Unzip and (re)place the DLL in your Effect folder usually:
My Documents/paint.net App Files/Effects (please reverse / for correct path)
You have to adapt for your language My Documents
Thanks to
@toe_head2001 for help with windows form issues (dark theme and good advices).
How to use it
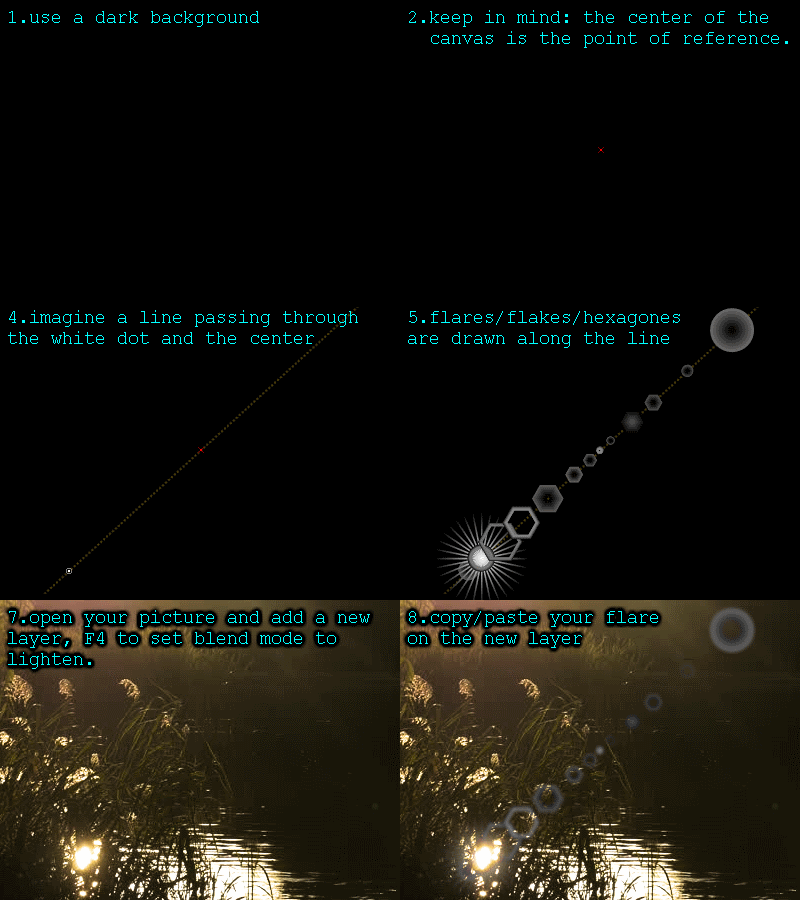
First of all the plugin is searching for the brightest point of the active layer. If the layer is empty or monochrome, the top left corner is the default point.
Then from this point passing through the center of the canvas, an imaginary line is used to place each of the fourteen shapes defined by the grid of settings.
Flares are concentric circles, hexagons and other shapes with a fading white to gray.
Flakes are rays.
NEW: Up to 10 bright points could be placed and found around the canvas. Use the pen to spot single pixels with same bright color.
The User interface
This plugin is added to the menu Effects, submenu Render.
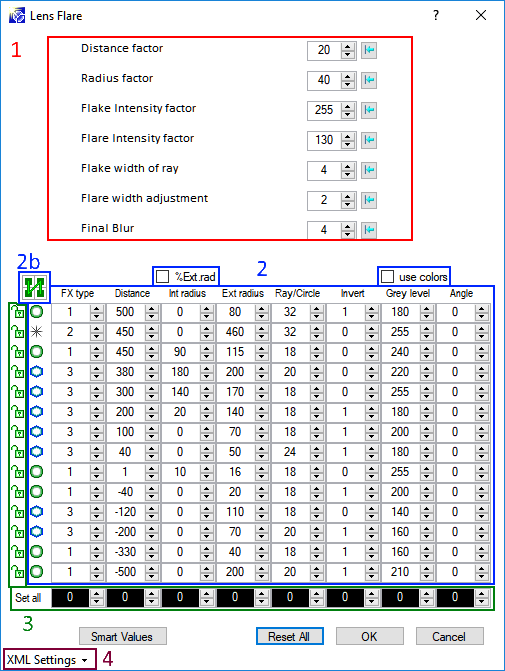
The interface is divided in several areas:
Area 1 common factors
Distance factor
Set the distance adjustment to the center of the canvas. Default distance is estimated by the white point.
Radius factor
Overall adjustments of the radius of the shapes.
FlaKe intensity factor
Change luminosity of all flakes.
FlaRe intensity factor
Change luminosity of all flares (circles, hexagons and other shapes).
FlaKe width of rays
Ratio to change the width of the rays of the flakes.
FlaRe width adjustment
Change thickness of concentric shapes (circles, hexagons and other shapes).
Final blur
The effect is better with a small blur. The blur is applied on the active layer. You should use a separated layer to keep your image unblurred.
Area 2 FX table
This table define each shape of the lens flare (FX).
The first column shows a symbol of the shape.
The default values are based on several samples I found on the web.
FX type
Select the FX type: 0=none, 1=circle, 2= star, 3=hexagon. This changes the symbol.
New shapes added: 4=diamond, 5=pentagon, 6=star, 7=flower, 8=triangle.
Distance
Set the distance to the center of the FX. The positive distances are the farthest, the negative ones are the closest. The shapes are drawn in the order from top to bottom, overlapping each other.
Int radius
Value for the internal radius of the shape (zero for a filled shape).
Checkbox above Int radius
Check the box to switch to a percentage based on the external radius. It’s easy to set an internal radius at 80% of the external radius.
Ext radius
Value for the external radius of the shape.
Ray/Circle
For flake, define the number of rays to draw the star.
For flare, define the number of concentric shapes to draw.
.
Invert
0=gradient from white (inside) to black (outside).
1=gradient from black (inside) to white (outside).
Grey level
Set the luminosity limit for the FX.
Checkbox above Grey level
Check the box to use the primary and secondary colors.
Angle
Set the rotation angle for the FX.
Area 2b tabulation sequence
Click on this picture to change the tabulation sequence in the table.
Green/Vertical: allows to fill the table column per column, going through a parameter for all the FX.
Blue/Horizontal: allows to fill the parameters FX per FX.
Area 3 Set all
Enter a value in the dark cell to set all values in the column above at once.
Click on the lockers to fix a line so the “Set all” won’t change locked FX.
Area 4 XML Settings
Menu with save/load possibilities.
Smart values button
Set the range of values you need on the first and the last lines. Then when you click on the Smart values button, the values are calculated and evenly distributed over the unlocked lines. Columns updated by this button are: Distance, Int radius, Ext radius, Rays/circles, Grey level and Angle. No change for locked lines and no change if first and last values of a column are equals.
Help button ?
Click on the ? (top right of the interface) to open this post.
The Examples:
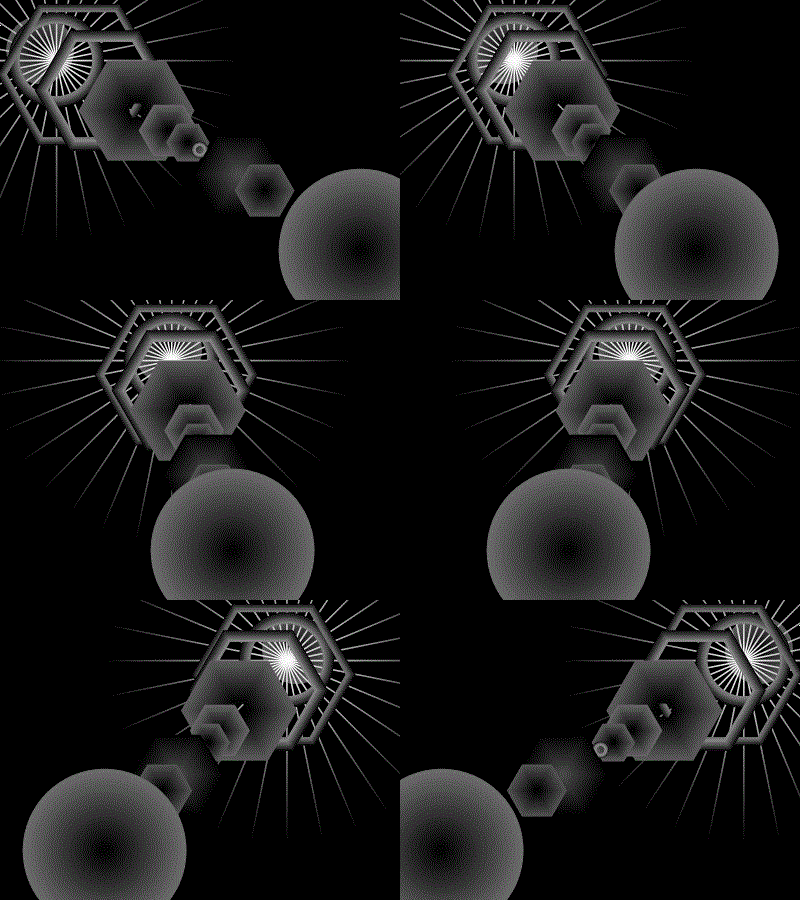
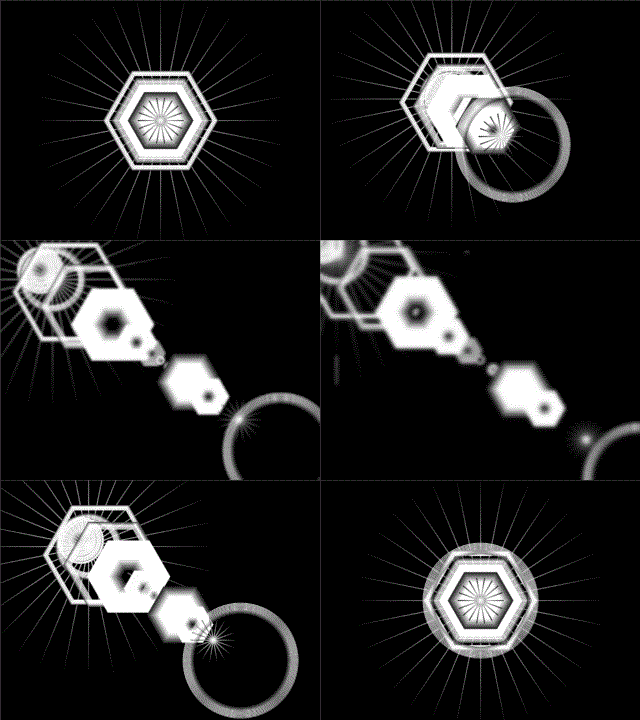
Voilà! Enjoy!
Let me see what you could do with it!
Update 2018-01-27
-New shape: Heart
Update 2018-01-18
-Up to 10 points could be placed and found around the canvas. Use the pen to spot single pixels with same bright color.
-Lockers
-Angle
-New shapes: 4=diamond, 5=pentagon, 6=star, 7=flower, 8=triangle.
-Smart values button
-Int radius %
-Primary Secondary colors
-Russian translation (thanks to @Remake)
-
 1
1
-
 1
1
-
-
Hi @Marina
Welcome to the forum.
The text tool does allow to use only one font at a time.
But you could use two layers to type your text: (ex:paint.net)
p i t n t
a n . e
and adjust manually the letters to fit in the gaps.

-
 1
1
-
-
@toe_head2001 thank you for your time. I did also that kind of tests, I was about to turn crazy about this.
I think I will release without blur.
Then try to adapt an old codelab sample for next version.
-
-
-
-
@toe_head2001 Still haven't found a way to solve the final blur. Just disabled it...
I'm not sure about the correct words to use in English for the flare (circle/hexagon) and the flake (star). Any clue?
-
1 hour ago, Ego Eram Reputo said:
Seems there are some issues.....
MadJik, did you edit the button after it was posted? Did it show up at all?
I add the button to the text then I refresh by F5 to have the attached file number. Then submit. Till this the button is ok.
When the post is "posted", the button is replaced by the text...
Could it be a browser problem?
-
The opposite corners ensure a longer path. You could choose to hide the exits and then make your own.
To make a patchwork of mazes you still could use rotate/flip/mirror
https://forums.getpaint.net/topic/28801-tolis-effects-for-v40/
-
@Eli this plugin is using an algorythm for regular form (square, rectangle).
You could cut complex shapes into smaller squares and link them manually.

-
 1
1
-
-
Download lastest version of LensFlare (Work in Progress)
What about the authorized volume per user for attached files?
or
What about an alternative external URL instead attached files ?
-
 1
1
-
-
New version:
Visual Studio Sources
http://jcljay.free.fr/pdn/LensFlareSRC.zip
The blur is visible while the UI is open. After Ok, no more blur.
Ctrl-F the blur is applied.
My config dialog design is empty, so I use the cs editor...

-
Hi Chip and welcome to the forum.
It's difficult to see what you are talking about without a picture.
Have you tried the clone stamp tool?
-
@toe_head2001 many thanks, it's much better. I have to dig more in the code to understand the changes.
For the tabulation sequence, I want to add a checkbox for the user to choose between horizontal or vertical tabulation.
I will Something try with "foreach (Control control in this.Controls)".
-
Oops, typo in the link... Ok now.
-
Searching help for debug this / or improve the code.

This effect is drawing 14 forms (circle/hexagone/rays).
It should look like a lens flare effect.
It needs a layer filled with black color. You could set the origin of the light by plotting a single white pixel on the canvas.
The center of the canvas is the second point used to draw a virtual straight line.
Each centers of the 14 forms are placed over this line.Settings allow to choose each type of form, distance, radius etc.
14 forms x 7 parameters, this is a number of 98 datas to define/handle.
Plus some other (7) common parameters.The problems are:
-(ok)changes on the 98 settings run the rendering.
-(ko)changes on the 7 common parameters have not effect.
-(ko)first cycle of the effect doesn't work (linked?).
-(ko)tried to have sliders for the 7 common parameters (failed so I delete these sliders).Instead of checking each change of parameters, I use a single counter++ to check for any change.
To make it works, I use the button reset of a common parameter or make a change on one of the 98 settings.
Other points to solve:
-dark theme for Windows form effects?
-XML save and load works fine. Any idea to set a saved file as default setting to load when the effect is openning?
-Tab (tabulation sequence) is set to go column by column. Any idea to have a checkbox to change it to go row by row?DLL:
http://jcljay.free.fr/pdn/LensFlare.zip
Visual Studio Sources
http://jcljay.free.fr/pdn/LensFlareSRC.zip
Thanks.
-

You have to use transparency for your logo image (jpg isn't working as it has a white background).
-
-
-
-
On 16/12/2017 at 4:25 PM, null54 said:
I posted an example of loading and saving XML settings in the following post (it is a Windows Forms version of @Red ochre's FurBlur plugin).
@null54 Thank you, I managed to implement it to my effect.




MadJik' all plugins (last updated: 2018-04-07)
in Plugin Packs
Posted
I haven't these excellent posts on the plugin thread...
https://forums.getpaint.net/index.php?showtopic=112248