


MadJik
-
Posts
2,690 -
Joined
-
Last visited
-
Days Won
68
Posts posted by MadJik
-
-
37 minutes ago, Seerose said:
@MadJik! Is that right? a question: transparent level or edit directly on the background?
I don't understand the question. I would say both.
My fourth example in black and white was made with a gradient background.
-
 1
1
-
-
Hi @Ambreville
You could use the gradient with conical mode, draw it vertical.
Duplicate the layer and flip it vertical
Cut half of the circle.

-
3
-
 1
1
-
-
-
You could go over 10 sides...
Spoiler... ColorBgra c1 = Amount5;//first color ColorBgra c2 = Amount6;//second color ColorBgra cc = Amount7;//center color ColorBgra bc = Amount8;//border color Color[] Ct = new Color[sides]; bool colswitch = true; for (int i = 0;i<sides;i++) { Ct[i] = colswitch?c1:c2; colswitch = !colswitch; } using (RenderArgs ra = new RenderArgs(dst)) { Graphics g = ra.Graphics; g.Clip = new Region(rect); g.SmoothingMode = SmoothingMode.AntiAlias; PointF[] vertices = CalculateVertices(sides, radius, angle, center); using(Pen myPen = new Pen(bc, width)) { myPen.LineJoin = LineJoin.Round; using (PathGradientBrush pgrbr = new PathGradientBrush(vertices)) { pgrbr.CenterPoint = new Point(rpx, rpy); pgrbr.CenterColor = cc; pgrbr.SurroundColors = Ct; //switch (sides) //{ ...
-
1
-
-
i just like rotation angle:

The gradient is on the angle/corner. But it isn't balanced with a odd number of angles (ex: triangle has two gradient with first color to two angles and only one with Second color to the third angle). Could you add an option to say first color gradient ends on angle and second color gradient end on the median of the side?
-
Hilbert filling curve texture
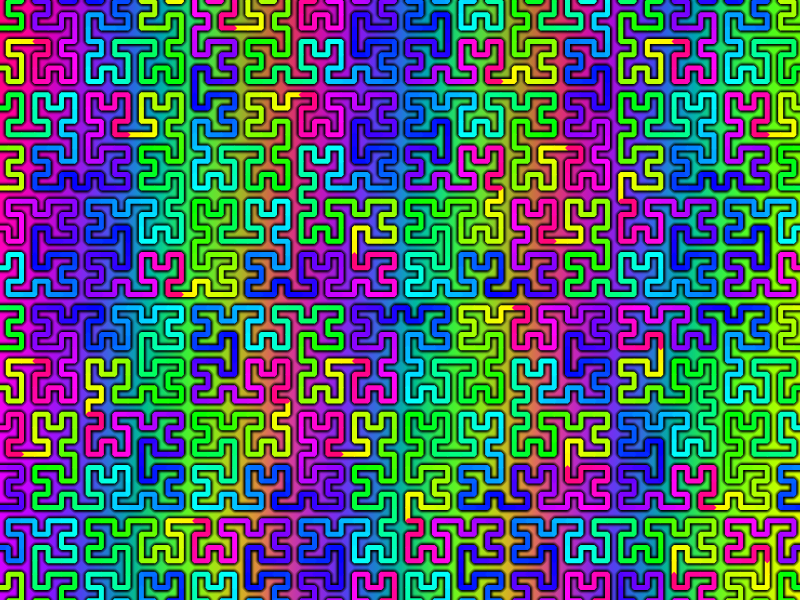
What's this?
This is a mathematical recursive formula.
Peano and Hilbert worked on these filling curves to the point to prove the graphical equation could fill an area at 100%. Read more about this on wiki:
https://en.wikipedia.org/wiki/Space-filling_curve
Only Hilbert version of the curve is available. I gave a try to Peano version but I need more time to find the good way to master it.
Download it!
Plugin HilbertCurve.dll
 Here is the DLL http://jcljay.free.fr/pdn/HilbertCurve.zip
The MadJik's All plugins package is available!
http://forums.getpaint.net/index.php?showtopic=7186
How to install
Close Paint.net
Classic version of Paint.net
Unzip and (re)place the DLL in your Effect folder usually:
C:/Program Files/Paint.NET/Effects (please reverse / for correct path)
Microsoft Store version of Paint.net
Unzip and (re)place the DLL in your Effect folder usually:
My Documents/paint.net App Files/Effects (please reverse / for correct path)
You have to adapt for your language My Documents
The User interface
This plugin is added to the menu Effects, submenu Texture.
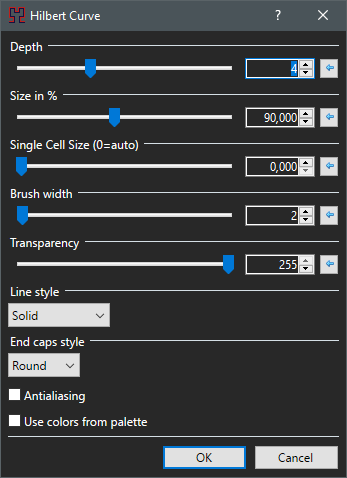
Depth
Set the recursive level of the curve. Higher = darker = slower.
Size in %
It works like a zoom.
Single cell size (0=auto)
Instead of the zoom you could set the size of the single smallest part of the curve.
Brush width
Choose the size of the brush wide of the curve. Large sizes work better with colorful background.
Transparency
Value 255 means opaque (no transparency). When you redure the transparency to something about 60, combined with a large brush width then you could see some kind of magic happening.
Line style
Choose the style of the line to be full or a mix of dot and dash.
End caps style
Set the end of the lines by choosing between round, triangle or flat square.
Antialiasing
Check the box for quality rendering.
Use colors from palette
When checked each segment of the curve uses a color from the active palette modulo 96.
The Examples:
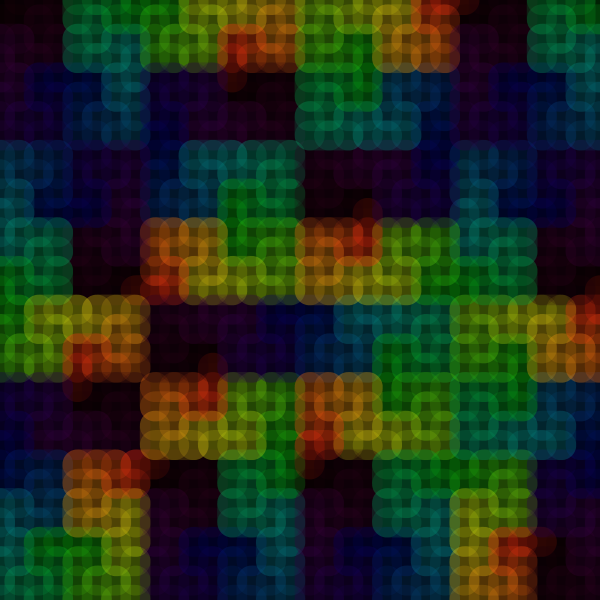
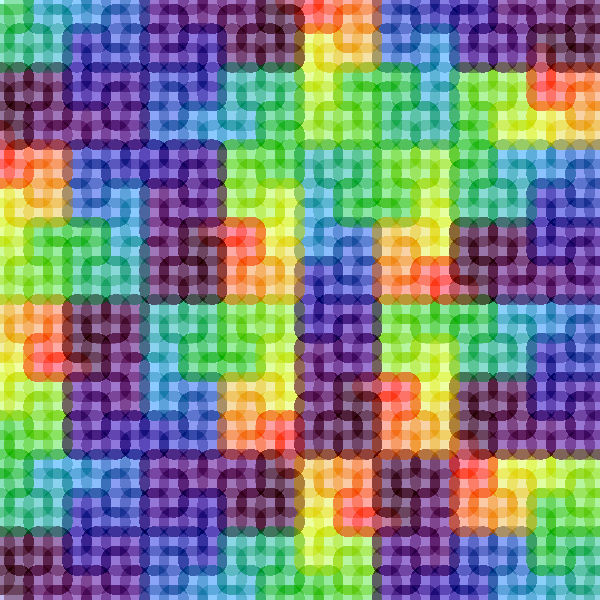
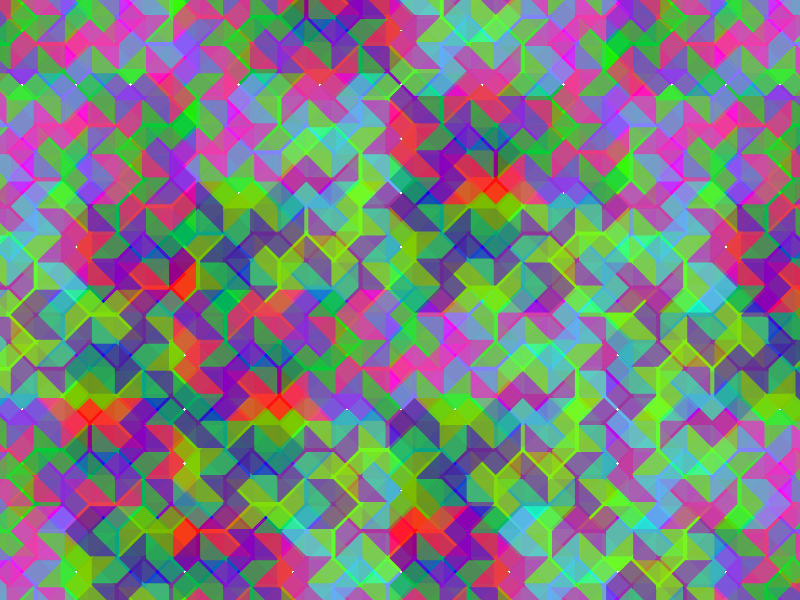

Voilà! Enjoy!
Let me see what you could do with it!
-
3
-
5
-
-
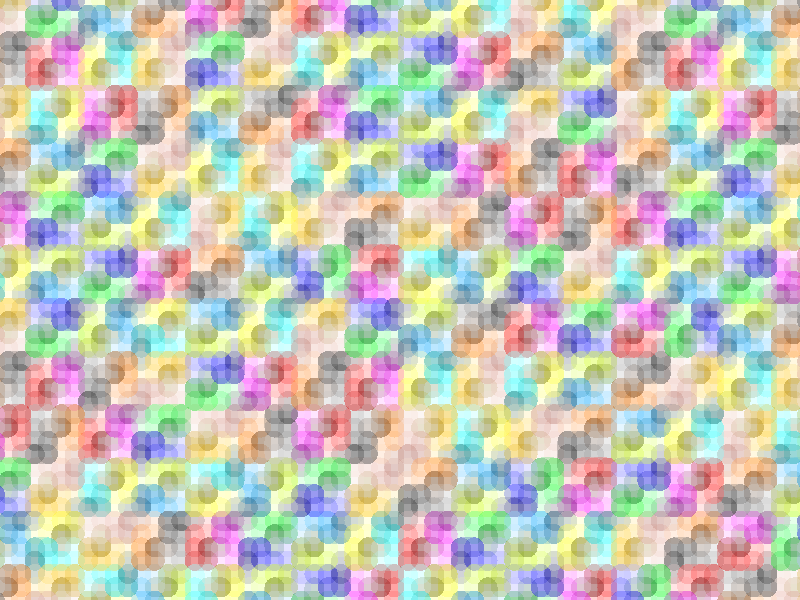
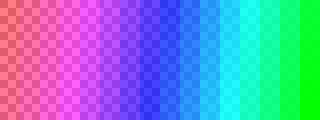
Generate 96 unique colors for palettes
What's this?
Some other effects could use palettes of colors to fill the canvas. This is why I need to create palettes in many ways to use with these colorful plugins. This effect is able to fill the canvas with 96 different colors (16 columns x 6 rows) and save as a palette file.
Download it!
Plugin Gen96Colors.dll
Here is the DLL http://jcljay.free.fr/pdn/Gen96Colors.zip
The MadJik's All plugins package is available!
http://forums.getpaint.net/index.php?showtopic=7186
How to install
Close Paint.net
Classic version of Paint.net
Unzip and (re)place the DLL in your Effect folder usually:
C:/Program Files/Paint.NET/Effects (please reverse / for correct path)
Microsoft Store version of Paint.net
Unzip and (re)place the DLL in your Effect folder usually:
My Documents/paint.net App Files/Effects (please reverse / for correct path)
You have to adapt for your language My Documents
How to use it
This effect replaces the canvas on the active layer. Be sure to use a new layer or a new image.
Then run the effect and choose the colors from start to end and the generator mode. If you check the box “save in user’s folder of palettes”, you will find “Gen96_aaaaa_bb.txt files.
aaaaa is the reseed number used and bb is the step value. Existing files are overwritten.
NB: If you use linear or HSV generator mode, you have to change the reseed value to save each palette with a different name.
The User interface
This plugin is added to the menu Effects, submenu Tools.
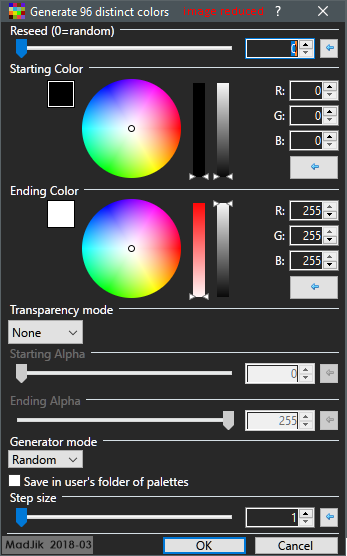
Reseed
When zero the effect is in random mode. Every time a control is changed a new image is calculated (also when you finally press the Ok button).
Other values than zero are used to initialize the random sequence. Same value should give the same result now and later, ever…
Of course, this control is not used when the generator mode is linear or HSV.
NB: This value is used to name the file of palette.
Starting/Ending colors
Select the colors from start to end as limits of your palette.
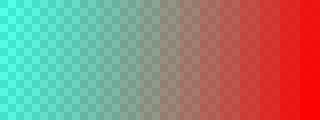
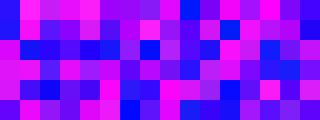
Transparency mode (None/Random/Linear)
Mode None, all colors are opaque.
Select random if you want transparency in the palette.
Linear gives a progressive/degressive transparency.
Starting/Ending Alpha
Set the transparency limits.
Generator mode (Random/Linear/HSV)
Select the mode of color calculation.
-Random
-Linear (from starting to ending colors, on the RGB channels).
-HSV: from starting to ending colors, using Hue/Saturation/Value conversion.
Save in user’s folder of palettes
When checked each rendering create (overwrite) a palette file in the standard folder. It could be a lot of files if you let the reseed slider going up 1 by 1 increment…
Step size
Fill the palette with a step between each color. Instead of a regular “gradient” you will have some kind of checker…
The Examples:

Voilà! Enjoy!
Let me see what you could do with it!
-
3
-
1
-
-
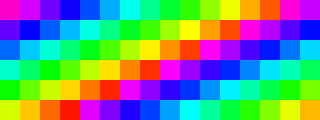
Generated palette:
-
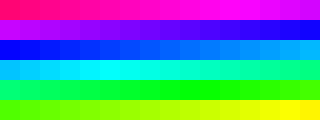 Spoiler
;MadJik 2018-03-01 ;HSV palette FFFF0574 FFFF0481 FFFF048D FFFF0499 FFFF04A5 FFFF04B1 FFFF04BD FFFF04C9 FFFF04D5 FFFF04E1 FFFF04ED FFFF04F9 FFF804FF FFEB04FF FFDF04FF FFD304FF FFC704FF FFBB04FF FFAF04FF FFA304FF FF9603FF FF8A03FF FF7E03FF FF7203FF FF6603FF FF5A03FF FF4D03FF FF4103FF FF3503FF FF2903FF FF1D03FF FF1103FF FF0403FF FF030DFF FF031AFF FF0326FF FF0332FF FF033EFF FF034AFF FF0256FF FF0262FF FF026FFF FF027BFF FF0287FF FF0293FF FF029FFF FF02ABFF FF02B8FF FF02C4FF FF02D0FF FF02DCFF FF02E8FF FF02F4FF FF02FFFC FF02FFF0 FF02FFE4 FF02FFD8 FF02FFCB FF01FFBF FF01FFB3 FF01FFA7 FF01FF9A FF01FF8E FF01FF82 FF01FF76 FF01FF69 FF01FF5D FF01FF51 FF01FF45 FF01FF38 FF01FF2C FF01FF20 FF01FF13 FF01FF07 FF07FF01 FF13FF01 FF1FFF01 FF2BFF00 FF37FF00 FF44FF00 FF50FF00 FF5CFF00 FF68FF00 FF75FF00 FF81FF00 FF8DFF00 FF9AFF00 FFA6FF00 FFB2FF00 FFBEFF00 FFCBFF00 FFD7FF00 FFE3FF00 FFF0FF00 FFFCFF00 FFFFF500 -
-
@AndrewDavid to tell the truth I'm about to release an other one tool for palettes + a new effect using palettes.
These two effects to come lead me to create the list of pallets ...
Stay tuned....-
1
-
-
24 minutes ago, Djisves said:
define the path for the palettes to be drawn.
If it's too much trouble, please forget I asked; your plugin is very useful as it is.
Then place the folder in the palette folder as sub folder...
@Djisves @lynxster4 @Seerose Thank you for your interest.
-
1
-
-
List of Color palettes
What's this?
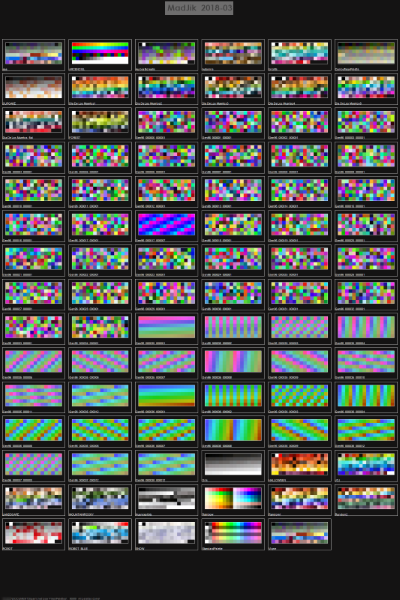
More and more color palettes are over time in the user folder and finding the right one can be difficult. This tool is made to display all the palettes on the canvas.
What does it do?
It looks for the files in the palette folder (and subfolders), reads the list of colors to draw a palette for each file.
Empty colors are marked with X. Invalid colors are marked with a red X.
NB: All errors (empty or invalid) are removed on all palettes when you save one palette with paint.net.
One image of palette uses by default a rectangle of 180 x 90 + margins 10 and 7. Palettes are placed regularly on the canvas.
Download it!
Plugin ListOfPalettes.dll
Here is the DLL http://jcljay.free.fr/pdn/ListOfPalettes.zip
The MadJik's All plugins package is available!
http://forums.getpaint.net/index.php?showtopic=7186
How to install
Close Paint.net
Classic version of Paint.net
Unzip and (re)place the DLL in your Effect folder usually:
C:/Program Files/Paint.NET/Effects (please reverse / for correct path)
Microsoft Store version of Paint.net
Unzip and (re)place the DLL in your Effect folder usually:
My Documents/paint.net App Files/Effects (please reverse / for correct path)
You have to adapt for your language My Documents
How to use it
This effect replaces the canvas on the active layer. Be sure to use a new layer or a new image.
Set the dimensions large enough to have all your palettes at once on the same image.
Then run the effect and choose the colors for the text and the background.
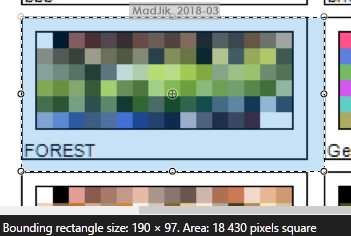
If some palettes aren’t shown, you could adjust the size (-/+ 5 pixels of the single color square) with the first slider.
The User interface
This plugin is added to the menu Effects, submenu Tools.
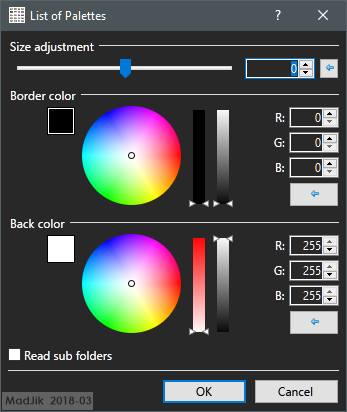
Size Adjustment
This slider allows small adjustments on size of the smallest unit used: single color square. The other elements are based on this size. This is a tool and not a toy ?. If the adjustment isn’t enough you should consider to use another size of image.
Border color
Select the color for the borders and the texts.
Back color
Select the color for the background of the list of palettes. Background is visible behind empty or invalid colors but isn’t for colors with transparency.
Read sub folders
If any sub folders (or tree) exist in the user folder, check the box when you want to see the palettes of the sub folders.
The Example:
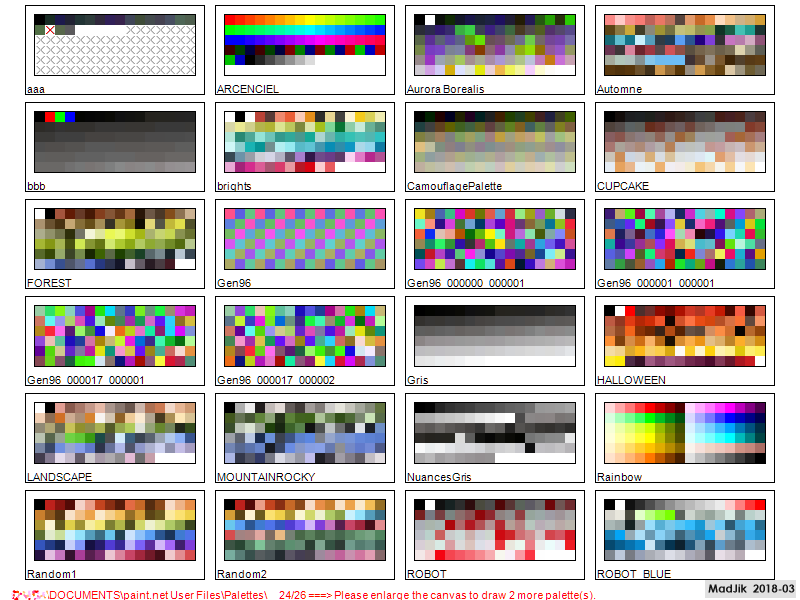
A message on the bottom line shows the full path of the folder and the number of palettes shown / the total number of palettes.
The message is red if there are too many palettes for the size of the canvas.
Voilà! Enjoy!
Let me see what you could do with it!
-
2
-
3
-
-
Sorry, I can't find the link to version 2.3...
-
-
Can't you generate a map from Zenith POV? Nothing is hidden by elevation?
-
New version of HeaxGrid could be helpfull for this task.
http://jcljay.free.fr/pdn/HexaGrid.zip
Mini tuto:
1. Make the background
Add a layer for the grid and a layer for the rivers
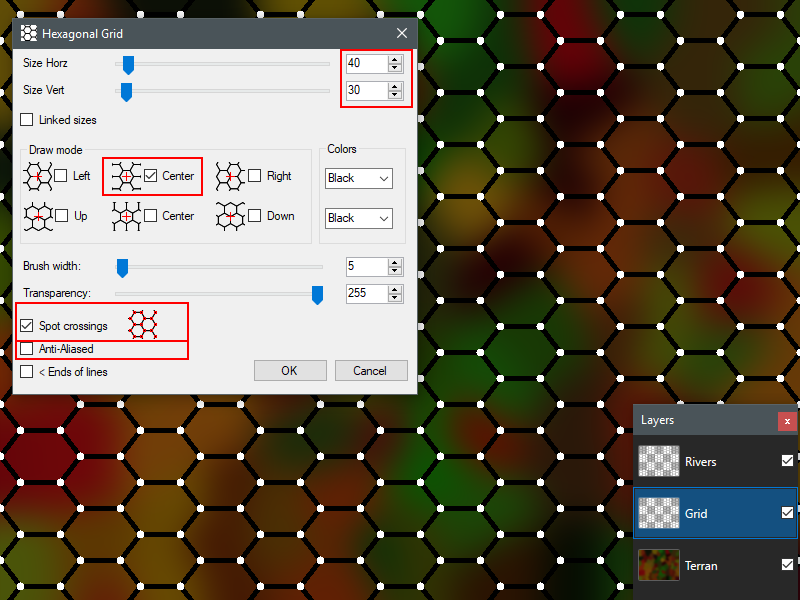
On the layer Grid run the effect Hexagrid:
- uncheck Anti-aliased
-check Spot Crossing (this will add a white spot
Then each segment of the grid could be slelected with the magic wand.
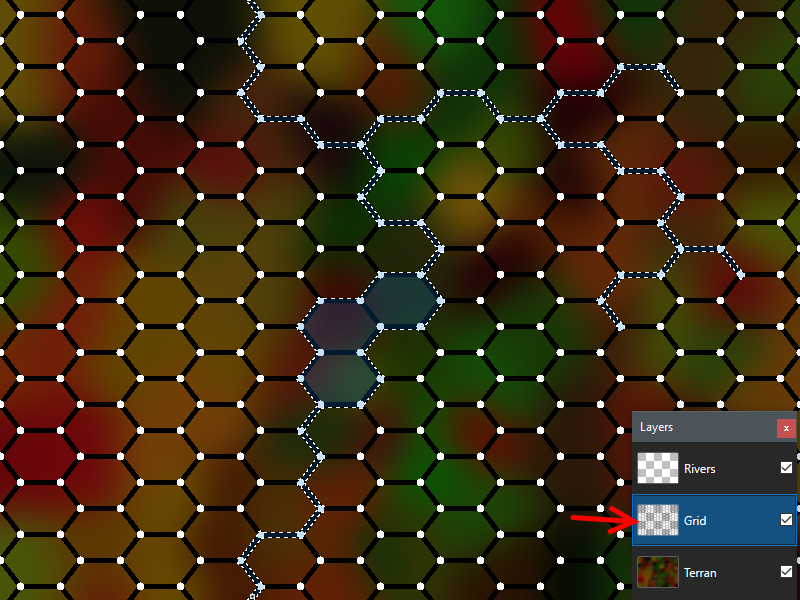
2. With the magic wand select the segments and the dots to draw the rivers. Eventualy select hexagons for the lakes.

3.Choose a color for the rivers. Activate the top layer and press backspace to fill the selection.
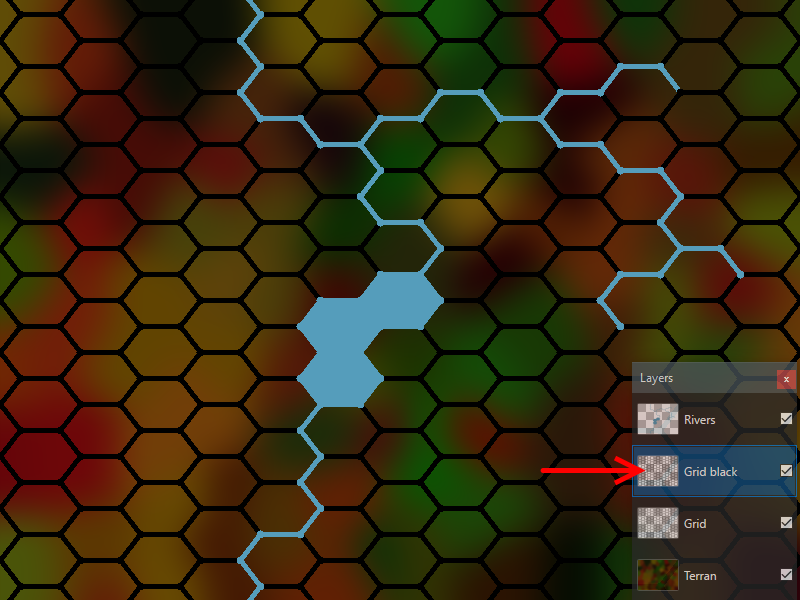
4. Add a new layer and redo the hexagrid without the spot crossing
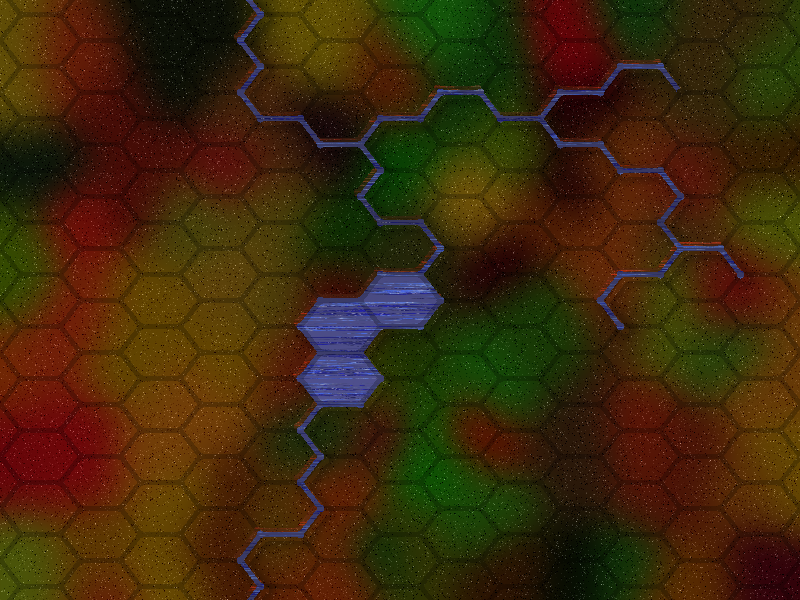
5. Finishing with more textures
-
4
-
2
-
-
New version of HeaxGrid could be helpfull for this task.
http://jcljay.free.fr/pdn/HexaGrid.zip
Mini tuto:

1. Make the background
Add a layer for the grid and a layer for the rivers
On the layer Grid run the effect Hexagrid:
- uncheck Anti-aliased
-check Spot Crossing (this will add a white spot
Then each segment of the grid could be slelected with the magic wand.

2. With the magic wand select the segments and the dots to draw the rivers. Eventualy select hexagons for the lakes.

3.Choose a color for the rivers. Activate the top layer and press backspace to fill the selection.

4. Add a new layer and redo the hexagrid without the spot crossing

5. Finishing with more textures
-
I think @AndrewDavid described a method to manually fill the gaps
On 22/02/2018 at 9:59 AM, old banshee said:This takes an enormous amount of time and was wondering if there is a way of speeding it up.
You could also try to use some sprites.
Draw every possible river patterns : straight, curve up curve down, crossing...
You could then have a neat grid when fil the gap by copy/paste the sprites.
This plugin could help you to see what I'm saying (in a square wolrd)
-
A lot of varicose2 used here:
-sky
-sea
-grass
-trees

original 4000x3000
-
3
-
1
-
-
Hello and welcome to the forum @old banshee
Image 1: How is generated the original? specific tool, plugin, by hand?
Do you use layers? (hexagrid background, generated river, river corrections, final river...)
Image 4: When you past an image while the zoom is on (200-400% or more), the copy is placed to be seen in the working area. Be sure to zoom 100%! Ctrl+B
-
-
Hello,
This is a code which works in Codelab 3.4 but I can't preview nor build it.
preview

build

(Same message had AndrewDavid but I have no specific characters in my comments)
I suppose the problem is linked with the loading of the palette. It stops working when I add this feature.
Spoiler// Name:Hilbert Curve // Submenu:Texture // Author:MadJik (Jean-Claude JAY) // Title:Hilbert Curve // Version:0.2 // Desc:Hilbert Curve (ref web: http://csharphelper.com/blog/2014/07/draw-a-hilbert-curve-fractal-in-c/ ) // Keywords:hilbert|texture|fractal|curve|maze // URL: http://forums.getpaint.net/index.php?showtopic=7186 #region UICode IntSliderControl Amount1 = 4; // [1,10] Depth DoubleSliderControl Amount2 = 95; // [1,100] Size in % DoubleSliderControl Amount3 = 0; // [1,100] Single Cell Size (0=auto) IntSliderControl Amount4 = 18; // [1,100] Brush width IntSliderControl Amount5 = 255; // [0,255] Transparency ListBoxControl Amount6 = 0; // Line style|Solid|Dash|Dash Dot|Dash Dot Dot|Dot ListBoxControl Amount7 = 3; // End caps style|None|Round|Triangle|Square CheckboxControl Amount8 = false; // [0,1] Antialiasing CheckboxControl Amount9 = true; // [0,1] Use colors from palette #endregion private float LastX, LastY, MapSize; private int depth, palcolor; private Pen p; private ColorBgra[] CurrentColors = null; // Draw a Hilbert curve. private void Hilbert(Graphics gr, int depth, float dx, float dy) { if (depth > 1) Hilbert(gr, depth - 1, dy, dx); DrawRelative(gr, dx, dy); if (depth > 1) Hilbert(gr, depth - 1, dx, dy); DrawRelative(gr, dy, dx); if (depth > 1) Hilbert(gr, depth - 1, dx, dy); DrawRelative(gr, -dx, -dy); if (depth > 1) Hilbert(gr, depth - 1, -dy, -dx); if (IsCancelRequested) return; } // Draw the line (LastX, LastY)-(LastX + dx, LastY + dy) and // update LastX = LastX + dx, LastY = LastY + dy. private void DrawRelative(Graphics gr, float dx, float dy) { if (Amount9) { p.Color = Color.FromArgb((byte)Amount5, (Color)CurrentColors[palcolor++]); if (palcolor>95) palcolor=0; } gr.DrawLine(p, LastX, LastY, LastX + dx, LastY + dy); LastX = LastX + dx; LastY = LastY + dy; } void PreRender(Surface dst, Surface src) { // copy original image dst.CopySurface(src); // load palette CurrentColors = new ColorBgra[96]; IReadOnlyList<ColorBgra> Palette = ServiceProviderExtensions.GetService<IPalettesService>(Services).CurrentPalette; for (int i = 0; i<96; i++) { CurrentColors[i]=Palette[i]; } palcolor = 0; // Get the parameters. float total_length, start_x, start_y, start_length; depth = Amount1; MapSize = (float)Amount2 / 100.0f; // See how big we can make the curve. if (src.Height < src.Width) { total_length = MapSize * (float)src.Height; } else { total_length = MapSize * (float)src.Width; } start_x = (src.Width - total_length) / 2f; start_y = (src.Height - total_length) / 2f; // Compute the side length for this level. if (Amount3==0) { start_length = (float)(total_length / (Math.Pow(2, depth) - 1)); } else { start_length = (float)Amount3; } ColorBgra PrimaryColor = (ColorBgra)EnvironmentParameters.PrimaryColor; PrimaryColor.A = (byte)Amount5; p = new Pen(PrimaryColor, Amount4); if (Amount7 > 0) { switch (Amount7) { case 1: p.StartCap = System.Drawing.Drawing2D.LineCap.Round; p.EndCap = System.Drawing.Drawing2D.LineCap.Round; break; case 2: p.StartCap = System.Drawing.Drawing2D.LineCap.Triangle; p.EndCap = System.Drawing.Drawing2D.LineCap.Triangle; break; case 3: p.StartCap = System.Drawing.Drawing2D.LineCap.Square; p.EndCap = System.Drawing.Drawing2D.LineCap.Square; break; default: break; } } if (Amount6 > 0) { switch (Amount6) { case 0: // Solid p.DashStyle = DashStyle.Solid; break; case 1: // Dash p.DashStyle = DashStyle.Dash; break; case 2: // DashDot p.DashStyle = DashStyle.DashDot; break; case 3: // DashDotDot p.DashStyle = DashStyle.DashDotDot; break; case 4: // Dot p.DashStyle = DashStyle.Dot; break; } } //Graphics gr = new RenderArgs(dst).Graphics; using (Graphics gr = new RenderArgs(dst).Graphics) { if (Amount8) gr.SmoothingMode = System.Drawing.Drawing2D.SmoothingMode.AntiAlias; // Draw the curve. LastX = (int)start_x; LastY = (int)start_y; Hilbert(gr, depth, 0, start_length); } } // Here is the main render loop function void Render(Surface dst, Surface src, Rectangle rect) { }
-

Last changes:
2018-02-20
Added new effect Varicose 2.
Added new effect Signature stamp.
-
1
-
1
-


Varicose 2 (ymd:18-02-20)
in Plugins - Publishing ONLY!
Posted
Thank you!