


jerry533482
-
Posts
402 -
Joined
-
Last visited
Content Type
Events
Profiles
Forums
Blogs
Gallery
Downloads
Posts posted by jerry533482
-
-
Yeah but you said the poll will close at 8:30 P.M. It's only ten to eight. Technically, shouldn't it still be open? Or is it a timezone thing, cause I live in Wisconsin.

-
I think entry 3 has 4 votes.
-
I'm just curious, before v3.5, why did you release PDN under the MIT license? I mean, it was pretty cool, but seriously, the right to sell the software without restriction? Wouldn't a custom EULA have been a better idea?
-
Actually, if you're into experimenting with interstellar plasma clouds, there's a couple things I'd recommend checking into to help you.
Mcamp14 is an astronomer, and recently gave me some advice on what colors go where in a nebula. That post is here, at his gallery (reply # 6):
And here is a brilliant tut by Frozen_byte that works by blending clouds to the point where they're almost invisible against the night sky, then painting and blurring colors in a layer below; which makes that particular section of the nebula become "visible", while adding color. It's here:
Making Polished Spacescapes v2
And I also found a nice Photoshop tutorial on deviant art that gives the outlines on how to make some very realistic nebulae from pictures of real clouds. It's in Voyager212's gallery: Nebula tutorial by Voyager212
Of course, You'll likely end up creating your own technique for actually making the clouds, as everyone has their own preferences. And Once again, I hope you find this information useful.

-
So, how long will the voting last?
-
I used Kerry Shotts' Sparkle_Glitter plugin.
Hope this helps, Ninja.
-
Weylin, isn't that the same thing I did? Go figure. If that technique works for you, then use it.
-
This is just an outline of the technique; much clearer and crisper outcomes are quite possible. If you don't believe me, check out my original SAC entry in the archives. I also didn't want to eat up all my photobucket bandwidth with 30 hq tutorial steps.
-
This tutorial is available as a PDF. Click here to view or download it
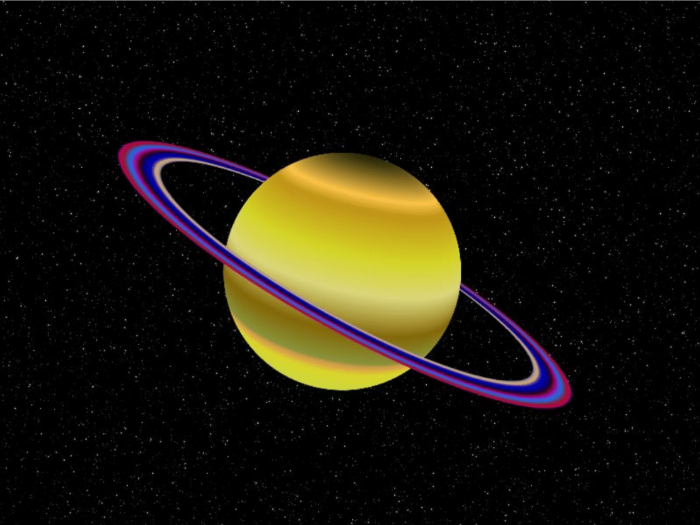
Hey guys. It's been a while since I've been posting, I dunno', leisurely, and I've decided to make up for it by writing a tutorial. I came up with this technique back when the SAC #1 was active, and I've found it quite effective. What we'll be doing is making planet rings from a gradient. Specifically, the gradient you choose. I won't be including a planet tutorial in here; maybe I'll make one in the future. I would definitely recommend this one though:100% PDN plnet tutorial v2. It's quite clever.
Alright, you'll need these plugins:
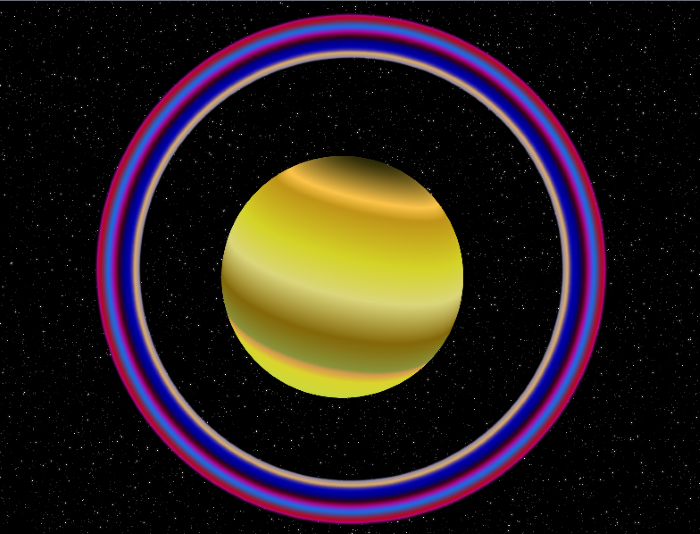
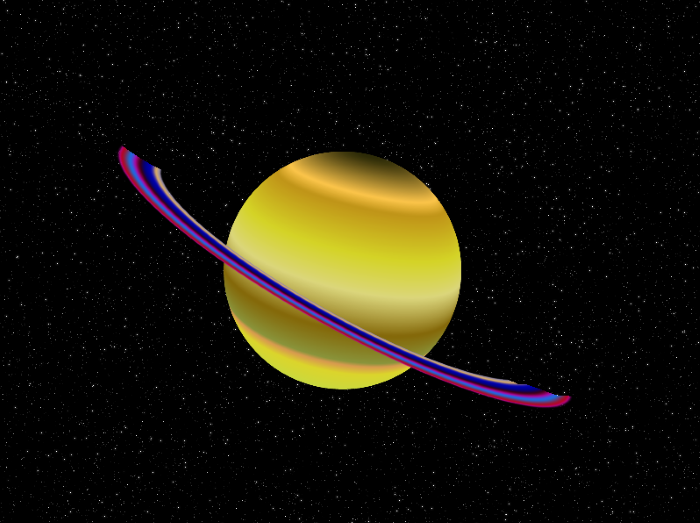
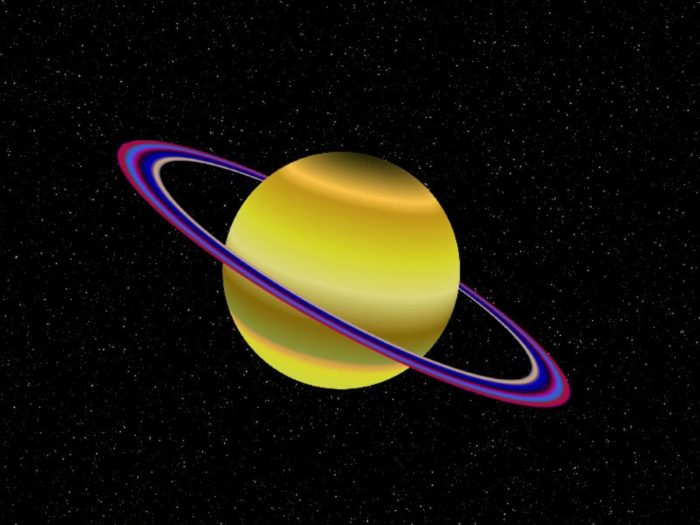
This is your goal:
Let's begin.
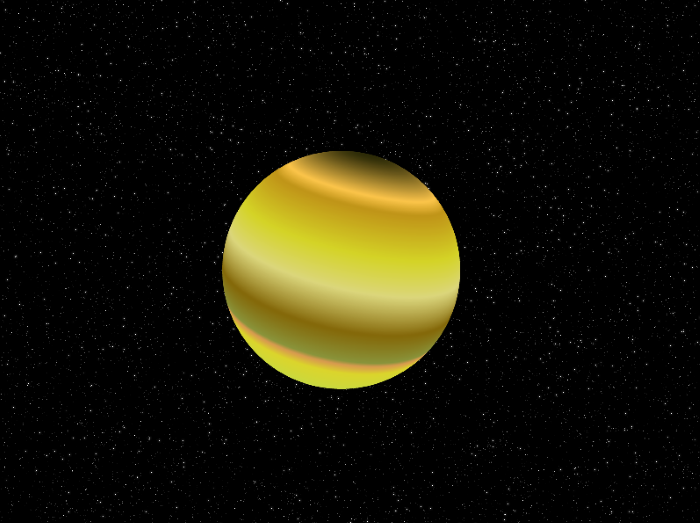
1. Create a planet. Once again, I will not be including this; please refer to the above paragraph for a tutorial:)
An example:
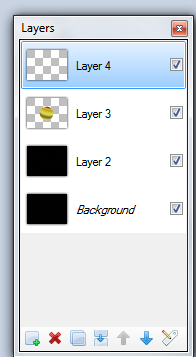
2. Add a new layer above your planet layer. You can name it whatever you want, but for the sake of newbs, we'll call it "outline"
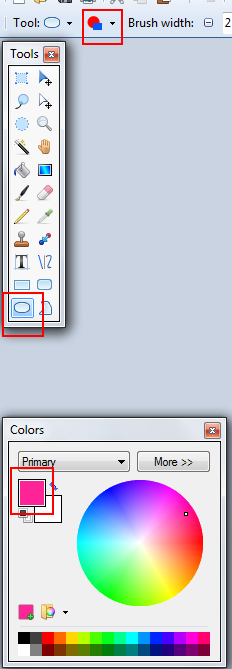
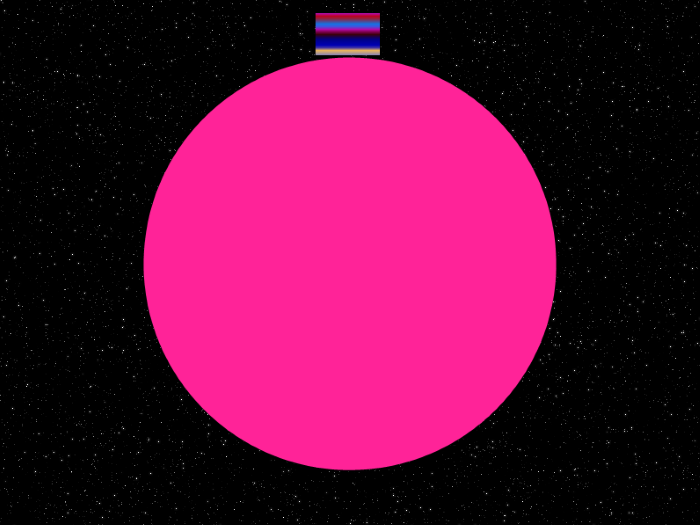
3. Next, select a bright, vivid color that you can pick out from the stars as your primary color. I usually use bright purple. Select the rectangle tool and adjust the menu to "draw filled shape".
4. Now hold shift to constrain a proportional shape, and draw a circle with about an inch worth of space between the top and bottom edges of the circle and the canvas border. I won't explain this in actual pixel values, because it can vary quite a bit depending on the resolution of the whole picture.

5. Go to effects>align object

In the both box, press the center circle. Some text at the bottom of this window should say "middle center". click OK.

6. Create a new layer above the "outline" layer. We'll call it "rings". Now what you're gonna want to do is click the square select tool from the toolbox, and draw a small square selection above the giant bright circle (which should be centered in the screen). Now, you're gonna want to do it the right way or the whole thing will get thrown off center.
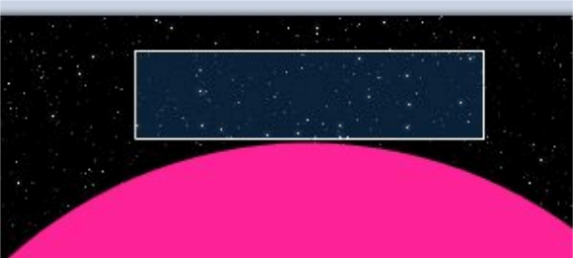
you're not going to want much more than a few pixels between the selection and the circle.
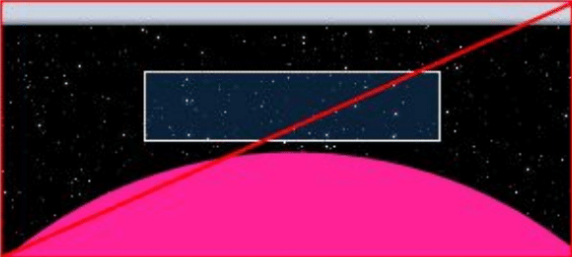
You also won't want the two to overlap.
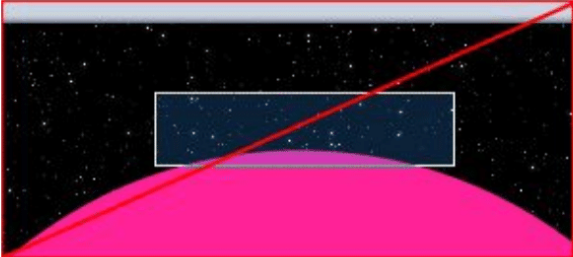
You also won't want it too wide (sorry I didn't add the slash watermark).
You'll want something along these lines:

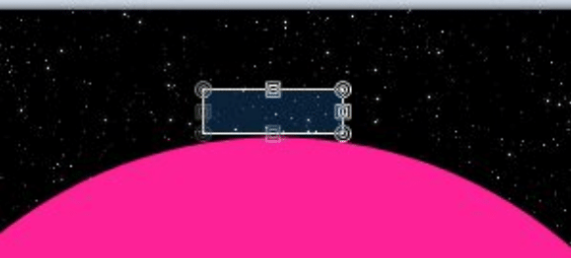
Now, depending on whether you want thick rings or thin ones, you may want to change the height of the selection. Use the move selection tool for this(the white arrow).
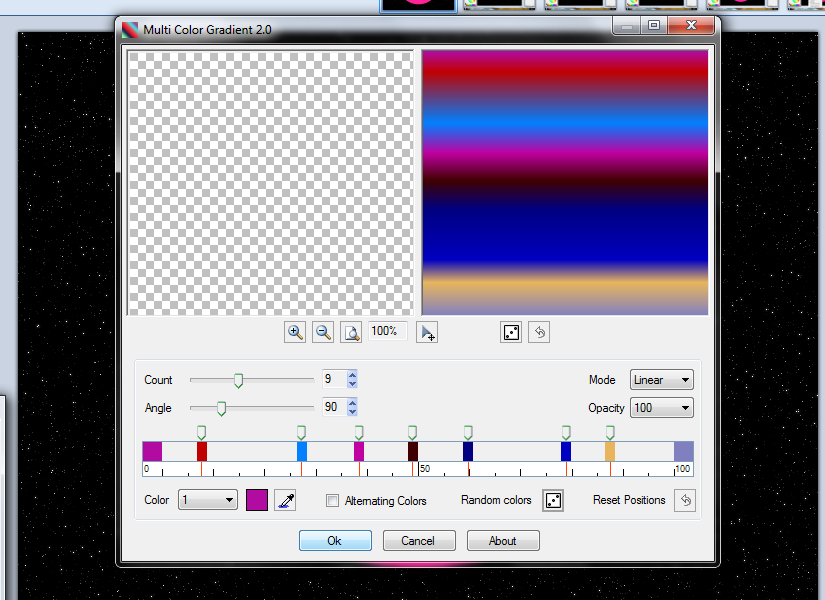
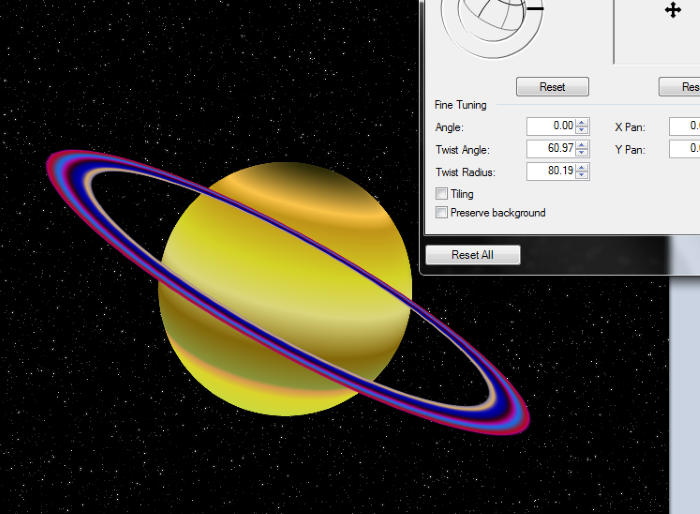
7. Now for the actual gradient. Go to effects>render>multicolor gradient. Set the angle to 90, and play around with the settings. Change the nobs, the color count, and the actual colors to your desire. If you're too lazy to change every color, the random colors button may be appealing to you. This is what your rings will look like, so take time on this step. When you're done, click OK. If you don't see the gradient in your square selection, hit ctrl+F a few times until it appears. Once is usually enough.
An outline of what you should get:
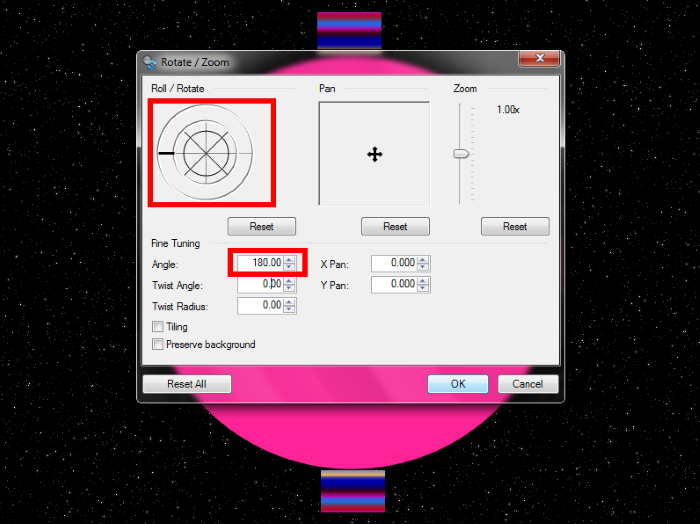
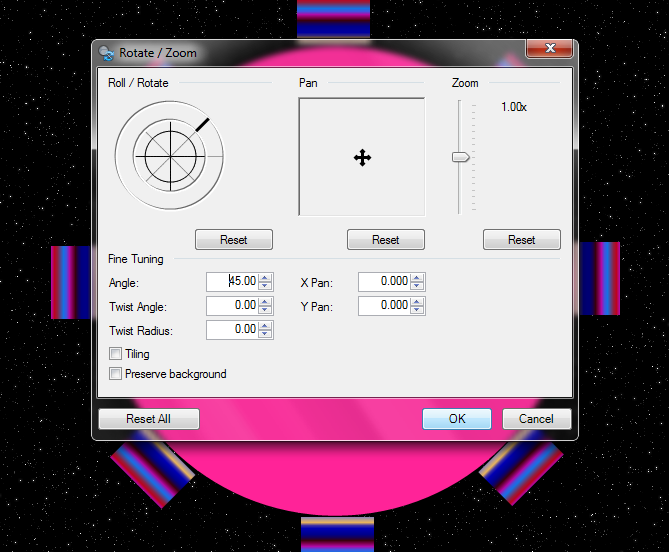
8. Now duplicate the "rings" layer and go to layers>rotate/zoom. Use the following settings. Hit OK, and merge your new rings layer down to your old one.
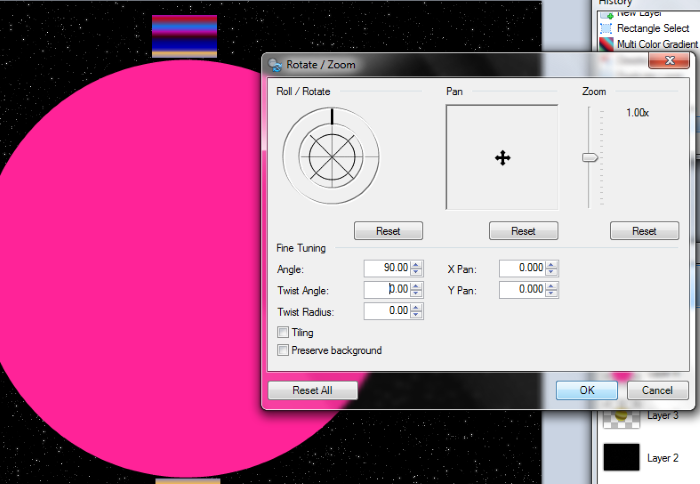
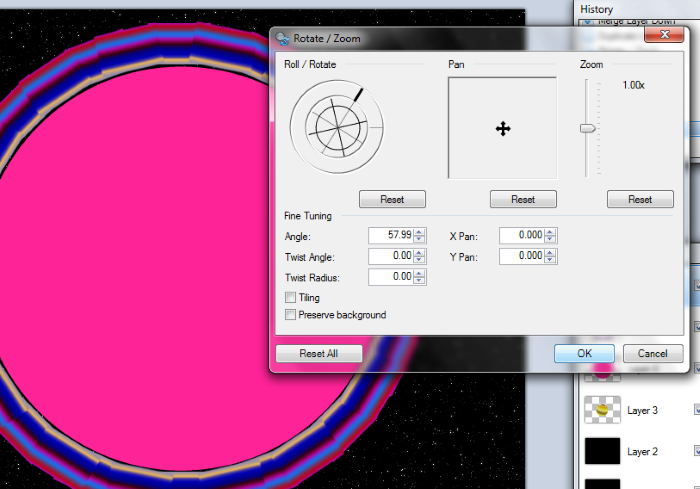
9. Repeat step 8, but use the following settings instead(90 in the angle box if you can't see):
10. Do step 8 again with the angle set to 45:
11. Repeat step 8. This time around, drag the notch in the roll/rotate ball freely so more space between the "ringlets" is filled.

12. Repeat step 8 once more freehandedly. If you've done this right, there should be no free space between the gradient blocks. You should also end up with only one "rings" layer (don't forget step 8 ends with merging layers down).
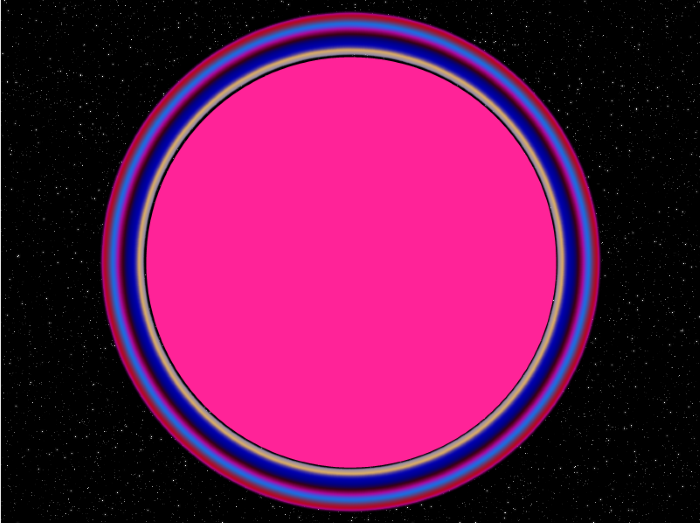
13. With the rings layer selected, go to effects>blurs>radial blur deluxe (normal radial blur doesn't work too well).

Now adjust the settings to fit your creation. Use the following settings as a guideline, but don't forget to experiment. Also, keep X and Y centered to get an accurate effect (that's why we used align object to center before; so we wouldn't have to worry about this step later). You should get this:
Now delete the "outline" layer.
Your rings are done.
14. These last steps are optional; they are meant to deal with the "ring behind the planet" issue. It works pretty good unless you're adding invisible gradients and other stuff to your rings, in which case you gotta take time. I used invisible gradients in my SAC entry, and it took me days to get it right (i was new to the technique at the time). If you have you own technique for this, I encourage you to use it instead.
Now use layer rotate/zoom to arrange you rings around you planet in a way that looks artistic. This is an intuitive step.
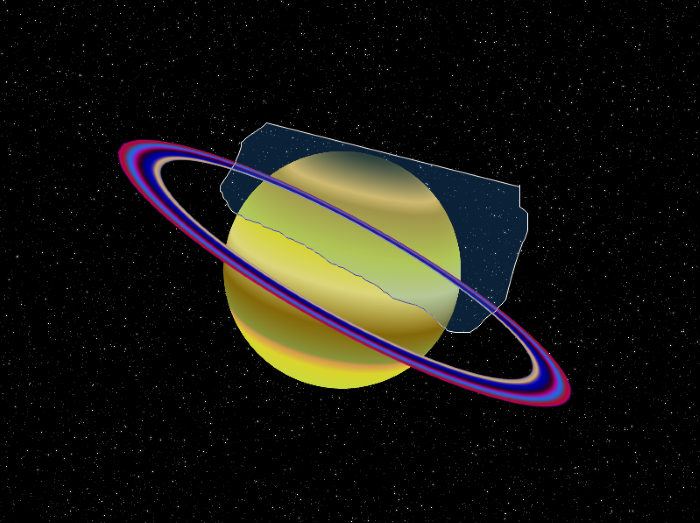
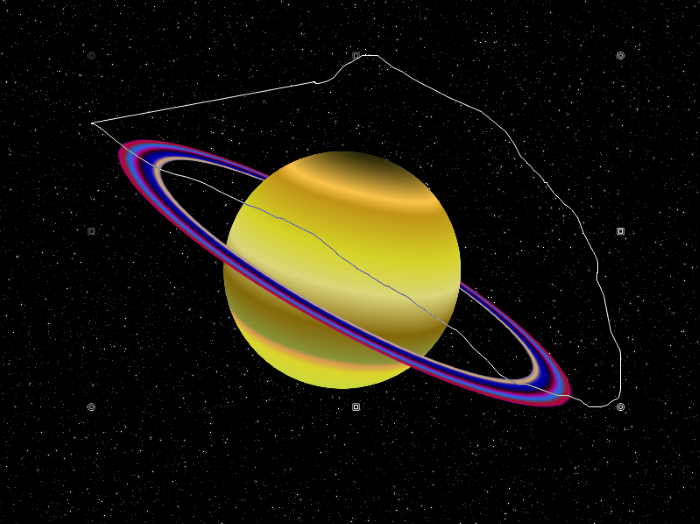
15. Now select the portion of the rings layer with the lasso select tool that will appear behind the planet. If you're not really going to move the planet, this would be decent:
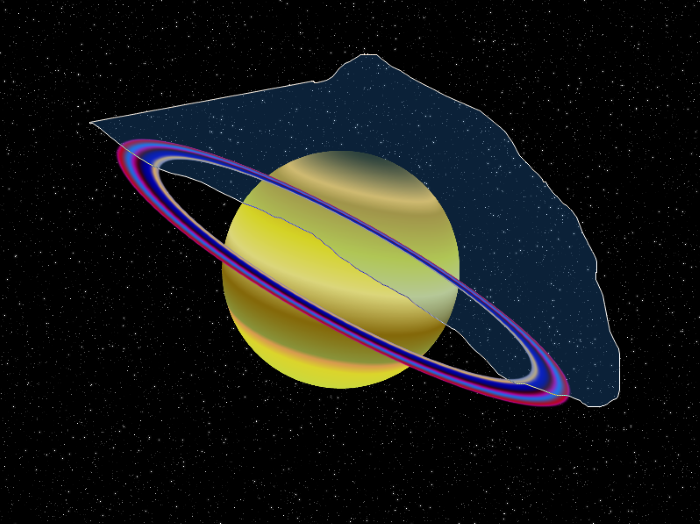
On the other hand, if you're going to adjust the planet's position, select almost the entire backside of the rings like so:
Ctrl+X
16. Create a new layer under the planet layer.
The finished product.
-
Did you tweak the actual DLLs and what not? If it's still giving you the DLL message it sounds as if it's files have been tampered with.
Also, you'll want to keep a copy of the DLL, cause the mods probably won't keep the link up for long.
One last thing; did the update notifier say v3.5.5? Cause, I've seen some old versions incorrectly report the newest version as something older (like v3.5.1 for example). If that's the case, you'll want to manually download v3.5.5. Maybe that'll solve all your problems.
-
Actually, I don't believe PDN v3.5.5 has a DDSfiletype DLL. Try this:
1. Uninstall Paint.NET. You'll want to backup all your plugins. You should either use Windows' built-in uninstaller, or I would recommend Revo Uninstaller. You can get it here(the free version):
http://www.revouninstaller.com/
2. Download windows installer cleanup. It's a little utility that FULLY uninstalls a program's registry keys (although I don't think I can say the same for trial software). Softpedia has a link to it:
3. Reinstall PDN and restore all of your plugins (if they're not already there, which they shouldn't be)
That's it. If you still get the same error, you must not have upgraded correctly. Once again, try this DLL. If it doesn't work, just keep uninstalling PDN and reinstalling it til' the error goes away, cause as far as I know, PDN 3.5.5 doesn't include this DLL.
Edit by Rick: Removed ZIP file. This is built-in to PDN v3.5+, no need to distribute the DLL
 And remember, users of anything but the latest version get no support.
 -
That's what I've been trying recently, but when you render clouds, it fills the entire canvas, not any particular shape. Do you know any technique that could create a random shape that looks realistic? Heck, even pictures of real clouds do the job. But I'm trying to make 100% PDN nebulae here, not just mods.
-
I don't mean to be critical, but wouldn't it be a good idea to give effect installer the capability to install filetype plugins too? And what about PDN's install location? 99% of the time, PDN is installed at C:\program files\Paint.NET, but what if users installed it in another folder? Perhaps an option to adjust where PDN is installed would be a good idea.
Just some ideas.

-
Simple, yet useful. Downloading right now.
-
PDN had a startup screen before?
-
Bookmarked.

-
Try putting this in your filetypes folder. First extract it; then place the DLL itself in C:\program files\Paint.NET\filetypes. Hope this helps.
BTW, you really should update Paint.NET.
-
I know that PDN is supposed to be a program that starts up REALLY fast, but I've noticed that when power users load all their favorite plugins into PDN (usually 2 to 3 hundred), it can take as long as 30 seconds to start up. And while it's starting up, it looks as if it has stopped responding. So, why not add a startup screen like in GIMP? To keep users "in the know"? It might clear up a lot of confusion.
-
Sorry, upload error. please ignore or delete.
-
Can you allow up to 1600x1200? I know it may seem useless, but a lot of people are probably going to use the 4:3 workspace; with a big resolution. Plus, it's standardized. I'll probably just end up cropping the sides of my entry if it isn't feasible.
-
Hm, Interesting. You don't see a lot of uniqueness in artwork these days. Nice job.
-
So you can copy and paste alpha? Never thought of that before. I'm gonna' test it. I just defraged my system and cleaned up my desktop, so PDN should load quicker now.
-
lol. Would PDN get it's own taskbar? That'd be a first for an image editor.
-
Well, we were given a lot of time to make some pretty good entries (I'm not just talking about mine), and not a lot of members are always noticing when a new comp is being voted on, so why not leave it open for another couple days?
It's kinda' pointless to dismiss an SAC competition with a 4 day vote. There are a lot of good entries. Some even look comparably to photoshop projects.
 And remember, users of anything but the latest version get
Hardware Accelerated Blur Pack v3.2
in Plugin Packs
Posted · Edited by jerry533482
I have an ATI radeon X1200, so no DirectCompute for me.
PDN won't make DirectCompute a requirement for a while, right Rick?