


-Expiration-
-
Posts
1,076 -
Joined
-
Last visited
Posts posted by -Expiration-
-
-
The mechanical leopard is amazing, sad you are not going to complete it!
Don't worry! I've got another one in production. :wink:
and have decided to restart, this time, with a cheetah, and in a much more interesting pose as well. I hope to finish the head in a day or too, and then move on to the rest of the body. I want this one to be a surprise, so don't expect any WIPs of this from me, but it will look similar to my Leopard Mech, like the color scheme and shading techniques. :wink:Yay!
Yeah, okay, so I finished the head. However, I am having trouble planning the line art for the upper back and the shoulders. I need it to look cool, but I just can't seem to find a good combination.

So I'm going to be working on my wallpaper pack for now, until I come up with some good inspiration, which I know you are waiting for.

-
Thanks ZizOiz!
I've been working on it over the weekend, but there's school tomorrow, so production will probably slow down a little.
-
Wow, nice job! Is that 100% PDN?
-
A preview for my (not) much awaited wallpaper pack! Enjoy! :wink:
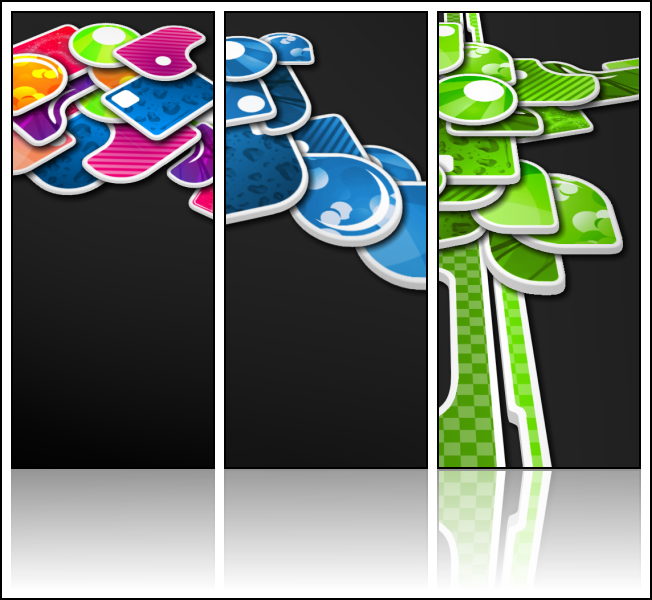
Its kinda like vector and 3D put together in an abstract manner. Inspired by Patrik Hubner (MadPotato), who was inspired by iuneWind (on deviantart). 100% PDN, except for, lets see ... Water Drop brushes and Glitter brushes from deviantart.
With three variations so far, expect more when the final pack is released! Unless I run out of ideas. In which case, expect only the aforementioned three.
-
Love your movie spoof sigs David. Hope to see more work from you!
-
Hello Sherryanne, welcome to the forums.

However, I would advise you to read the rules, especially #6, or else your thread could be locked.
Thank you!
-
Actually, I remember Ash posting something about wispy smoke on the PDN Fan Forums. It seemed to go like this:
Linear Reflected Gradient, Primary: White, Secondary: Fully Transparent
Make a few of those.
Run Dents, use Stretch.
Hopefully my memory serves me right.
Hope this helps!
-
For starters, you've got the highlights, but where are the shadows? :?: :idea:
That might help a bit. Although, personally, I have no idea how one would go about approaching that ...

-
Umm ... I don't think so.
See, first you take the half of each coordinate of the bounding rectangle size. Round if necesarry. (who knew there was so much math involved in art?)
Which would be 162 for each dimension.
Then, since your Top Left is 31, 84, and the center of your selection is 162, 162:
162 + 31 = 193
162 + 84 = 146
So the coordinates for the center of your selection are (193, 146).
Also, for writing text in a circle, try the Rectangular to Polar plugin.
-
In order to get your mouse to the center of a square or circle, select them using the magic wand, then look to the bottom left. There should be some information on your selection there. If not, click on the Move Selected Pixels tool, and then click once on your canvas. This should bring up the information (if it is not already there). There will be a section showing you the dimensions of your selection. Again, take half of each coordinate (length and width), but then add those coordinates to another pair of coordinates in the information section, the "Top Left" coordinates. If you need further elaboration, I would be happy to assist you further.
-
Welcome to the forums! Don't worry, you will not be bitten or banned, especially since you have followed one of the most often broken rules! (specific thread title)
I don't think that was what he was asking sabrown. My interpretation of his question is that he wants to know the center point of the canvas. For this, look in the bottom right corner of the Paint.NET window. There should be 2 pairs of numbers. The one on the left is your canvas size, in pixels by default. The one on the right is the coordinate location of your mouse. Simply take a half of each side (length and width) from your canvas size, and then position your mouse accordingly.
Alternatively, you could create a new layer, place a one pixel dot on the canvas, and then use the Align Object (Search it if you do not have it already) plugin set to center. This will give you the exact center of the canvas.
There is another solution, a plugin called Centerlines, however I remember getting it off of the PDN forums, so I am not sure where it would be found.
Hope this helps.
-
I love this tut... I have one question though. Where's step 5?
Woops. Mis-numbered the steps. :oops:
Thanks for noticing, I'll fix it right away.
Glad you enjoyed my tut!
Thanks Expiration, I have PDN version 3.3.1 and do not have the "Stretch" tabs in Dents.Can you tell me where to download it?
Also, I'm having a problem with the "Gaussian blur set at 1 or 2 pixels".
When I click on Gaussian blur, I only see "Radius" option.
I have Gaussian blur+ and the options are: Radius, Channel to blur and Blend Mode.
Am I looking in the wrong place for the pixel settings? Thanks.
Hmm, the 'Stretch' Tab is on the Dents plugin when I view it. I'll show you a picture of where it is.
As for the Gaussian blur, the 'Radius' is measured in pixels. Sorry for the confusion.
-
Good job rtargo, although I would suggest adding a little more stretch to the tail, in the 'Stretch' tab of Dents.
As for the crescent shape, I think I drew a curved line using the line/curve tool in a blue-ish cyan color, and then Gaussian blurred it by 1 or 2 pixels, followed by a linear (reflected) transparency gradient from the center to the edge of the canvas (vertically).
Hope this helps!
-
whoa! that leopard thing is awsome!
Thanks Salu!
Wow.I love your last piece, even though it breaks the rules!

Work in progress I take it?
Thanks Dalton, yes it is a work in progress.
And I hadn't noticed that it was too large, I guess I should fix it. Besides, I've scrapped it (as stated above), and started on another one.
-
Yeah, I got stuck with the mini size too, although it didn't hinder my photo-manipulating.
Great entries so far!
-
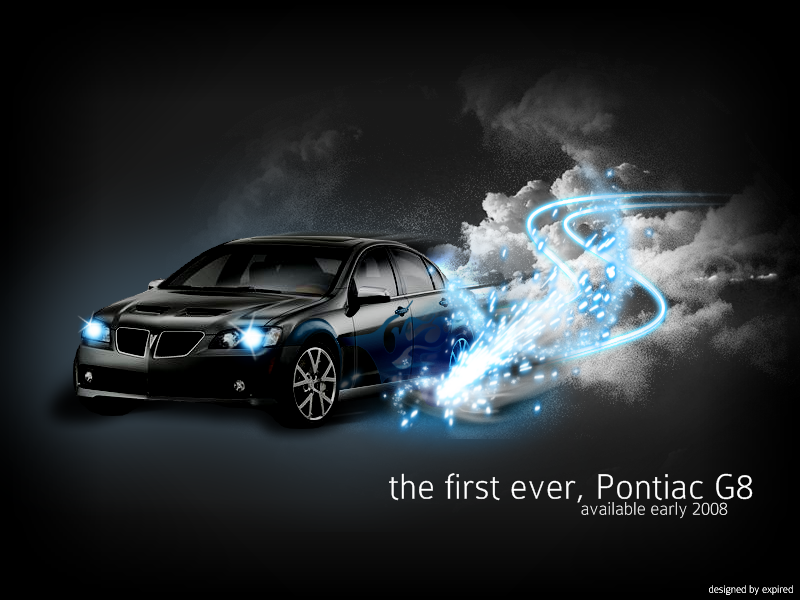
Most of this I would actually classify under special effects, not photo manipulation, but I did add flame decal to and recolored the car.
Anyways, here is the image:
Links to brush packs ...
-
Wow i love your work, you are definatly my hero. My goal as pdn user is to become as good as you.
Thank you.
And i was looking through your comments and not a single bad comment, that i could see anyway. Do you ever have anyone saying" wow that picture sucks"?No such comments from anyone on the boards, although my brother makes some remarks like that, as he looks down on Paint.NET, being a Photoshop user ...
oh and another question does all this praise ever make u have an ego? or does it just make you want to do better?I would hope I am not getting an ego from all the compliments. It also does make me strive to improve, as well as looking at the works of others who are better than me.
ok nvm ill shut up now. Im gonna try and make something like ur Latest WIP: Leopard Mech.No need to be sorry, if you have more questions I will be happy to answer them. Good luck with your piece!
On a side note, I have scrapped my Leopard Mech (well, not totally, I've just stopped production on it), and have decided to restart, this time, with a cheetah, and in a much more interesting pose as well. I hope to finish the head in a day or too, and then move on to the rest of the body. I want this one to be a surprise, so don't expect any WIPs of this from me, but it will look similar to my Leopard Mech, like the color scheme and shading techniques. :wink:
-
Lol, Chinese chess! I used to play that with my dad ... I sucked at it xD. Nice pic Crimson.
-
by the way, i dont open it with them, i open paint.net, and paste into the already new blank file
=)
Actually, I wasn't talking about opening it with them. Try opening Paint.NET, then copying a picture, and then make a new document. So you should have 2 canvas's. The one you created after copying the image should have the image's dimensions.
Glad to help!
-
Well, I meant to say post a reply in the "How to Make a Desktop and Paper" thread, not make a new topic within the Tutorials subforum.
Sorry if I was unclear.
-
You should post all questions on how to follow tutorials in their respective threads, not GD&Q.
-
If you have an image on the clipboard (an image that you have copied from somewhere), creating a new image in Paint.NET will automatically generate a canvas with the size of that image.
Also, if you paste an image into a canvas that is larger than it, before deselecting, hit Ctrl + Shift + X, which will crop the canvas to your selection, in this case, your image.
Regarding your question about the transparency turning back white, it depends on what image format you are saving it in. Some image formats, such as GIFs and PNGs, support transparency, while others, such as JPGs and BMPs, do not.
Hope this helps.
-
-
Thanks LFC.

I might start over though, with a more interesting pose ... it just seems a little bland to me.
And for future reference, you don't have to call me "-Expiration-." "expired" or "expiration" works fine.


Image Umbrella: Desktop Art
in The Pictorium
Posted
Thanks Jerkfight!
I probably could. However, one of the three I've already created (the green one) will be impossible to make into a 1280x1024, because it goes vertically. I would have to remake the entire piece.
Thanks Flow. It'll (hopefully) be ready in a week. Or two.
You might want to post a thumbnail to your image. It's wayy too big for my screen, it stretches the page. The limit for images posted in the Pictorium is 800 pixels in the largest dimension, or else you should link to it with a thumbnail.