

Red ochre
-
Posts
3,019 -
Joined
-
Last visited
-
Days Won
125
Posts posted by Red ochre
-
-
If you literally only want tones of one colour, then why not:
1. convert to black and white (adjustments)
2. add a layer and fill it light blue
3. change the layer option to multiply.
- only a thought

-
Yes please - the project file will be useful
 .
.When I tried using VS express for plugins before, I didn't have much success getting any codelab generated code into it.
Before starting with codelab about a year ago my only coding experience was on the Commodore 64 - nearly 30 years ago!
- so all the 'using' statements and various files needed to create a '.dll' were a bit overwhelming!
The code you have supplied above should help me enormously to get started with VS.
The project file will help a lot too.
It was wonderful to finally see that plugin work without stripes!!!
It is very much a 'beta' regarding the 'enhancements', but once I get the hang of VS, I can work on the algorithms.
Sorry I should have included more explanation comments in the code and more descriptive variable names - but I had all but given up this.
Once again Thank You

File downloaded - brilliant!
-
Hello barbieq25,
Thanks for your comments over on Abstract images
.Your latest 3 are great as ever - you're getting a very strong body of work together there.
I think you'd be first choice if 'Tiffany' need a new lamp designer
 - and a lot of church windows would benefit from your stained glass ideas too!
Keep up the good work!
Great gallery ... where's the cheese and wine ?

-
 1
1
-
-
WOW! - Thank you very, very much
.I have visual studio express installed but haven't had much luck with it yet. The code you have supplied above means I have no excuses now!
Again thank you, writing that must have taken an age - I have only just downloaded it but I am sure it will me help immeasurably.
Hopefully this will enable me to explore more complex plugins than are possible with code lab alone.
Right - better fire up VS express.
Even more thanks
:star: :star: 

-
echo89 - good strong start
Barbieq25 - always good! - 12GB!!
Xhin - I like your work - same colour scheme through the latest ones - clever.
Delpart - good image, but I prefer some of the ones in your gallery from your sig.
here's something to balance against Welshblue's (brilliant) crucifix painting - offense not intended - (I'm an athiest
).
-
Hello Tipton harrier
The method I used was basically:
1. duplicate layer
2. run my 'tweak edges' plugin on top layer to get black outlines on transparent layer
3. tidy this up with the eraser
4. run surface blur on lower layer
5. use color picker to set colour to the background color
6. use paintbrush to cover the damaged areas
7. run surface blur again till background is smooth
8. merge layers down
9. use contrast/brightness adjustment to suit.
Hope this helps - good luck!
-
Hello again - hope this doesn't count as necroposting!
Well I thought that rewriting the plugin to use methods might solve the ROI problem - it hasn't.
The methods to load and alter the array have to be called from within the render method, as they currently depend upon the dst surface having the blur values. I suppose I could write my own simplified blur function reading from the src surface directly into the array - but I doubt this would solve the problem either.
If anyone can explain how to avoid these ROI effects I'd be very grateful.
Please assume that I am an idiot! - if the explanation is too cryptic I won't understand.
I am totally stumped as this problem depends upon knowledge I don't have - rather than something I could deduce.
I know the forum is not here to teach C#, but this topic seems to be specific to PDN and not explained elsewhere.
Additionally, PDN effects are the only programming that I do. So the only benefit is to PDN users (and myself).
If I cannot overcome this problem in a reliable way then I cannot write more complex effects, which is a shame, because I have some interesting and hopefully useful effects in mind for the future.At the moment it seems like the computer's left hand doesn't know what it's right hand is doing - and producing incorrect logic - but quickly!
I am quite surprised as to why this plugin has problems when my 'Composition tool' (which uses methods called from within the render loop) doesn't? - perhaps I had no need to use a method for that one?
Note: I only use codelab. Also the code below is only 'beta' and will be tidied up considerably if I can sort the ROI problem. In the attached picture the red stripes are where the plugin is doing what it should.
Many thanks in advance - I realise how busy Rick and the experienced plugin writers are currently.
Sorry if the tone is a little disgruntled but this is the third rewrite, with no progress, I'm getting frustrated!
/* =================================================== */ /* */ /* Newedge.cs */ /* (c) 2011 Red Ochre (John Robbins) */ /* */ /* Description: produces various ink outlines */ /* */ /* ========================================== ======== */ // Name:Newedge // Author: Red ochre (John Robbins) // Submenu: Advanced // URL: http://www.getpaint.net/redirect/plugins.html // Title: New edge Feb 2012 Red Ochre #region UICode byte Amount1 = 0; // detection type|0.darker than blur|1.lighter than blur|2.both (blur) int Amount2 = 1; // [1,100] blur radius - smoothness OR edge angle OR brush size int Amount3 = -150; // [-256,256] dark / bright threshold byte Amount4 = 0; // outline properties|primary colour|transparent|as original(src)|as detection type(dst)|src greys|dst greys|secondary colour byte Amount5 = 0; // background properties|secondary colour|transparent|as original(src)|as detection type(dst)|src greys|dst greys|primary colour int Amount6 = 765; // [0,765] background if tone above this int Amount7 = 0; // [0,765] background if tone below this int Amount8 = 4; // [0,4] remove isolated pixels int Amount9 = 1; // [0,1] thicken lines bool Amount10 = true; // [0,1] test: blue = removed, red = added #endregion // load array method here private bool[,,] loadarray (Surface src,Surface dst,Rectangle rect,bool[,,]v,bool l,bool b,int th) {for (int y = rect.Top; y < rect.Bottom; y++) // LOOP 1 analyze src and put result in array sval { for (int x = rect.Left; x < rect.Right; x++) { int h = y - rect.Top; int w = x - rect.Left; ColorBgra cp = src[x,y]; int B = (int)cp.B; int G = (int)cp.G; int R = (int)cp.R; int A = (int)cp.A; ColorBgra dp = dst[x,y]; int dB = (int)dp.B; int dG = (int)dp.G; int dR = (int)dp.R; int dA = (int)dp.A; int td = dB + dG + dA;// destination - blurred, int ts = B + G + R;// source - unblurred pixel if(Amount1 == 0 || Amount1 == 2) {if(ts < td + th && ts > Amount7 && ts <= Amount6){v[w,h,0] = l;} // if darker (line) then true else v[w,h,0] = b; } if(Amount1 == 1) {if(ts > td - th && ts > Amount7 && ts <= Amount6){v[w,h,0] = l;} // if lighter than blur by amount2 then also true else if (Amount1 == 1){ v[w,h,0] = b;} } if(Amount1 == 2) {if((ts < td + th || ts >= td - th) && ts > Amount7 && ts <= Amount6){v[w,h,0] = l;}// both, if darker (line) or lighter (background)then true else if (Amount1 == 2){ v[w,h,0] = b;} } v[w,h,1] = v[w,h,0];// simply copy initial values to the 2nd part of array } }// end of loop1 return v; } // alter array method here private bool[,,] altarray (Rectangle rect,bool[,,]v,bool l,bool b,int H,int W,int A8) {for (int y = rect.Top; y < rect.Bottom; y++) // LOOP 2 - changes sval entries remove single pixels { for (int x = rect.Left; x < rect.Right; x++) { int h = y - rect.Top; int w = x - rect.Left; if((h >= 1 && h < H-1) && (w >= 1 && w < W-1)) { if(A8 >= 1)// case 1 - by 4 { if(v[w,h,0] == l && v[w - 1,h ,0] == b && v[w ,h - 1,0] == b && v[w ,h + 1,0] == b && v[w + 1,h ,0] == {v[w,h,1] = b;}// if line surrounded by 4 background make background if(v[w,h,0] == b && v[w - 1,h ,0] == l && v[w ,h - 1,0] == l && v[w ,h + 1,0] == l && v[w + 1,h ,0] == l) {v[w,h,1] = l;}// if background surrounded by 4 line make line } if(A8 >= 2)// case 2 - by 8 { if(v[w,h,0] == l && v[w - 1,h - 1,0] == b && v[w - 1,h + 1,0] == b && v[w + 1,h - 1,0] == b && v[w + 1,h + 1,0] == {v[w,h,1] = b;}// if line surrounded by 4 background make background if(v[w,h,0] == b && v[w - 1,h - 1 ,0] == l && v[w - 1,h + 1,0] == l && v[w + 1,h - 1,0] == l && v[w + 1,h + 1,0] == l) {v[w,h,1] = l;}// if background surrounded by 4 line make line } } if((A8 >= 3) &&(h >= 2 && h < H - 2) &&(w >= 2 && w < W - 2)) { if(v[w,h,0] == l // case 3 - 20. previous 8 checks & 12 pix perimeter check && v[w - 2,h ,0] == b && v[w - 2,h - 1,0] == b && v[w - 1,h - 2,0] == b && v[w ,h - 2,0] == b && v[w + 1,h - 2,0] == b && v[w + 2,h - 1,0] == b && v[w + 2,h ,0] == b && v[w + 2,h + 1,0] == b && v[w + 1,h + 2,0] == b && v[w ,h + 2,0] == b && v[w - 1,h + 2,0] == b && v[w - 2,h + 1,0] == {v[w,h,1] = b;} // make background if isolated line pix if(v[w,h,0] == b // case 3 - same for sad lonely background pixies && v[w - 2,h ,0] == l && v[w - 2,h - 1,0] == l && v[w - 1,h - 2,0] == l && v[w ,h - 2,0] == l && v[w + 1,h - 2,0] == l && v[w + 2,h - 1,0] == l && v[w + 2,h ,0] == l && v[w + 2,h + 1,0] == l && v[w + 1,h + 2,0] == l && v[w ,h + 2,0] == l && v[w - 1,h + 2,0] == l && v[w - 2,h + 1,0] == l) {v[w,h,1] = l;} // make line if isolated background pix } if((A8 == 4) // case 4 - 36. previous 20 checks & 16 pix perimeter check &&(h >= 3 && h < H - 3) &&(w >= 3 && w < W - 3)) { if(v[w,h,0] == l && v[w - 3,h ,0] == b && v[w - 3,h - 1,0] == b && v[w - 2,h - 2,0] == b && v[w - 1,h - 3,0] == b && v[w ,h - 3,0] == b && v[w + 1,h - 3,0] == b && v[w + 2,h - 2,0] == b && v[w + 3,h - 1,0] == b && v[w + 3,h ,0] == b && v[w + 3,h + 1,0] == b && v[w + 2,h + 2,0] == b && v[w + 1,h + 3,0] == b && v[w ,h + 3,0] == b && v[w - 1,h + 3,0] == b && v[w - 2,h + 2,0] == b && v[w - 3,h + 1,0] == {v[w,h,1] = b;} // make background if isolated line pix if(v[w,h,0] == b // case 4 - same for background && v[w - 3,h ,0] == l && v[w - 3,h - 1,0] == l && v[w - 2,h - 2,0] == l && v[w - 1,h - 3,0] == l && v[w ,h - 3,0] == l && v[w + 1,h - 3,0] == l && v[w + 2,h - 2,0] == l && v[w + 3,h - 1,0] == l && v[w + 3,h ,0] == l && v[w + 3,h + 1,0] == l && v[w + 2,h + 2,0] == l && v[w + 1,h + 3,0] == l && v[w ,h + 3,0] == l && v[w - 1,h + 3,0] == l && v[w - 2,h + 2,0] == l && v[w - 3,h + 1,0] == l) {v[w,h,1] = l;} // make line if isolated background pix }}} return v; } // thicken lines method here private bool[,,]thickenlines(Rectangle rect, bool[,,]v, bool l,bool b,int H,int W) {for (int y = rect.Top; y < rect.Bottom; y++) // LOOP 3 - changes array values thickenlines { for (int x = rect.Left; x < rect.Right; x++) { int h = y - rect.Top; int w = x - rect.Left; if((h >= 1 && h < H - 1) &&(w >= 1 && w < W - 1)) {if(v[w,h,0] == l && v[w,h,1] == l) {v[w - 1,h - 1,1] = l; v[w ,h - 1,1] = l; v[w + 1,h - 1,1] = l; v[w - 1,h ,1] = l; v[w + 1,h ,1] = l; v[w - 1,h + 1,1] = l; v[w ,h + 1,1] = l; v[w + 1,h + 1,1] = l;} } } } return v; } void Render(Surface dst, Surface src, Rectangle rect) { // Call the Gaussian Blur effect - this can only be done from here as it uses dst GaussianBlurEffect blurEffect = new GaussianBlurEffect(); PropertyCollection bProps = blurEffect.CreatePropertyCollection(); PropertyBasedEffectConfigToken bParameters = new PropertyBasedEffectConfigToken(bProps); bParameters.SetPropertyValue(GaussianBlurEffect.PropertyNames.Radius, Amount2); blurEffect.SetRenderInfo(bParameters, new RenderArgs(dst), new RenderArgs(src)); blurEffect.Render(new Rectangle[1] {rect},0,1); ColorBgra PrimaryColor = (ColorBgra)EnvironmentParameters.PrimaryColor; ColorBgra SecondaryColor = (ColorBgra)EnvironmentParameters.SecondaryColor; ColorBgra cp; // current pixel //ColorBgra dp; // destination pixel int B, G, R, A, td,ts,lb,lg,lr,la,bb,bg,br,ba,h,w; w = 0;h = 0;// needs to be assigned int th = Amount3; int H = rect.Bottom - rect.Top; int W = rect.Right - rect.Left; int A8 = Amount8; int A9 = Amount9; //int A10 = Amount10; bool[,,]v = new bool[W,H,2]; // hope this is ok. array W by H and true or false * 2 bool l = true; bool b = false; // l = outline = true; b = background = false // call load array method v = loadarray(src,dst,rect,v,l,b,th); // call method to reduce isolated pixels if(A8 > 0 || A9 > 0){v = altarray(rect,v,l,b,H,W,A8);} // call thicken lines method if(A9 == 1){v = thickenlines(rect,v,l,b,H,W);} for (int y = rect.Top; y < rect.Bottom; y++) // LOOP 4 - sets BGRA values, re-assembles and sends to dst canvas { for (int x = rect.Left; x < rect.Right; x++) { h = y - rect.Top; w = x - rect.Left; cp = src[x,y]; B = (int)cp.B; G = (int)cp.G; R = (int)cp.R; A = (int)cp.A; td = (int)dst[x,y].B +(int)dst[x,y].G + (int)dst[x,y].R;// destination - blurred pixel ts = B + G + R;// source - unblurred pixel lb = 0; lg = 0; lr = 0; la = 255; // set initial line variables to black bb = 255; bg = 255; br = 255; ba = 255; // set initial background variables to white switch (Amount4)// line properties {case 0: lb = PrimaryColor.B; lg = PrimaryColor.G; lr = PrimaryColor.R; la = PrimaryColor.A;break; //line colour = primary colour default black case 1: lb = B; lg = G; lr = R;la = 0;break; //transparent case 2: lb = B; lg = G; lr = R; la = A;break; // as original case 3: lb = dst[x,y].B; lg = dst[x,y].G; lr = dst[x,y].R; la = dst[x,y].A;break; // as blur case 4: lb = (int)(ts / 3);lg = (int)(ts / 3);lr = (int)(ts / 3);la = A;break; // src greys case 5: lb = (int)(td / 3);lg = (int)(td / 3);lr = (int)(td / 3);la = A;break; // dst greys case 6: lb = SecondaryColor.B;lg = SecondaryColor.G;lr = SecondaryColor.R;la = SecondaryColor.A;break;}// secondary colour switch (Amount5)//background properties {case 0: bb = SecondaryColor.B; bg = SecondaryColor.G; br = SecondaryColor.R; ba = SecondaryColor.A;break; //background colour = secondary colour default white case 1: bb = B; bg = G; br = R; ba = 0;break; //transparent case 2: bb = B; bg = G; br = R; ba = A;break; // as original case 3: bb = dst[x,y].B; bg = dst[x,y].G; br = dst[x,y].R; ba = dst[x,y].A;break;//as blur case 4: bb = (int)(ts / 3);bg = (int)(ts / 3);br = (int)(ts / 3);ba = A;break; // src greys case 5: bb = (int)(td / 3);bg = (int)(td / 3);br = (int)(td / 3);ba = A;break; // dst greys case 6: bb = PrimaryColor.B; bg = PrimaryColor.G; br = PrimaryColor.R; ba = PrimaryColor.A;break;}// primary if(v[w,h,1] == {B = bb; G = bg; R = br; A = ba;}//background values if(v[w,h,1] == l) {B = lb; G = lg; R = lr; A = la;}//outline values if(Amount10 == true && v[w,h,0] == l && v[w,h,1] == {B = 255;G = 0; R = 0; A = 255;} // if changed line single pixel make blue if(Amount10 == true && v[w,h,0] == b && v[w,h,1] == l){B = 0;G = 0; R = 255; A = 255;} // if changed background single pixel make red // re assemble cp = ColorBgra.FromBgra( Int32Util.ClampToByte(, Int32Util.ClampToByte(G), Int32Util.ClampToByte(R), Int32Util.ClampToByte(A)); dst[x,y] = cp; } } } -
Hello ceauke,
Perhaps my 'composition tool' plug in may help. composition tool - good luck
-
Why can't I report spam?
- Logged in - obviously -

- ah - spam removed already
- they're good these 'mods' !! -
I think Lance is more knowledgeable than myself.
Can only think of adding a layer in black and transparent and blending ? - sorry i can't help more
There are some very capable pixel artists on here that may be able to help
-
Hello 'Woman!'
Would the layer options help? - sorry can't find the icon - layer window - little tag at end and then blend options.
or the blend options plugin? blend options
-
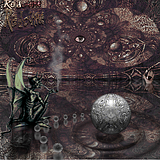
Just having fun
- if any of the techniques used are useful - I can describe:basically : noise, jitter, gaussian blur, physchocolour .... and the wonderful liquify!
- idea from cat pic
-
Last time this question was asked, BoltBait said "codelab" and locked up the topic D:
- codelab is the best plugin, but I think redrocker wanted suggestions for useful and easy to use - so not mine then!
-
Whoah ! - I'd better start calling you 'Maestro' - brilliant bananas and grapes - looking forward to more (and a tutorial ?)
-
Hello RedRocker227, welcome
.Boltbait's plugin pack is probably a good place to start Boltbaits plugins .
The other type of plugins are 'filetype' - specialist ones to open non standard file types!
-
1
-
-
Hello Richard,
I have a tablet but would probably still use my mouse (ball type) for this.
At risk of stating the obvious, have you cleaned the internals of the mouse and are you using it on a decent surface?
Have you checked in window's control panel what the mouse settings are?
- just ideas
Also I think layers are the way to go - (obviously preserve your original image safely first) - you could then separate out the black lines onto a clear layer and have this above the layer with your colouring (should help to cover any slight mistakes). If the coloured fields etc are on there own clear layer you can easily tidy them up with the eraser or paintbrush tools.
-
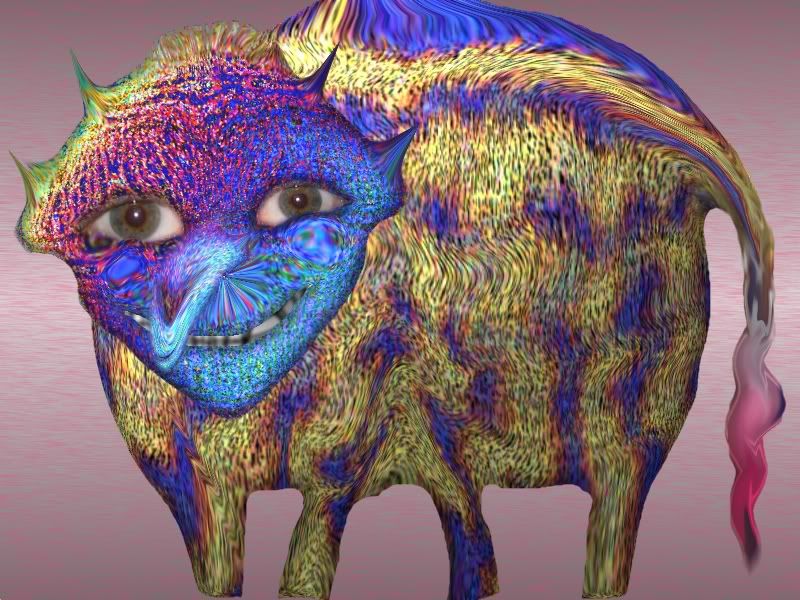
i can't see anything
- Perhaps it's the Cheshire cat
Seriously good image.
Criticism: - none! .
Compliments: - love the fur textures, overall composition, little glint on right eye lower eyelid, wonderful subtle 'eyelash' type whiskers.
Good use of simple colour scheme too! Overall, a brilliant first image - looking forward to seeing more
I'm not normally so 'gushy' - but this is very professional looking image.
-
Instructions and screenshots added at bottom of first post
-
2
-
-
@ Redochre. nice plugin, I just downloaded it and got some cool results, still trying to understand it, endless possibilities...
I'm still trying to understand it too!
- I'll try to put an explanation on the thread page.@ Aislin - many thanks.
@ jim100361 - strong ideas as ever. - the work in your gallery is improving nicely too!
@ yellowman re: city - brilliant - strong idea, well executed
- I'm never sure where 'image manipulation' stops and 'abstract images' begins.
-
Hello ultrakiddo,
Have you explored what the 'liquify' plugin can do - it may be a more hands-on approach than what you are thinking of - but it is a very powerful distortion tool.
-
I started playing around with noise/random stuff - this compiles in codelab and is open to adaption. - probably terrible 'style' though
#region UICode int Amount1 = 128; // [0,255] probability (spacing) byte Amount2 = 0; // [255] Reseed #endregion void Render(Surface dst, Surface src, Rectangle rect) { ColorBgra CurrentPixel; for (int y = rect.Top; y < rect.Bottom; y++) { for (int x = rect.Left; x < rect.Right; x++) { CurrentPixel = src[x,y]; if (RandomNumber.Next(255) > Amount1) { CurrentPixel = src[x,y]; } else { CurrentPixel.R = (byte)RandomNumber.Next(256); CurrentPixel.G = (byte)RandomNumber.Next(256); CurrentPixel.B = (byte)RandomNumber.Next(256); } CurrentPixel.A = (byte)255; dst[x,y] = CurrentPixel; } } } -
Try Noise on it's own layer then run Splinter on that?
The versions of add noise I have don't like transparent layers - not a problem as I use my own very beta, unpublished plugin.
I'm pretty sure that 'Dents' is run at a low distortion on the 'splinters', to get the organic feel of the fibres.
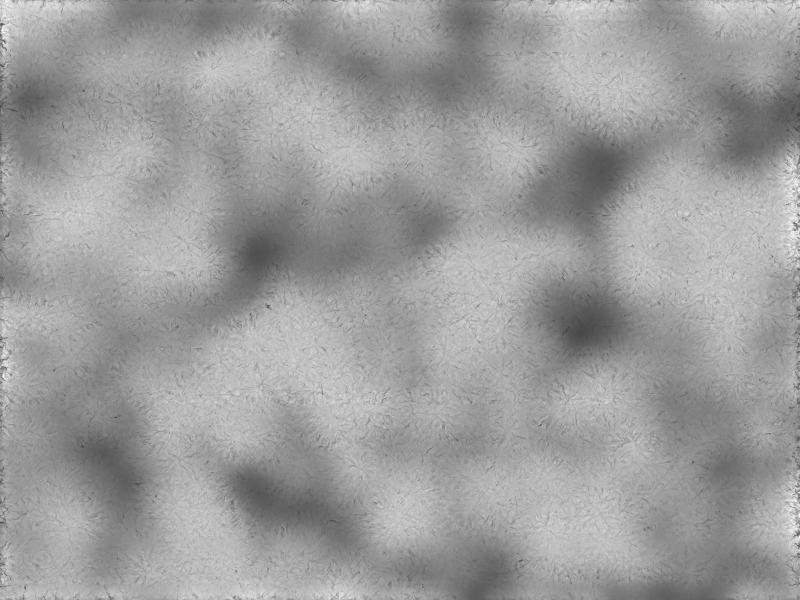
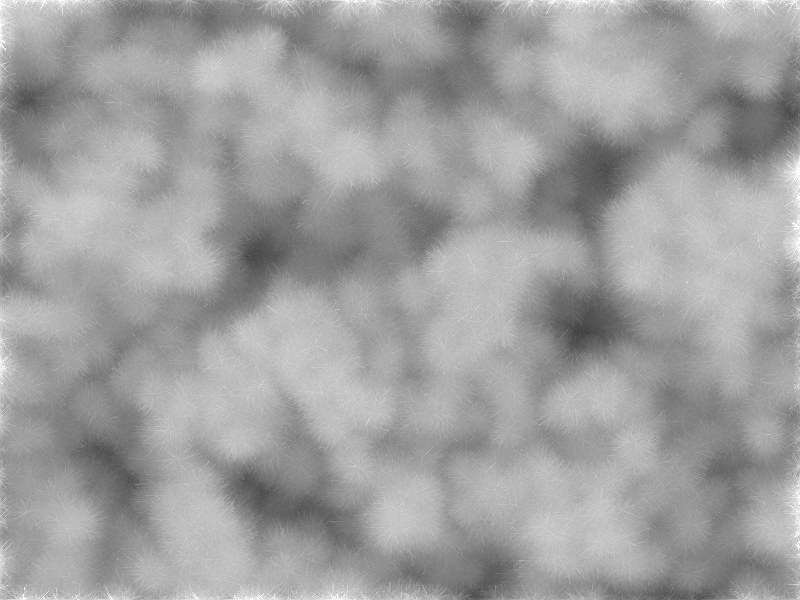
Anyway, I wanted to comment to say how much I've enjoyed this unplanned 'tutorial' - these techniques are brilliant for making watercolour paper textures, mosses etc. and Welshy's looks like some grey (brain) matter
.'Dents' and 'splinter blur' are two of my favourite plugins. Maybe it's good that you cannot exactly replicate the first texture, or everything would look the same. It's the exploring/discovering that I see as art! - well done awakeneddragon, I'm glad you posted this.
My efforts along these lines.
-
3. I have Simon Brown's custom brush plug in, but no brushes as this involves the need for photoshop brushes (which I can get) and another program called abrviewer, which I am unable to get at present as one link to it is broken and I get a 404, and the other just does nothing (but this may be my ISP) So I will look into this further when I can. But it would be nice to have some other brush types built in.
I could be wrong but I think you can just make a brush by saving a shape as .png file then directing the plugin to it.
Hope that helps
-
Ooops. I thought you knew about it or I would have screenshot that for you some time ago ... (Note to self, dont assume ...)
- I only did this one as a bit of fun really - and assumed that problem was to do with the edge smoothing
Quite nicely surprised that particular problem was so easy to solve!
Anyway I got into the more exciting 'squirklewarp' and forgot about this one - but I assume it is more important now as it compliments squirklewarp.
I'll do some more work on it soon


Autorotate rectangular selection when pasting as new picture
in Paint.NET Discussion and Questions
Posted
I may have misunderstood the question
But it may be worth looking at this composition tool
- don't forget to save your original first!