


jerry533482
-
Posts
402 -
Joined
-
Last visited
Content Type
Events
Profiles
Forums
Blogs
Gallery
Downloads
Posts posted by jerry533482
-
-
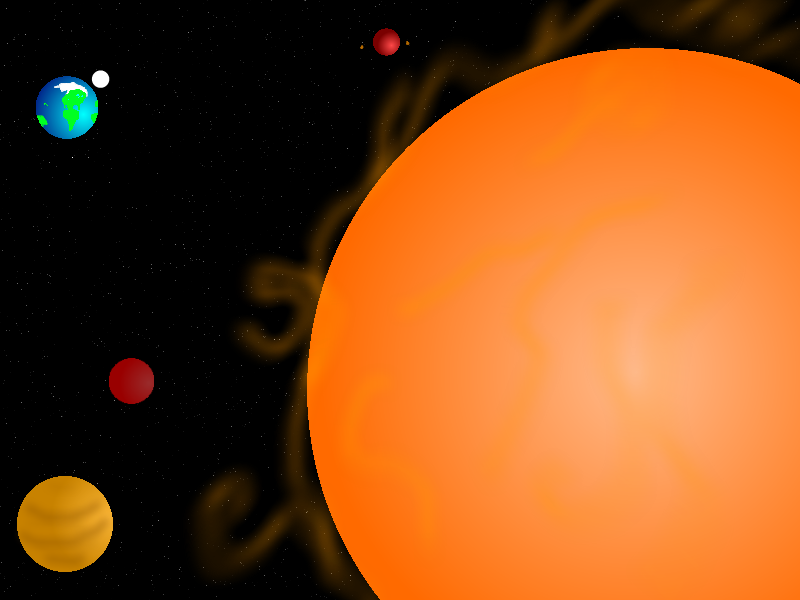
Looks good, but the orange/yellow planet is too bright/distracting
That "planet" is a sun.
-
Is the icon for Paint.NET v4.0 going to be changed, like it was with v3.0?
-
Just another interstellar pic.
-
I have a question. When i save the animation and play it back, the entire frame seems to go up by ten pixels and a white bar appears at the bottom for a fraction of a second when the animation repeats. Is this normal? I've saved the file as .gif, and everything else works correctly. Please note that this is an 800x600 20-frame animation.
-
I mean a brush that simulates an airbrush.
-
Hey Rick, what's your word on this?
-
The license for paint.net allows users to redistribute the software, but not to sell it. However, if it is distributed via physical media(CD, floppy, etc), does charging money(to cover the manufacturing costs) violate the license?
-
Does anyone have any links to a photoshop brush or a png that simulates an airbrush? You know; for custombrushesmini.
-
Just so you guys know, a plugin's been released that let's you make animations within PDN, without a third-party app.
you can find it here:http://paintdotnet.forumer.com/viewtopic.php?f=16&t=28407
-
Can you make a tutorial for the ipod nano?
-
Nothing big, but I've changed my avatar to a more...artistic pic, that consists entirely of my artwork.
-
Does anyone here have any recommendations or know of a tutorial that explains how to make an earth-like cloud effect? I'm trying to make a realistic picture of the planet. I'm pretty much on board with the textures and blurs, but i never know how to make a selection to fill in that looks like real, Terran clouds. Anyone got any ideas?
If I'm not being specific enough, feel free to ask more about this topic.
-
Just so you know hopcarl85, this is a Paint.NET forum.
-
I have been checking for updates, but screenshots have been posted that say Paint.NET v3.5.2 beta release. Are these Alpha releases; or is my updater working incorrectly?
The screenshot is here:http://blog.getpaint.net/2009/12/21/paintnet-v352-is-on-the-way-%E2%80%93-better-font-support-for-win7vista/(the third picture)
-
Assuming that non-destructive editing was a feature, what would the system requirements be?
-
"The Planet Earth"
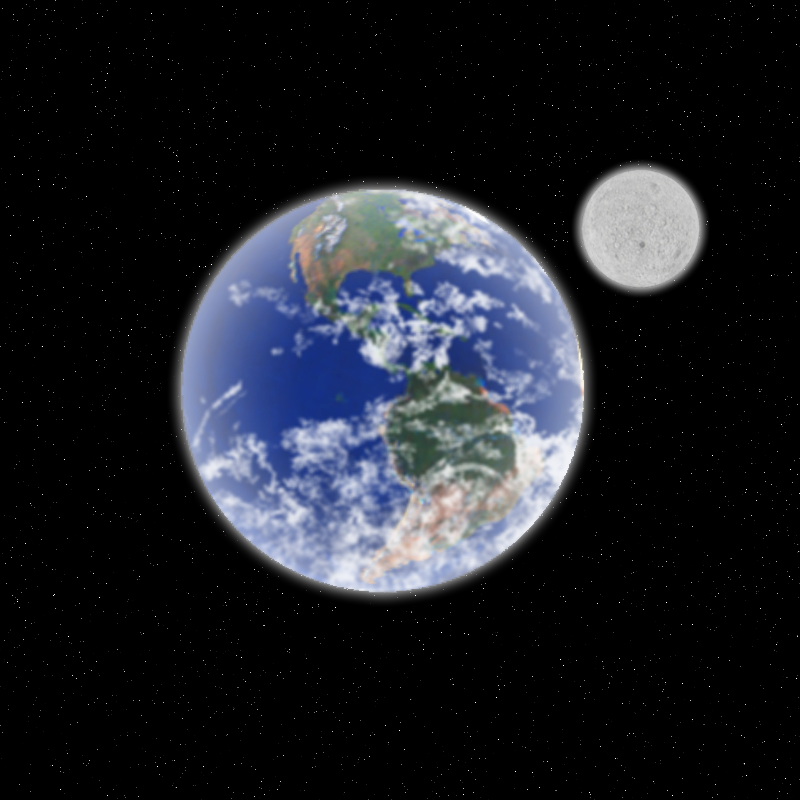
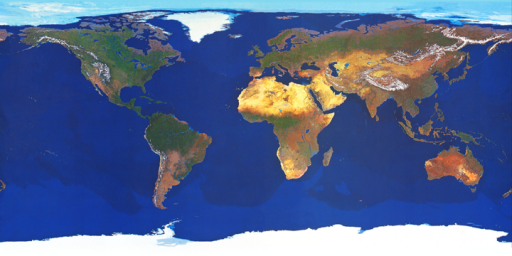
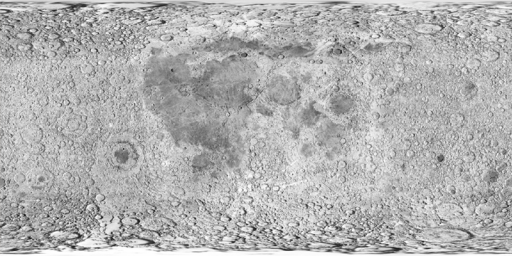
This pic was made from the following 2 images(source-Galactic Civilizations 2:Dread Lords planet maps):
Earth's map:
And Luna's(the moon's) map:
The clouds were made by getting a selection from a real picture of Earth's clouds and rendering the cloud effect in with some blurs.
-
"The Planet Earth"
This pic was made from the following 2 images(source-Galactic Civilizations 2:Dread Lords planet maps):
Earth's map:
And Luna's(the moon's) map:
The clouds were made by getting a selection from a real picture of Earth's clouds and rendering the cloud effect in with some blurs.
You can find an awesome tutorial on making planets here:
http://paintdotnet.forumer.com/viewtopic.php?f=31&t=31472&hilit=planets
This image is also in my gallery:
-
Yes, but what if the blur could be adjusted on-the-fly without stepping back in history; like the opacity bar? That would help if you messed up a blur a couple steps back.
-
Hey, this may sound weird, but I've recently been following some tutorials and they frequently ask to run Gaussian blur on individual layers. Is it possible to implement a control on the layer properties box that allows you to blur the selected layer without affecting the others? Perhaps this could be implemented in a future release?
-
Another space pic. Geez, I must be on a streak. Any advice and/or tutorials on improving the flares would be greatly appreciated.
-
The .PDN format is lossless, right?
-
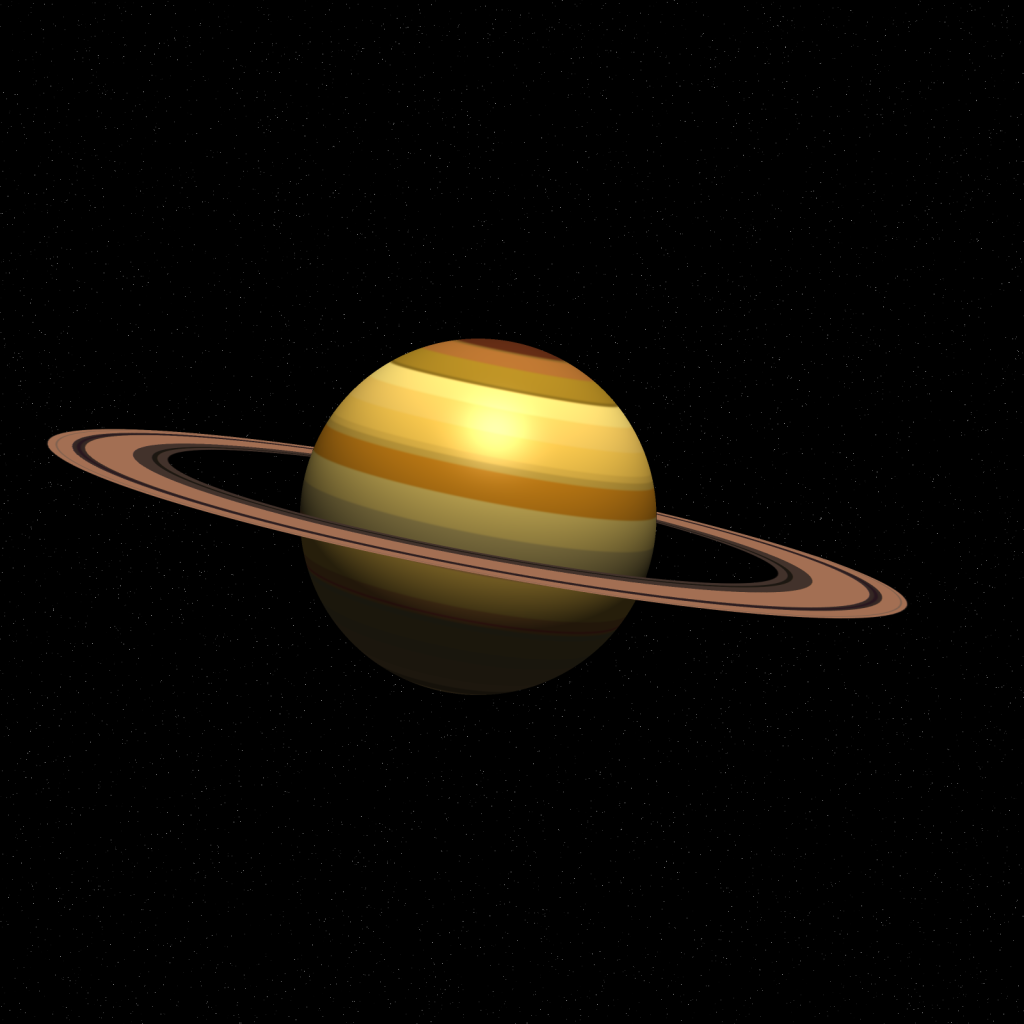
I had to do it. I've improven upon the original. People, I bring to you...Saturn mark 2.
-
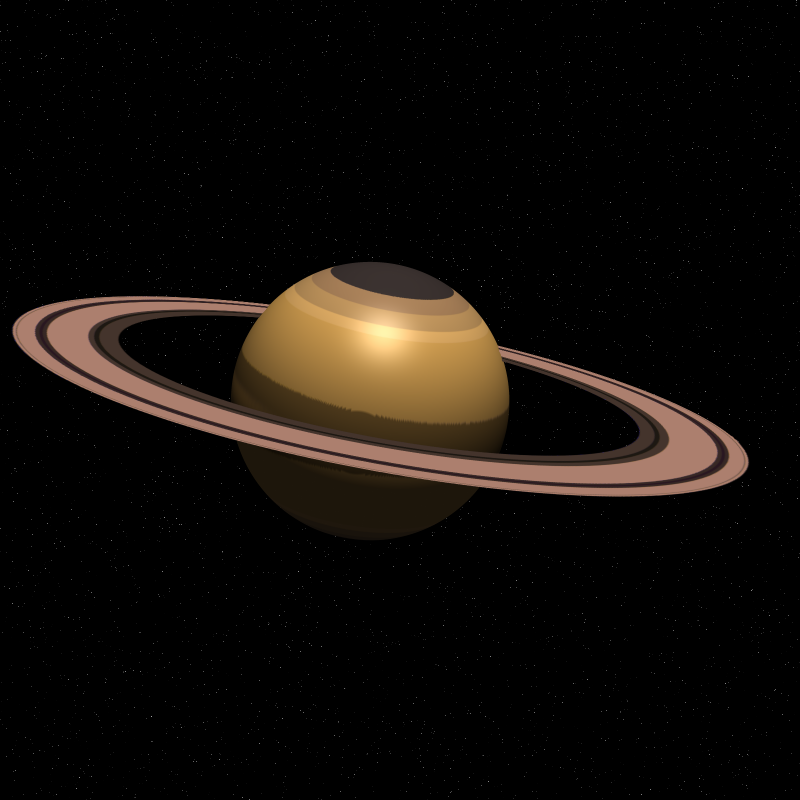
Another space image.
-
I was watching star trek TNG recently, and thought I might try to draw a galaxy.
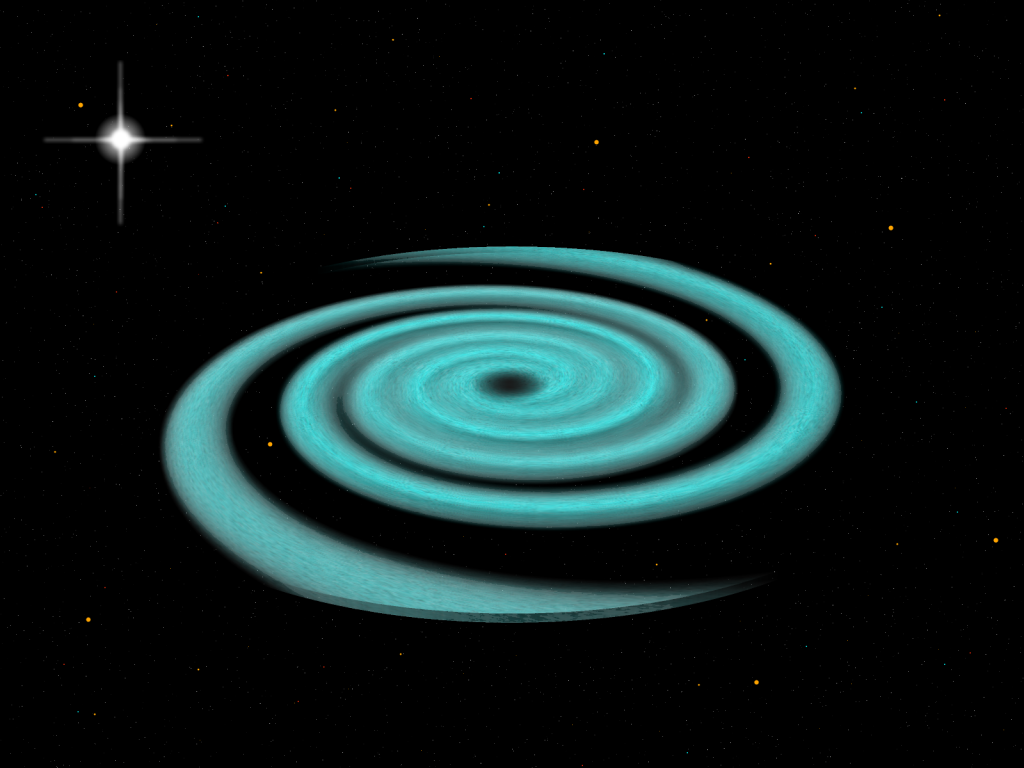
Galaxy Tutorial
in Creations
Posted
This tutorial is available as a PDF. Click here to view or download it
Hey guys. I've done some searching, and i couldn't find any other galaxy tutorials, so i figured I'd make one. This was inspired by learning a couple other tutorials, and watching star trek TNG. Forgive me if the screenshots are a bit hard to see; this is my first tutorial.
First you're going to need a few plugins:
- Color Filter
- Sinewaves
- Feather
Your goal is this:
1. Create a new picture, at 800x600, with white as your background.
2. fill the background with black, or press ctrl+shift+I to invert colors.
3. Add noise at the following settings(effects>noise>add noise):
4. Add a new layer. Make sure your primary color is black and you secondary is white. Render clouds at the following settings(default), with the mode set to difference:
5. Repeat the clouds effect 3 to 5 times(ctrl+F). If you do it correctly, it should look like this:
6. Run color filter(effects>color>color filter). Set the wheel to the color you want your nebulae to be. I choose dark blue because it looks more realistic:
7. Once you've rendered the effect, go to layer properties for the current layer and set the blending mode to glow. Once you've done this, reduce the visibility bar until you can see most of the stars in the background.
8. Hit okay, then add 2 more layers. Select the uppermost layer(it should be layer 4). Set you primary color to white with an opacity of 255, and your secondary color to white with an opacity of 0. select the gradient tool, choose radial mode, and make a small sphere in the center of screen.
9. Switch to layer below(should be layer 3). Leave your secondary color alone, but change your primary color to the color you want your galaxy to be. I choose light blue because it looks more realistic. Make another radial gradient that overlaps the white one.
10. Merge the top two layers. Now we have to add stars, so we're going to need the magic wand. Select the magic wand from the toolbox, change selection mode to add(union), and keep clicking the blob until you've got the whole thing selected. You're probably going to have to reduce the tolerance. you can also select the outside and press ctrl+I to invert. Once you've got it selected, go to effects>noise>add noise, and render with the following settings:
11. Next. deselect(ctrl+D), and go to effects>distort>sinewaves. Use the following settings:
12. Now we're going to start building the actual galaxy. Go to effects>distort>twist. Use the following settings:
13. Now, we've got too much galaxy, so we're going to have to crop it. select the eclipse selection tool from the toolbox, and select the portion from the twist that you want to actually be in the galaxy. Hint: hold shift as you select, to make a perfect circle. If you have to move the selection, remember to select the white arrow from the toolbox, so you move the selection; not the actual pixels.
14. Hit ctrl+I to invert selection, and press delete.
15. If you've finished the previous step correctly, it should look like this:
16. The edges are probably a bit sharp, so use the feather effect(effects>object>feather) at the default settings.
17. Time to finish up. Go to Layers>rotate/zoom, and use the following settings.
18. You're done! It should look something like this:
Congrats on your PDN galaxy. Remember, these are only basic guidelines, you can mod the steps to your preferences to make your own unique design.
Thank you for trying my tutorial.