


BoltBait
-
Posts
15,730 -
Joined
-
Last visited
-
Days Won
405
Everything posted by BoltBait
-
Mine would be USCGR_SharpShooter_GoodConduct.png
-

problem with .dds files
BoltBait replied to MalvinoXDD's topic in Paint.NET Discussion and Questions
Some games use the alpha channel not as transparency but as an indicator of how shiny something is. So, you can try using my plugin Adjustments > Transparency to raise the transparency for working on the image... then, lower it again before saving for the game. -
Instead of pressing Ctrl+V, try Ctrl+Shift+V to paste your non-square image.
-
Changing Default Tools on Paint.Net Startup
BoltBait replied to Azor's topic in Paint.NET Discussion and Questions
If you're curious about how Paint.NET works, the best thing to do is run Paint.NET and press F1 which will bring up the help pages. From there, click on the User Interface > Settings menu. You'll see screenshots and explanation of what's available on each settings tab. -
Turning source pixels to transparent pixels in destination.
BoltBait replied to tev's topic in Plugin Developer's Central
Try this: void Render(Surface dst, Surface src, Rectangle rect) { for (int y = rect.Top; y < rect.Bottom; y++) // Don't change this { if (IsCancelRequested) return; for (int x = rect.Left; x < rect.Right; x++) // or this { ColorBgra CurrentPixel = src[x,y]; if (x == 231 && y == 74) { CurrentPixel = ColorBgra.Red; } else { CurrentPixel = ColorBgra.Transparent; } dst[x,y] = CurrentPixel; } } } You may want to read these tutorials: https://boltbait.com/pdn/codelab/help/overview.php Good luck! -
No
-
Paint.NET simply uses the fonts that are already installed on your system. So, install a font the normal way, restart Paint.NET and you should see it in your font menu (assuming it is compatible with Paint.NET).
-
Pen Pressure Sensitivity
BoltBait replied to TheCrudNation's topic in Paint.NET Discussion and Questions
That just looks like a great excuse to buy a new tablet! -
BoltBait's Plugin Pack for PdN v4.3.10 - 4.3.12 (Updated May 28, 2022)
BoltBait replied to BoltBait's topic in Plugin Packs

-
Safely rendering any effect programmatically
BoltBait replied to Roly Poly Goblinoli's topic in Plugin Developer's Central
The plugin browser runs effects programmatically. https://forums.getpaint.net/topic/110458-the-plugin-browser-v14-oct-2-2021/ -
No, that’s the original size I created.
-
It seems you know the answer to your own problem.
-
fatal error while reinstalling paint.net
BoltBait replied to evan mark's topic in Troubleshooting & Bug Reports
The current version is 4.3.11. Try downloading that and see if you get the same issue. -
You may choose one: 2 colors and pixely or more colors and smooth You can't have both. That said, there is one other thing you can try and that is to increase the DPI of the image.
-
Reduce image size but keep a high pixel ratio
BoltBait replied to Gabriel989's topic in Paint.NET Discussion and Questions
Since the logo is just text, just recreate it at a smaller size. -
Making Cool Looking Background
BoltBait replied to Bloodshot_pico's topic in Paint.NET Discussion and Questions
Are you asking how to be an artist? Or, do you have a question about to accomplish something specific? -
Not "replaced by" but "replaces"
-
How to make outfits in bloxburg
BoltBait replied to Moonlove2017's topic in Paint.NET Discussion and Questions
You should ask in a forum setup for your game. This forum is for Paint.NET and we don't necessarily know how to work with skins in various games. -
BoltBait's Plugin Pack for PdN v4.3.10 - 4.3.12 (Updated May 28, 2022)
BoltBait replied to BoltBait's topic in Plugin Packs
It is obviously a "false positive". Feel free to send the zip file over to your anti-virus software developer so they can fix their broken software. -
BoltBait's Plugin Pack for PdN v4.3.10 - 4.3.12 (Updated May 28, 2022)
BoltBait replied to BoltBait's topic in Plugin Packs
I plan to do that. That will also give me history of edits which I think is very important. (I can also give access to a few trusted people just in case of emergency.) In the mean time, I went out and bought a NAS and have my backup software run once per day. I've already used it to restore a file I edited by mistake which saved my bacon! Plus, my new laptop had One Drive preinstalled, so every one of my files is now backed up twice... once on the cloud and once on the NAS. -
BoltBait's Plugin Pack for PdN v4.3.10 - 4.3.12 (Updated May 28, 2022)
BoltBait replied to BoltBait's topic in Plugin Packs
Thank you for the kind words! Glad to hear it. Be sure to explore all of the other plugins as I didn't mention all changes in the "new for this pack" section. For example, "Floyd-Steinberg Dithering", "Pastel", and "Outlined / Gradient text" have some really cool new features. -
Lasso Select tool is missing icon on +
BoltBait replied to Fox_Miner's topic in Troubleshooting & Bug Reports
@Fox_Miner your signature image was too big. Please read the site rules, specifically #15: https://forums.getpaint.net/topic/2932-read-first-the-rules-yes-you-read-this-2013-12-21/#15 -
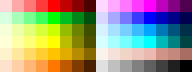
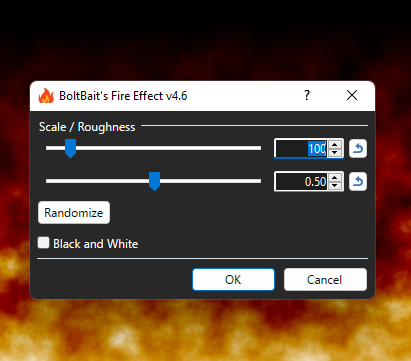
Here is what I consider my "Essential", award winning , plugin pack for Paint.NET v4.3.10 and beyond. It includes 46 plugins in 38 files, 2 palette files, and 50+ shapes. This allows you to pick and choose to install only the effects you want. Then, later you can run the installer and uncheck an item to uninstall it. When you see in this post, you can click it for more information (including source code in some cases). To install, download this file to your Desktop, unzip it, and run the install program. Note: This is an older version of my plugin pack for paint.net v4.3.12. For the most recent version, go here: https://forums.getpaint.net/BoltBaitPluginPack Download Donate I'm going through a really tough financial time right now, so anything you can spare would be much appreciated. Which of my plugin packs is right for you? You need to look at the Paint.NET version number in the title bar. Classic: Download: 3.5.11 https://forums.getpaint.net/index.php?/topic/8318-b 4.0.x https://forums.getpaint.net/topic/32048-b 4.2.12+ https://forums.getpaint.net/topic/113220-b 4.3.10+ You're in the right place! Click the download button above (surrounded by blue arrows) 5.0+ https://forums.getpaint.net/topic/121343-boltbait-plugin-pack-for-paintnet-50/ Windows Store version of paint.net: You're in the right place! Click the download button above When you see the main screen (shown below), select the "I'm running the store version of Paint.NET" checkbox. Installer / Plugin Manager: Once you click the download button above and open the zip file, run the included BoltBaitPackInstall52.exe file. You'll see this: When the installer first runs, it updates the check boxes to what's currently installed (checked for installed, unchecked for not installed). However, if nothing is installed, it automatically checks ALL the boxes figuring the user would like to install everything. Carefully review each line and make sure the items you wish to install are checked. When you click the Install button, checked items will be installed and unchecked items will be uninstalled from your system. If you've had my plugins installed on your system before, you will see the following warning: Just click "Apply to all files" and then click the "Overwrite" button. This will make sure your system has all the latest updates! Network Managers For high volume network managers: Plugin Manager has a silent install function... for more information: C:\> BoltBaitPackInstall52.exe /? New for this pack: My laptop crashed and I lost all of the code for my plugins. So, in this pack I have gone through all of my plugins and rewritten them from scratch. While doing so, I added a new features to many of the plugins, improved the output of some, and I optimized the code to run faster in almost all cases. For example, here is a comparison of the previous version of Render > Flames (left) and the new version (right): "Normal flames" renders as before. "Transparent Flames" renders the same flames but on a transparent canvas so you can add them to your favorite photo more easily. I have also split Object Shadow Pro into two different plugins: Object Shadow (which handles all 2D shadows, including Drop Shadow and Modern Shadow) and Object Shadow 3D which handles only the 3D shadows: Many people found the combined shadow plugin too complicated to use. Hopefully this will be easier. I have also rewritten the algorithm for Drop Shadows to make them look better and be easier to use. Also, I updated my Render > Chart plugin which had stopped working because of a change in Paint.NET. I had posted a corrected copy in the chart thread, but now it is included in this plugin pack. Finally, I added some shapes to the shape pack. Help: If you need help with an individual effect, look for the question mark "?" in the top right corner of the effect UI (near the X) and click it. Once you install this plugin pack, here's what you get: Adjustments menu Black and White+ Use selected method for converting a color photograph into B&W. Color Balance Easily adjust the tint of an image. Useful for color correcting photographs taken indoors without flash. The difference between this and the built-in Hue/Saturation adjustment is that this one will affect black and white areas. Combined Adjustments All of your favorite adjustments on one screen. Hue/Saturation+ Conditional Hue / Saturation effect. Temperature/Tint Temperature / Tint effect. Transparency Adjust the transparency of a selection just like you can adjust it for an entire layer. Effects menu Flip Horizontal - flips the selection on the vertical axis. Similar to the layer flip of the same name. Flip Vertical - flips the selection on the horizontal axis. Similar to the layer flip of the same name. Effects > Artistic menu Dream This makes your picture look like it was seen in a dream. Oil Painting+ Makes your photographs look painted. Pastel This makes your picture look like it was drawn with pastel chalk or water color paint. Big update for this release. Effects > Blurs menu Gaussian Blur Plus - With it, you can blur only the Red, Blue, Green, or Alpha channel of the image. It also allows you to blend the original picture with the blurred image. (Try blurring all channels of the image with a radius of 10 and a Darken blend mode. Cool stuff.) Effects > Composition menu Complementary Colors - Select the primary color of your design work and this plugin will tell you which accent colors to use. It uses the RYB color model for more natural matches. Effects > Fill From Clipboard Fills the current selection with the graphic on the clipboard. From File Fills the current selection with a graphic file. Effects > Object menu An "object" is a group of pixels on a layer that is completely surrounded by transparent pixels (or the edge(s) of the canvas). These are useful when doing "cutouts" or with text on a new layer. Bevel Object This effect allows you to make objects 3D. Works great with text! Feather This effect softens the edges of objects. Inner Shadow Renders a shadow on objects so they look like they have been cut out. Object Shadow Renders a 2D shadow behind objects. This is your standard "drop shadow". It can also render modern shadows. Object Shadow 3D - Renders a 3D shadow behind objects. Outline - This effect puts an outline of the selected color around your object. Paste Alpha - This effect takes the graphic on the clipboard and converts the colors to shades of gray and then uses that for the alpha values of the current layer. Useful for using masks. Switch Alpha to Gray - This effect converts the image to shades of gray based on the alpha value of each pixel. Useful for making masks. Switch Gray to Alpha - This effect deletes white from and image and converts all other pixels to black. Useful for isolating line art. Effects > Photo menu Combined Adjustments Many adjustments for photographs all on one screen Level Horizon Rotate an image by drawing a line across the horizon. Meme Maker Create your own Memes. Remove Dust Removes little white dust particles by clone stamping them out. I find this very helpful when scanning photographs. Sharpen Landscape Makes your landscape photographs look like they belong in a magazine! Seam Carving - Reduce height Reduce the height of an image without scaling (squishing) the image. Seam Carving - Reduce width Reduce the width of an image without scaling (squishing) the image. Vignette+ Extends the capabilities of the built-in Vignette effect with colors and the ability to render a vignette to a blank canvas. Effects > Render menu Calendar Render a monthly calendar. Month name and Days of the week are localized. Includes many options. Charts and Graphs Like a mini spreadsheet, enter your data and plot a graph! Dimensions This doesn't measure anything. It just renders the dimension arrows and label text. Flames This effect allows you to render flames. It is based on Tom Jackson's excellent fire tutorial. Big update this release. Gradients Render colorful HSV (rainbow) gradients. Grid / Checkerboard Create checker board or grid patterns. Polygon / Stars This effect allows you to render triangles, pentagons, hexagons, etc. It also allows you to render stars. It is useful in making standard shapes and the pointed edges of stickers. Effects > Selection menu Effects in this menu perform their effect by following the selection outline (marching ants). While they will work with a square selection (or no selection by using the edges of the canvas as their path), they are more interesting when the selection is curved , selected by hand , or by magic wand . Bevel Selection This effect allows you to make selections 3D. Works great with text! Blur Selection Edge - This effect feathers the edges of a selection using the surrounding colors instead of transparency. Useful when the selection is not surrounded by transparent pixels. Feather Selection This effect softens the edges of your selection. It works just like the feather in other graphic$ program$. Inner Shadow Selection Renders a shadow on the inside of a selection so it looks like it has been cut out. Outline Selection This effect allows you to outline a selection. Effects > Stylize menu Floyd-Steinberg Dithering This effect will reduce the colors of your image using the Floyd-Steinberg dithering technique. Another plugin with a big update this release. Added some really cool new features. Effects > Text formations Creative Text Pro Creates professional looking 3D text. Amazing. I still can't believe we give this one away for free. Outlined / Gradient text Creates text that is outlined with a selected color and filled with a solid color or a gradient. I have really enhanced this one during this release. Be sure to check out all the new features. Window > Colors > More > Open Palettes Folder I have also included my Rainbow Palette. This is very popular on the forums. In the Color docker window, click the button and choose Rainbow from the list. This is what the Rainbow Palette looks like: Custom Shapes This plugin pack also includes 50+ custom shapes. In the installer, you can pick-and-chose which ones you want. This pack supersedes my plugins available elsewhere. I will be updating the other locations eventually, but if you want the latest versions, download my plugins from this post. Enjoy. Also, for you luddites that refuse to use the installer, here's a zip file with all the DLL's in it: BoltBaitDLLs52.zip How to install Paint.NET plugins. BoltBaitPack52.zip


-
Fill style settings in Paint Bucket?
BoltBait replied to faramir's topic in Paint.NET Discussion and Questions
First, install my plugin pack: https://forums.getpaint.net/topic/113220-boltbaits-plugin-pack-for-pdn-v4212-and-beyond-updated-july-16-2020/ Then, try Effects > Render > Grid / Checkerboard Hope this helps!
-
Digitally Fixing Ripped Pictures?
BoltBait replied to Unimatrix's topic in Paint.NET Discussion and Questions
Brilliant! I really think you nailed it!


