


arik-so
-
Posts
56 -
Joined
-
Last visited
Posts posted by arik-so
-
-
though your glass image is the best, and you managed to do a good job on your reflection, realistic reflection is impossible with Paint.NET, because it has to work the following way: where the object that is reflected touches the reflector, the immediate vertical line of pixels above that touching point is shown flipped on the area of the reflector. So if the touching line of an object is not absolutely horizontal, which means it is the same distance away from us one the one side as it is on the other, we cannot make a realistic reflection by means of this grapphics-editing software

But, no! Now, I've had an "epiphany", and I found out how it can be made, using MaDJik's Gravity plugin!
I'll post a tutorial soon.
-
This tutorial is available as a PDF. Click here to view or download it
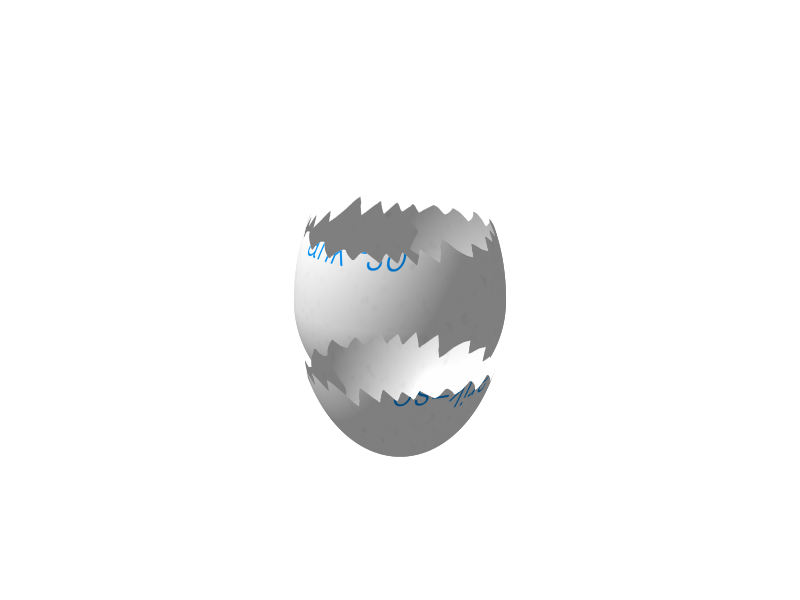
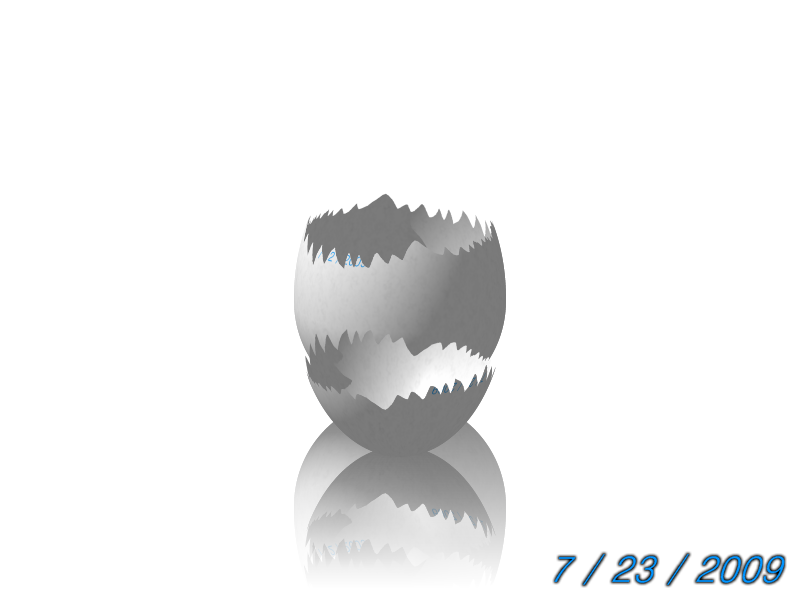
Today, we are going to make with Paint.NET. Your result should look like this:
To make eggs we need
-
[*:2cad0lew]the texture
[*:2cad0lew]and the shape
.
So here we go:
Making the Texture:
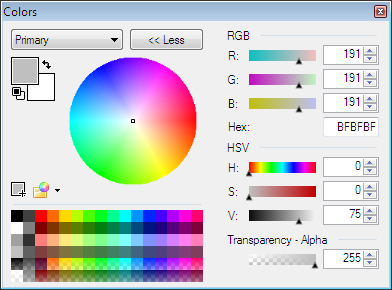
Hidden Content:In an image 800x600, do following:1. Set Colors:
Primary = Grey, Hex=BFBFBF, V=75
Secondary = White
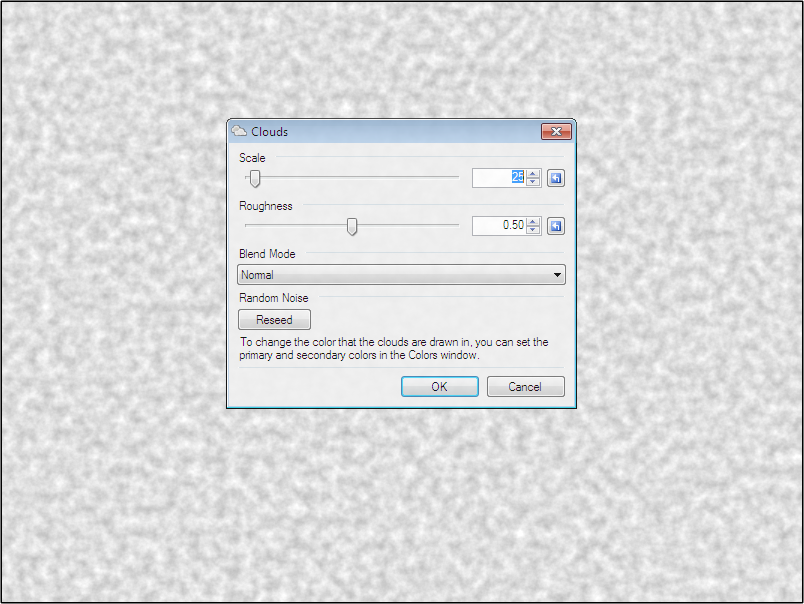
2. :Clouds: Clouds:
Scale = 25
Roughness = Default
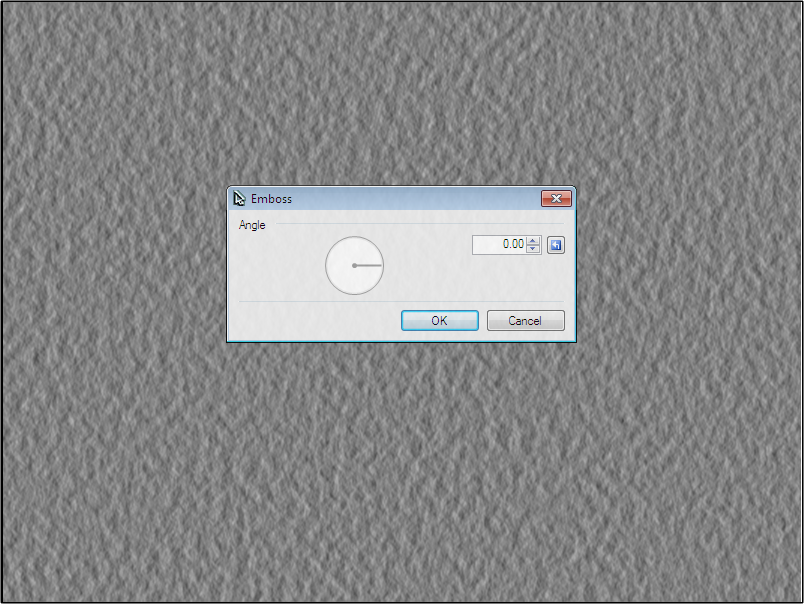
2. :Emboss: Emboss
All default
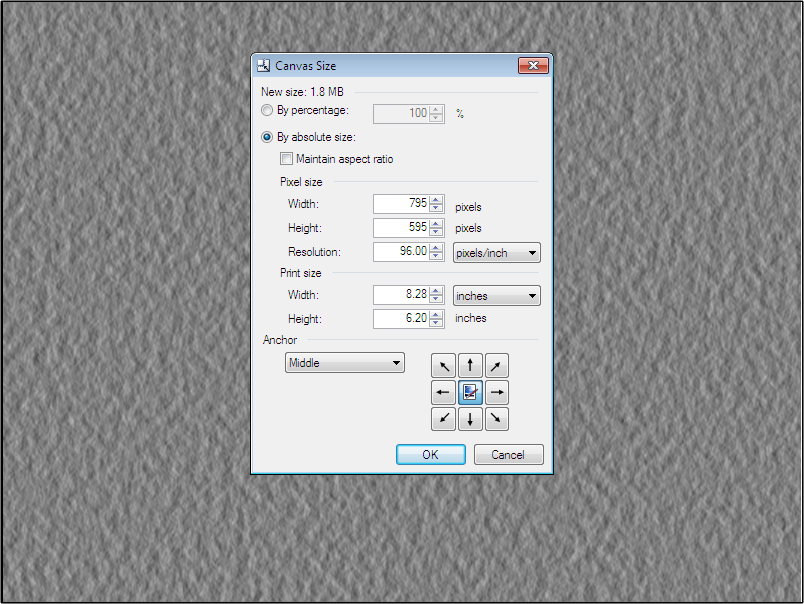
3. :ExpandCanvas: Canvas size:
"Maintain aspect ratio" unchecked
Size = 795x595
Anchor = Middle
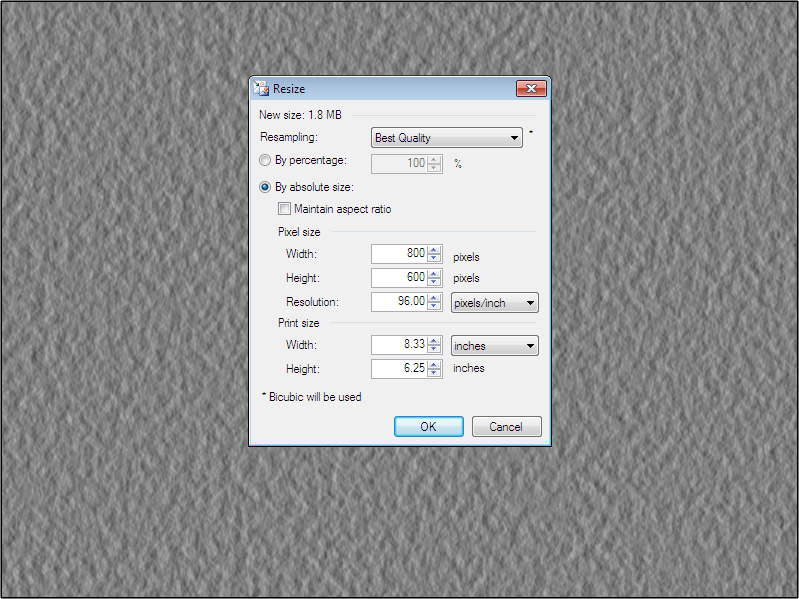
4. :Resize: Resize:
"Maintain aspect ratio" unchecked
Size = 800x600
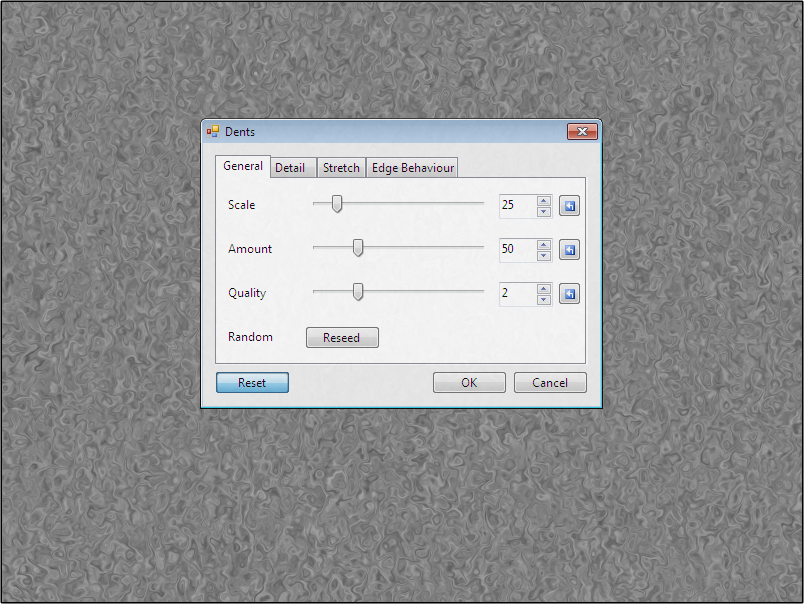
5. Dents
All default
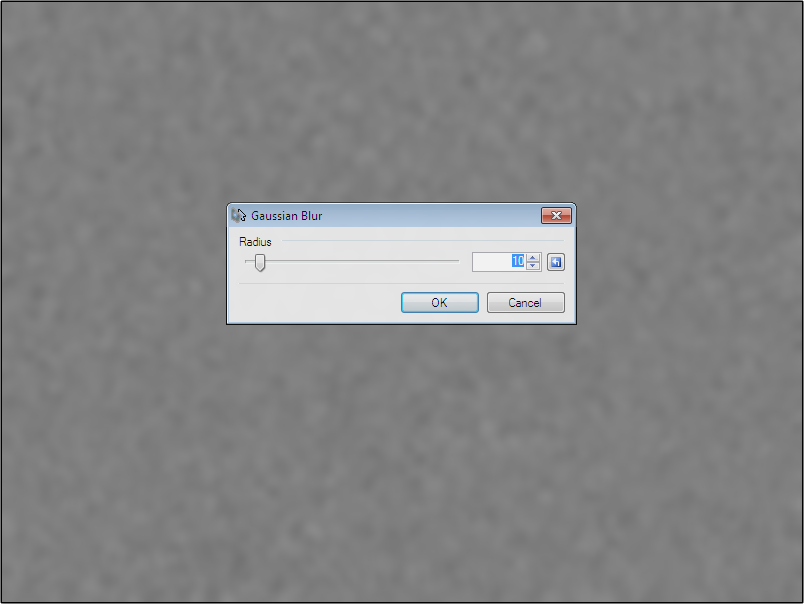
6. :GaussianBlur: Gaussian Blur:
Radius = 5-10
(I recommend 10).
7.
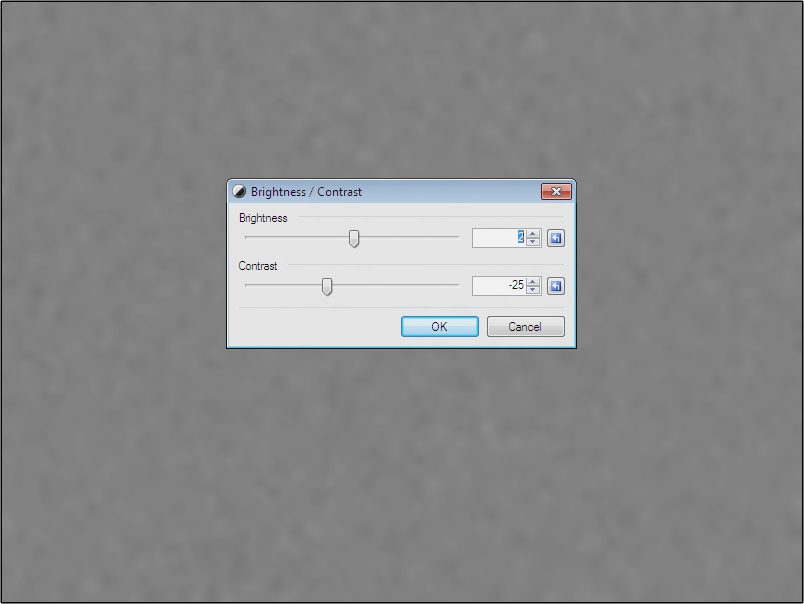
 Brightness/Contrast:
Brightness = 2
Contrast = -25
8. :AddNewLayer: New Layer
Fill with White
Blend mode = Overlay

9. :Flatten: Flatten
Done! - at least for now ^^
Forming the Shape I:
Hidden Content:If you don't want the egg to be broken, simply run Shape 3D at following settings:
Now, if you want to have something written on the egg, you should skip reading here and go on reading in "Forming the Shape II". Else "Forming the Shape II" is redundant.
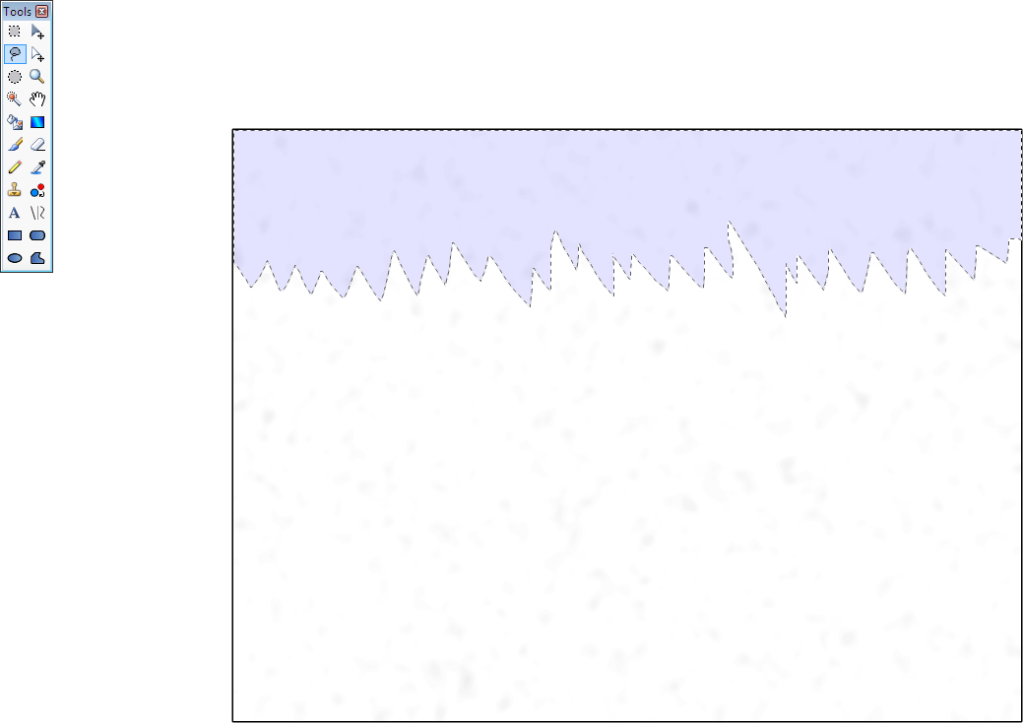
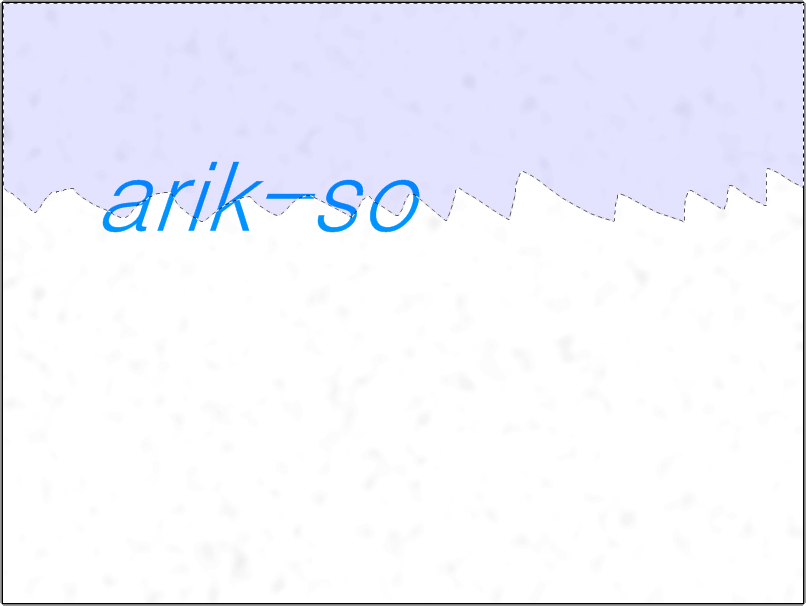
If you want it to be broken, use the :LassoTool: lasso tool, select some random top part of the egg (just zig-zag it from left to right, and then move the cursor so that all the top part is selected, as in the next screenshot), hit "Ctrl. + X", make a new layer, and there, hit "Ctrl. + V".
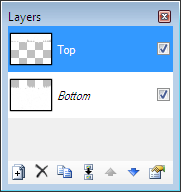
Name the bottom layer "Bottom", and the other one "Top".
Then, go to the bottom layer, use Shape 3D with the settings as shown above, except for Axis 1. Change it to 15° (just so you see the hole better).
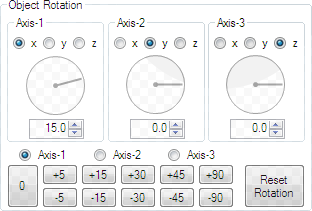
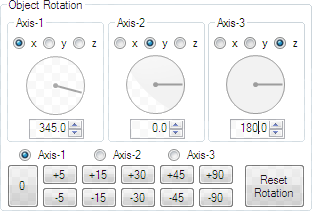
On the upper layer, run Shape 3D as shown above, but change following settings:
Axis 1 = 345°
Axis 3 = 180°
Done!
Forming the Shape II:
Hidden Content:Now, :DuplicateLayer: duplicate the layer. Add whatever you want to be written to one of the layers. Name that layer "Font" or something that indicates it's the one with the writing.If you want the egg to be whole, simply merge the two layers and run Shape3D with the settings from my XML and you're done.
If you want the egg to be broken, use the :LassoTool: lasso tool, select some random top part of the egg (just zig-zag it from left to right, and then move the cursor so that all the top part is selected. It's most useful when the crack runs through the writing. It's shown in the next screenshot.), hit "Ctrl. + X", :AddNewLayer: make a new layer, and there, hit "Ctrl. + V". Name the top Layer "TopFont", the layer below "BottomFont.
Now, use the
 Magic wand, set Tolerance to 50% or less, and click on the transparent area on the topmost layer, "TopFont". Then, go to the layer that has no writing (should be the bottom one), hit "Ctrl. + X", :AddNewLayer: make a new layer, and hit "Ctrl. V". Name this latest layer "BottomWhite" or sth. like that, and the bottom layer "TopWhite".
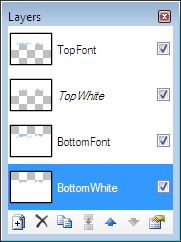
Now, move the layers so, that they are listes that way from top to bottom:
-
[*:2cad0lew]TopFont
[*:2cad0lew]TopWhite
[*:2cad0lew]BottomFont
[*:2cad0lew]BottomWhite.
On BottomWhite, run the settings as shown above, only change Axis 1 to 15°.
On BottomFont, run Shape3D as shown above, only change Axis 1 to 15° and change the Texture Map to Half Cylinder Map.
On TopWhite, run Shape3D as shown above, only change Axis 1 to 345° and Axis 3 to 180° (texture: Half Cylinder Map (Repeat)).
On TopFont, run Shape3D as shown above, only change Axis 1 to 345° and the Texture Map to Half Cylinder Map.
Merge the layers TopFont and TopWhite, and merge the layers BottomFont and Bottom White. Or just flatten the whole image (it's not a photograph
 )
)
Done!
Done!
Here's what I have done before making this tutorial:
-
[*:2cad0lew]the texture
-
I appreciate your opinion. But maybe there is no tutorial for good, because it's so easy nobody needs it? And I couldn't bear the shame if it was moved to the Newbie Playground ^^
-
I think you should read the rules. Don't post tutorials on something anyone could learn by just fiddling with the effects (rule 5a). That's exactly what you've done. You should read huge orange boxes:
In addition, please read this thread before posting a tutorial. -
Hi!
I'm wondering whether you want - or need - a tutorial on how to create this

or this

?
If yes, I'll make one. I'm just not sure whether it's elementary techniques or something one would rather not just make.
-
Great tutorial!

{
}
How do you elongant it?
Did you ask me?
Well, if yes:
Hidden Content:I did not elongate it, it was just a picture, if you want to, I can give you the original.If you refer to the distortion, I moved the tower to a separate layer, ran twist, and smoothed the edges.
Did that help?
-
I might have overlooked the question having been already asked once somewhere here, but what font are you using, jake2k?
-
I think this may be the best gallery I have come across yet. Your glass work is amazing!
Me too. By the way: You simply have to make a glass tutorial. And be sure not to remove the screenshots from Photobucket!

And I'd love to find how you color and make the texture for those eggs, though it seems to me that you use emboss for the outer surface.
-
awesome tut, really!
but I modified the methods nevertheless *smirk*, slightly, though.
which nevertheless made me see the superiority of your way. that's my (failed) attempt:

*edit*: I forgot the drops which cause the surface to ripple
-
 1
1
-
-
That's my try:

-
I'm an Apple-fan!
The effect looks nice, by the way ^^
-
-
I used the same motive as you, darkshock, however, in order to make that happy picture look like rain, I lowered brightness, contrast and saturation.
And I did not make the rain so intense
Here's what I got:

-
you now what would be extremely handy for this (making this tut obsolete, though)?
a zoom blur applicable negatively. gut tut, anyway^^
-
of course. simply rotate the glasses by 180°
but your picture is right. and it's good. and thanks ^^
but in order to use the full extent of 3d-imaging, I recommend you to focus on an object that has a background that is far away. Or best, a background that is 'a bit far' away and one that is further, for layered distances
-
And here's a tutorial about creating your own 3D-glasses.
Though I don't find it very useful - mainly due lack of understanding what they actually mean - you can have a go trying this:
-
There is something I must add:
If you need two pictures, simply take a digital camera, secure your position, focus on an object and take a photo.
Then, without moving your head, make a pic of the same object holding your cam at the other eye, but don't forget to rotate the camera slightly in the focussed object's direction.
Make sure you know in which order you shot the pics, so which one is from left and which one from right, and then, only then, you can simply follow my tutorial.
-
This tutorial extends http://forums.getpaint.net/index.php?/topic/12895-create-a-waving-flag-using-displacement/
What you will need:
Paint.NET (self-evident)
Displacement and Alpha Mask - plug-in
'UnFREEz' - GIF-animator
This tutorial explains, how to change this

into that:

Interested? Then the follow the tutorial carefully, for the tiniest mistake returns noticeable roughness (you know what I mean
)For we want the flag to wave forever, we need a mask for alpha displacement, that can be moved without interrupting the pattern. We want the flag to wave in horizontal movements, so the displacement mask must be panoramic. Let's make it!
Making the displacement mask:
Hidden Content:First of all, you need to decide, how big you want the flag to be. I like 600x400 best. So we make a new 600pix wide times 400pix high image.
Then, in order to make the pattern appear random, we render clouds, all default values. Now comes the tricky part: we want it to be panoramic:
We select the whole picture (Ctrl. + A), and copy it (Ctrl. + C). Then we go to Image - :ExpandCanvas: Canvas Size (Ctrl. + Shift + R), uncheck 'Maintain aspect ratio', double the width (here: 1200), and set the Anchor to 'Right'.

Now click 'OK', or simply press 'Enter'. Then we paste the image (Ctrl. + V)
Next, we go to Layers -
 Rotate/Zoom (Ctrl. + Shift + Z), click 'Reset All', check 'Tiling', and set 'X Pan' to '0.500'.
Press Enter and apply :GaussianBlur: 'Gaussian Blur' at Radius '40'.

Now, go to :ExpandCanvas: Canvas Size, halve the width (here: 600), and set the Anchor to 'Middle'.

Go to Adjustments -
Brightness/Contrast, set Brightness to '0' and Contrast to '40'.
Create somewhere on your computer a new folder. Save this image there as '01.png'.
Then, go to
Rotate/Zoom, click 'Reset All', make sure 'Tiling' is still checked, and set 'X Pan' to '0.100'.
Press Enter. Press 'Ctrl. + Shift + S'. Save this image as '02.png' in the same folder.
Press 'Ctrl. + Shift + Z'. Press Enter. Press 'Ctrl. + Shift + S'. Save this picture as '03.png'. repeat this until you have saved the image '20.png'. And you've got all displacement masks!

Making the actual flag (though based on the displacement masks):
Hidden Content:Now, download or save or whatever but simply open a flag with Paint.NET. :Resize: Resize it to your mask's dimensions (here: 600x400). If you're having trouble doing this, make sure 'Maintain aspect ratio' is unchecked.
Next, :Resize: resize the image to 90% of its size.

Set the transparency alpha of your secondary color to '0' and :ExpandCanvas: expand the canvas of your image to the mask's dimensions (here (once again): 600x400).

Save that image as 'FlagTemplate.png' or something like that, main thing is you can find and open it and that you know what it is.
Now comes a repetitive procedure. I'll only explain it once, so read very carefully:
Open your FlagTemplate. Run the 'Alpha-Displacement'-effect as following:
For the Mask File, browse '01.png'.
Check the checkbox for 'Displacement on'.
Set the X and Y values to '12'.

Click 'OK'.
:ImportLayers: Import another layer from a file. That file should be the mask you applied to the FlagTemplate, here '01.png'. Go to this newly imported :Properties: layer's properties (F4), set the Blending mode to 'Multiply' and the opacity to '128'.

Next, select the
'Magic Wand'-tool, set the Tolerance to '50' or less and go to the layer of the distorted flag.Click somewhere on the transparent area around the flag.

Without changing the selection, go to the other layer (of the shadows, actually) and hit 'Del'-ete.
Make a new folder in the folder of your masks (named 'Flags' or sth. like that) and save this image as '01.GIF'. The format is very important. Don't mind flattening.
Now, repeat that part, the only difference is that you won't be using the mask '01.png', but '02.png', and you will save the resulting flag as '02.gif', do that until that folder looks like that (you must have '20.gif'):

Animating:
Hidden Content:Having done the repetitive part, open the folder of the Flag-GIFs in Explorer, open UnFREEz, and drag the files form the Flags-folder in the right order to the GIF-animating program. Set the frame delay to '9 cs' and then, click 'Make Animated GIF'.
Save it somewhere you'll find it. Open the animated GIF in a browser. I recommend Firefox: I have tried opening the same animation in IE7, IE8, Safari and Firefox, and in the latter, it simply works best.
Thanks for reading!
-
That's my try: (though I did not follow your tutorial but one I found for photoshop. that was ages ago ^^)

And that Portals-picture is really good! Especially the idea
-
Nope. That tutorial is wrong.
One cannot turn one simple image into 3D. One needs two. What's done there, is seeing the same image through 3D-spectacles, but it has no depth: it's not real. No offense, really.
But thanks for answering!
-
Requirements:
Paint.NET
No Plug-ins
A pair of 3D-glasses
Anaglyphs are one type of 3D-images. It's the type you need red- and green-blue-tinted glasses for. The glasses separate the picture you see in one for the right and another for the left eye. But in order to do that, the image must be able to be separated.
The red-tinted glass blocks out all blue and green light. Vice versa for the green-blue-tinted glass. The red filter's usually the left one, so the picture for the left eye should be reddish. The right filter is green-blue (let's call it simply R and GB - filters), so the right image should be BG-ish.
However, first of all, we need the pictures.
I take these:
Left eye:
Right eye:
Now comes the tricky part :wink:
We place the pictures in a layer each - incidentally, the have the same dimensions ^^
The it doesn't matter which picture's on top. Anyway, the upper layer must be set to 'Additive' mode.
It's also important that you know which image is from the left and which from the right. It's shown above, but I recommend you to name the layers 'R' and 'L', depending from how your images are placed:

Now, we need the picture from the left eye recolored. Therefore, we highlight the layer with the left-cam-photo, go to :Curves: Curves, make sure it's set to "RGB", hit 'Reset', deselect the 'Red' - button, click somewhere in the tiled area and drag the mouse to the bottom right corner. That way, the GB-color channels are turned off, only red remains:

Then we highlight the other layer, and do pretty much the same, apart from that now the 'Red'-button is not deselected, but on the contrary, the only one selected. If rubbish turns out, click undo and make sure you click 'Reset' before turning down the Red-color channel.

That's how your image should look like now:

Congratulations! You've created an anaglyph.
That's my first tutorial, so please, don't be too hard on me, but I don't mind constructive criticism ^^
PS: In anaglyphs, the focal point, so the object your view is drawn to, has nearly no halos around it. So you can try expanding the canvas (in your still layered picture) and moving the layers around, so e. g. that shadow of the mars robot is most distinct.
That's what I've got:
Now it's your turn! Please post your results.
-
There is one very clear use of this plug-in:
making 3D-shadows. If you are working with a picture, not just with text, and this picture has a 3-dimensional background, and you add an element from somewhere else, you'll have to create shadows.
With oblique, it's finally possible to do that with paint.NET.
-
 Brightness/Contrast:
 Magic wand, set Tolerance to 50% or less, and click on the transparent area on the topmost layer, "TopFont". Then, go to the layer that has no writing (should be the bottom one), hit "Ctrl. + X", :AddNewLayer: make a new layer, and hit "Ctrl. V". Name this latest layer "BottomWhite" or sth. like that, and the bottom layer "TopWhite".


 Rotate/Zoom (Ctrl. + Shift + Z), click 'Reset All', check 'Tiling', and set 'X Pan' to '0.500'.
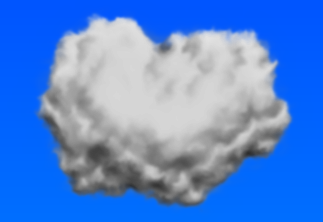
Creating EGGS with Paint.NET
in Creations
Posted
Thanks!
I really appreciate that people - or right now, it's just you - improvise, change some stuff, adjust it, and don't just follow the tutorial blindly.