


Copy Cat Master
-
Posts
47 -
Joined
-
Last visited
Posts posted by Copy Cat Master
-
-
You're changing the layer blend mode on the top layer. I was only talking about the white one. Glow on the top one changes the results because it wasn't completely white like the middle layer. Step five, then, has no error.
Oh, I misunderstood. Sorry.
-
This has been done before, though with a slightly different method.
My tutorial is more simple, though.
Note for step 3: because the line is white, setting the layer blend mode to glow will not affect the image.
Ah, I see. Sorry but I'm still newbie/rookie & I'm still learning
 . Thank you for telling me.
Edit : Actually, it do affect the image.
White line without Glow mode (Lighter).

White line with Glow mode (Darker).

-
Good idea. I'll get into that when I have some time later.
-
You sure?. Because I'm using Paint.NET in window 7. Anyway, your tools box suppose to look like this one.
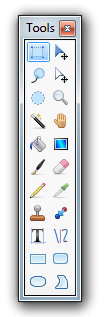
(Window > Tools and press F5 for shortcut)
If you don't have it then I suggest you to download it from this link http://www.getpaint.net/.
-
If it has the exact same name as the previous version, you will be informed that it - exists and would you like to overwrite it - click on yes (or OK) and it will be replaced. Just remember before you do install the plugin to - right click the dll > properties > unblock.
Ok, thank you for helping.
-
then you need to update it
 click on the top most download in this thread http://forums.getpaint.net/index.php?showtopic=1854
Sorry but another question. I just need to replace the old Alpha mask with the new Alpha mask in the folder, right?.
-
Wow...
Thank you so much, bro!.
Also, my Alpha mask do not have Paste from clipboard. So, my question is does it put any effect on it or it just do some minor changes?.
-
Well, no you can't. You cannot select an object you just drew and move the object; you can only select an area and move ALL the pixels, which is not useful to me.
I looked under the Effects menu and didn't see anything called "Fade." (Actually, I didn't recognize anything I did see under the Effects menu, either.) Where can Fade be found?
Draw the object on new layer and select the object with the select tools then move it with the move tools.
Also, download and install the plugins pack for more effects.
-
You can move & resize objects (Like picture, text & etc) with the move tools. I do suggest you to watch Paint.NET basic tutorial on youtube.
-
This tutorial is available as a PDF. Click here to view or download it
Hello. This is my first tutorial. If there something lack please let me know so I can fix it and please forgive me if there grammar and language mistake. I do not know if this kind of tutorial have been made but I tried to search for it and I cannot find any so, yeah.
Okay, after a few hours sitting infront of my computer trying to copy photoshop glow beam/light beam by using Paint.NET. I'm successful did it. It's very simple and you can done it in 30-60 seconds.
So, today I'm going to teach you how to make something like this.

Step one : Color your background with dark color like black by using Paint Bucket.
(You will get something like this)

Step two : Make a new layer. Choose white color as your primary color then choose Line / Curve tool with your desired size (Mine is 10). After that draw a line like this.
(You will get something like this)

Step three : Go to Effects > Photo > Glow & set the radius to 20, the brightness to 100, the contrast to 100. Then go to the Layer Properties and change the mode to Glow.
(You will get something like this)

Step four : Make a new layer. Choose your desired color (Mine is yellow) as your primary color then choose Line / Curve tool with three times size bigger than your white line (Mine is 30). After that draw a line like this.
(You will get something like this)

Step five : Go to Effects > Blurs > Gaussian Blur & set the radius to 50 (or something). Then go to the Layer Properties and change the mode to Glow.
(You will get something like this)

Step six : Merge down all the layer and background and you done.
(You will get something like this)
Step 6.1 (If you want to get a brighter result) : Merge down Layer 2 and Layer 3 then duplicate the layer and merge it down with the background. You are done.
Thank you and I hope this will help a lot of people out there.
P.S: I do not have any examples of what else can be done with it from me at the moment but you can look at SAND33P work as example for now. I will add one when I have free time later.

-
 2
2
-

Background colors??
in Paint.NET Discussion and Questions
Posted
Select the background layer & choose your desired color. Click Paint Bucket tool then click the background and the background will be colored.