


Bob11
-
Posts
49 -
Joined
-
Last visited
Posts posted by Bob11
-
-
I had the text between the lines at one point because I remember having had trouble applying a shadow to the lines using the gradient tool. Anyway, I'm happy enough with the result without that effect.


-
I think I understand the process pretty well, but can I select any section of tubing from any diameter circle? I was doing this and then rotating the copied tube section so it would fit into the tube section that came before it. I had a hard time controlling the shape of the tubing. This image was the result of my practicing the tut's method.
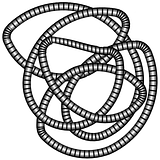 Thanks for this tut. It gave my brain a good workout!
-
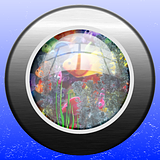
This was a very challenging tut for me. It was very well written and illustrated so even as a beginner, I was able to follow it okay. I had some problems getting the reflections at the right intensity and position. Any pointers to improve the image are welcome.
 Thanks for this tut.
 -
I dunno Bob, it looks ok to me but I see where you are coming from. I've only ever started this tute & abandoned it in preference for other styles. What if you started with an ellipse?
The gold is really good but the blur is chopped off at the bottom. Likely because you've selected a rectangle & then blurred & it has gone too far or you blurred & it went off the page.
I just made a few ellipses. You're right, of course. All perfectly symmetrical. And then I could just drag it by a corner to change its size. I don't know why I started using the rectangle selection tool to do this. I must have been using it in a lot of tuts lately.
Thanks.
-
Here's mine. I wasn't going for originality.
How do you get that great reflection of the text in the water? When I used the Water Reflection effect with the settings stated in the tut, I couldn't come close. I ended up lowering the opacity and using Rotate and Zoom to reposition the reflection. I noticed only a couple of posted images had water reflections that looked like the one in the tut.
-
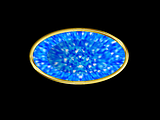
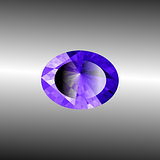
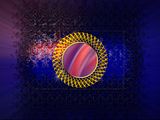
I had a hard time keeping the ellipse shape of the gem symetrical. I know about the circle and the shift key, but when I went to squeeze the circle into an oval shape, I did it by eye, and thus my gem is not symmetrical. Also, any other pointers on how I could improve the image would be welcome. I used Ash's other tut to make the top part of the gem. I used Sarkut's tut for the gold band.
-
I had a hard time reproducing the facets, especially if I tried to change the gem's color. I read somewhere in this forum that gem facets are hard to reproduce in PDN. I wondered why the PDN gems I'd seen lacked them. Anyway, I thought I had posted this, but I don't see it here. It's not perfect, but I got the idea okay. Thanks for this tut.
-
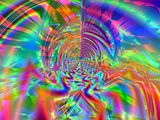
I too would love to have the images for this tutorial reuploaded. Very frustrating. I just downloaded and installed Seamless Texture Maker (as part of an effect package) on one of my computers. I also watched the video tut. I was amazed. Tonight I plan to install the effect package (including Seamless Texture Maker) on my other computer and tackle that video tut. Even though I'm still a newbie, it looks like something I'll be able to follow. The tut here seems to add to that. So NoNonsense, here's another humble request to include the images to this tut. Thanks.
Here's what I did with the YouTube tut. I learned a lot from doing it. I always wondered what the tiling option in the rotate/zoom effect was for...Now I need the pictures that go with this tut to learn more...
-
I learned a whole lot from this tutorial, especially about precise positioning of the cursor to make elipses and lines. I did get stuck towards the end. After applying the median plugin, the center hole closed up. Also, I've never used the Magic Wand with the Alt Key before. I couldn't get it to do anything. I got rid of the hole by clicking the Magic Wand in the empty hole in the white gear layer (contiguous mode) and then going to the black gear layer and deleting it. I would like to know what the Alt + Magic Wand was supposed to do if anybody knows.
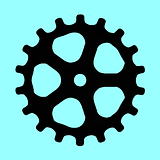
I'll do the other tuts to make this gear shine later. My brain needs a rest.
Thanks for the tut.Thanks for responding. I went back and did your tut again. I didn't realize that when you subtract with the Magic Wand +Alt, you actually tap the Magic Wand on the part you want to subtract. I know. It seems obvious, but I had never used the Magic Wand in this way before. I made four different gears using your tut, but I only "finished" one version. I think in this one I used a triangle instead of the ellipse to form the outside of the gear. This version of the gear seems a little warped, but that's from the other tut.

wand o
-
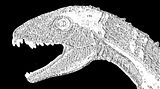
Thanks, BarbieQ. Doing this eye tut made me feel like I was ten years old again!

-
This was a great tut. I was motivated to learn how to do the animation when I saw some of the posted eye images that were animated. I made an eyeball with the slit pupil, but it was too hard for me to animate it. Also, the extra light highlight is missing from this eyeball for the same reason.
-
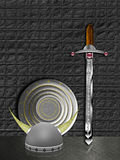
This is one of the first tuts I tried when I first started a couple of months ago. The results looked so cool, I had to make the attempt. I gave up in frustration. Although I'm still a beginner, I am proud I got through the tut this time without too much trouble. I added stuff I have made from other tuts, etc. Maybe there's too much going on in this image, but any pointers would be welcome. I attempted to lean the sword back a little.
Also, I think a step to use conditional hue on the curved part of the hand guard was left out. Although the image below where this step is omitted shows the effects of that plugin. Anyone else notice this?
Oops, I just noticed Oma's added steps to modify the sword's blade edge and handle. I'll have to try this later and see if I like the change. I don't know how I missed it the first time because I read through all of the posts.
 Thanks for this great tut!
 -
This was a great tutorial for me because I could follow it and learn about how Paint.net works. Also, I'm satisfied with the results even though I know it can be improvecd.

-
I tried to get through the Glassy Ball tutorial but I got stuck early on. Still, I'm glad I could produce what I did with your tutorial.
-
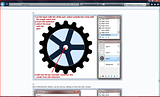
Can anyone tell me what I'm doing wrong? When I go to drag the gradient on the orange shadow circle it turns white. I've included a screenshot of where I got stuck.
10. Click the “Select Circle” layer and using the Magic Wand tool, click on the inside of the circle. Now, click on the Orange Layer and using your radial gradient tool, run it just slightly below the middle of the circle
I can't find a place to delete this post. Anyway, I got past this snag. The secondary color has to be in transparency mode for the gradient. Now I'm stuck on the ellipse- subtraction mode. I have to figure out how to do that.
June, 2011

And After Helen told me she used Bezier Curve for the lines I found out how it worked.

Much better. I still need to practice with the line tool's Bezier Curve Mode, but now I'm happy enough with the result.

-
Although not embellished, I love the results I got strictly from following your tutorial. Gold!
Thanks from a newbie!

-
Can you tell me what I'm doing wrong? This is what I get when I apply Emboss (from the Effects - Stylize menu), set at default 0 angle. Actualy, all angle options on the dial result in this.

Since I can't find a way to delete this post, I want to mention that I think I figured it out. I needed to go through the curves step. Also, in order to exclude the background, I had to use the magic wand. I still need more practice with the magic wand, but I think I'm beginning to see how it's often used in creations such as this.
-
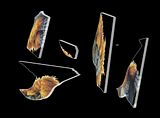
Thanks for the tip about Trail. Much faster, easier, and with better results. But how did you get the clear plate glass effect? I read through Making Backgrounds of Images Transparent and can now do this, but when I cut the glass, only the image in the clear background looks cut. [/url]
-
After many hours of trying to figure out how to generate the edge of the glass shards, I think I got the gist of it. (I copied the shard image to a new layer, used the arrow keys to move it and then merged that layer with the shard layer.) But mine did not come out looking like broken glass. More like a jigsaw puzzle. Any ideas on how I can get better results? I especially like the first one you did.
-
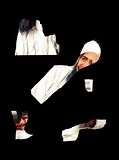
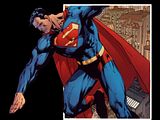
This tutorial was very hard for me to follow. I spent more than a couple of hours a few weeks ago attempting to follow the tutorial but was lost after the first couple of steps and finally gave up in frustration. But today I began reading the replying posts. The questions and answers were very helpful. I even viewed the linked Youtube video a few times. And of course the posted results were very motivational. Anyway, here's my first pop-out picture. I am so thrilled I was able to do it. I'm going to try it again soon.
-
This is my first attempt to upload a thumbnail link to Photobucket. I followed MadJikf59's easy to follow tutorial which is posted in the tutorial forum. But I don't think I'm supposed to respond there. I've only been using paint.net for a few weeks. Thanks to all the artists who take the time to produce tutorials for newbies like me. My link


S3D#1:Different image on each sides of a cube.(EASY)
in Creations
Posted · Edited by Bob11
Here's mine. I played around with this tut for many hours. I was having trouble with the transparency. A solid background color like black did not make the cube look the way I wanted. There are some jaggedy edges.
[/url]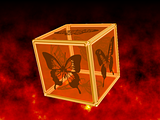 Thanks for making this tut.