


rwp80
-
Posts
43 -
Joined
-
Last visited
Content Type
Events
Profiles
Forums
Blogs
Gallery
Downloads
Posts posted by rwp80
-
-
While Color Target is somewhat promising, I think you should try to heavily incorporate some of the technologies I had to 'invent' when developing Color to Alpha: viewtopic.php?f=16&t=25155
If you want some code examples, some of my theories and math, or anything else to bump up Color Target you can PM me

Interesting plugin! Be prepared for a PM! :wink:
-
OMG

you are fast,
Thanks for the comment.
Yes, I do work fast. I must say, having BoltBait's tutorials and "C++ for Dummies" available is very helpful. :wink:
but can't you try to make a good plugin and not publish or update it every day
Well, this is a good plugin. Have you tried it yet? I use it all the time.
I am aware that I rushed too quickly to publish. Color Target v1.3 is very useful. The other effects are included because they are useful, but only in specific colour/brightness circumstances. Because of it's usefulness, I will leave it as is and keep developing it behind the scenes. If and when I come up with something brilliant, then I will re-publish, but that wont be soon.
-
Updated!
Color Target v1.0 is now obsolete.
The original post now has a link to the new Color Target Plugin Pack, which includes Color Target v1.3.
I hope you enjoy these new effects. Please feel free to post anything that you have made using these tools right here. Thanks.

-
I got tired of working on this! Here's how far I got before my patience ran out:

-
Excellent tutorial!
Here's my semi-proper attempt:
-
Nice plugin!
When I need to input symbols, now I don't need to abuse MSWord anymore! :wink:
-
:shock: :shock: :shock: WOW :shock: :shock: :shock:
HUGE improvement, thanks a lot :!:
I am amazed at your super-quick response! Thanks!
Did someone shine this above you? :wink:
I hope this turns out to be helpful. I'm quite pleased with my red bear, although the amazon river demo turned out to be very ugly.
-
Updated! My first plugin is already obsolete!

You can just attach the *.zip file to the original post. See the bottom of the post editor, just under the submit button is a file attachment area. click the browse button to upload directly from your computer and attach to the post.Plus this time round, I used a better file storage provider.
Ahh, I didn't know that. However, I remember faintly something about all plugins having to be hosted off site. (I better re-check the rules!)
Coding a checkbox is reasonably easy once you know how. Check out my WhichSymbol code here for checkbox syntax: viewtopic.php?p=194899#p194899I'm trying to get my head around v1.1 which wll include a check box to 'Make Transparent' as opposed to 'Make Opaque'.
Thanks for the plugin!
Thank you for reading/testing/commenting!
I hope this new version turns out to be more useful!
-
edit: make it a .zip some antivir-softwares are hard to .dll ( :?: )
Fixed!
Plus this time round, I used a better file storage provider.
I'm trying to get my head around v1.1 which wll include a check box to 'Make Transparent' as opposed to 'Make Opaque'.
An idea for further in the future is to 'squeeze' the Alpha values instead of simply making them totally opaque or totally transparent. Just a thought at the moment.
-
Seasons Greetings!
The Color Target Plugin Pack started off as 'Make Opaque' and developed into 'Color Target v1.0'. Successive versions of Color Target v1.0 (versions 1.1, 1.2, and 1.3) differ somewhat in their function, and thus became separate effects in their own right.
This is the newest version of Color Target.
Color Target Plugin Pack 13th July 2008
Unzip the file to your Paint.NET/Effects folder. (Normally, this is C:\Program Files\Paint.NET\Effects)
Open Paint.NET, and find the effects in the Effects>Colors menu.
Color Target v1.3 (ColorTargetV13.dll)
Use the Color Picker tool on the area to be retained.
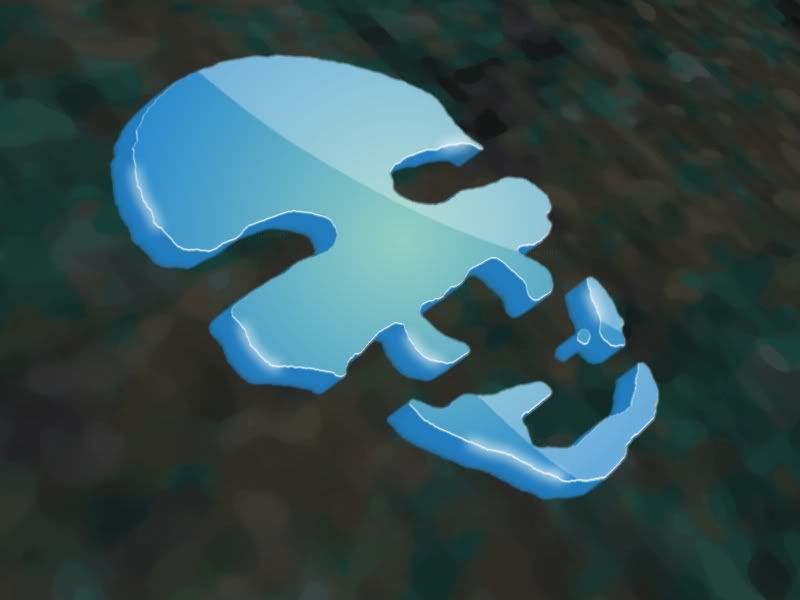
Color Target 1.3 retains pixels of a similar color and brightness, according to slider settings.
All other pixels are made transparent. Color Target is the crowning achievement of this plugin pack; I urge you to try it on a photograph of yourself.
Color Stretch v1.0 (ColorStretchV10.dll) (Formerly "Color Target 1.1")
Color Stretch 1.0 enables the artist to stretch color values of pixels within specified threshold limits.
Target Panel v1.0 (TargetPanelV10.dll) (Formerly "Color Target 1.1")
Target Panel 1.0 is an advanced color manipulation tool. The daunting interface includes sixteen sliders: Eight for input, and eight for output. This tool works, but is not user-friendly.
Here is a couple of demonstrations for Color Target v1.3

Here's a older demonstration of Color Target v1.0 (now obsolete and replaced by Color Target v1.3):
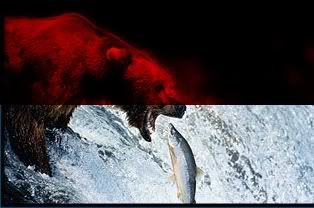 Hidden Content:Here's a 'power-user' tutorial for the bear pic using Color Target v1.0:
Get bear pic; Duplicate layer;
Layer 1 - Black&White;
Layer 2 - Hue/Sat (0,200,0), Hue/Sat (0,200,0), Color Target (0,255,0,0), Color Target (0,255,0,1), Gaussian Blur 6, Set layer to 'Multiply'.
The user is required to use other Paint.NET skills in conjunction with these effects.
Any effect is only as good as the artist. Common sense is mandatory! :wink:
In an effort to keep things tidy, I have decided to delete the previous original post for 'Make Opaque' and 'Color Target v1.0'. My apologies to all those who commented below on the previous versions. For newer readers, keep in mind that any comments before 13th July 2008, are in reference to the older versions of the effect. Also, I recommend that any '.dll' files of older versions of Color Target or Make Opaque be deleted, as they are now obsolete.
I hope you enjoy making use of these tools. 8)
-
@Boltbait (or any other kind expert)
Firstly, thanks again.
There's been some great progress. I managed to chop parts from the thread you linked to and put something together that worked. Well... produced a result.
Here is the revised code as it stands:
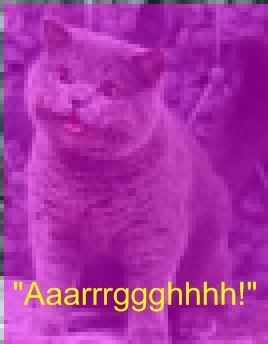
#region UICode
//int Amount1=0;    //[0,100]Slider 1 Description
//int Amount2=0;    //[0,100]Slider 2 Description
//int Amount3=0;    //[0,100]Slider 3 Description
#endregion

void Render(Surface dst, Surface src, Rectangle rect)
{
   PdnRegion selectionRegion = EnvironmentParameters.GetSelection(src.Bounds);
   ColorBgra CurrentPixel;
   int PixelCat;

   for(int y = rect.Top; y < rect.Bottom; y++)
   {
       for (int x = rect.Left; x < rect.Right; x++)
       {
       CurrentPixel = src[x,y];
       PixelCat = 0; // This variable is reset to 0 for each pixel render.

       if ( (x>0 && x0 && y        {
           if (selectionRegion.IsVisible(x-1, y)) PixelCat++;
           if (selectionRegion.IsVisible(x, y-1)) PixelCat++;
           if (selectionRegion.IsVisible(x+1, y)) PixelCat++;
           if (selectionRegion.IsVisible(x, y+1)) PixelCat++;

           // Here, we assign values of transparency, yellow, or purple back to CurrentPixel.
           if (PixelCat == 0) CurrentPixel = ColorBgra.FromBgra(0,0,0,0);
           if (PixelCat == 1) CurrentPixel = ColorBgra.FromBgra(0,255,255,255);
           if (PixelCat > 1) CurrentPixel = ColorBgra.FromBgra(255,0,255,255);
       }
       dst[x,y] = CurrentPixel;
       }
   }
}
The result is that it turns the entire layer purple, except for when either x or y = 0.
I'm pretty sure the problem is
- my if statements are wrong and they are adding 1 to PixelCat regardless of conditions. I tested the "if (PixelCat > 1)..." line and basically every time PixelCat got to those final if statements, it had a value of 4.
or,
- I'm using selectionRegion.IsVisible the wrong way or it is simply the wrong function for this purpose. When I replaced the '!' back in (as in "!selectionRegion.IsVisible"), the whole screen remained black, again, except for when either x or y = 0. I think "if (selectionRegion.IsVisible(...))" is returning true for everything! :shock:
Is there anywhere I can see a list of functions like 'selectionRegion.IsVisible'? Kind of like a 'function encyclopedia', if you see what I mean?
PdN forum search and google yielded very little on this. To be honest I dont even know exactly what 'selectionRegion.IsVisible' does. :?
Boltbait, or any other kind expert in these matters, please shed thy wisdom, I beg of thee!
Thanks in advance.
Just in case you're wondering...
PixelCat = "Pixel Category", not...
-
First, use [code] tags instead of [quote] tags. That will fix the indent problem. (I edited your message for you.)
Next, your problem is probably here:
for(int y = rect.Top + 1; y < rect.Bottom - 1; y++)
If you look at CodeLab Effects Design Overview, you will see that your Render function is usually called with very small rectangles (1 or 2 lines tall). By adding 1 to the top and selecting 1 from the bottom, your loop variables are given nothing to loop through!
To give you an idea on how you can solve your problem, read this script that I wrote: viewtopic.php?p=179496#p179496 Everything you need to solve your problem is there.
Enjoy. 8)
Wow! Thank you!

Erm... I don't mean to be a pain, but in the code you linked to ("Outline"), I can't see where the code checks to see if the neighbouring pixels are transparent or not. Can you point me to the line that does this please?
Once again, sorry to be a pain! :oops:
[edit]
Scratch that! I was looking at the wrong code! :shock: :x
-
Seasons Greetings!
I am trying my luck in codelab, and I'm trying to make a simple effect that detects if the adjacent pixels are transparent or not.
No matter what I do, codelab runs the code fine, but it has no effect whatsoever on the layer I'm applying it to. :x
I think I must be missing something plainly obvious, or something very subtle. I've read through the forums, checked I'm saving and building correctly, and making sure my layer has random opaque squiggles all over it (surrounded by transparency).
Any ideas what I'm doing wrong? Please?
#region UICode
int Amount1=0;    //[0,100]Slider 1 Description
int Amount2=0;    //[0,100]Slider 2 Description
int Amount3=0;    //[0,100]Slider 3 Description
#endregion

void Render(Surface dst, Surface src, Rectangle rect)
{
   ...
   ColorBgra CurrentPixel;
   ColorBgra LeftPixel;
   ColorBgra RightPixel;
   ColorBgra UpPixel;
   ColorBgra DownPixel;
   int PixelCat;
   for(int y = rect.Top + 1; y < rect.Bottom - 1; y++)
   {
       for (int x = rect.Left + 1; x < rect.Right - 1; x++)
       {
           // Here, we're grabbing the BGRA values from src[x,y] and it's neighbours.
           CurrentPixel = src[x,y];
           LeftPixel = src[x - 1,y];
           RightPixel = src[x + 1,y];
           UpPixel = src[x,y - 1];
           DownPixel = src[x,y + 1];
           PixelCat = 0; // This variable is reset to 0 for each pixel render.

           // Here, we add 1 to PixelCat for each of the adjacent pixels that have Alpha over 0.
           if (LeftPixel.A > 0) PixelCat++;
           if (RightPixel.A > 0) PixelCat++;
           if (UpPixel.A > 0) PixelCat++;
           if (DownPixel.A > 0) PixelCat++;

           // Here, we... erm... recompile?... values of transparency, yellow, or purple back to CurrentPixel.
           if (PixelCat == 0) CurrentPixel = ColorBgra.FromBgra(0,0,0,0);
           if (PixelCat == 1) CurrentPixel = ColorBgra.FromBgra(0,255,255,255);
           if (PixelCat > 1) CurrentPixel = ColorBgra.FromBgra(255,0,255,255);

           dst[x,y] = CurrentPixel;
       }
   }
}
Any help is appreciated!
[edit]
Uuuurrghhh! The quote function removed the space before the beginning of each line! :x
I know these are correct, so please assume so if possible. Thanks.
-
Thanks for this amazing tutorial!
Here's my quick attempt:
I want to make a really high quality pic like you did, so I'll give this tutorial a 800x600 re-try when I've had more sleep.

-
Winterfest, you should use that pic as your sig, it looks amazing!
I'm certainly going to try and emulate that myself for my own training. I love the reflection and the 'neon ice' feel it has. 8)
-
ps keep the images 800X600 or less or the mods will remove them
Thanks, and problem fixed. I just linked the large images instead of embedding them. I wondered why the thread kept expanding beyond my view! :?
-
Great tutorial! Very clear and the images helped a lot, too.
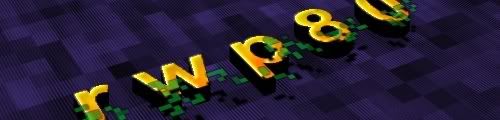
I got tired of the boring windows user button (everyone chooses the chessboard, dont they?). So, I used this tutorial to make my own user button:
 8)
8) Thanks for this!
-
Great tutorial! Very clear and the images helped a lot, too.
I got tired of the boring windows user button (everyone chooses the chessboard, dont they?). So, I used this tutorial to make my own user button:
8) Thanks for this!
-

Seasons greetings!
I'm relatively new to Paint.NET. I first used Paint.NET about a year ago, but never fully understood it's potential. I simply assumed it was a slightly upgraded version of MS Paint.
Paint.NET has revealed to me a talent I never thought I had. The last few days have been insane; Every spare moment has been spent on Paint.NET. I've stopped working out. I hardly eat or sleep. I just about get my work done.
Here's hoping that creating a gallery will put my mind at ease. I need to slow down a gear or two and get on with things whilst enjoying Paint.NET as a hobby, not a substitute for life!

Old Artwork
First I just want to get the old stuff out the way. These are clan-related sigs, avatars, and spraypaints I made for the Team Fortress 2 clan I was in, "Servants of the Death Walus". Yes, I thought of the name. See if you can spot the 'walrus version of Kim Jong Il' with the cigar!
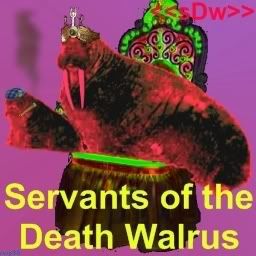
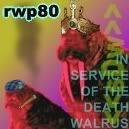


 ---> (Note to Mod: I'm not sure if I'm aloud to post .gifs here in my gallery thread. If not, then please remove this one or give me the word and I'll do it. Thanks, and sorry, I don't mean to break the rules!)
Present Artwork
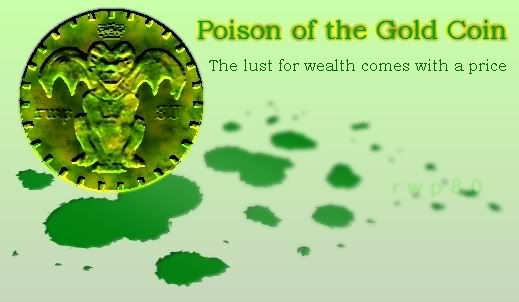
Here's what I've made since 'returning' to Paint.NET. Each piece has taught me a lot in terms of technical and artistic ability. They are more-or-less in chronological order, so hopefully the progression will be apparant.
These are too big to display here:
"Determination" Golden Leopard
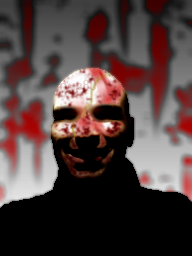
This image 'happened by accident' when I was trying to figure out how Buzzkill made his signature. I finally learned how to make blood drops and spatters! :twisted:
I made the following image in one day, entirely from scratch. I started by painting over a picture of myself. The full version is 1600x1200, and the quality is much better. Unfortunately, I'm still figuring out a way to upload it!
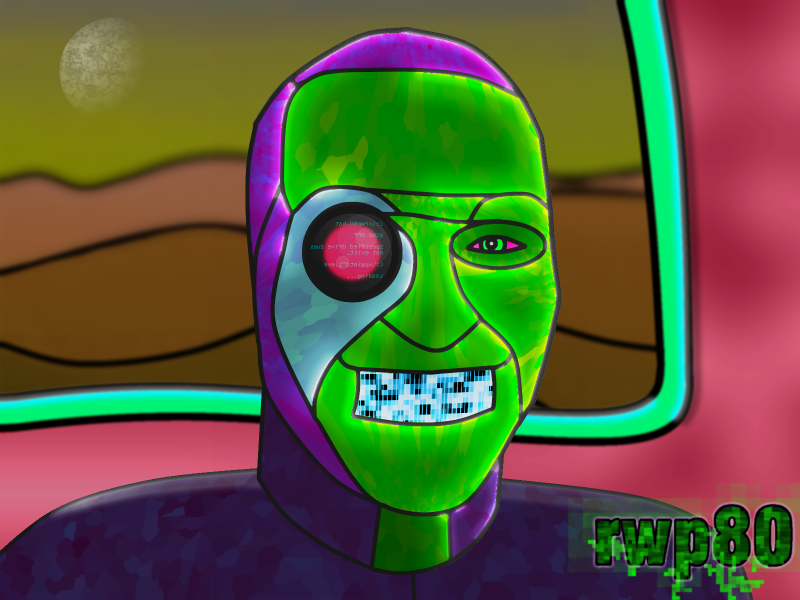
I made this one from one photo in about two hours total.

Avatars and Signatures
Making signatures and then converting them to avatars is by far my favourite use for Paint.NET.

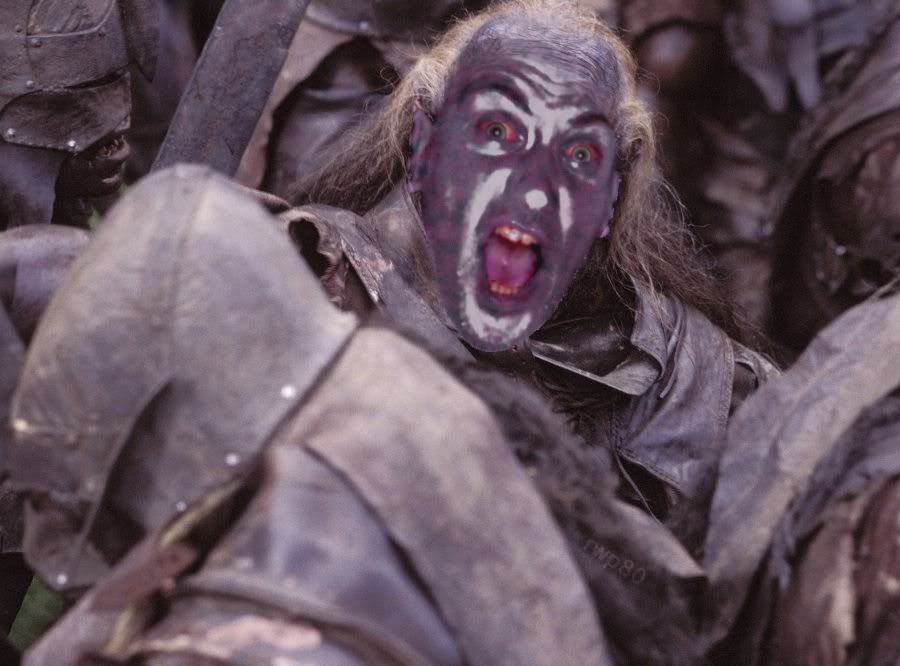
Comedy Corner
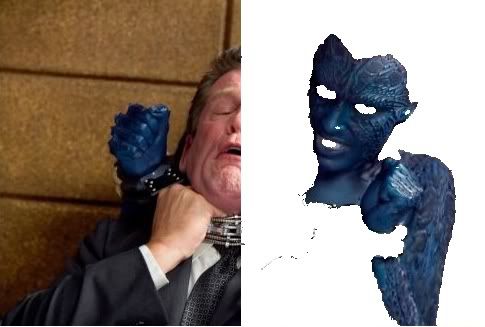
One of my best friends 'challenged' me (well, he asked but I took it as a challenge) to make him into a Lord of the Rings Uruk-Hai Orc. The result is a clumsy mess, a mess that made me laugh out very loud. Click here to see it.
Well, that's all for now. As always, constructive criticism is appreciated, particularly if it provides artistic or technical tips for my improvement. Cheers! 8)
-
I now officially admire you, Crimson. These pieces are amazing. :shock:
So I'm going to spend hours of my life trying to figure out how you've done some of the amazing things in this gallery!
-
:shock: :shock: :shock:
Wow, I really am a noob!
This is amazing; Thanks for the wisdom, Expired!
-
I loved your nuclear explosion image. Great choice, using that over-sanitised windows standard wallpaper
The 'going crazy' skeleton made me chuckle somewhat.
-
Wooo nice!
I'm definitely going to be taking a second look at this tutorial when the time comes. :wink:
-
:shock: We haven't had a great tutorial in so long. And, I think this may be the best written! Two thumbs up big time, and I definettly recommend stickying this tutorial.
Thanks! That made my day!
welcome to the forumsCheers!
I look forward to taking part in this mature, friendly, and talented community. 8)


pyrochild plugins (2020-11-21)
in Plugin Packs
Posted
c = Common plugins
c^2 = Pyrochild's plugins (exponentially better)
m = Me
E = Eternal joy, derived from great works of digital art boosted by amazing plugins
E = mc^2
'nuff said. Thanks, Pyro! 8)