


BuzzKill
-
Posts
869 -
Joined
-
Last visited
-
Days Won
1
Posts posted by BuzzKill
-
-
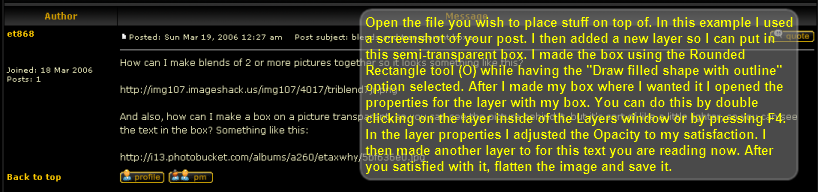
Start by opening the image you want to add stuff to. Then go to Layers > Import form file... This will let you add another image on top of the other one. It will also put the new image on its own layer. You will have one layer with one image on it and another layer with a second image on it. Open the properties for the top layer (the layer with your second image) by going to Layers > Layer Properties, pressing F4, or by double clicking the layer inside the Layers window. Adjust the Opacity of the image to your satisfaction. You can make it semi-transparent or you can leave it like it is. After you have it like you want it, flatten the image and save it.
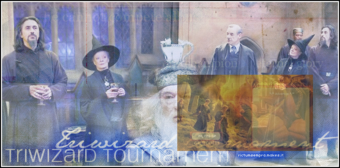
This is just a quick example using the pictures from your links:
If there is a specific object or person in an image that you want to place in another image you can read April's 'Quickmasking Tutorial' here: http://paintdotnet.12.forumer.com/viewtopic.php?t=1127
The same principle can be used to do the transparent boxes
Here is another example:
NOTE: These are just quick and crude examples to give you an IDEA of how it can be done and by no means are they meant to give an example of what Paint.NET can ONLY do. You can produce much more sophisticated results with a 'lil creativity, experimentation, and some patience on your part.

-
Where would somebody look to see if they are running 32 bit or 64 bit Windows?
-
aatwo, I see you implemented some blurs and shadows in that drawing. Gives it a whole different look. I for one am liking the shadows. It adds just the right amount of detail.
-
Also, you might be able to use SearedIce's tutorial for this. http://paintdotnet.12.forumer.com/viewtopic.php?t=1122
-
Mose, April just added a new tutorial to her site that can probably help you as well. You can find the link to her site in this post: http://paintdotnet.12.forumer.com/viewtopic.php?p=4732&highlight=#4732
-
The clouds were done by using the Freeform tool. I just made some shapes that I thought looked liked clouds and blurred them. I then made a new layer and put in some black markings over the clouds and blurred them as well. It gave the clouds a little more detail.
I also didn't notice the nipple thing untill aatwo said something. Like you Darren, that is all I notice now.
Thanks aatwo! You just had to point that out, didn't ya!

I was thinking of changing it before I gave it to my brat nephew but I decided to keep it as is. I just wonder if his mother (my sister) will notice it.
-
aatwo, you can pick up Rick's Glow plugin here: http://paintdotnet.12.forumer.com/viewtopic.php?t=1124. Install it the same way you did the other one.
-
What! Huh? Did somebody say nipple?!? I wasn't thinking of that when I made it, I swear!!!
-
Nice image. How'd you do the moon?
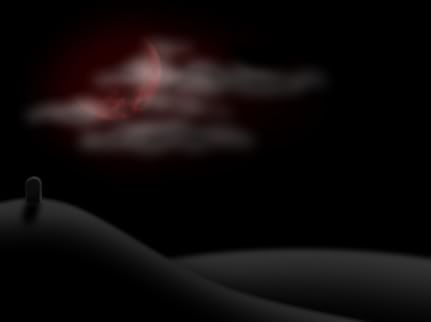
The moon was originally a white full moon I grabbed off of an Encyclopedia Britannica DVD. Turning it red and keeping it looking right was the hardest thing. It took about a dozen layers, utilizing the Magic Wand quite a bit. I fooled around with a couple of blends but I can't recall if I ended up leaving them in or not. Turning it into a quater moon was fairly easy as you could imagine. I just put a black circle over it and blurred it. The slight red glow around the moon and clouds was done by putting a red circle over the moon, blurring it, reducing the opacity, and then stretching it. The whole process, just for the moon, took me about 45 minutes.
I orginally did this project for my nephew. After he saw my sigbar he wanted me to make him something. "Make me something spooky" were his exact words. So, that is what I came up with. I just hope he is happy with it. He's a picky 'lil prick!
Anyway, this is the final cut:
I burred the moon a little more since everything else has a blur to it.
That's a very impressive image you put together. There is one thing that caught my eye right off the bat. You can see more stars closer to the sun and less of them further from the sun. Seems like it should be the other way around. But hey, it's your masterpiece and you can make it however you want it. That's what make individuality so awesome! I can see why you're proud of it. Like I said earlier, impressive!

-
You might wanna try the Magic Wand for that. If the background area (color) is extremely different than the object you want to cut out, this would be very easy. For example, the picture with your son (cute kid btw) playing in the snow would be fairly easy. His outfit is very different than the background (the sky, snow, or whatever is behind him) color.
On the other hand, if the object you want to cut out (isolate) is surrounded by similar colors, then it will be a pain in the arse and take you some time to get it just right. Another example, the picture to the left of the one with your son in the snow (the group photo) would be a little harder. It would be a little tricky to isolate a single face. Since all three faces are close together and have similar skin tones, the magic wand will have a hard time determining if there are seperate objects there or if it is just one big object.
Play around with the tolerance level to find the "sweet spot". If the Magic Wand doesn't select the entire object you are trying to isolate, just press and hold the Ctrl key and use the Magic Wand again to select more of the object while keeping the previous selection. In other words, it will broaden (add to) the selection. You may need to adjust the tolerance level again while adding to the selection.
I hope this helps you out. If not, just ask again. I'm sure a more seasoned Paint.NET user will be more than happy to help you out.
Also, I hope you get back to your normal self soon. I had a full leg cast about 2 years ago and it just plain sucked!
-
Another great plugin!
I've used it in a couple spots on this background I've been working on.
Thanks Again, Rick!
-
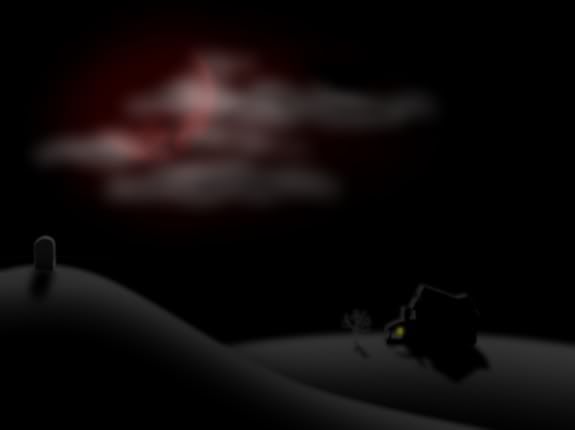
This is something I've been fooling around with for the past hour or so. I think all that is missing is an old, creepy, broken down house sitting atop the smaller hill. In some areas I utilized Rick's new "Glow" plugin.
Anyway... Trick or Treat :!:
-
@ CMD
I never even thought of doing a circular beveled edge like that. I was doing them by... well, let's just say it was a long and cumbersome process and keep it at that.
@ aatwo
Once again, it is always great to see your drawings. Mouse trap huh? I remember that game. I also remember how the little plactic man would never quite make it into the the bowl. Wait! Am I thinking of the right board game here? I don't know lol. Anyway, keep them drawings coming!
-
Since it didn't take you too long to make a patch, will these fixes be included in the planned upcoming release of 2.61?
-
Cool! Looking forward to its release.
-
I agree, Rick. I don't see how anybody could come about recreating the zoom bug unless they read this topic.
-
@ CMD
I like how the orb is only sitting halfway (well, a little more than halfway) in the bar.
How are you getting your beveled edges so sharp and clean? I tried to do a background with a big orb in the middle surrounded by a beveled edge but i couldn't get it as sharp and clean as yours.
-
I do agree that this should be fixed as it would just plain suck to lose what you were working on if you did do that.
I just double checked and it seems that the only time pressing Ctrl+Z while still pressing the mousebutton will have any effect is when you're using the Lasso, Magic Wand, and the Magnifying Glass. If using any other tool and you press Ctrl+Z while you still have the mousebutton pressed nothing happens (other than the pointed out bug above). It doesn't even "undo" what you just did.
I found another interesting bug while using the magnifying glass. If you have any part of the image selected from using the Rectangle or Ellipse Select tool and switch to the magnifying glass and click and drag to zoom in... if you press Ctrl+Z before you let go of the mousebutton the entire image gets cloudy and the outline of the area you were going to zoom in on stays visible. This can not be undone. Even if you create a new image or open a new image it still stays cloudy. The only way to get rid of it is to shut down Paint.NET.
I don't know if this has been mentioned before but it is new to me.
-
You can lighten an image by adjusting the brightness and contrast. Layers > Adjustments > Brightness/Contrast or by pressing Ctrl+Shift+C.
When saving, you can do a "Save As". This will save your image as you see it but it will let you choose a specific name and file type. File > Save As or by pressing Ctrl+Shift+S. If you go to File > Save or press Ctrl+S you will save over the original file and keep the original file type.
-
It does the same for me. Although I don't see why you would want to press Ctrl+Z while you have the mousebutton pressed.
-
aatwo, extract the driver (.dll) from the zip and place it in the "Effects" folder in the "Paint.NET" directory. The next time you start Paint.NET it will be located in the "Effects" menu.
-
Thanks for the post!
For advanced users is correct! I myself have no idea how to write code.
However, there are some cool effects in the "Samples" folder included in the .zip file that you can fool around with. If for nothing else, grab this plugin for the included effects!
-
Great plugin! I think I will find myself using quite a bit.
Thanks!
-
 1
1
-
-
@ Crazy Man Dan
Thief!!!
j/k. I'm curious though, which ones did you rip off? Also, I see you're getting in-touch with your inner darkness! That skin for your site is wicked looking! It gives it that "artist touch".@ SearedIce
Fontmania is a good term to describe it. lol Now, if they only made a "patch" or "gum" for that. Kinda like a "quit smoking patch/gum".
@ Rick
Lmao, even the icon for the pencil tool looks like it was drawn using the pencil. Too funny!!!1 <--
That screenshot gives me even more appreciation for Paint.NET and where it is to date!@ Darren
Nice work! The light shining through the bullet holes is a nice effect. Hmm, that just gave me an idea...Thanks man!


![[Full Size]](http://i36.photobucket.com/albums/e18/docbuzzkill/DeadMoon1.jpg)
![[Full Size]](http://i36.photobucket.com/albums/e18/docbuzzkill/DeadMoon.jpg)
Dimensions of a Selection
in Paint.NET Discussion and Questions
Posted
The grid is shown when you zoom in on an image. Since the grid shows you the outline of each pixel and since each pixel is so small, you can't see the grid while viewing the image at actual size.