


Alpha23
-
Posts
22 -
Joined
-
Last visited
Content Type
Events
Profiles
Forums
Blogs
Gallery
Downloads
Everything posted by Alpha23
-
change reflected background color
Alpha23 replied to Alpha23's topic in Paint.NET Discussion and Questions
Thanks! If I understand correctly, that plugin should be able to change the alpha of a certain color. Strangely nothing happens, no matter where I put the sliders. I've posted to ask for help. -
UnAlpha (Remove or Replace Alpha Pixels)
Alpha23 replied to doverdemon77's topic in Plugins - Publishing ONLY!
I have a picture of an object in front of a white background and I want to reduce the alpha of the background color to be able to put it in front of a differently-colored background. Apparently I'm doing something wrong here because exactly nothing changes, no matter where I put the sliders... Shouldn't the following settings yield a result?
-
Automatic layer alignment (via anchor points)
Alpha23 replied to Alpha23's topic in Paint.NET Discussion and Questions
While that is certainly great news, it's not even necessary in my case: setting one layer to overlay and applying the plugin to only one layer will let you see and select all four points on the layer you'd like to transform. -
change reflected background color
Alpha23 replied to Alpha23's topic in Paint.NET Discussion and Questions
Can you explain how I would go about this? Nothing happens when I click on the plugin... -
Automatic layer alignment (via anchor points)
Alpha23 replied to Alpha23's topic in Paint.NET Discussion and Questions
Simple: I need to do this to around 2,500 picture pairs. 😉 -
change reflected background color
Alpha23 replied to Alpha23's topic in Paint.NET Discussion and Questions
Your plugin does the exact this that the cut color plugin does. Look at the result when I change the background color afterwards: Definitely not what I want obviously - I'd need this to look as if the object was photographed in front of a different background. Here's a screenshot of another photo with a colored layer below that shows what the plugin does and why this isn't working: You see all that white reflection still present on the surface - when the tolerance is turned down, it just deletes whole areas: Here's another example what I basically need to change: The primary color is taken from the lower part of the rear fender. That color contains a portion of "white" light (rgb-overlay) that previously came from the background. This pars needs to either be transparent or taken to a different layer. So basically what ray racing does in renders.


-
Automatic layer alignment (via anchor points)
Alpha23 replied to Alpha23's topic in Paint.NET Discussion and Questions
Alright, somehow I need to come back to this, now that I got the time to. Here's a mock-up of what I'm envisioning relating to the attached pictures Step 1: choose anchor points on image 1 Step 2: choose anchor points on image 2 Step 3: let the plugin align those two points together with the layer (linear transformation through a rotation matrix on one layer only) Example: P1a=(731,1047), P2a=(1319,620) P1b=(745,999), P2b=(1359,536) The resulting zoom-rotation matrix is calculated as (1.0281, -0,0043 -0.0098,0.8737) (internally with more decimal places of course) and applied to the second picture. Both points are now exactly on top of each other - done. I don't know how to write plugins but it doesn't strike me as particularly complicated...


-
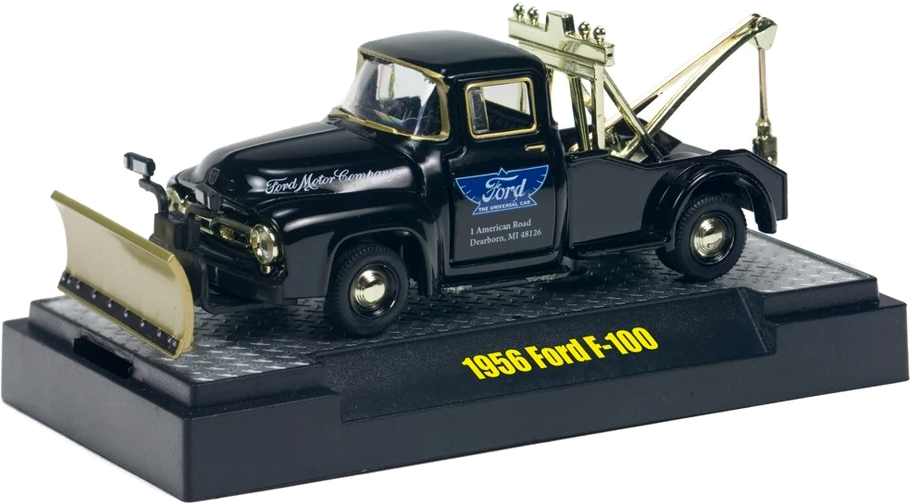
Hi folks, this is something that I have been asking myself for quite some time now. Let's say I have a photo of an object with a uniform background like the attached one. If I want to change the background, I'm running into the problem that the current background is obviously reflected on every surface, e.g. the car's side. I have several color plugins installed but I'm missing a way to properly do it. For example, using Color Cut (XMario) with white as primary color, I can remove part of the background but the reflection areas aren't changed. I'd need something that basically lets me split the "white channel" from the rest of the colors. What plugin is best for this? Thanks for your help! :)
-
One of the most useful plugins out there for me, hands down! What I use it for: I'm collecting toy cars and take archival photos on a plain white background. I use this plugin to cut out the background but leave in the half-transparent shadow, so any background will look natural.
-
Automatic layer alignment (via anchor points)
Alpha23 replied to Alpha23's topic in Paint.NET Discussion and Questions
Hm, the plugin only has to: mark first and second primary point (just store the coordinates) run plugin on active layer in a plugin window (like the Spirit Level Rotate) let the user mark the first and second secondary point while showing the stored points run to align active layer (matrices to move, zoom and rotate are easy to calculate) If I had any coding experience, I'd give it a shot. Sadly, I don't. But it actually it doesn't sound that complicated to me to be honest. The spirit layer rotation code is available if you need some background. Any ideas? Anyone up for the task? Because I think such a plugin is extremely helpful - also to others! I'm almost shocked that there apparently isn't one already available... Or did I miss it? Greetings, Timo -
Center photographed object on plain-colored background in 30 seconds
Alpha23 replied to Alpha23's topic in Beginner Tutorials
Oh and by the way, there is a plugin for centering an object if you're in need of that: -
Center photographed object on plain-colored background in 30 seconds
Alpha23 replied to Alpha23's topic in Beginner Tutorials
Thanks for commenting. Of course your approach works as well but imagine having lots of pictures to adjust - you won't do that every time. This version gets rid of all the numbers, which is why I find it neat. A little side note about your comment on the title. You're right but you can get from any picture to a version like above and add a border afterwards, for example with an easy batch program like IrfanView64, which I use reeeeally often because it has so much possibilities for batch processing. I've changed the title to make it clearer what I meant. This is about photographs of objects after all. -
Hey guys, I see that various similar questions have already be asked inside this forum. However, somehow I can't find the exact page that discusses this or the plugin I need for that matter. I'm searching a way to automatically align one layer to another - but with included rotation. Eyeballing with a half-transparent layer is almost impossible because changing the size doesn't preserve the rotation anchor. So if my rotation is correct and I zoom, my previously aligned point isn't anymore. It's really frustrating. A plugin should be possible or already exist, because basically it's just two linear operations after one another: select two points on each layer and the plugin aligns one layer to the other. The spirit level plugin is able to rotate an image according to a line the you have selected, so the basic principle is possible. Any idea which plugin can do this? I can't imagine that it's not possible... Greetings, Timo
-
Hi folks, As you all know, there is no possibility to center an object really quickly. Well, I just found a way to do it in 30 seconds. Prerequisite: the object background must be plain-colored, at least toward the edges on at least two adjoining edges. Say you have the following picture (addedd a border - the picture itself has a white background): Note: All edges are white. As you can see, the car isn't centered properly because of the shadows. Of course you could expand your canvas and eyeball it but that's not what we're here for. Ok, here's what you do: make sure your backround color matches the background of the object (K, right click on color) select all (Ctrl+A) select the "Move selection" tool (2 x M) drag the right and bottom selection edge to the edge of your object (in this case disregarding the shadow as it's not part of the object) invert the selection (Ctrl+I) add new layer (Ctrl+Shift+N) select the Paint Bucket (F) and fill the selected area duplicate layer and open the "Expand Canvas" dialogue (Ctrl+Shift+V,R - just stay on Ctrl+Shift) anchor on bottom right, select appropriate value (120% in my case) and confirm (Enter) rotate layer by 180° (Alt, L, 1) select move tool (M) and align one corner of the reversed L-shape to the corner of the other L-shape (top left) - quickly zoom in to the edge (Ctrl+Mouse Wheel) Crop to selection and delete two layers (Ctrl+Shift+X,Del,Del - stay on Ctrl+Shift) Et voilá, you now have a centered object. Once you get the hang of it with those shortcuts, it won't take you longer than 30 seconds! Questions? Suggestions? Compliments? Post here!
-
Just a little wrap-up after some tests. Here's what I did: select area I want to be white with the Magic Wand Tool create new layer -> fill selected portion white (maybe make some previously unselected parts white too) duplicate layer mask 1 = Layer 1 (white selected): Gaussian Blur 5px mask 2 = Layer 2 (nothing selected): TRs EFX 100px on mask 1: delete "hard" Gaussian edges with eraser tool (radius ~ 200, hardness low) to show the faded portions where I want them to show Here's the result: Looks like the vehicle is sitting inside the post, eh? (The "double" shadow is produced by the light source btw if you're wondering) What this edit basically does is brighten the background without the object in front. A little explanation and background why I needed this: I'm archiving my toy car collection and I take photos from multiple angles. I use the Chart White Balance tool to correct hue and white but darker portions of the picture remain (edge of the light cone - yes I could buy a decent light, I know... 😅). If I use the white balance on an area that is in half-shadow, the picture gets overexposed. Ergo, I can only select an area that is directly inside the light cone but I don't like the darker shade around the object. In the end I create collages with white background out of and this is the part where the effect really shines: Put any photos in one collage and it looks like a single picture because you cannot see the edges pf the photos. Oh well, the lengths we go to to achieve a result we're satisfied with. P.S.: Maybe I should post a tutorial for those archiving purposes? 🤷♂️
-
Ok guys, sorry for posting AGAIN! I've finally found what I'm looking for: https://forums.getpaint.net/topic/26479-trs-edge-fader-extreme-v-535-june-15th-2014/ Basically what I can now do: - select portion I want to be white with Magic Wand - create white mask on new layer - use TRs EFX on unselected mask layer with given radius (- wait for my shrivelled potato to compute the result) - combine layers Will play around with it further but here's a first (un-tweaked) result. Old: And new: I basically "just" wanted the edge of the picture to be invisible on white background. Theoretically I can add an additional Gaussian blur with another mask to blur out the still visible edges. Turned out to be an odyssey but hey, I've finally arrived where I wanted to be. Thanks for listening to my rambling - you passively motivated me to do some research and solve the problem myself!
-
Searched a bit inside the forums. Turns out I want something that is called a fade. Basically create a white mask around the object and blur it. Gaussian Blur works only to a certain degree - I need the radius to be much bigger... Sorry for spamming this but I'm trying to learn here. 😕
-
Here's another edit, that reflects my plan better I think. I need the red portion to be feathered. It's a combination of different shades in the original picture. Come to think of it, I need a way to feather with a TOLERANCE. So basically: "select the portion I want to be white (probably multiple steps with the magic wand) -> inverse -> feather with tolerance towards primary or secondary color. Is there a plugin that can do that?
-
Ok so this is the picture with the center selected and a white layer where I removed the center. I want the edge you see feathered but into the white portion. Now here's the selection feathered: Well, 10px is not what I'm after but more like 100px. How can this be done automatically?
-
Well, not exactly what was suggested. Basically I want to fade to white starting at a certain amount of black. Meaning: I want to select the center object with the Magic Wand and get everything else white. But with very smooth edges.
-
Hi guys, somehow I lack the skill to do do an edit according to my plans. I want to do something like an "inverse" feather. What I mean by this is feathering a selection outwards. first of all here's the picture: I want to "fade" the object in the middle to white. I have the BoltBait plugins installed. Here's what I tried: - select the background -> "Selection -> Feather" -> hard edges around object/shadows - select background, invert -> "Selection -> Feather" -> object outline gets feathered/deleted How can I achieve the effect I need? Thanks for your help!
-
Hello there! I've searched this forum in hope for an answer to my question but, alas, to no avail. Here's what I want to do: I want to automatically align two layers on top of each other. Let's say I have two pictures. Each picture has a photography in the background and some text in the foreground. I now want to maximize the parts of the picture that aren't blocked by text. The two pictures don't have the same size and additionally, the aspect ratio of both photographies is slightly off. So to align both pictures (e.g. in two layers on top of each other), one of the images would need to be not only rescaled but also streched (or clinched respectively). Is there a way to do this automatically? The operation itself would be extremely simple: 1. create two "anchor points" (with mandatory diagonal distance to each other) on both images which depict the same part of the picture each 2. run the automatic operation. It justs alignes the anchor points by re-scaling one of the images - nothing more. Can anyone point me to a plugin or built-in function of Paint.NET? Thanks a lot for your help! Regards, Timo


