


dynojuggler
-
Posts
29 -
Joined
-
Last visited
-
Days Won
1
Posts posted by dynojuggler
-
-
Thank you so much for this tutorial!!!
I needed a prism for a project I am working on and your tut was just what I needed.
Here is what I came up with using your methods...
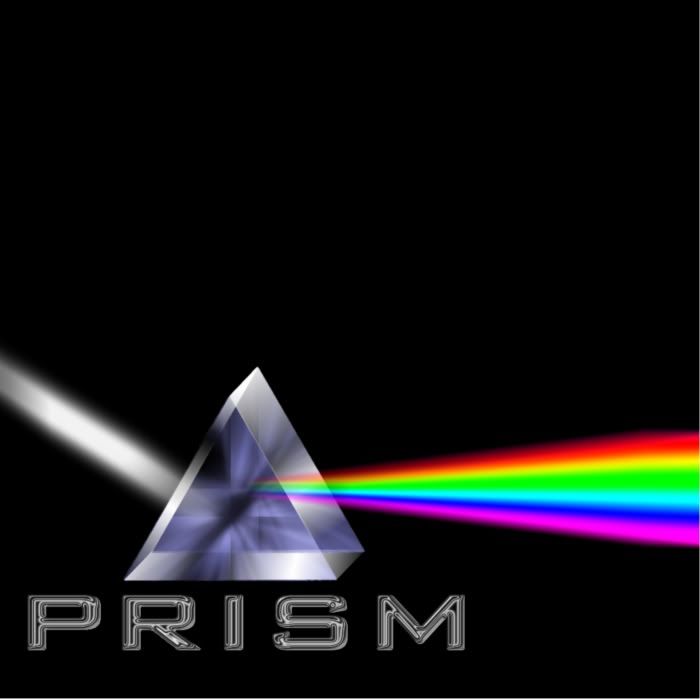
Thank you again for a wonderful tutorial!
-
 1
1
-
-
Thanks for the kind words and input pdnnoob and delpart.
I have never used splinter blur before but after your advice I have been playing around with it. It can give some very fun results. I will look into playing the cloud deformation as well since I am not familiar with that (I am a noob in many pdn tools and techniques). If I am able to get the hang of using them to get better esults here I will definitely update the tut (as humble as it may be). Thanks again!
-
I apologise, but, in my opinion, you are not right. I am assured. I can prove it.
I won't disagree with you and I will be glad to learn how to improve, but, I am not really sure what you are talking about.
So, after posting this tut I did some more searching and found a Photoshop tut that was very similar to what I had here but with a few extra steps that I think gave a better result than what I originally had. I implemented those steps with what I had and offer what I hope is a better result.
-
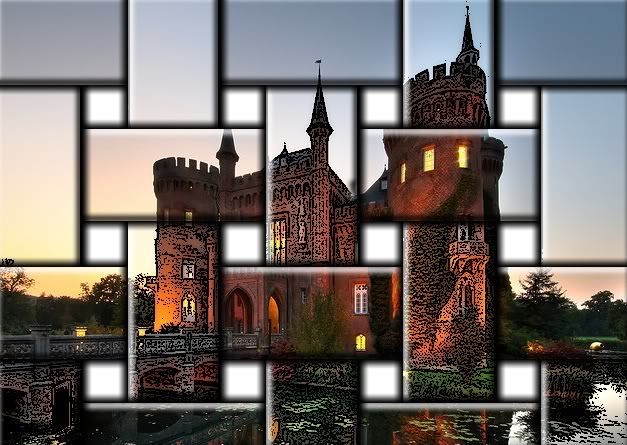
This tutorial is available as a PDF. Click here to view or download it
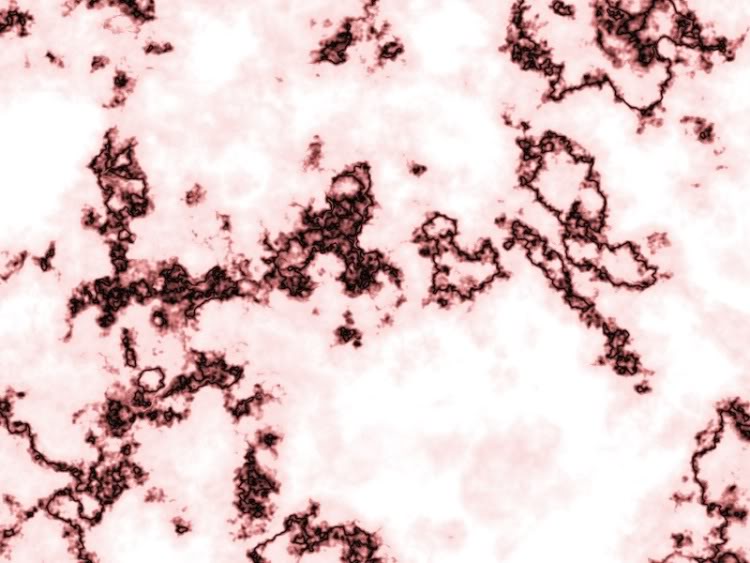
I am almost hesitant to post this tut because it is so simple, but a search found no marble tuts covering veined marble. So, I will go ahead and post this tut for better or for worse.
This is what we are aiming for in this tut...

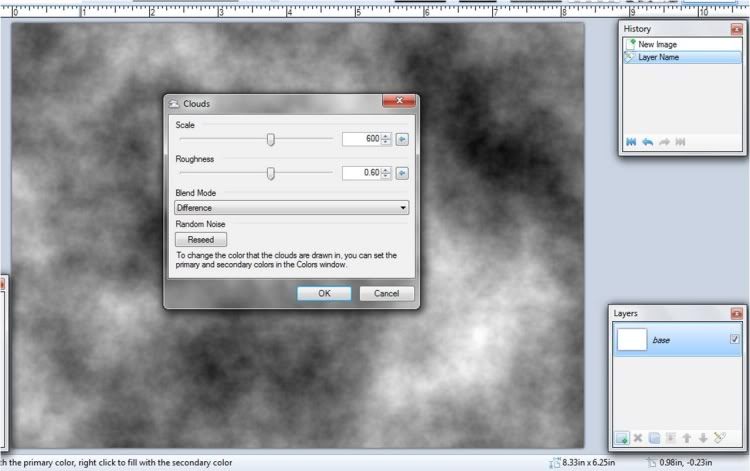
1. Begin with a New Image 800x600. If you are into naming your layers, you can call this layer "Base" (or Bob, or Wallace, or whatever you want).
2. Render Clouds using default colors with Scale @ 600 and Rougness @ 0.60. Set the Blend Mode to Difference
Effects > Render >> Clouds
3. Now hit Ctrl+F to duplicate the render clouds effect. You can do this as many times as you wish. To get the effect pictured above I hit Ctrl+F five times. I have found I get best results if repeat the render an odd number of times. You should end up with something like this...

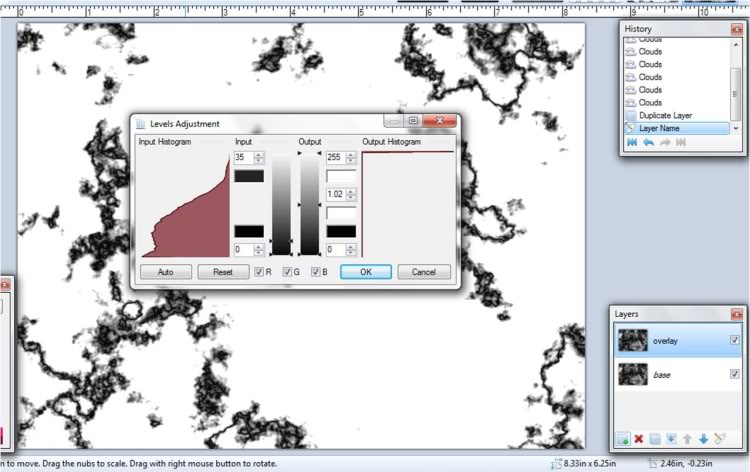
4. Duplicate the layer. Name the duplicate "Overlay".
5. Now change the Levels setting for this new layer. Set the top Input @ 35. Everything else can be left at default.
Adjustments > Levels
6. Set the layer Blend Mode to Overlay.
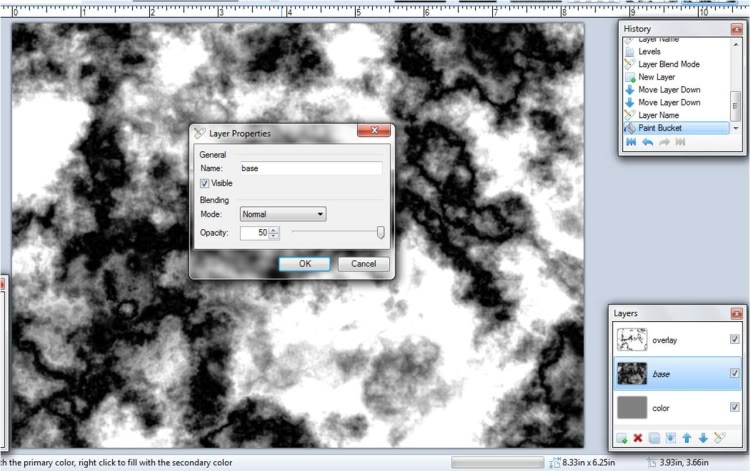
7. Create a new layer, name it "Background", and move it to the bottom.
8. Choose the default light gray from the color pallette (HEX: 808080) and bucket fill the Background layer.
9. Choose your Base layer and set the Opacity to 50
10. Flatten your image and, voila, marble...

Play around with Curves (or your favorite coloring method) to get various results
Adjustments > Curves or Curves+
I hope this wasn't too simple for a tut. I know it would have helped me out to have one rather than fiddling around until I got the right (or at least satisfactory) result (but, hey, most of the fun is in fiddlin' around).
-
 1
1
-
2
-
-
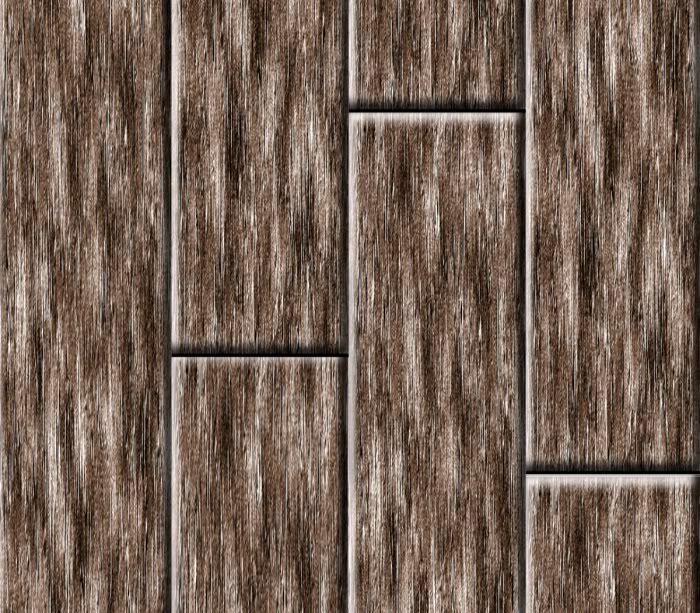
I have been trying to make a weathered barn wood texture and finally decided to check the tuts. I like to at least attempt it on my own first- more often then not though I find myself here looking desperately for a tut.

Anyhow, this tut is exactly what I was looking for...
Thank you for sharing your know how with us!
-
I love this tut! It is definitely one of my favorites. I like that it taught me techniques to use for other projects and not only how to make the object from the tut.
I played around a little using the steps and techniques of this tut and here is one my attempts...
Thank you again for an absolutely great tut! This indeed will prove a handy learning experience for me.
-
1
-
-
Nice tut!
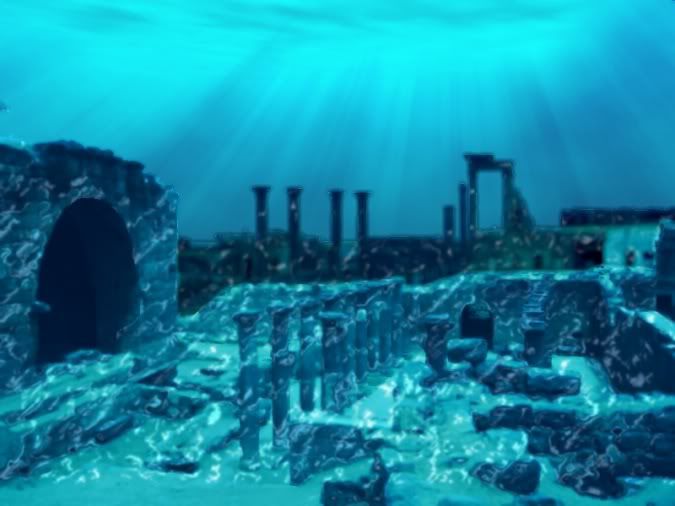
Here is my first attempt. I was experimenting with alpha-displacement to get sunlight reflections on the ruins so the quality didn't turn out as good as yours. I hope to figure it out so that I can eventually get the quality of your pic with reflections as well. I will fiddle with it some more when I get a chance. Thanks again for the tut!
-
Thanks for sharing your work AGJM!
I like the "scrubbed" look of your result.
-
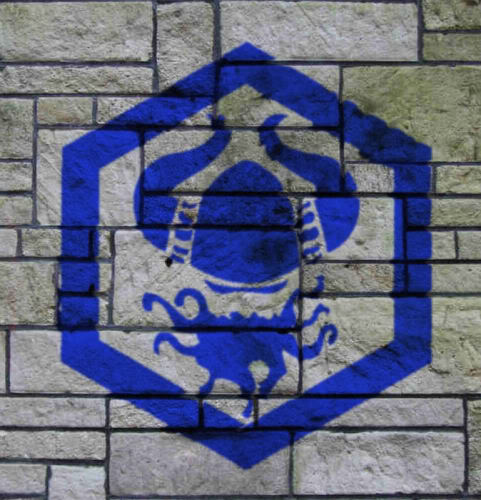
Thanks for the fun tut!
Here is my go at it...
-
This, imo, is probably the best graffiti tutorial on the forums ^^ I've been trying to achieve the same for a while, but only just figured out what I wasn't doing right thanks to your tutorial. Thanks!
Thank you for the great encouragement!
I am very glad that my tut was helpful to you.
-
Very cool! Love the colours too.
Thank you!
I have been trying to put multiple layers in one image and I am sure there is an easier way than what I am doing.
If I just adjust the shift of the fore image without doing anything else I get this (it is just a circle in front of a rectangle; something simple to experiment with)...
The backfilling of the front image cuts out portions of the back image and the back image distorts the front image.
With some fiddling I can get to this...
It is a little sloppy right now, but, the cutting out and distorting are pretty much remedied but it took three separate layers to get it.
In a separate image I ran backfill on my front image and used the resulting image to make 2 different cut outs of my back image.
Is there an easier way to get multiple layers in one of these images?
-
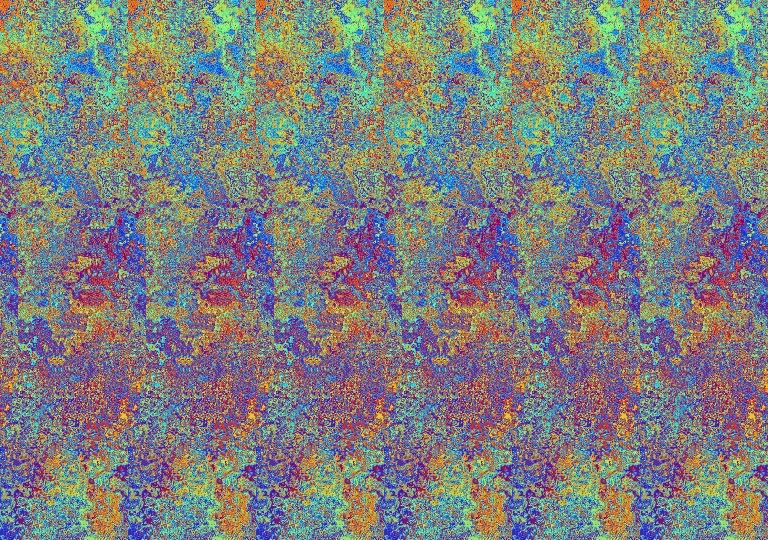
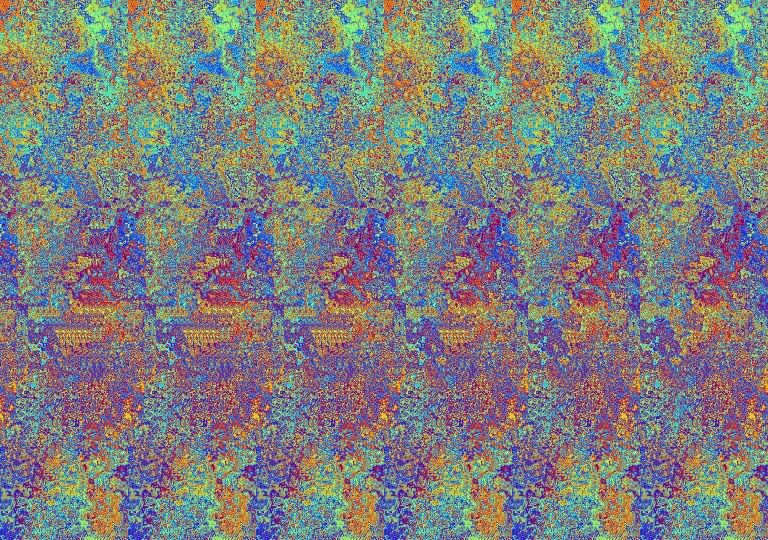
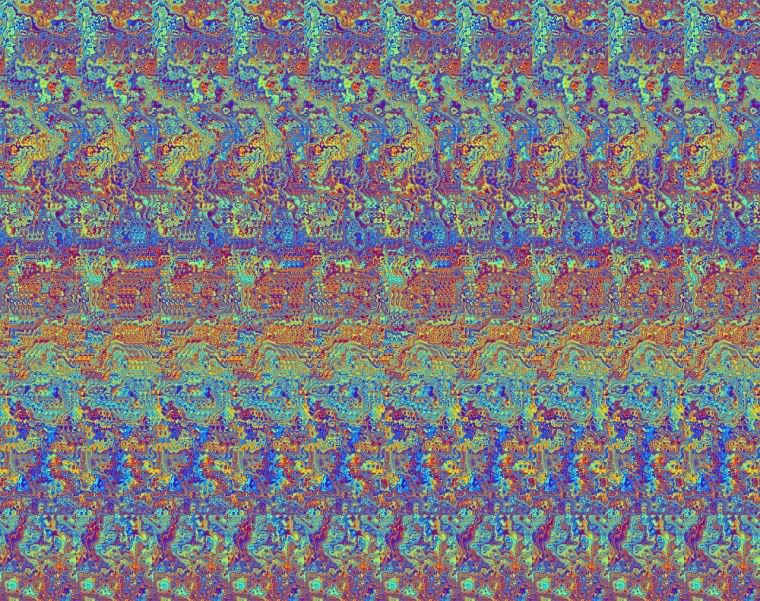
Very nice image! Your color scheme is just like the Magic Eye images.
The swirl must have taken ages to tile - did you use the backfilling plugin or do it manually?
Thank you! I used the Perlin texture and then Dents to get the background.
The swirl did take a while to tile. I did it manually. I discovered your plug-ins after doing this image (that will teach me to do a tutorial before reading all of the pages following it
 ).
). Your plug-ins for this are great, BTW. They have come in very handy; thank you for taking the time to create them.
-
Thanks for an awesome tut!
I am experimenting with some variations on it but here is my first attempt...
I am looking forward to seeing what else I can do with this.
Thanks again!
-
Ok, lets move it then. Abracadabra.....,
That's a cool trick. David Copperfield had better watch out.

Thanks for moving it.
-
Great tutorial! Very useful.
Thank you! I was hoping this wasn't already covered in this fashion.
The only thing I'm asking is: shouldn't this be in 'Distortions & Modifications'?
Sorry, I guess I had tunnel vision. I was originally looking to do some things with text using this, so that is what I had in my head. But in retrospect, yes, definitely this belongs in Distortions and Modifications.
-
^^ "See, the Alien was down that hallway. Crouching & feeding on something. I let off a burst from the hand cannon but it disappeared quick. LOOK! You can see I hit it by the acid etchings in the floor....,"
- unreleased (& unwritten) Sci-fi novel by EER

I eagerly await the full publication.
-
This tutorial is available as a PDF. Click here to view or download it
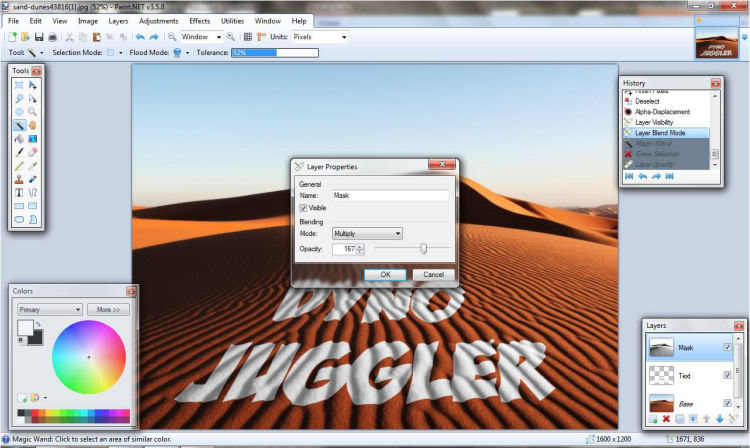
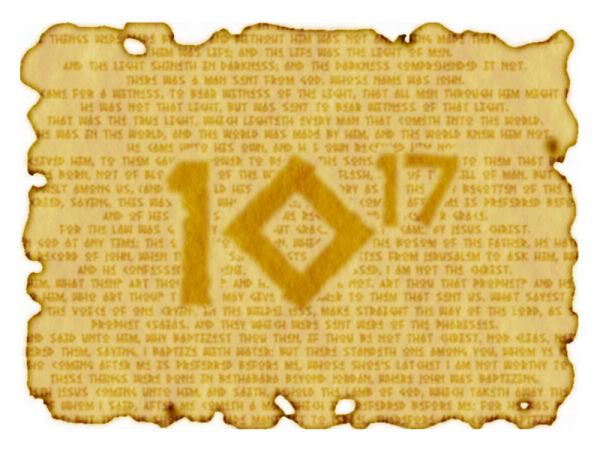
I have seen several tuts for using Alpha-Displacement Mask. I have seen examples of it using text but they weren't exactly what I was looking for. I wanted one that looked more like it was actually laying on top of the ground.
Simply using my image as-is for a displacement mask gave me this...
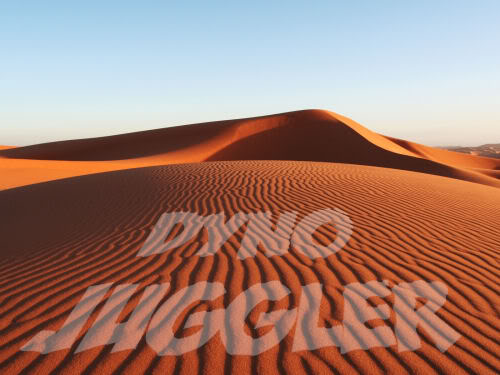
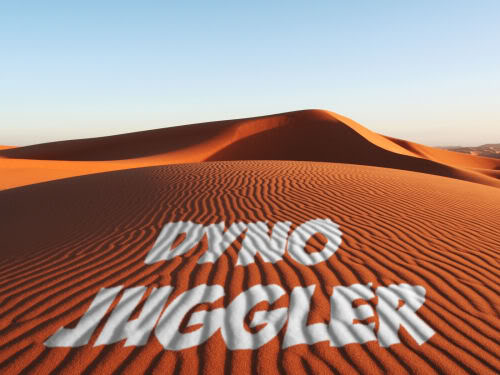
This is what I wanted it to look like and this is what this tut will share with you...
Only one Plug-in is necessary for this effect:
Displacement and Alpha Mask Plug-in by Bleek II
Okay, let's get started...
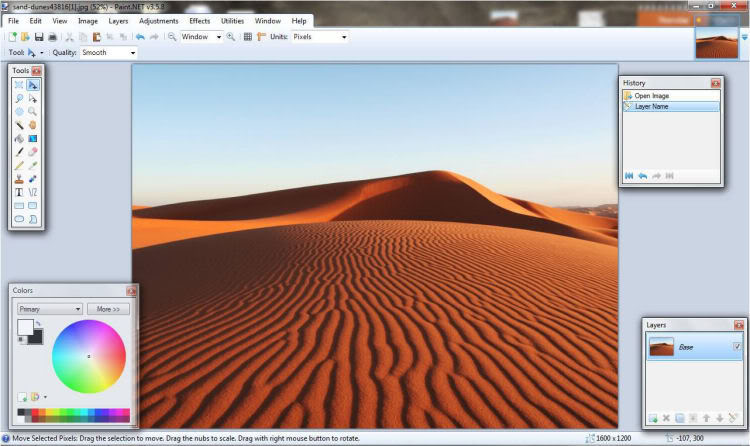
1. Open the image you will be using for your background and name it Base. Duplicate this layer and name the new layer Mask.
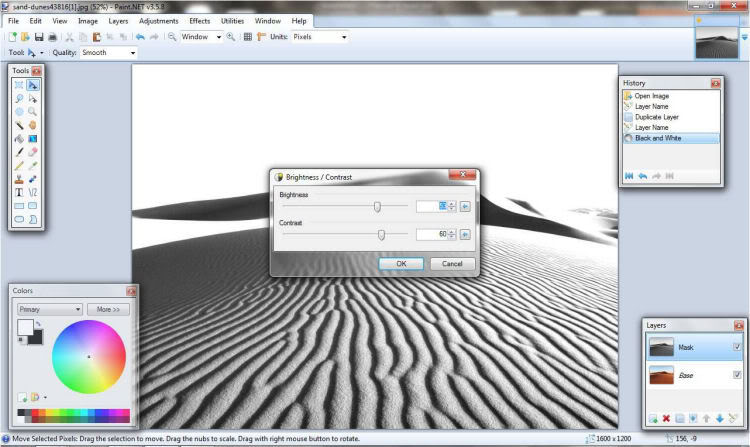
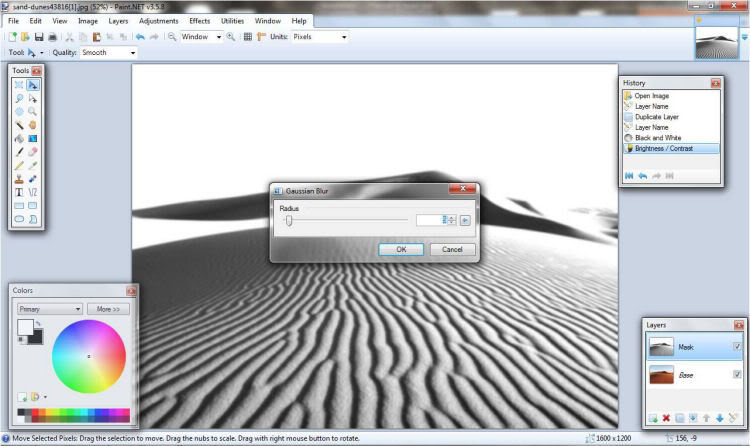
2. Change the Mask layer to Black and White. Change the brightness and contrast. The levels will vary depending on your chosen background image. You want the image to have clearly defined shadows.
Adjustments> Black and White
Adjustments> Brightness/ Contrast
3. Slightly blur the image with Gaussian Blur. Again, the level of blurring will vary depending on your chosen image. This layer will be used later to give shadows to your text so think about how soft you want your shadows to be.
Effects> Blur>> Gaussian Blur
4. Flatten the image and save it as "Displacement Mask".
Undo the flattening.
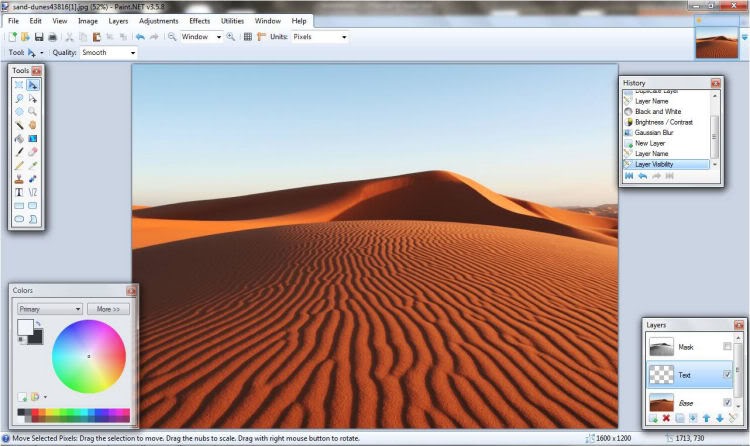
Render the Mask layer invisible
Add a layer between the Base Layer and the Mask layer and name it Text.
5. Add your desired text. Black typically is not an ideal choice for text color since it won't really show any shadows later in the process.
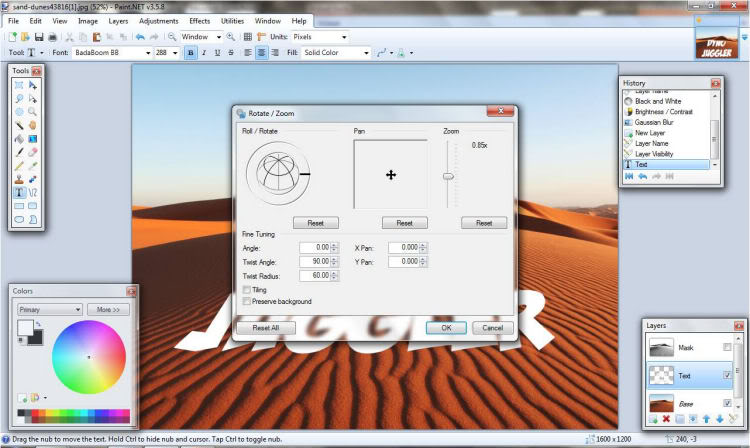
5a. Optional: If necessary, adjust your text layer to follow the "lay" of your image using Rotate/Zoom
Layers> Rotate/Zoom
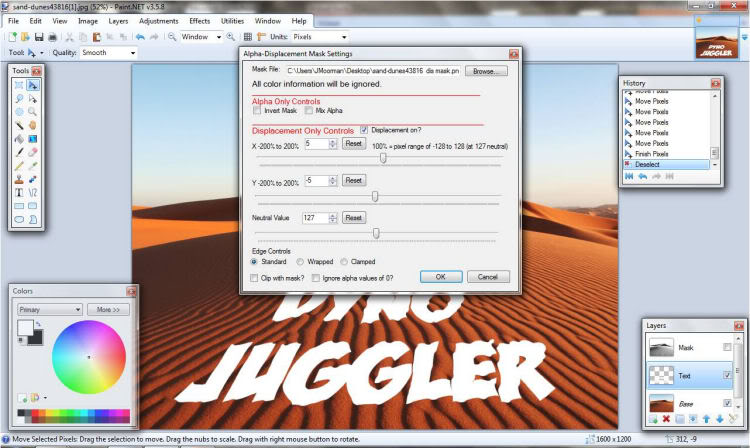
6. Run Alpha- Displacement using the image you saved earlier as Displacement Mask.Make sure “Displacement On?” is checked.
Adjust X and Y settings to your preference. Your settings depend on how deeply you want your text to fall into the grooves/ cracks of your image. Higher setting create deeper grooves.
IMPORTANT: Whatever you choose to set them to, make sure X and Y are exactly opposite (i.e. if X is 5, then Y is -5).
You can leave everything else at the default settings.
Effects> Alpha- Displacement
7. Make the Mask layer visible again.Change the Blending Mode to Multiply.
If necessary, adjust the Opacity of the layer.
8. Choose the Text layer.
Using the Wand Selection Tool set to Global, click anywhere outside the text.
Choose the Mask layer and hit delete.
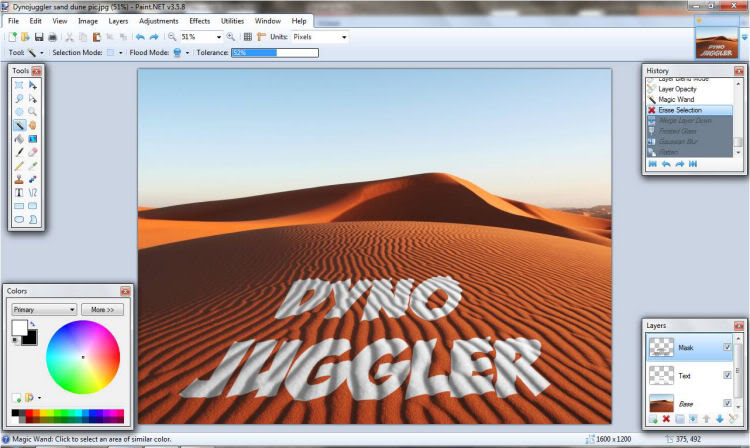
8a. Optional: Merge the Mask layer down. Depending on the texture of your base image you can run Blur, Feather, or AA Assistant and then any other effects that will help your text blend into the landscape. For this image, I ran a light blur on the text and then used Frosted Glass to give it a subtle sand texture.
9. Congratulations, you are done. Flatten and save your image.
Some other examples of using this technique with other than text...
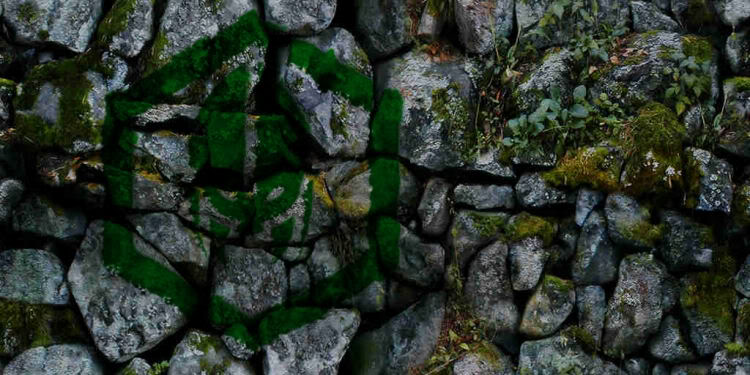
Hope other n00bs like me find this useful!
-
Thanks for the kudos, all. I am glad you guys like it and hope you find it useful.
I discovered if you use this tut in conjunction with theonlychad's Concrete texture you end up with a splendidly corroded texture...
Try it out!
-
1
-
-
I used this in conjunction with my Rust tutorial to make a super corroded metal surface.
Thank you for showing us how to create such a simple and realistic looking effect!
-
This is just what I was looking for. It worked great for the dinosaur skin texture I wanted to make.
Thanks!
-
This tutorial is available as a PDF. Click here to view or download it
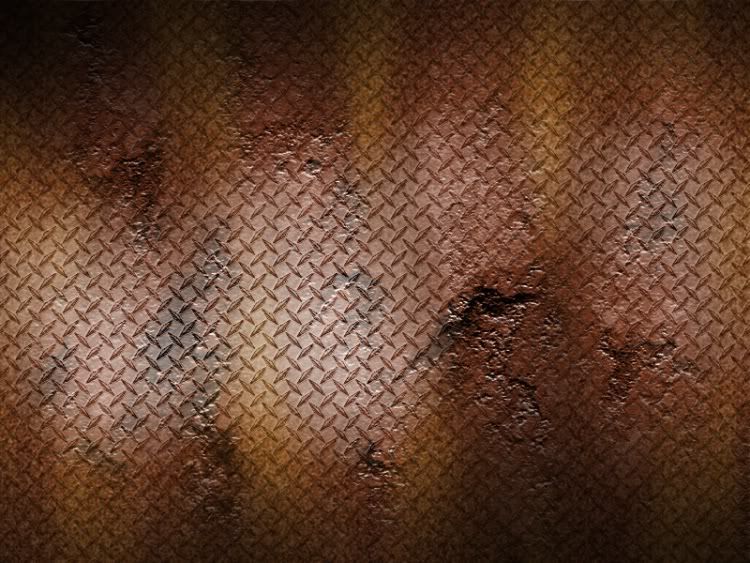
In this tutorial we will be making the rust/ corrosion covering this metal. There are a couple of tutorials on the site for creating different types of metal plates.
This is what the result will look like...

No plug-ins are necessary for creating this texture.
1. Create a new image 800x600
2. Render clouds on this layer. Scale: 188, Roughness: 0.73
Effects> Render>> Clouds

3. Run Emboss on the cloud layer
Effects> Stylize>> Emboss

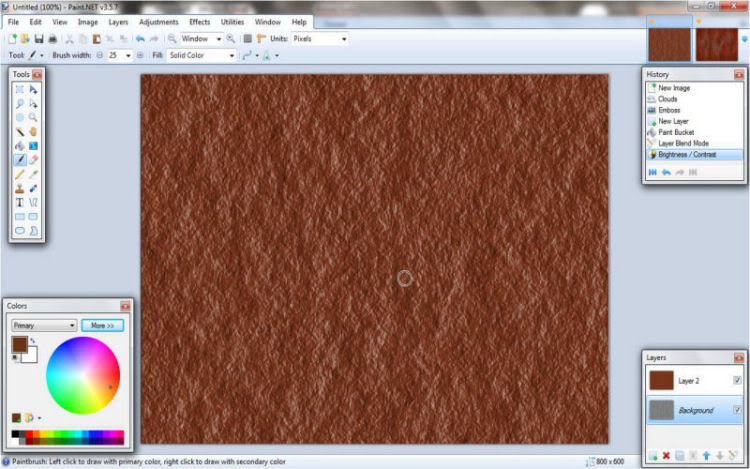
4. Adjust the contrast: Contrast -40
Adjustments> Brightness/ Contrast
5. Create a new layer
6. Choose the paint bucket tool. Set the HEX color to 77351C and fill the new layer. Set the layer Blend Mode to Overlay.
7. Create a new layer.
8. Choose the paintbrush tool and set the brush width to 25. Set the HEX color to 934C20. Color in around the perimeter of the image and make a few "squiggles' tapering in from the edge to the center.
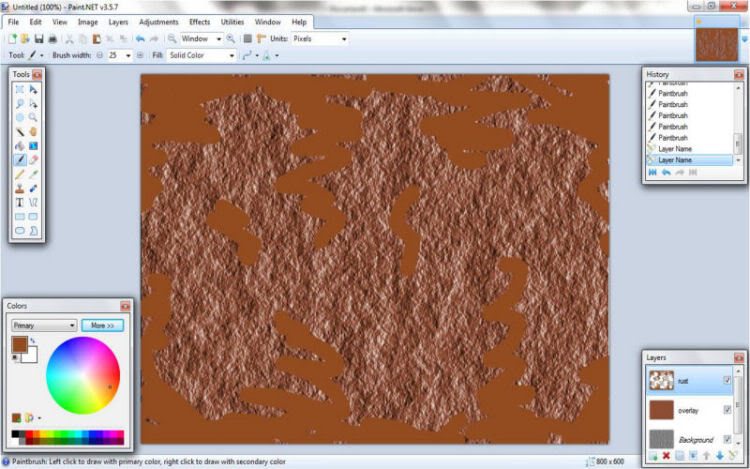
9. Set the HEX color to 683415. Repeat the procedure from Step 8. As you can see, neatness and precision aren't necesseties with these two steps; just basically scribbling really. You will get better end results if you run the darker color alongside the lighter color on the tapered squiggles.
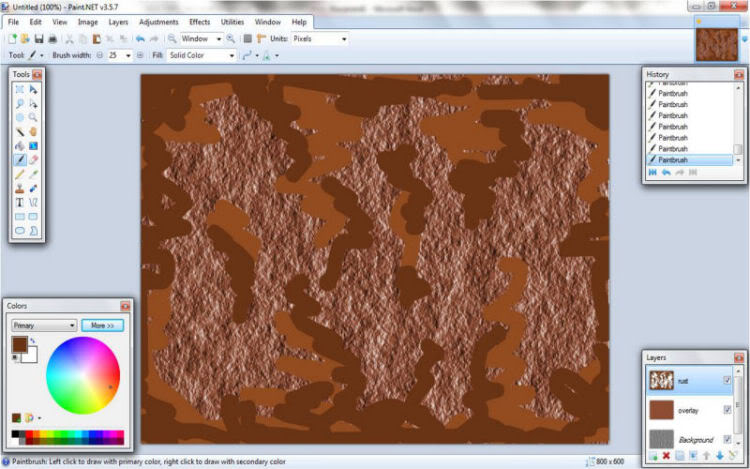
10. Blur the layer using Gaussian Blur set to Radius: 15
Effects> Blur>> Gaussian Blur

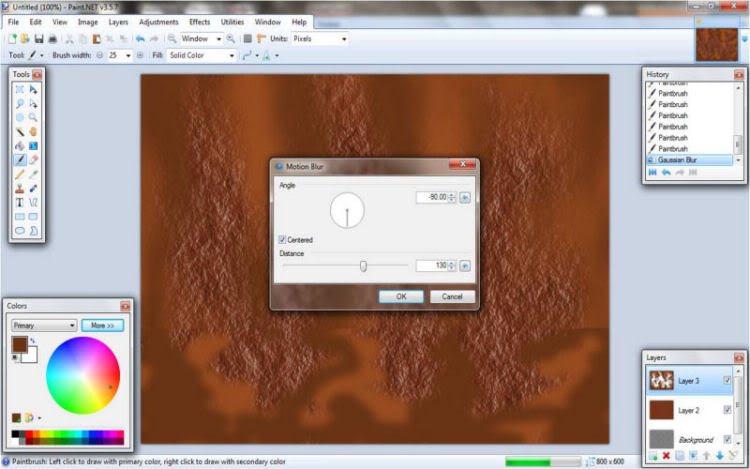
11. Blur this layer again using Motion Blur set to Angle: -90, Centered, Distance: 130
Effects> Blur>> Motion Blur
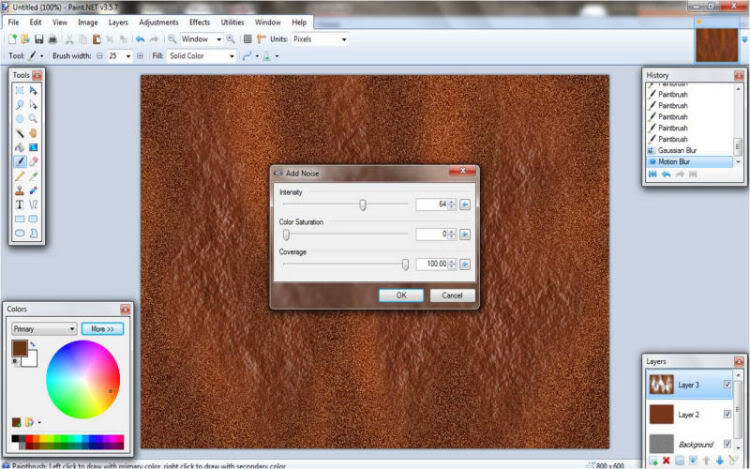
12. Add Noise set to Intensity: 64, Color Saturation: 0, and Coverage: 100
Effects> Noise>> Add Noise
13. Blur this layer again using Gaussian Blur set to Radius: 1
Effects> Blur>> Gaussian Blur
14. Flatten the image
15. Import the metal plate image of your choice and move it below the Rust layer.
16. Set the Rust layer's blend mode to Overlay.
17. Create a new layer between the Rust layer and your plate metal layer.
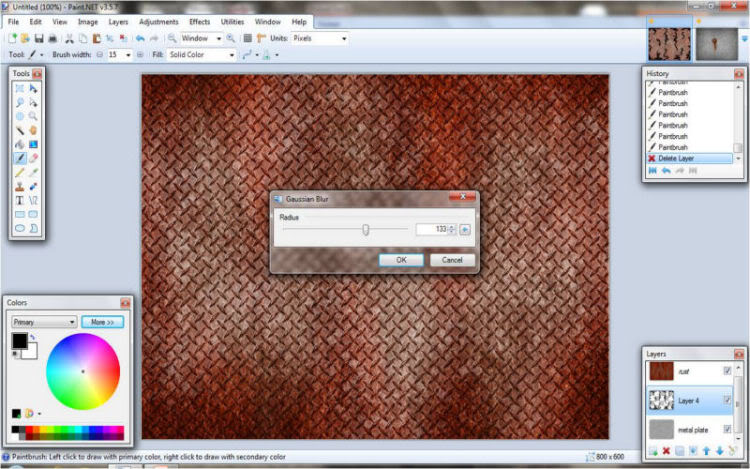
18. Choose the paint brush tool set to a brush width of 15 using the default black color. Make some squiggles on this new layer. keep them mostly vertical. feel free to experiment with brush size and coverage amounts with ths step.

19. Blur this layer using Gaussian Blur set to Radius: 130-135. Again, feel free to experiment with this step with even greater or less blur.
Effects> Blur>> Gaussian Blur
20a. Optional: You can set this layer's blend mode to Overlay for a more subtle rust effect.
21. Flatten your image and you are done.
-
1
-
-
This is great advice for a newbie like me.
Thank you for helping me avoid a good deal of trial and error (and heartache
). -
Great tut!
I used it along with another tut from here to make this for a lesson I was teaching...
Thank you for a great tut!
-
This is one of the first tuts I have tried.
I used it along with another tut from here to make this for a lesson I was teaching...
Your tut was just what I was looking for. Thank you!


A way to design a gear
in Creations
Posted · Edited by dynojuggler
I wasn't able to use this tut in its entirety because I couldn't dload the Kaleidoscope script. However, it taught me techniques I was able to adapt and inspired me to come up with this...
Thanks for a tut that didn't just show how to make an object but taught techniques that could be used in other ways as well.