


dgirl555
-
Posts
55 -
Joined
-
Last visited
Content Type
Events
Profiles
Forums
Blogs
Gallery
Downloads
Posts posted by dgirl555
-
-
Awesome tut!
Mine turned out good..

-
hmm.... maybe I'll update with screenshots complete with the figures I used.
-updated!! :wink:-
-
This is....
An awesome tutorial! Great Effect, could be useful.
But I dont get anything like yours.
Are you sure you made a whole new layer for the grey gradient? I forgot it once and it threw off the picture completely!
-
I used it on mario... I found a way to add a shiny spot on them too!
-
Sorry guys I've been tied up for a few days with annoying issues, long story involving train cars and politicians and an evil rich guy. Anyway, I'll try to make this as simple as I can and maybe someone can make this into a tut. I hope you don't mind but I'm going to send this to Yellowman in a PM and copy it to David Atwell so that they can look it over so I can stay out of trouble by posting a tut within a tut. It's been a long week. Thanks.
It's a community tutorial... you're supposed to put your tutorial for stone in it!
-
Used it for a planet... but different colors than blue and green. I didn't want to make Earth.
-
awesomeness!! I finally got to make that beach house I've been meaning to...
-
I used it on a bottle of coke lol...
-
Omg, amazing tut. When I was younger, I could see these things without a second's hesitation... I went through a whole book of 'em... Now... it takes forever to see 1!
-
Awesome tut... I was wondering how to do that... I finally got to make virtual dice!
-
Back again... but this time I experimented a bit... (I once again used google for the pic... Gotta love search engines
) I used surface blur, and I think it works better... It preserves the shadows a bit. -
Hehehe... my vampire is purple... And has a green tongue... Nice tut!
-
I tried again with the example pic... The eyes are very stare-y... and kinda scare-y because of it...
-
Good tut...Here's my first attempt with Caitlin Kinney from So You Think You Can Dance... hahaha I think I overdid the makeup...
-
Woah... It does something totally cool to the fire... I used the Linear (Relected) Gradient to make fire instead of clouds... and Voila... Cool accents to the flame.... On the full size, it has colors mixed in on the after... Nice effect & Nicely done tut!
-
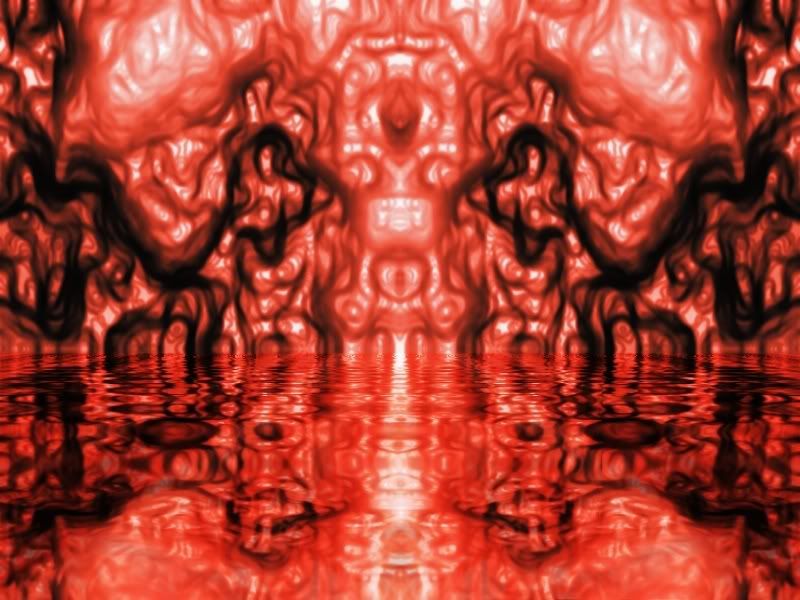
Flesh and blood!

I kinda see some idol-looking thing in there... Intentional?
-
Hey, I'm just adding another example!!!!
-
Hey all... Great tut, and gave me an idea thats a bit of a spin off... but same idea! Perfect for text, with a few tweaks!

-
First tut, so don't laugh... It is kinda gruesome, but a cool effect.
This tut will be mostly in pictures, so just follow the arrows on the screenshots. Most are self-explanatory.
You will use:
Paint bucket
Gradient (reflected linear and radial)
Curves
1. Fill the Background with black.

2. Add a new layer, you can name it if you really want...

3. Select the light grey on the pallette for your primary and clear (0 on the transparency alpha) and use the linear gradient or the radial gradient (see arrows).

4. Make a line or radial on New Layer.

5. Repeat 4 until you are sastified with the result.

6. Go to Effects>Render>Fire! while still on New Layer. Adjust until you are satisfied with the results.

7. Go to Adjustments>Curves and adjust the luminosity to darken the 'blood.'

8. Go back to Curves to make it redder. Notice that it is still separate from the background. Do not flatten, since it will mess with the coloring.

9. Once again, go back to curves to fine-tune the darkness on luminosity.

10. Finally, we flatten the image and voila! Bloody metal!

Don't be afraid to show what you've made!
Thanks to Sarkut for the link back to the plugin!
-
First tut, so don't laugh... It is kinda gruesome, but a cool effect.
This tut will be mostly in pictures, so just follow the arrows on the screenshots. Most are self-explanatory.
You will use:
Paint bucket
Gradient (reflected linear and radial)
Curves
1. Fill the Background with black.
2. Add a new layer, you can name it if you really want...
3. Select the light grey on the pallette for your primary and clear (0 on the transparency alpha) and use the linear gradient or the radial gradient (see arrows).
4. Make a line or radial on New Layer.
5. Repeat 4 until you are sastified with the result.
6. Go to Effects>Render>Fire! while still on New Layer. Adjust until you are satisfied with the results.
7. Go to Adjustments>Curves and adjust the luminosity to darken the 'blood.'
8. Go back to Curves to make it redder. Notice that it is still separate from the background. Do not flatten, since it will mess with the coloring.
9. Once again, go back to curves to fine-tune the darkness on luminosity.
10. Finally, we flatten the image and voila! Bloody metal!
Don't be afraid to show what you've made!
Thanks to Sarkut for the link back to the plugin!
-
my best attempt....[attachment=0]planet2.jpg[/attachment]
-
my best attempt....
Glass Boxes/Windows | New + Better Pictures
in Tutorial Graveyard
Posted
You could highlight the part you want magnified and copy it to a new layer. Use the layer properties to zoom it on the Rotate/zoom... then select the empty area on either side and invert the selection. Merge layer down, make a new layer, and proceed as normal! See the kitten pick below... I used it there.