


Bespectacled Squid
-
Posts
51 -
Joined
-
Last visited
Posts posted by Bespectacled Squid
-
-
*sigh* Is your real name Edward? Wouldn't be surprised.
Anyways, great tut! I'm not much of a Twilight fan myself, but this will suuuure come in handy! Bookmarked!
I shall be a Vampire. Rawr.
Psh, sparklepires don't even have fangs. Lame.
Happy to be of use, though.
&& everyone else's tries look fantastic. ^^
-
Cool tutorial, I might need to try this one for fun.

Thanks! ^^

The lipstick is very becoming ;D
-
Very cool.
Less rings and they'd look almost like the portals from Portal.
Obviously you'd have to add stuff to it, though. xD
-
Very nice. You could make the fangs more non-triangular... make the sides curved a little.
I would try it but I don't have enough time.
Thanks.
But how do you mean, the sides curved?
-
this is awesomee xD
Thanks!
-
Flowers!
-
I can't describe how much I love you for this. xD
I refrained from putting text, since I thought it looked better without my username. Just gotta wait till I can decide what to put on it. ^^
-
THANKYOU
So much!
I'm in the middle of writing a tutorial and can't remember which effects are plugins! xD
-
You're very welcome then, I guess. xD
-
None of the pictures are showing up. But the result looks nice. I'd try grayscale to make it more wall-like.
-
Yay!
Thank you so much!

-
This tutorial is available as a PDF. Click here to view or download it
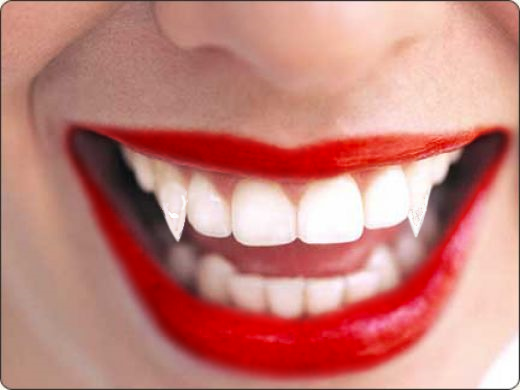
Hi! First tutorial, and have been playing with this effect a lot. Here are a couple of my tries:
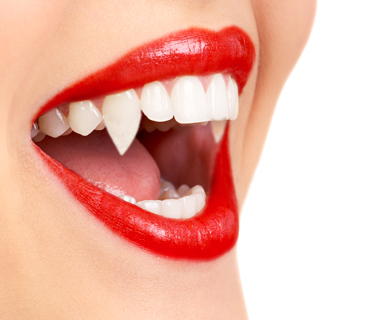
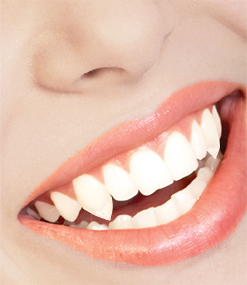
Okay, so first off, find an image. You'll have to use one with an open mouth, I googled something like 'teeth smile' or 'open teeth smile'.
If you're gonna change the color of the lipes (i.e. give her lipstick) then it also helps to have an image where they already have some on, so it's easier to see where the line of color that you make should stop.
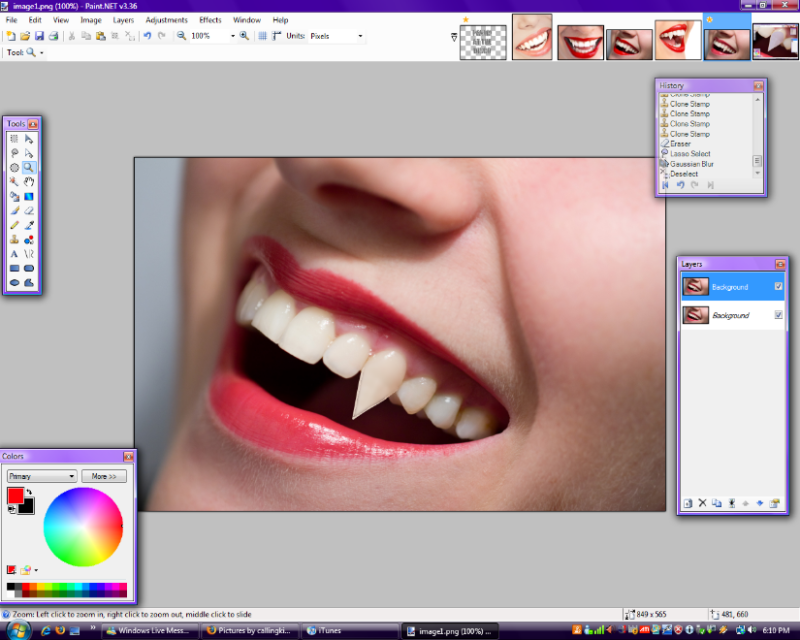
First thing you'll wanna do is copy and paste it into PDN. Then, you'll have to decide which teeth you want to be the ones with fangs. For the sake of this tutorial, I'm using an image where you'd have to do the tooth in the background, but one that is straight on where you can see both teeth you want to put fangs on, just redo whichever steps needed.
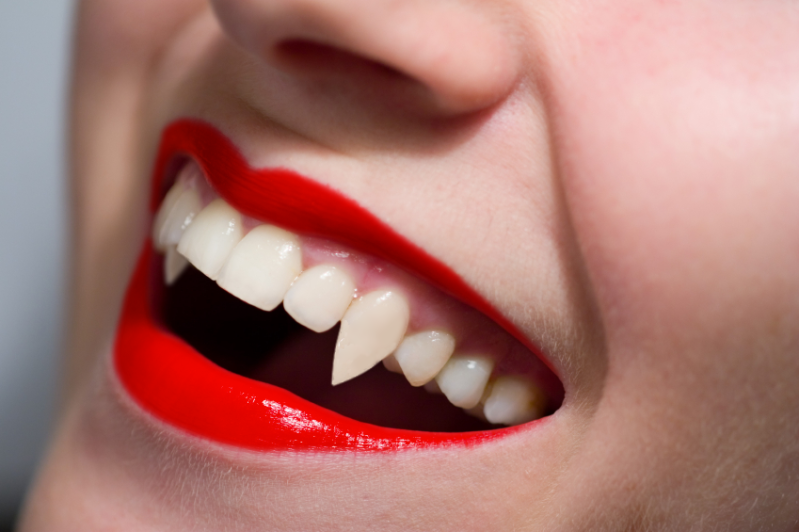
I'm gonna use these teeth:
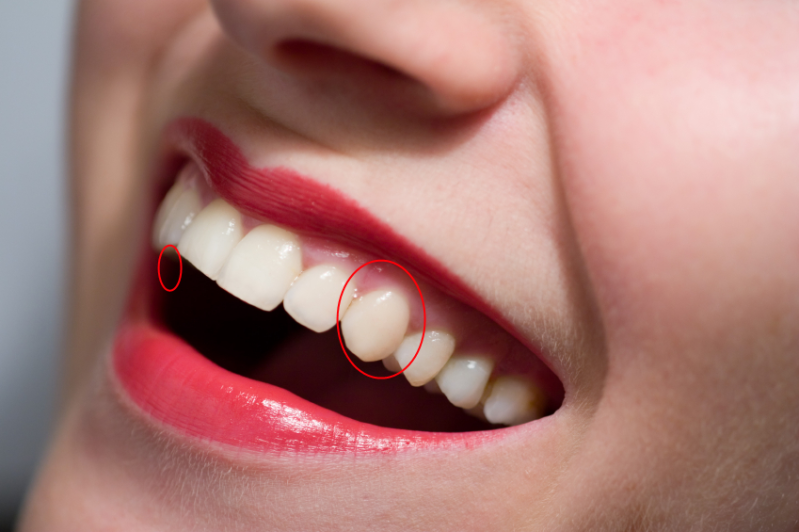
Next, you'll need to use the eyedropper tool :ColorPicker: to pick a color similar to the tooth you're going to do the first fang on (i usually use a color toward the center.) For this picture, I'm gonna use the color #E0CEC0
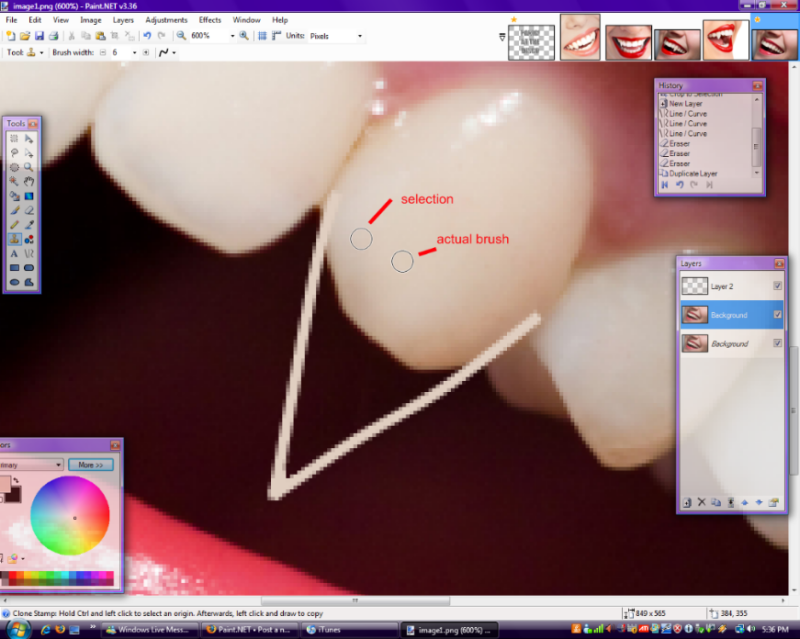
Now, you'll need to make a new layer. Using the color you just picked, draw the fang outline with the line tool (:LineCurveTool:)
To do this the most realistic way, first find the natural tooth's point and draw a line from the point to where you want the fang's point to be. If you start making a ton of these pictures like I did, soon you won't have to do this and you'll be able to tell just by looking where the natural point is, if you couldn't already.
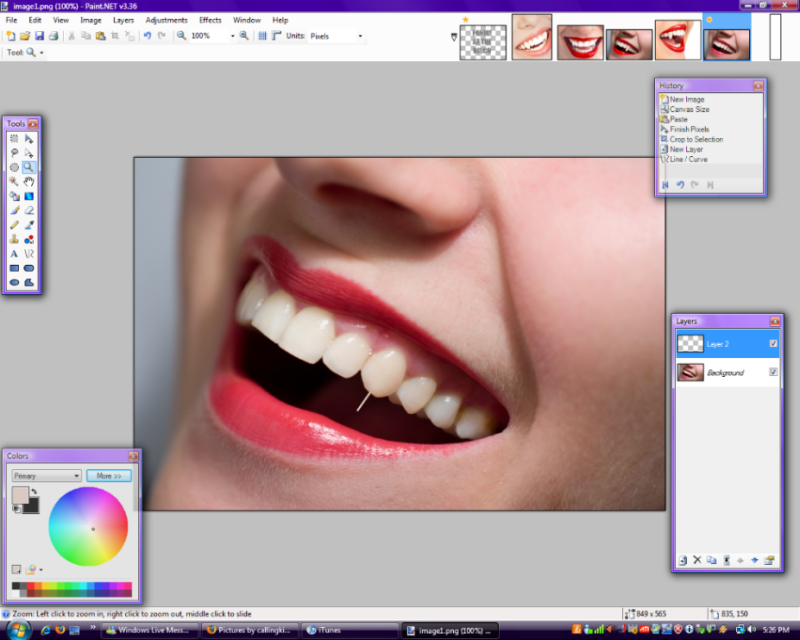
Now, draw the outline of the fang meeting the center line at the tip.
(as you can see, I made the center line a little longer than the first picture just because it looked better that way, showing you'll have to experiment with fang sizes and lengths to make it look the best)

Now, you can erase the center line. (I'll just skip the photo for this step, it's not that hard xD)
Next, the hard part. (second hardest, really, depending on your photo)
Duplicate the layer with the original picture on it, so if you fudge up a ton, you can just restart by deleting the layer you're working on. Now, select the clone stamp tool in your tool window :CloneStamp:
Start by selecting the lightest part of your tooth. I used brush size four or five to start with on this picture.
Now, begin filling in the lines you've already drawn about halfway.
STOP
When you get to about here (where it starts to get darker), stop clone stamping
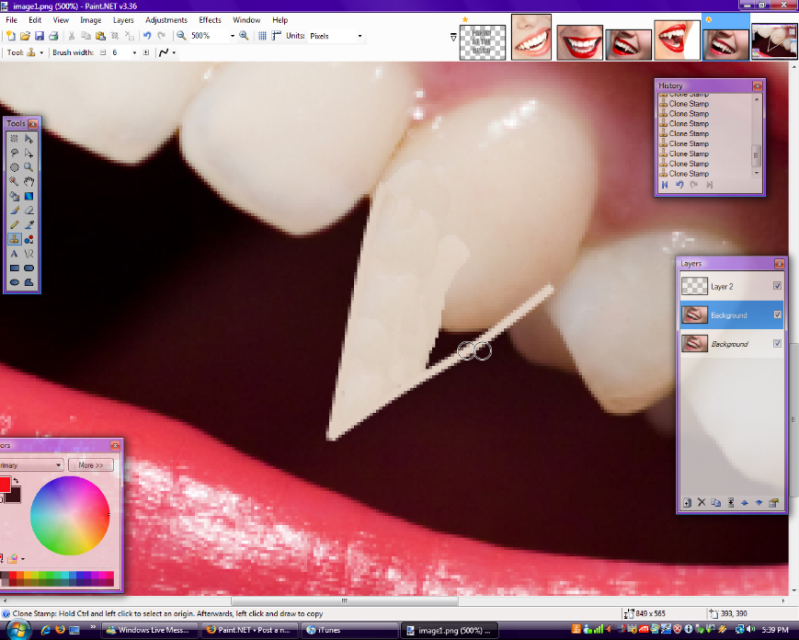
Now, go back to the layer where you have the outlining lines for the tooth. Merge it :MergeDown: with the layer you're clone stamping currently.
Now continue clone stamping, this time using the darker color instead of the middle of the tooth. It's okay if it looks pretty crappy now, we'll fix that in a little while.
Obviously, clone stamp over that glaringly whitish line that's contrasting the darker shades of the tooth.
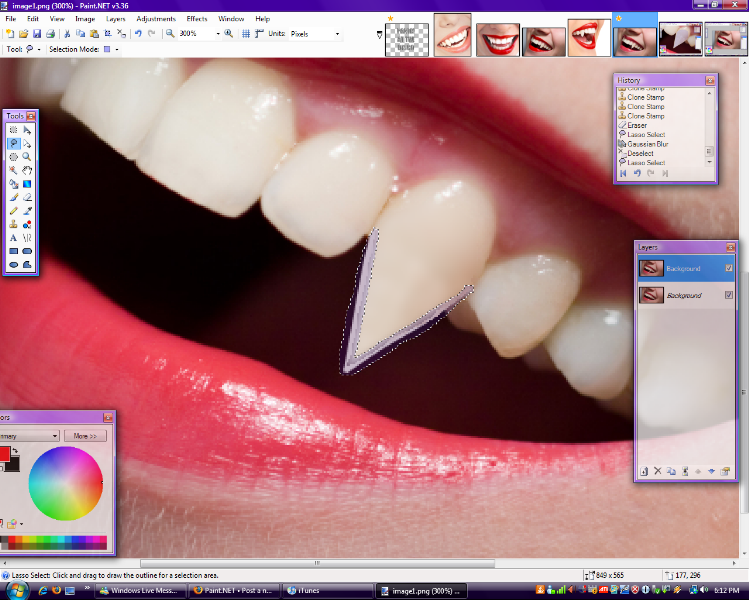
Now, to make it look less crappy, select the lasso tool :LassoTool: . Leaving a little bit around the outside, select the inside (all the clone stamping) of your tooth.
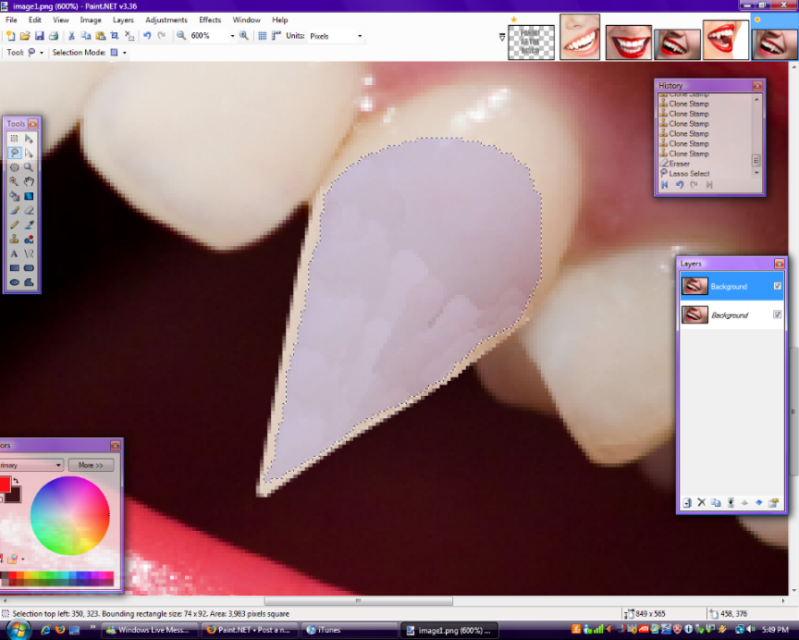
It helps to zoom out at this step, so you can see better.
Next, you wanna Gaussian blur. I used it around 6, but you'll probably have to adjust it depending on your image. Now it should look like this:
You'll notice the edges look a little wonky.
Lasso select the edges like so:
Now, Gaussian blur again. Like last time, it'll depend on your image, and what looks best in comparison to the other teeth showing.
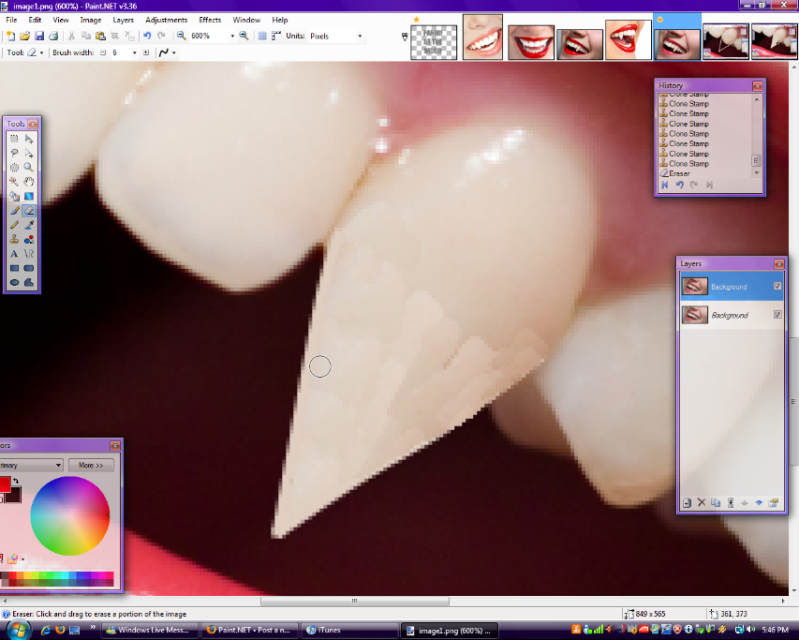
Tah dah!
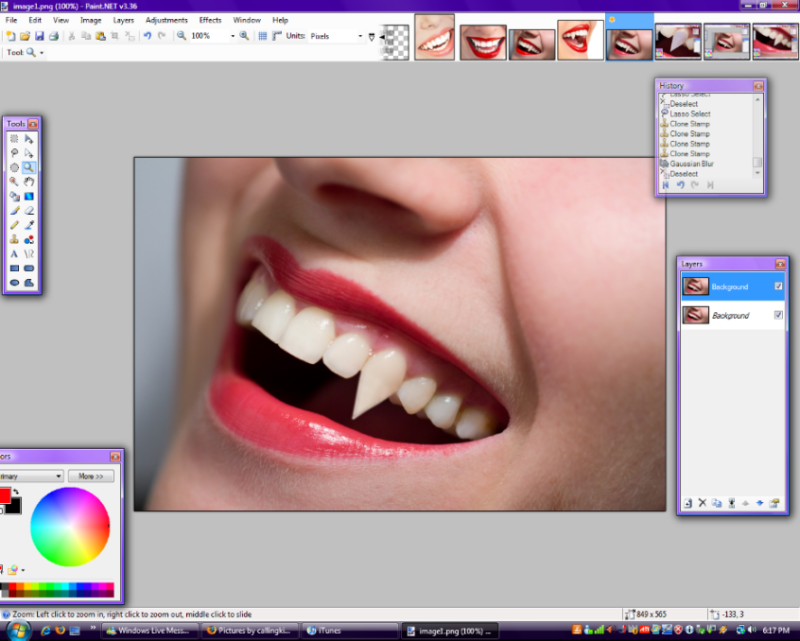
You now have one fang done. If you're using an image where both the fangs are showing, you'll just repeat the steps you did. If like mine, where you can't see the tooth you'll be fanging, continue on to the next part.
Current image (with one fang done, I know the shape is a little weird looking, sorry, I did this really quickly):
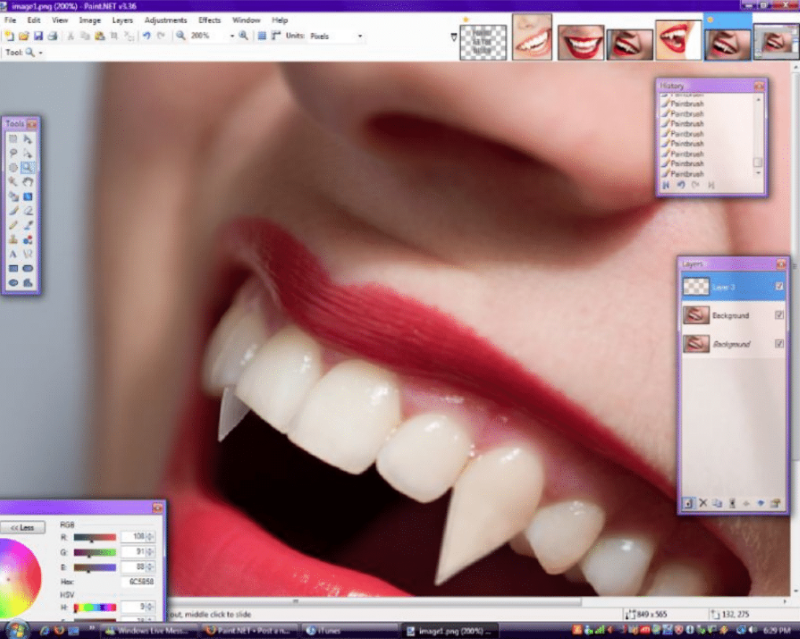
Now, referring to the first image in the tutorial, you'll figure out where your next fang should go. In a new layer, select the colors of the tooth next to it to outline (I'm using #A49A98) Since this mouth is tilting up and isn't straight (plus the tooth is farther back in the picture) the fang will be shorter-looking than the one you just completed. This picture is extremely easy, since it'll just be blurred like the last tooth you see to the left, so it doesn't have to be perfect. Other pictures will be harder.
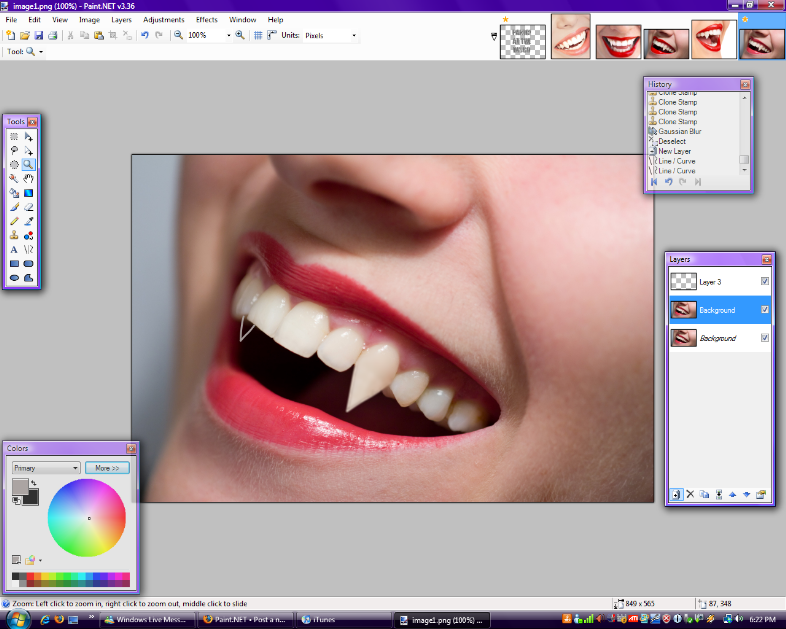
Now, the light will hit it in the front and it will gradually get darker and browner the farther you get to the back of the teeth. Changing the color every so often to make it go darker like so, use the paintbrush tool to fill it in like this.
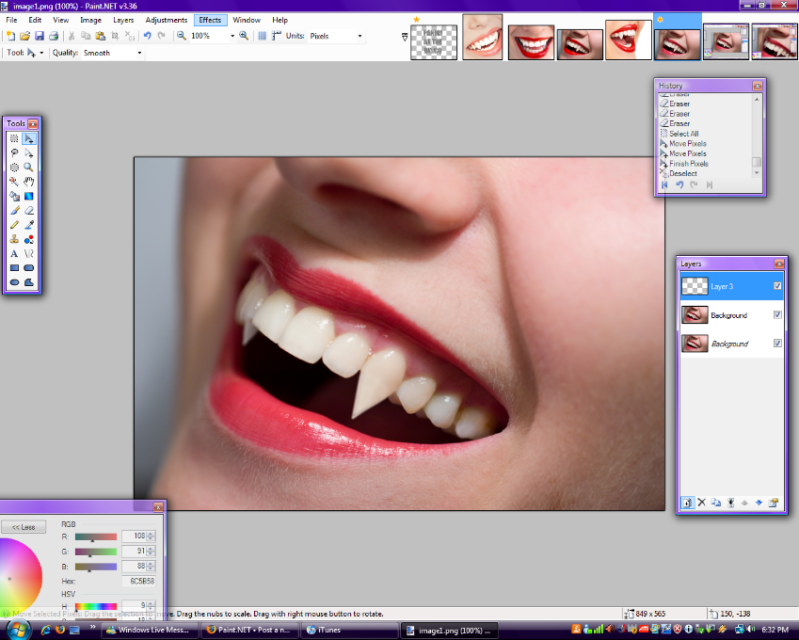
Now, Gaussian blur it.
I used about 4 px, but again, depending on your image, it will vary.
You might need to go into adjustments->brightness/contrast to lighten or darken the fang accordingly depending on how it looks. I needed to lighten it up here a bit, and then you're done!
OPTIONAL
Now is how to turn the lips RED!
So, you have your image from before open. First, make a new layer, and double click it in the layer window. A box should pop up, and then set the layer mode to overlay. Now, pick a red color in your color wheel, and use the paintbrush to color the lips red. You might need a dark red over some color lips to make it look less orange, so experiment with the color.
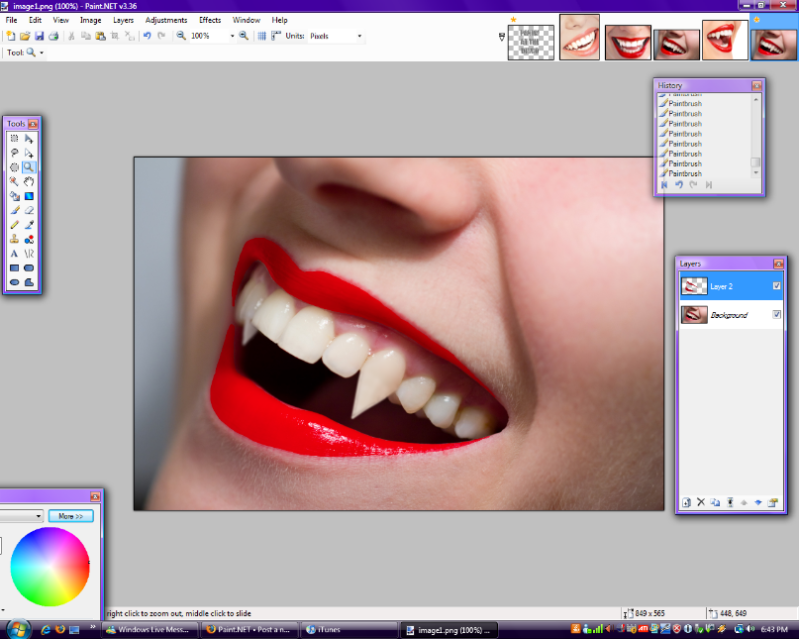
Now it kinda looks like lipstick, right? Yeah, not really. So, we need to make it more realistic. First is to gaussian blur, I used about 7px. Double click the layer again to bring up the layer properties panel, and bring the opacity down a bit. I put it at 176, but your picture will probably be different.
And...
YAY, ALL DONE
Final product:
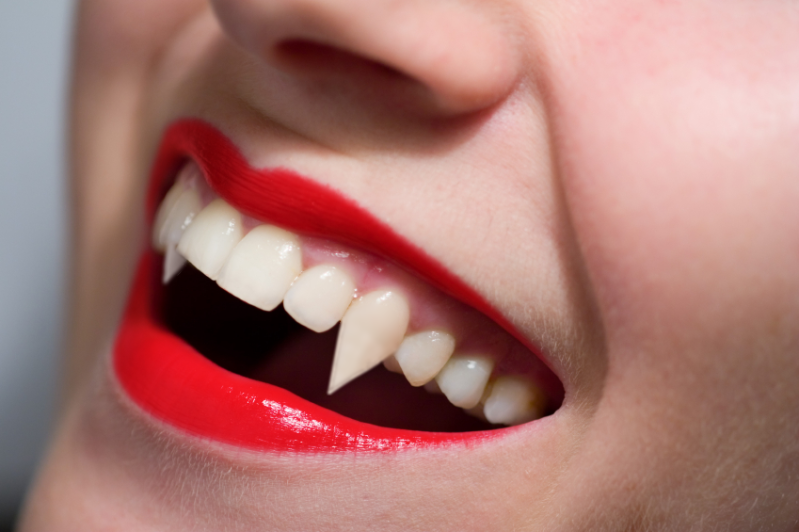
Like I said, these fangs look a little funny here since I was doing them so quickly *facepalm*
But for better references, check out the first couple images. They're also examples of other fangs I've done.
Show me your results and comment/rate this tut, please!
Thanks!
-
 1
1
-
-
Already checked it out, tried a bunch of the things mentioned and a few just don't even fit my problem xD
But yeah...it's making me sad >.>
-
Are you sure you just didn't delete the shortcut to PDN? Just create a new shortcut on your desktop with the destination to "C:\Program Files\Paint.NET\PaintDotNet.exe"
Or you could have partially removed some of the files from PDN (highly unlikely) or something might have accidenlty been moved. Just go to your control panel and "Add or remove programs" Unintall PDN then try again.
Just one thing, the question should have been, Gah! My PDN Won't re-install!
Good luck!Yeah, I'm sure it's not the shortcut. And if it was, why would there still be an error when re-installing?
I tried going to the control panel and uninstalling it, but it came up with the same error Dx
-
*facepalm*
Sorry, didn't realize there even was a troubleshoot forum xD
-
Looks nice, only thing I'd suggest is lowering the opacity of the white part even more...
-
So, the other day I realized I had about zilch disk space left. I start going through my old files to do a little spring cleaning. After deleting a ton of stuff, my recycle bin was full, so I had to empty it. Next day, i go to open PDN and...
GAH!
It's gone!
So, no problem I figure. I just go and re-download it and the few plugins I had, right?
Wrong.
I get to the PDN download page, get the installation started, etc. About half way through, an error pops up.
"There was an error while installing Paint.Net. (1603)
Fatal error during installation"
Okay, so I groan, restart the installation, same thing happens.
I throw up my hands in disdain and mutter at my computer for being such an idiot.
(at this point my brother gives me a very strange look)
Anyway, does anyone have any idea on how to fix this? I really miss PDN and I'm ready to stab myself in the eyes from using paint.
thanks,
(with hearts and other intimate organs)
'squid
-
Paint.Net will just cut it off, so try flattening all the layers then copying and pasting into paint?
-
Paint.Net will just cut it off, so try flattening all the layers then copying and pasting into paint?
-
PDN is /MUCH/ faster, easier and less confuzzling to use. I have Photoshop Elements (not the real one, unfortunately, though my school computers have Photoshop) and if I run more than one other program when using it my computer crashes >.
-
PDN is /MUCH/ faster, easier and less confuzzling to use. I have Photoshop Elements (not the real one, unfortunately, though my school computers have Photoshop) and if I run more than one other program when using it my computer crashes >.

Vampire teeth!
in Image and Photo Touch-ups
Posted
Eh, you're right, but it's not quite as sharp looking. Plus the shading isn't as accurate. It would be easier for more far-away photos, since these details wouldn't matter then, but for close ups I think it has issues.