


TeachesWithPDN
-
Posts
38 -
Joined
-
Last visited
Content Type
Events
Profiles
Forums
Blogs
Gallery
Downloads
Posts posted by TeachesWithPDN
-
-
A better, more accurate (though slightly more complex) method to cut out is to use the 'Alpha Mask Import Plug in'. This method makes the edge pixels transparent (much like feathering does in the above example) which will help it integrate into your new background later. I started to prepare a video tutorial on this method, but never finished it. I'll try and find it - if I can't - I'll make a new one...
Here goes...
1a.Open image you wish to cut out
1b.create a new layer and fill white, change opacity to suit image (white as possible but clarity of 'background' layer is still required)
2.Create new layer (don't forget to name your layers BTW - it is a good habit/practice to get into whilst learning)
3.Ensuring the newest layer selected, select 'Line/Curve tool' (Keyboard Shortcut 'O')
4.Make sure you select black (you can change the layer opacity ~200 to make it transparent, which will make placing this line easier)
5.Select a line width appropriate to your image size (you want a little overlap, the alias of the line WILL BE IMPORTANT)
6.Use multiple, overlapped lines/curves to outline your object, being careful to line the outside of your line with the outside edge of the object (ie the outline of the area you want) - use the 'nubs/handles' to make the curve meet the edge nicely
7.Once finished, ensure you enclose your shape (ie make the ends meet)
8.Use the magic wand to select the transparent area outside your mask, as well as most of the anti-aliased outside edge (try tolerance about 68-70%)
9.Invert the selection and fill the selection black (the black area is your mask)
10. merge the layer down to the white layer below and return both layers' opacity to 100%
11.select the mask layer and copy to clipboard (Ctrl+C)
12.select the background layer (originally opened image) and use the Alpha Mask Import (Effects > Alpha Mask) - delete the mask layer (unless you want it later)
13. Save the image (save as a .PNG file to preserve transparency - if you didn't delete the mask layer, turn it off first)
14.Open the image you want it in and use 'Layers > Import from file' to open the .PNG you just created
Notice how the cutout object merges nicely into the new background with its own pixels, not estimates feathered in... beautiful...
-
One of the most useful plug ins EVAH!!! I use it for cutting out images accurately...
Just one suggested improvement/request - is it possible to get it to use a selected layer in the current drawing as the Mask? (although having the ability to use the clipboard is an awesome improvement and will probably do what I am asking anyhow)
-
Just installed this update - playing with 'halftone' - "AWESOME!!!" :wink:
-
I made this ages ago, in the old Pictorium...

-
Teaching Comic Layout... so I made this example...

-
Just one to keep something new in here... my son on a recent snow trip (Smiggins Holes, NSW), new DSLR (Canon 400D - thanks for asking)... a dash of inspiration from one of wife's scrap-booking magazines (words + letters around edge)...
Background textures from CG Textures - very cool site ;-)

-
Sitting at the dinner table tonight, I just got struck by a simple idea to make 'vector-style' clouds...

-
I'm Teaches With Paint.NET... I am a Media Teacher in Canberra, the capital of Australia. I teach Digital Imaging topics using Paint.NET because students are able to download it for use at home - and it is so damn good!!!
So here is my Gallery...
-
@sabrown 100 & Mike Ryan: for image manipulation, I use Paint.NET exclusively... Photoshop Contest is just a Image Manipulation competition site that I came across many years ago through Fark.com... Having a set image to manipulate can help with creativity when you've got "imager's block" :shock: ... I try to encourage my students to do stuff like that to take their work "out of the classroom" and (kinda) "into the world".
I haven't played with Photoshop since I discovered Paint.NET (around 3 years ago). It is far simpler for student's to "grasp", but lends itself to more advanced application should students be interested enough.
-
Very cute tute... saw it ages ago, but only sat down to have a go with it when some of my students did it today! So here is mine (no "tooning" - played with other things instead):

A mini Lotus Exige (these things look great racing)

-
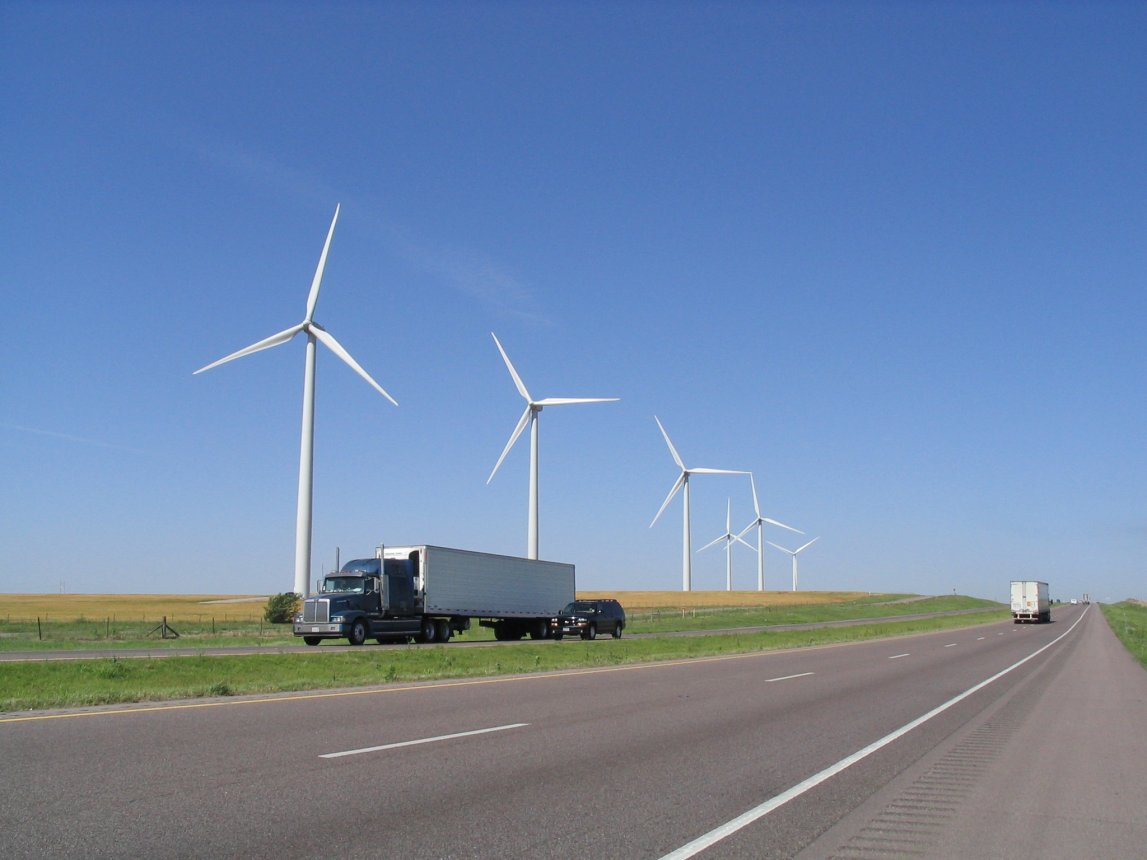
My entry for a Photoshop Contest competition...
20 mins, and not much 'magic' save for the 'radial blur'...

From an original image @ http://www.rogerwendell.com/images/wind ... 2006_2.jpg
-
Myrddin nailed it with that link - but in short:
1. Images need to be on seperate layers (allows more control - can always "flatten" or "merge layers" afterward)
2. Click on the Gradient Tool (
 )
)3. Click on RGBA dropdown ( :AllColorChannels: ) to ensure Transparency ( :AlphaChannel: ) is selected
4. Select layer with first image
5. Click where you want transparency gradient to start - hold button and move to where you want image to be fully transparent and release button
6.repeat steps 4&5 for 2nd image
7. Voila! Done...
Did that work?
-
If I understand correctly, you are trying to composite images (put the subject from one image onto a different background)?
You'll need the Alpha Channel Mask for that... try to follow these directions http://www.geocities.com/gerry_satrapa/Compositing.pdf
PM me if you need more detailed instructions or more information... :wink:
-
One way to crop easily back to the same size is to create a new layer and fill it a colour that stands out (I use a horrendous pink, 'cause I ain't likely to use that anywhere intentionally. Anytime you need to return to the original image size, use magic wand to select somewhere in the resizing layer, then use "Crop to Selection" to return your image back to that size.
Obviously, you can simply import the image to a new layer, whatever the size is, resize the new layer appropriately (ie "move selected pixels", move nubs (handles) then do the above to return to original dimensions...
...well - that's what I do anyhooooooo :?
-
@Illnab1024:
I should have said this months ago:
Most.Useful. Plug-in. Evah!!!
In my media classes, I get my students to do A LOT of image compositing - and this plug-in makes it a breeze...
If anyone is interested, I posted a Student Handout: (http://www.geocities.com/gerry_satrapa/Compositing.pdf)...
Is it worth a Tutorial (PM me if you think so)? I did search, but couldn't find a similar tutorial

-
I haven't posted anything here in a long time. I'm a 2nd year Fine Arts:Major / Computer Science:Minor at LSSU. I feel I that I should give a little back to the community that I love some much. Here is some of my work over the last year or so. I've compressed all of them to fit under the 256KB limit because I'm too lazy to upload else where.
I Like "Goddess" piccie - but perhaps play with transparency so some of wall texture shows through. BTW everyone - lots of good background textures @ http://cgtextures.com/
-
@Pluberus:
probably 800x600 or 1024x768 (check under Start>Control Panel>Display>Settings for your desktop wallpaper size)
-
I wondered what all the fuss was about with makin' planets - I just did my first - and now I know :wink:

-
@rhona
As my username suggests, I use Paint.NET in my high school Media classes for intro-ing image manipulation - great because the students can download for free at home (unlike certain other popular imaging progs)...
I have a few worksheets etc on things like cropping, resizing and also compositing images. I will PM some to you tomorrow from work if interested... and I might add some in this post to make them available to all...
...the kiddies love to PDN - oh yes they do :wink:
-
Are we allowed 2 - I played


Anyone see Moses around?
-
Am I the only one to notice the perfect circle that's cut into the ground around the tree? o.O
question>
Probably a grate around the trunk, you know - one of those wrought iron numbers they put into paved/concreted areas... and they break, and get raised up in sections and, well, stuff... and then the snow appears to be "cut in"...
-

Nightvision goggles!?! :shock:
-
@Rai Shizaki:
OMFG! Awesomeness (especially loved 2nd pic)
@Mike.Ryan52:
K.Diggenarro was talkin' to me :wink: (I asked if I could use one of his piccies in a tute on layer masking)
@HaPK:
Pixel Art is awesome (I'm teaching a short unit on it this semester at school!) - have you checked out pixel moonhttp://pixeldam.net/indexpixelmoon.html or pixel damhttp://www.pixeldam.net/? I love that PDN locks lines to 15 degree increments (great for isometric pixel art)...
@Wither:
The series of "space" sigs is looking gr8 m8!
@Expiration:
Love the "industrialize" piece!
I think that just about wraps it up :wink:
-
@ k.digennaro:
can I use one of your scanned in characters for a quickie tute?

 )
)
Cutting out images
in Beginner Tutorials
Posted
Cutting Out using Alpha Mask Import Plug In Tutorial, as mentioned previous post, on YouTube: