


massive_frog2
-
Posts
68 -
Joined
-
Last visited
Posts posted by massive_frog2
-
-
Just reset my password so I could into my account again, so I thought, right SoTW.
 really hard stock to use.
Stock pack can be found on deviant art: http://mizzd-stock.deviantart.com/art/S ... -115873479 All the rest is my own work.
-
Yeh, kinda.
Although I'd say that this one isn't, but I wrote it a long time ago (on my other account which I lost the pass for and it wouldn't recover) so it's not amazing..
I wrote a better one here
-
Nice outcome. I'd try blurring the people other than the middle guy a bit more so he stands out more.
Also, some of your sig looks a bit low quality, I'd try saving as a .png instead of .jepg as it keeps better quality.
Other than I'd only say, text never looks good in the corner, but text placement is hard so I never used to do it untill I 'got' it.
-
Both those sigs are great. Thanks for using my tut.
-
Quite a few views but not many people comment. Atleast I know people are looking.
-
Well, he'd be freaky girl
-
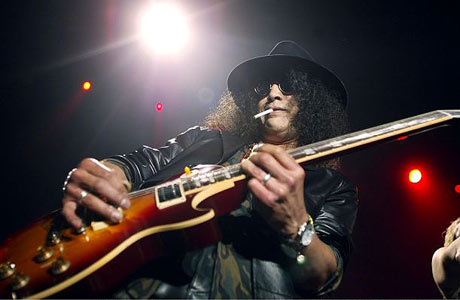
Just realised I never posted these.

And I was also asked to make some metallica sigs elsewhere.
Ignore the text on these, it sucks


-
I like the band one ^_^ but the last one is really cool except for the huge strip going down the middle ??
Thanks. The strip I guess is just experimental stuff, I wasn't sure if I should post it or not but I did.
-
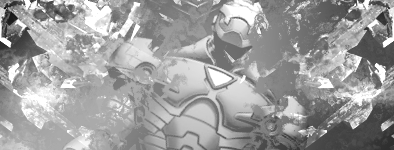
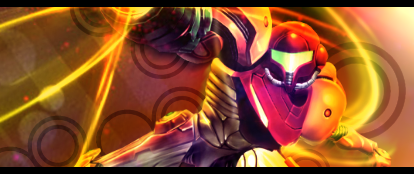
i really like the samus one
everything is matching good
just the render feels a bit unblended
Yeh, I have had that CC before, lol, I get the same with all my sigs, but it's still nice to hear people are paying attention.
I always read this topic, But I only comment every now and then. Your sigs are beautifull.Thanks:
here are some new one:

-
not bad.
will help a lot of new members

KIU
Well I always try to make tuts as easy as possible now so that anyone can use them.
-
Totally updated my OP, check it out!!!
-
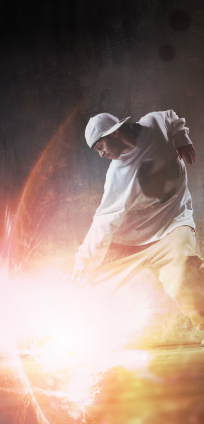
Today (or any day you want really) we will be making something like this:
C4D used can be found here.
Rainbow Twist filter can be found here.
Feel free to post outcomes, I want to see how well this works for other people.
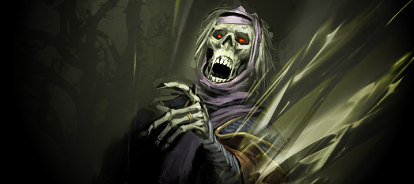
Okay, first off, you need to find a stock. I used this one
as it has a lightsource and flow already built in. A good stock can be found using google by typing in he person you want a stock of.
Open it up and label this layer stock. Crop/re-size it into a sig size/shape keeping the focal/guy slightly one side of the centre.

1. Now we have our stock we can start sig making (yay), so we are first gonna need to duplicate the stock into a new layer. Then Gaussian blur one of the layers, I used around 30 radius, and move it too the bottom. Name this layer ball effect. We will need this layer later.
2. Create a new layer and move it to the top. This layer will be our lighting layer, so name it accordingly. On the lighting layer, draw a big white blob (brush tool) were you want the light to come from. I suggest using a lightsource to mark where to draw if there is already one on your stock.
3. On your lighting layer, use effect-blur-zoom blur. Set the amount to full, and move the sliders untill it get to the centre of your blob. ctrl-F to repeat this untill it starts to cover you main focal (the guy in the stock) a bit. [Optional]Adjustments-Colour balance[/color] to recolour it slightly]

4. Next, we are gonna need to start adding some effects. Create a new layer, call this layer temp effect and select the brush tool. This is were it starts to get tricky, we are going to need to draw lots of little balls in at random sizes, following the flow of the stock.Make sure non of the balls are touching. It's better to over-do it here than under-do it, as you can erase them later.
5. Once you are happy with them, select the magic wand tool. Now change it's flood mode to global and click on one of the balls to select them all. Ctrl-i to invert the selection, then go onto the ball effect layer and hit delete. You no longer need the "temp effect" layer so you can delete it.
6. Move the ball effects layer above the stock layer. Erase anything that looks bad on it now and then Gaussian blur at 2 pixels. Set the layer mode to screen, you may need to adjustments-lighten if they aren't showing up well.
http://img519.imageshack.us/img519/2708/balleffect.png
7. Create a new layer called Rainbow colour. Move it above the ball effects layer. Now run Effects-texture-rainbow twist. Move the place thingy so it it roughly over the lightsource. Change this layer to overlay at opacity between 60 + 100, I used 77. Gaussian blur at around 40.

8. A bit more blurring next. Duplicate the stock layer and call it blur BG. Gaussian blur at around 5 so it looks out of focus. Lower the opacity to about half so you can see the layer under it and erase over the focal/person. Change opacity back to full the hit ctrl-f to repeat Gaussian blur.

9. Create a new layer and move it to the top. Call this layer gradient lighting. Make your primary colour white and secondary black (opposite to default) and draw a radial gradient with the white over where the focal/guy is. Set this layer to overlay at around 130 Opacity.
10. Make a new layer below the ball effect layer. Call it C4D layer. Paste the provided (or another if you wish) C4D into the layer. Scale, move and twist it untill it matches the sigs flow. Once you are happy, press Ctrl-d to de-select. Change layer blending mode to additive. Erase/move anything that looks bad. Conditional hue/saturation it to change it to a fitting colour.

11. Finally, make a new layer and move it to the top, call this gradient colour. Select to colours that would look out of place in the sig but are not bright. I used a dull yellow and light brown. Draw a Linear gradient from left to right. Change layer settings to overlay at 109 opacity.

Finishing up:
Text, use the text tool on a new layer and write a simple one/two words to suit the sig. This layer is best fitting above the ball effect layer.
Border, Select a few pixels wide border along the top, fill black. Ctrl-A to select all then Copy + Paste into a new layer and spin it onto the other side.
C4D, I also increased the the brightness and contrast of my C4D layer.
Finished sig should look something like this:
-
-
New sig:
Starting to feel like no-one is reading this thread anymore.
-
-
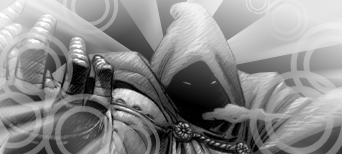
It's basically, texture-less shapes.
You see those funny circles in my pic, those or vector rings. And those light rays, I suggest you look up some more stuff, it is brilliant fun.
-
If that doesn't work (though it is the best way), you can always try making another layer above, colouring over shirt with brush tool, blurring it a bit and changing the layer settings until you get it right, but you do need a good eye if you wanna get it perfect.
P.S. if you post a pic of the person's shirt you wanna change then I will do it for you and tell you excatly how if you still can't do it.
-
 , did this a few hours ago. BTW, if anyone wants any help or vector brushes, just ask.
-
Yay, I inspired someone.
-

Collab with a friend called yuyuter (he is on kong), man he knows how to vector.
-
Made whilst waiting for a friend to send back a collab'd sig we are making. Thought I'd make a vector sig for a change, though I couldn't find any brushes, still didn't take long to make them.
-
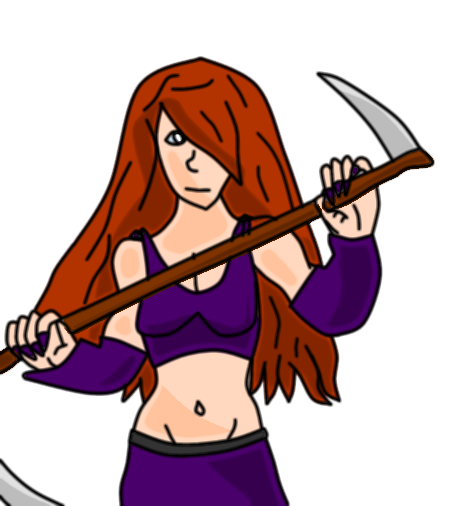
Could this count?
It does say decaying, and returning to nature but I'm unsure.
-
Thanks, lion took about 25 minutes, which is quite a while.
-
Photoshop style sig. Really easy. Includes pics. C4D usage.
in Tutorial Graveyard
Posted
Nice, I really like it. I think your C4D could do with some moving/resizing/removing but apart from that, really nice flowing sig, congrats.