


adel
-
Posts
33 -
Joined
-
Last visited
-
Days Won
1
Posts posted by adel
-
-
great outcome AGJM
 , if you still like this you will be better in a short time.
 -
I love this way comments, it let the practice (with time) to give more and better however his level is bad.
thank you Yellowman, and barbieq25
-
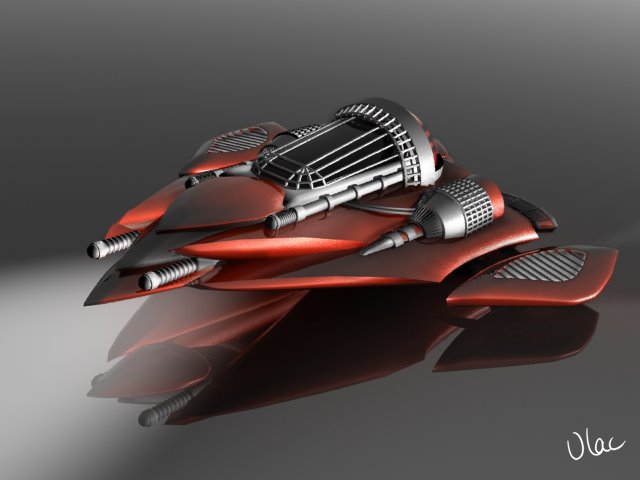
hello...i tried with 3d shap and i got this pic ( i know that's very simple
 )
) 
-
really this is what i want
, it's great works , i like all the tree shipsthank you very much Yellowman.
-
Thanks pdnnoob ; it was helpful comment ; now i download blender and i will try it,
but i want to creat it only with PDN.
-
If you give an idea of what sort of spaceship, post a link to an image and we'll be able to give more help/ directions
Hello Welsh....like this one ( not exactly )
-
Hello....i want to design a spceship, can some one help me ?
-
Thank you all ( Welshblue, barbieq, Helen, Yellowman,Moninca ) i'm so happy after this comments
...i think in this forum i not learn only design with PDN but with people like you here i learn politeness, english and how i help people.
for this pic i tried to do some thing like an explosion planet ( but it was difficult )

after Welshblue comment (thank you Welsh
)
-
@ HELEN, @welshblue
thank you for your comments
, really you are giving me power to continue with pdn not like some other peopel.and this is the second pic in my gallery

to be continue inchallah
-
to pdnnoob First i'm not liar
 , my name realy is Adel , and shortly you will see great ... soon
@ beautifull Barbieq25
thank you again for your encouragement , and from you we learn
-
Welcome To My Gallery
--------------- Planets ---------------

Stones
Explosion

Flame

Shine
--------------------------------------------------
-
thank you YM it's nice from you.
i had got the plugin from a member here.
when i finish the tut i will see you the result.
from you we learn.
-
good , nice first try....i'm sure that the other tries will be better.
-
It was nice modification ; Goonfella and Moninca ; thanks for the participation.
Chitodog i'm sorry if the tut was not more explaining.
This Vdo is very helpful Yellowman ; thank you for your help ; but i havn't the plugin ( Hieght field normal map)
i had searched about this plugin but i don't found it !!!!!?
-
ventor1 not at all,
.Goonfella i'm waiting your try don't forget.
YM really it's nice job, can you tell me how you do it ( shortly)?
welshblue great work.
really i'm amazing from your tut's, so i tried to do one like this

-
I have corrected the error ; Thanks for the note Sfifer,Chitodog.
-
Nice end result Adel. However, I was trying to follow your tut, but you lost me at step 8. You say:
So I put my color palette at white (primary) and black (secondary), then I go to Effects >> Render >> but then that's where you lost me. I don't see anything that resembles 'Scale'. Any idea where that is or is that another plugin that you forgot to mention we need? Can you please clarify that step before I can continue? Thank you ahead of time.

i don't forget any step ; it work with me normally ; but you can use other method ; with black (primary) and white (secondary) add a new layer and go to Effects >> Render >> scale : 200, roughness :0,50 , Blend mode : normal ; after this go to layer properties and put the blending mode in Overlay. and merge layer down. good luck.
-
It’s easy tutorial , but the difficult is how to make it clean and real.
We need here essentially :
- BoltBait’s - outline selection -
- Metalize
Secondly : Tile reflexion- noise – motion blur –Splinter- clouds – curves.
This is theresult
Make a background
1- Add a new layer (background ) with : Width (1600)Hieght (800)
2- Gradient radial with color : # C3C3C3 primary , #000000 secondry
3- Effects >distort>Tiles reflection : angle :30 , Tile size : 10, Curvature : 45
4- Gradient radial with color : Transparence primary, #000000 secondry
Metal texture
5- Add a new layer (textur)with color # c3c3c3
6- Effects >Noise >add noise : Intensity :100, color saturation :0, covrage :100
7- Effects >Blurs>motion blur : angle : 10, distance :30.
8- with color :white and black , Effects >render>Clouds scale : 200, roughness :0,50 ,Blend mode : Overlay
9- Effects >Noise >add noise : Intensity :50, color saturation :0, covrage :100
10- Effects >Blurs > Splinter : Number of splinters : 4, Rotation :25, distance :8. (or you can also use motionblur )
Text mask
11- Add a new layer (Text mask) and write your text (just a few letters)with : black color ,Font :arial black ; size : 72
12- With rectangle select you can tronsform your text in a large size ; put it now in the middle
13- Add AA’s assitance to delete pixelated.
14- in the layer (text mask) : - select all Ctrl+A , copy Ctrl+c, deselect Ctrl+d
You are not need this layar now (you can delet it or check out layer).
Apply Alpha mask
in the layer (textur)
15- Go to Effects > Alpha mask : make you sure that (invert Mask and Paste frome clipboard) are checked.
16- with magic wand (floodmode : global, Tolerance: 50%) select the outside of your text and invert selection (Ctrl+I).
17- add your text a few Gradient linear with color : Transparence primary, #000000 secondry (transparancy-alpha : 140 ) .
18- don't deselect; add now Effects>selection > outline selection BoltBait’s : outline width : 10, color diffirent with black and white ( like blue ).
19- Deselect text and select the outline selection always with magic wand (floodmode : global, Tolerance: 50%). Copy the outline.
Outline chrome
20- Add a new layer (outline selection) and paste the copy of outline selection.
21- use magic wand (floodmode : global, Tolerance: 50%), gradient linear, color : black and white to add a chrome color.
22- Add a metallize effect.
Finaly with curves and a few drop shadow you will get a nice result
-
 1
1
-
-
hi..it's very fast effect ... good job my friend
this is mine

-
hello...imm... i'm a beginner but i think with u in this forum i will be better...thanks to all
and this is my try..!!!!!!!!!!!

-
This is my try....Thank u for this nice effect

-
It's not easy effetc....I try with this....

-
Thak u for this effect; it's nice
and this is my try

-
Hello friends..mmmm this is my first work in this forum

What u say ?


Metal text with outline chrome
in Tutorial Graveyard
Posted
Hi all membres
I'm so sorry for this long absent and for the images deleted of this TUT
But it's not a problem i will re-upload all images of this tut soon -inchallah-
My cheers