


ssaamm
-
Posts
17 -
Joined
-
Last visited
Posts posted by ssaamm
-
-
If you are looking for professional photo manipulation, I suggest GIMP. It seems much better suited to what you want.
You will find it for different OS's here
Though it takes some time to learn it, it is very very useful, and seems like the more hands-on approach you are looking for.
Paint.net is made primarily for former MS Paint users, and most solutions to those sort of issues are inconvenient at best.
-
To be honest, it is best for you to save in the .PDN format until you need to make a final version. It does not have a save dialog, so it is not a problem. Also, it ensures losslessness, it is safer in case of a crash, it is generally faster when saving, and it can be deleted when you are done.
Then just "Save As..." into whatever other format you are using.
It may be slightly inconvenient when editing an image to create a copy that is a .PDN, but if you're saving it hundreds of times, it is definitely worth your while.
-
Make sure that the bottom layer doesn't have any special blend modes activated
-
Those are pro quality, I'd say. Nice work!
-
Unironically, anything Curves+ can do could be done in Curves if it had whatever. That's the point of Curves+

I realize this now...Ahh whatever
The internet seems to generally like debating about irony, but that's kind of a no-brainer now that I think about it.
-
Thanks guys! Ironically, this could be done in curves if it had presets.
I'd like to see any results of this and get feedback so I could attempt to make another set of curves for something else.
-
I have put together a collection of vintage-style effects based on actual vintage photographs, for use in making new stuff look older.

Download: >>Click Here<<
The photo I used was taken with a digital camera, and not modified aside from the vintage effect.
-
I have an idea that different channels of an image could be supported in Paint.net
This feature does not appear to me as though it would be possible as a plugin.
I think it would work best this way: there is an extra window, much like the layers one, that shows the channels of a selected layer. It would let you choose whether you want RGB, HSV, LAB, CMYK, or whatever schemes are associated. It would allow you to click on a channel from the list and view only that channel in grayscale, and have all filters apply only to that channel while it is selected. Each channel could be simply deselected by clicking it a second time, allowing you to see what the changes to the channel did to the entire image.
Does this sound possible?
-
For larger images, I think that if they are Gaussian blurred the right amount and you apply the effects multiplied by the resolution of the image you are trying it on, it works just as well.
EDIT: I also found that applying a sharpness effect with a large radius makes it look much more VHS'y
-
Aha! Now I understand.
The new improved tutorial is much better. Has anyone managed to use this on photos with people with any success? In the ones I've tried people always seem to come out looking very red and 'sunburnt' and I just can't seem to balance the colours out to correct it. Any tips?
You may want to try adjusting the saturation lower in step 9.
Otherwise, a black & white image may be the way to go.
-
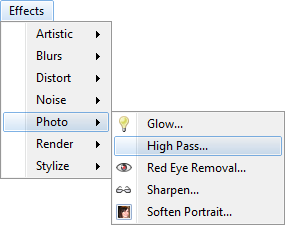
Ok, I've gotten to the step where you say apply a high pass filter to the layer that is color burned. What is the high pass filter? Any suggestions on where I can download the plugin? Or can I Just use something already installed in Paint.net?
Isn't there already a link there?
I found the problem, btw. It thinks because of the url that the extension is .png/ rather than .png
I'll fix that up...

-
Wait, no.
It appears I can make a post with and image, but I can't edit one to have images
-
Insert media?
It says this is how it should be inserted in a forum:

By ssaammpp at 2011-02-09
EDIT: There we go
-
My PNG's were optimized, why did it say they weren't allowed?
This is one of them:
-
Okay, so I need to take screenshots for the more complicated steps, Make it more descriptive and friendly, and post the new draft. Any chance there is a way to put attached images inside of the tutorial, or do I need to use some image hosting service? Also, is an interlaced PNG a viable method of making images for friendly for slow connections? I do have OptiPNG and everything, and I like to keep my images in that format instead.
I'm also considering making it an entirely visual tutorial, putting the instructions and pointers on the pictures themselves, and naming this topic, "High detail imagery" or something more appropriate than just slapping the word HDR into something not really HDR.
-
Under construction: My images were PNGs, so I had to convert them to put them here... Here is the PDF
You will need the High Pass filter.
Well, I've looked at Photoshop tutorials to HDR effects, and we don't have all the effects Photoshop has, but I've managed to experiment enough to come up with a recipe for an extreme HDR effect.
Before:
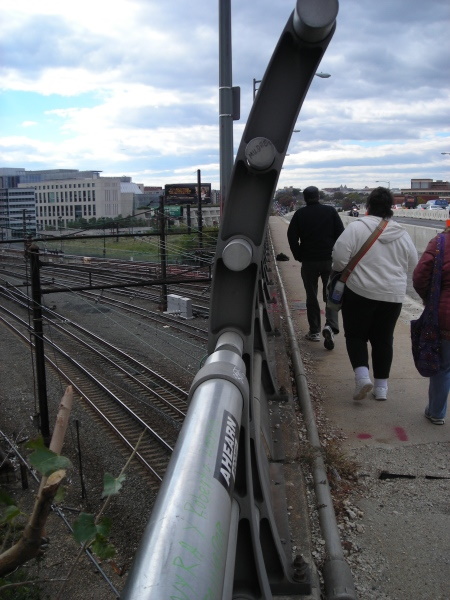
After:
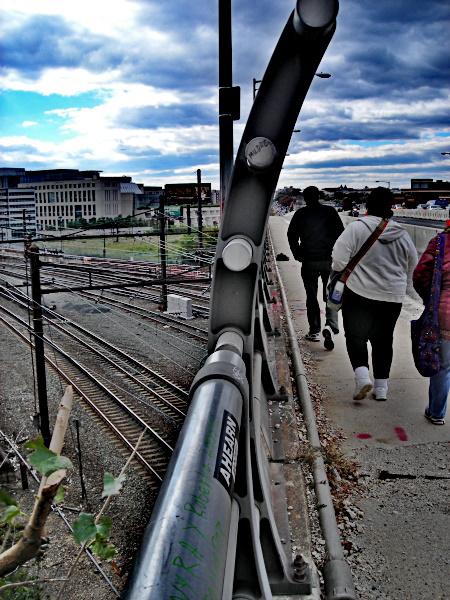
I'm going to go through this step by step, for beginners
1.
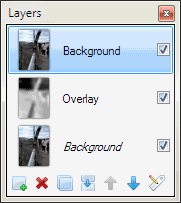
Once you have an image, duplicate the base layer (see buttons at bottom of layer dialog)
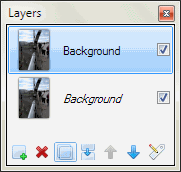
2.
Double-click the top layer to edit the details of it.
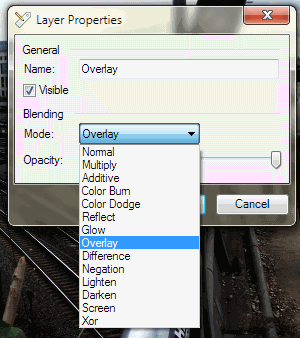
Name it, "Overlay", and set the color blend mode to "Overlay".
Your layer stack should look like this:

3.
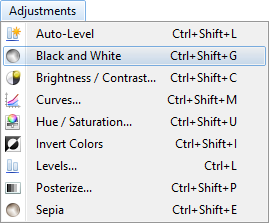
Make your layer Black and White
4.
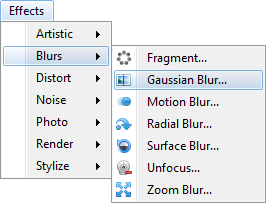
Apply a Gaussian blur
Set it to a level high enough that your image looks kind of spray-painted, like this:
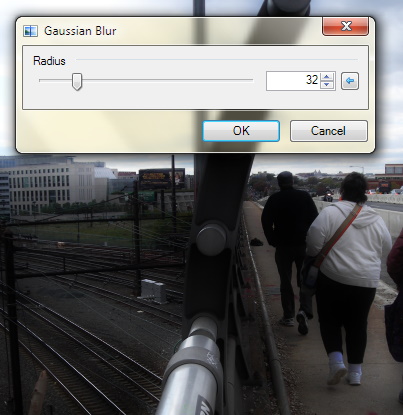
Remember that number!
5.
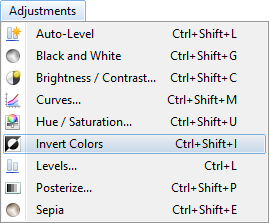
Invert the colors
Your image should now look like this (compared to its original self)
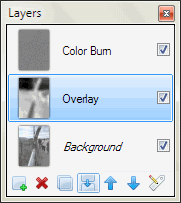
6.
Duplicate the background layer & move it to the top.
You can use the up arrow on the layer dialog to move it up
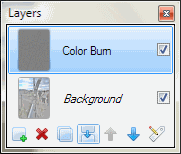
7.
Rename the layer to "Color Burn" and set the layer blend mode to "Color Burn"

8.
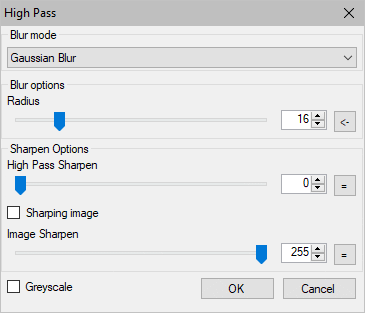
For this step, you will need the High Pass filter.
Set the radius at about half of the radius you set the blur to earlier.
9.
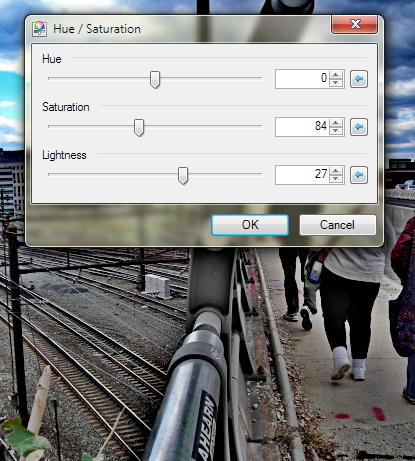
Select the background layer
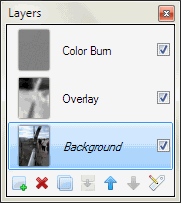
Adjust the Saturation and Lightness
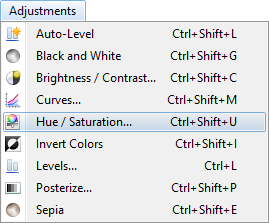
Set it them to whatever looks best to you
10.
Merge the middle layer with the bottom one by selecting it and pushing "merge down"
Do the same with the last layer
11.
Adjust whatever there needs to be more or less of. Brightness, Contrast, Saturation, White balance, or whatever other filters you have in store will do for it.
Disclaimer: Your image may not look great, as HDR effects are not for every image, but it will work very well for the right photo. I encourage you to experiment between steps and try new things to get it work right for you.
-
 3
3
-

Save Dialog revisited
in Paint.NET Discussion and Questions
Posted
Hmm...
If somebody were to program a filetype that reads a configuration file and then automatically sets the attributes of a PNG based on them and does not use a save dialog, then what you are looking for could be done without using .PDN files. You would just have to save them as the other type of PNG.
I don't know squat about making file types, but it seems like being able to read a text file rather than making an interface would be really easy to do.