


kaunas163
-
Posts
12 -
Joined
-
Last visited
Posts posted by kaunas163
-
-
Rule of thirds doesn't apply to architecture, like you did with the second picture.
-
Or you can use plugin which will put a already-made watermark for you: http://forums.getpaint.net/index.php?showtopic=14517
One con: it won't be able to work with Paint.NET version 4, but still works with the 3'rd version thought
-
Hello
 I want to ask what you were doing with Paint.NET then you have found it? Like, if you were trying out effects, or maybe doing simple everyday-tasks, or something?
 Talking about myself I was just improvising with different effects, trying to get something nice out of nothing or from any image. After that I've started editing some of the photos, which really needed some of the fixes.
-
Nice effect ... got to admit I'm not a fan of video tutorials. A written one is easier to follow IMO. But I guess it's horses for courses
Now I understand that I was wrong stucking just only at youtube, because for everyone the "easier" way is different and whats good for one doesn't mean for the other
I will try to write some of the tutorials there. Also, I will check out other people, while I have some free time -
ay yer the woman with the funny accent!I follow this girl on youtube.Learned a lot from her but never seen her here before.Her PDN skills are way up there.
Thank you
You haven't seen me here before just because I thought that to follow video tutorials is easier than forum post, so this is why I been stuck at youtube 
A very nice tutorial of a very nice effect kaunas163!

Thank you!
-
It's called Bokeh, and it can also be done using this plugin. :-) Your effect gives more control over the process, though, and teaches some nice concepts.
You did a good job with the tutorial. You do need to check out the tutorial posting rules, though. You'll need to paste in the links to the plugins you used. Thanks!
Thank you
I have read the rules and added links to the plugins -
This tutorial is available as a PDF. Click here to view or download it
Moderators Note: This tutorial has been rewritten by ReMake
So we are going to make this:

Before you start you will need following plugins:
Random Shape Fill by @pyrochild
Gradient Mapping by @pyrochild
Color Tint by @Ed Harvey (optional)
So, create a New (
 ) image (File -> New). Choose any size. I'm going to use my screen resolution.
Set Primary color to 700061 (or you can choose whatever), and Secondary color to black as shown below:
) image (File -> New). Choose any size. I'm going to use my screen resolution.
Set Primary color to 700061 (or you can choose whatever), and Secondary color to black as shown below: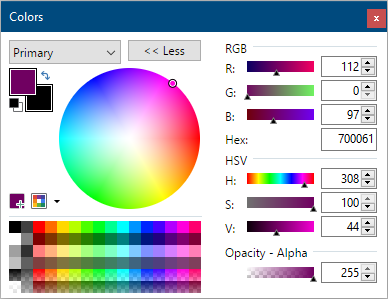
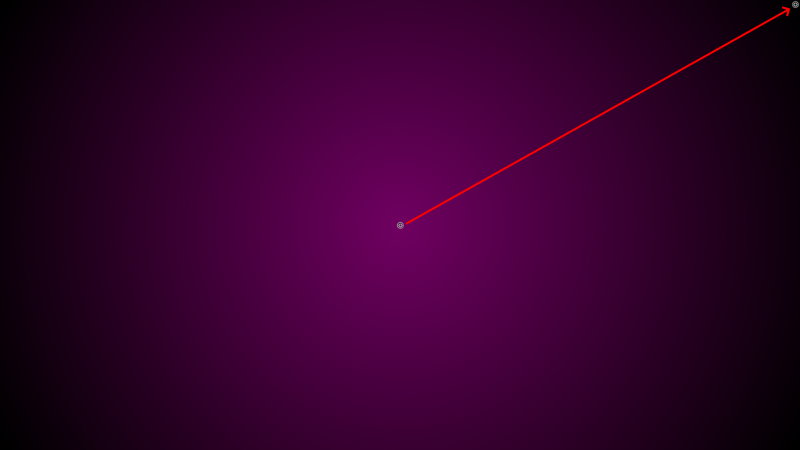
Choose Gradient (
 ) tool with Radial (
 ) mode and draw from the image center to the side as shown in the image below:
Add a New (
 ) layer. Choose white color as a Primary color.
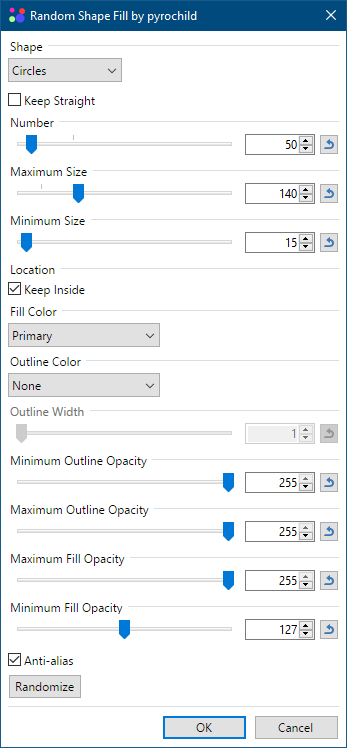
Apply Random Shape Fill effect (Effects -> Render -> Random Shape Fill)
Set the controls values as shown below, you can play around with number, maximum/minimum sizes.
Add a New (
) layer and go to the same effect. This time you can change settings a bit, but mess around only with the number, sizes and if needed randomise circles.

Go to Layer 2 (
 ), and apply Gaussian Blur (
 ) effect (Effects -> Blurs -> Gaussian blur). Choose radius at about 25-30 and make these circles kinda very blurry.

Go to Layer 3 (
). Apply Gaussian Blur () effect again. But this time radius should be like the half of the previous attempt, or 1-10.

Add a New (
) layer. Change colors to Black and White ( ), as it was by default.
Apply Clouds (
 ) effect (Effects -> Render -> Clouds). Choose first setting at about 240, and lower the second.

Change the layer's blending (
) mode to Overlay.

Add a New (
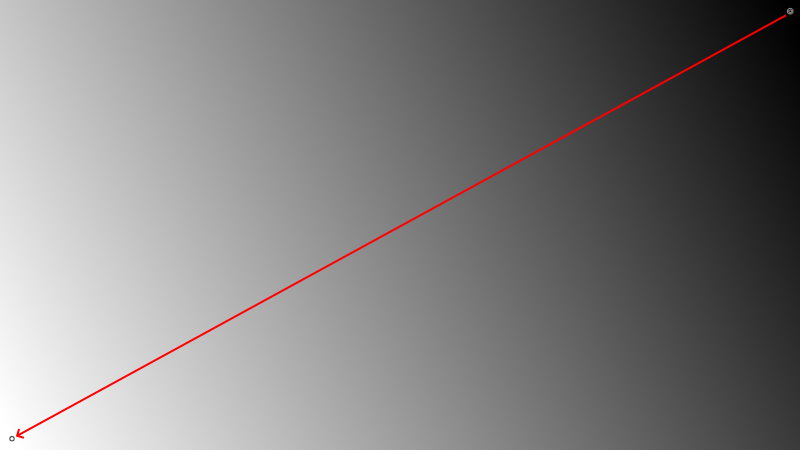
) layer. Choose Gradient () tool with Linear ( ) mode and draw something similar to what I did in the image below.
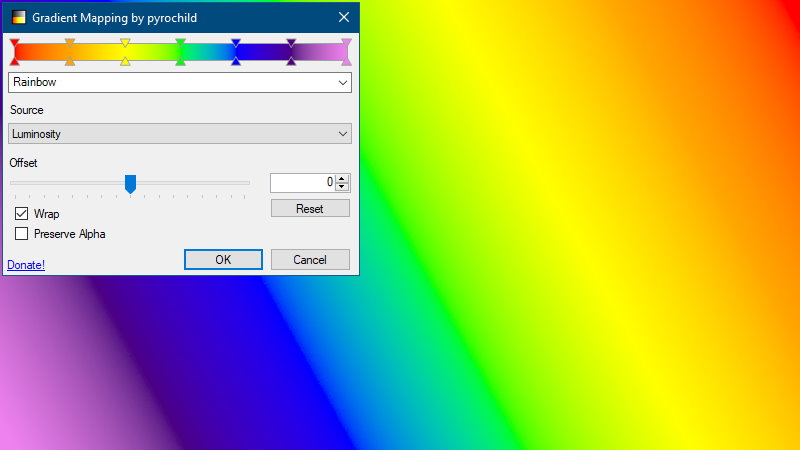
Apply Gradient Mapping adjustment (Adjustments - Gradient Mapping) with built-in Rainbow preset.
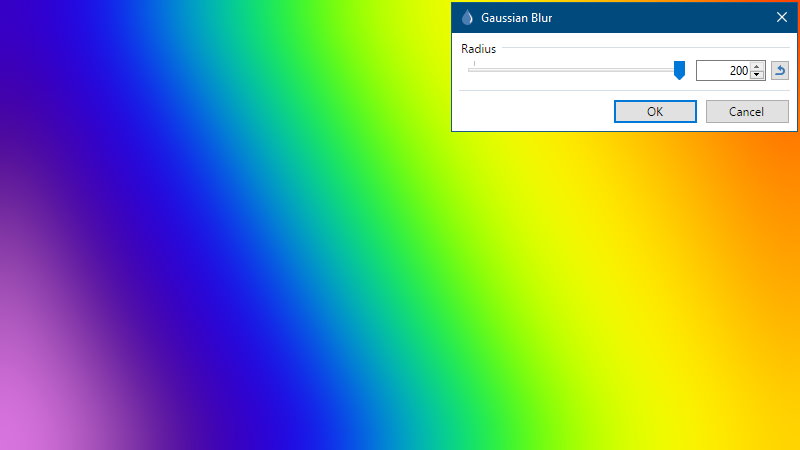
Then apply Gaussian Blur effect with a maximum Radius. Repeat (Ctrl+F) if necessary, but one time should be already ok.
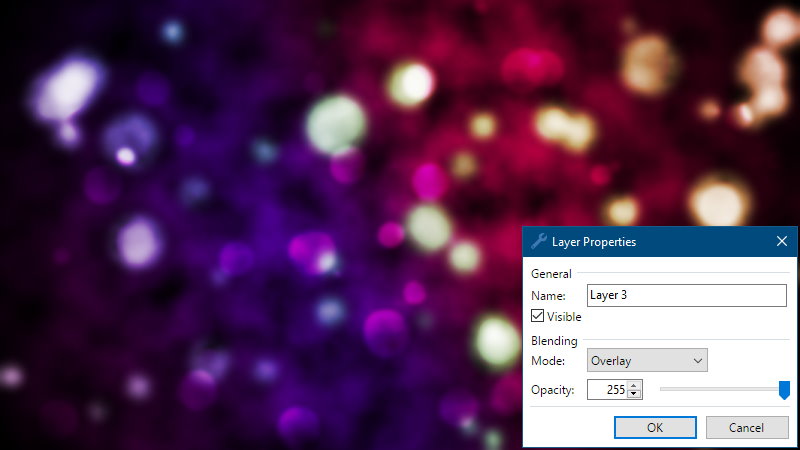
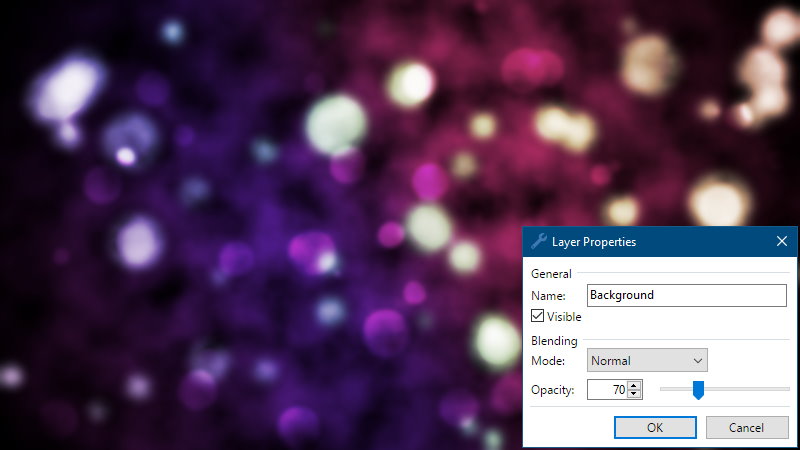
Change the layer's blending (
) mode to Overlay and lower the opacity till it looks good.

(Optional) If you want, you can change the Layer 3 blending (
) mode to Overlay.
Save (Ctrl+Shift+S) project as pdn file, so you can do something else later on if needed and after that merge (
 ) all layers (Image - Flatten). From this point you can choose way you want to finish your project.
Option 1:
Duplicate the layer
Apply color tint
Apply glow
Change the opacity.
Option 2:
Just apply glow
I'm going to do the first option.
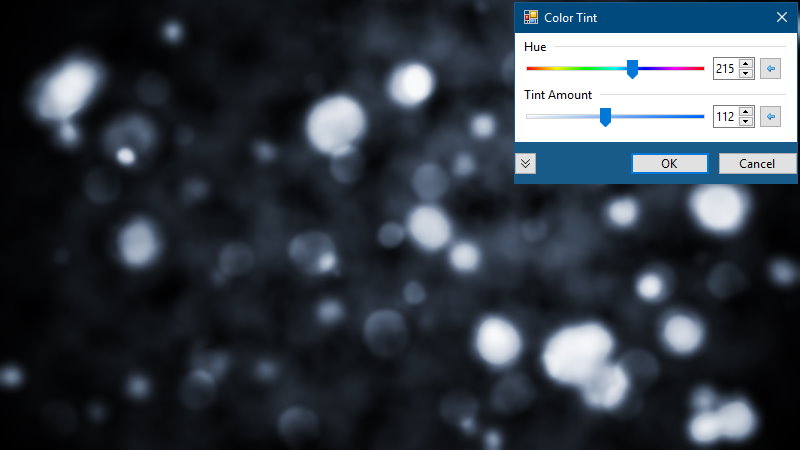
So duplicate (
 ) the layer and apply Color Tint effect (Effects -> Color -> Color Tint) with any color you want.
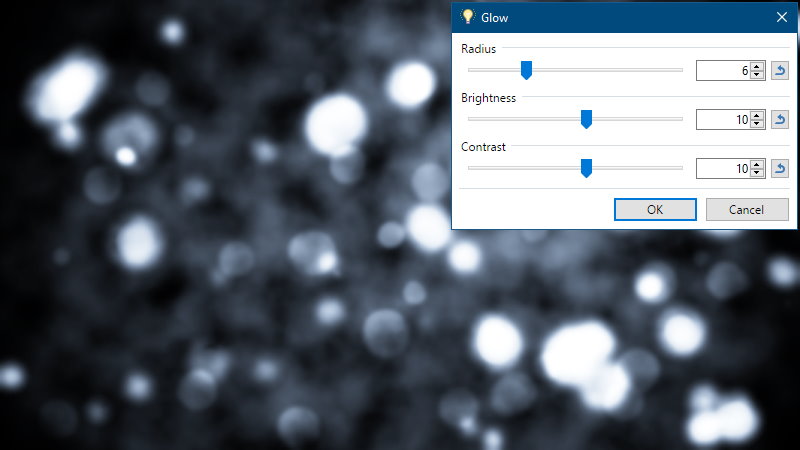
Apply Glow (
 ) effect (Effects -> Photo -> Glow) with default settings.
And the last step is to change opacity (
) of the layer.
So that's all. Hope you like that

Also, I have got an tutorial in video format here: http://youtu.be/Xg1uRdWUSEU
-
 4
4
-
-
Everything is ok
Thanks for sharing my video I haven't shared any of my videos, because I think that in this forum I should write everything down and don't do the simplier way - post a video, so this is why I'm not posting anything And I'm not angry on you or something, don't be afraid of me -
That is my video, I hope creator of the topic don't try to take credit for it.


Paint.NET is getting noticed!
in Paint.NET Discussion and Questions
Posted · Edited by kaunas163
My university has got Paint.NET on EVERY of their computer (they have at least a few hundred of them). It's 2nd-3rd biggest uni in my country. So I think Paint.NET had been noticed pretty well