


epic epiphany
-
Posts
146 -
Joined
-
Last visited
-
Days Won
2
Posts posted by epic epiphany
-
-
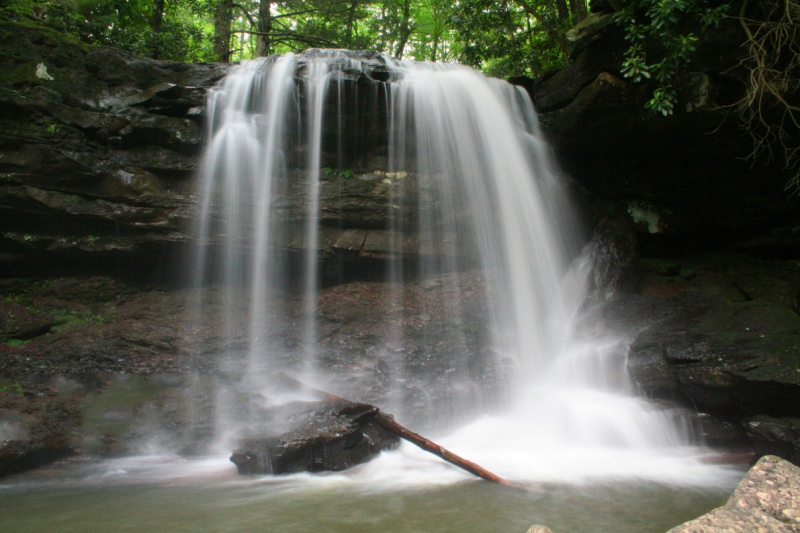
After some practice, I think I have cured the dreaded over-blur and figured some of my own techniques... This is my favorite...

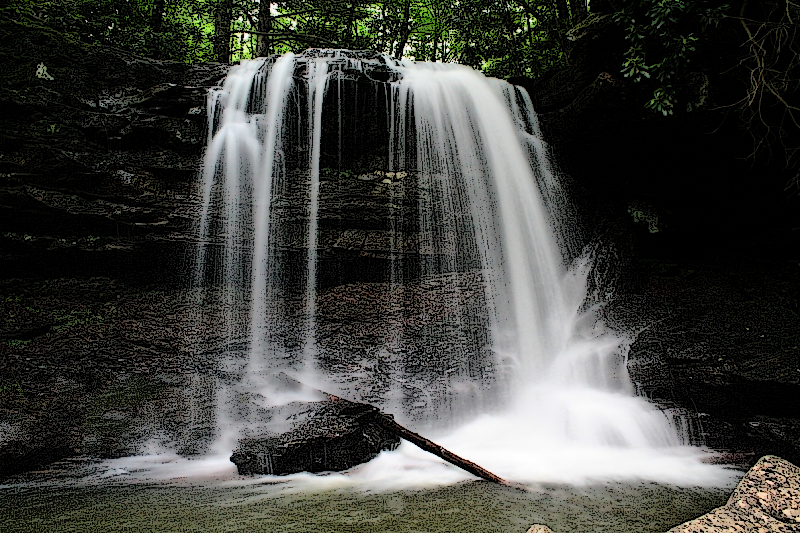
BEFORE

AFTER
Tada! Someone else did an airbrush on the before, and it inspired me to try on the same pic, but on PdN instead of Photoshop.
Oh, and I reshaped the nose a bit...
-
I looked at the Forumer directory and this has ove 76,000 posts.... :shock:
-
I don't know... I think it has a wintery feel right now and want to keep that... Also the blue trees seem sort of other-wordly to me so something like that but can't seem to figure what would do it...
-

(it's resized. Original is HUGE! PM me if you want to see original version...)
Any ideas? It started as

But I don't know what else I could do to it...
-
I tweaked a little bit, but I really like the result...

Jitter is my new best friend!

-
I dont think it's cheating if you use dithering in your image and use that for finding your pallete...
-
This tutorial is available as a PDF. Click here to view or download it
This tutorial will start at
and give us
Cool, huh? So how do you do it?
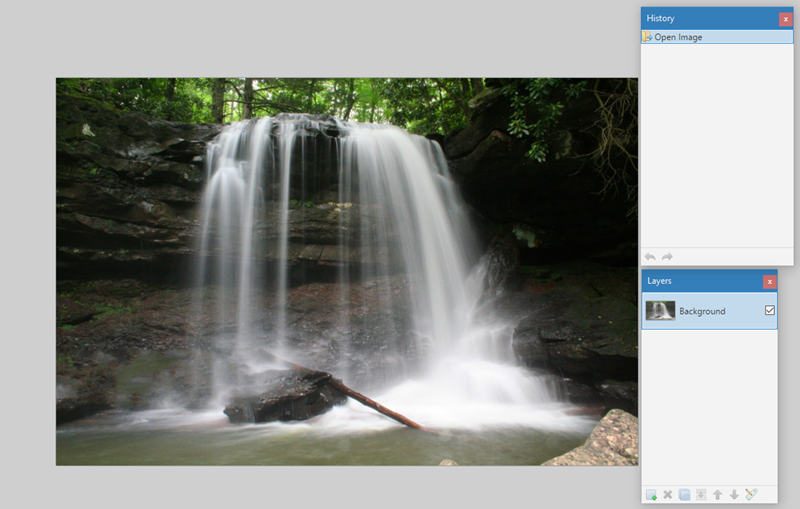
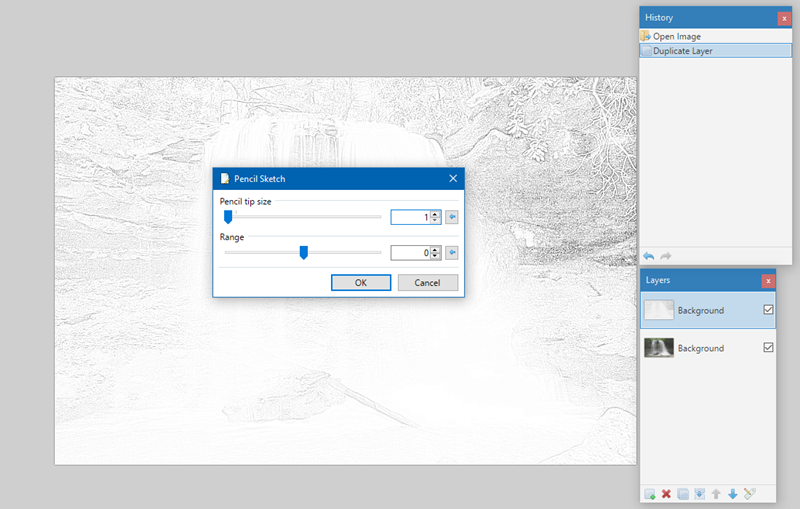
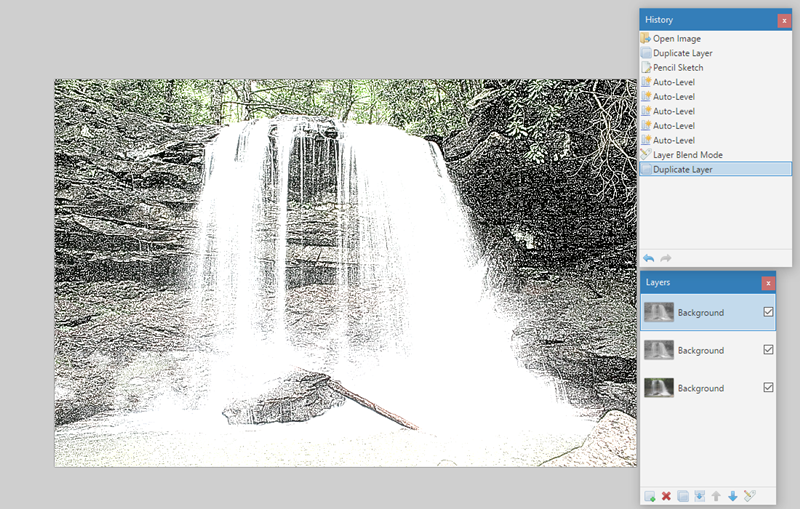
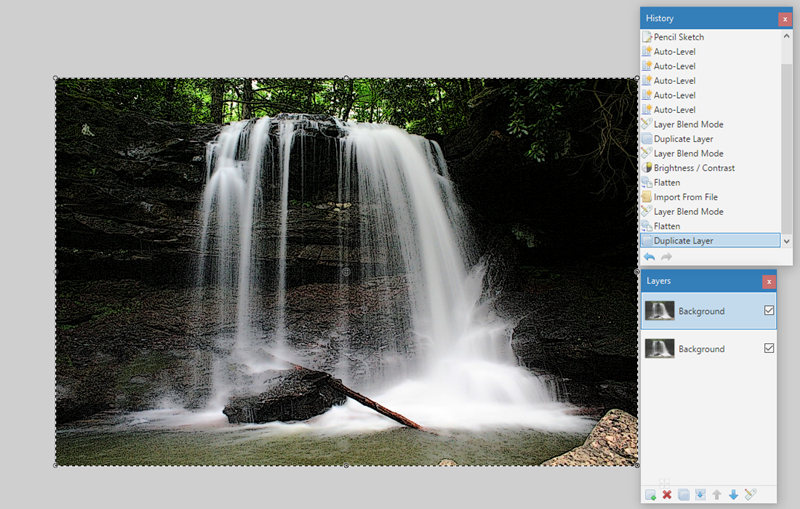
Well, first, pick your image and paste it onto an new canvas.
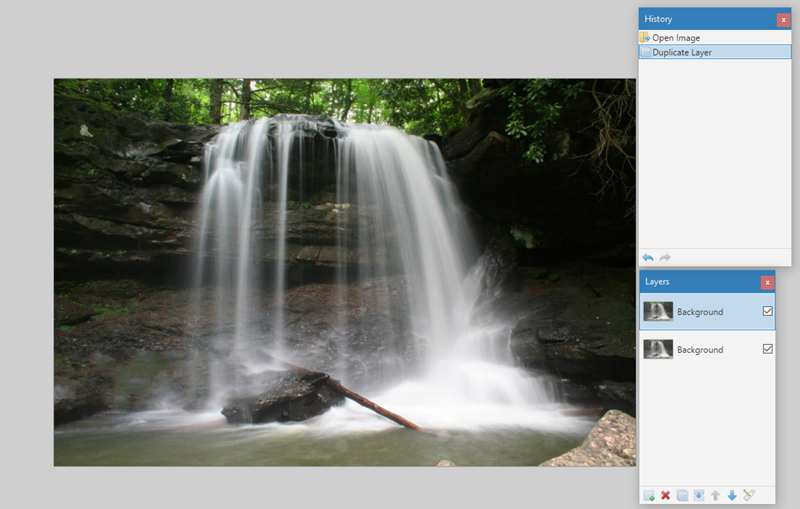
Second, duplicate the layer.
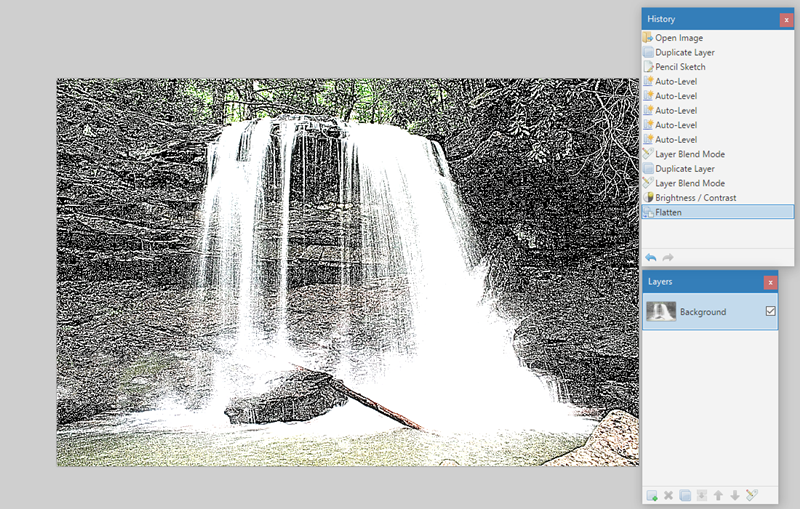
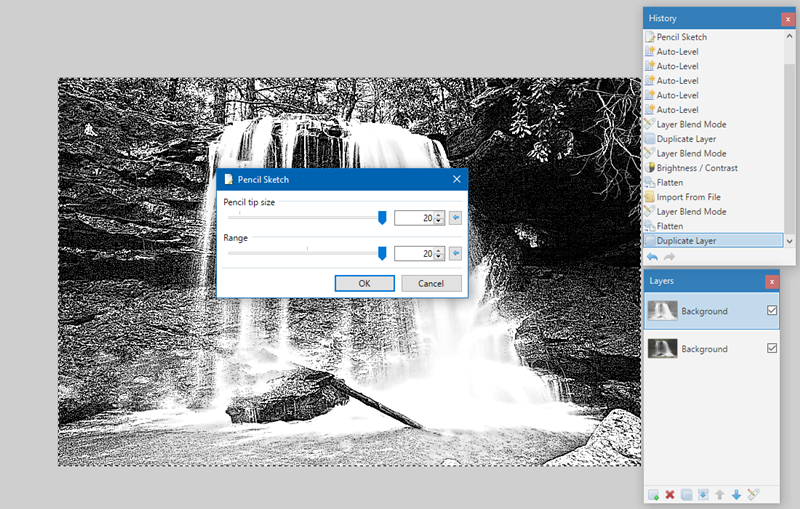
Run the layer through pencil sketch with 1 for pencil tip size, 0 for range.
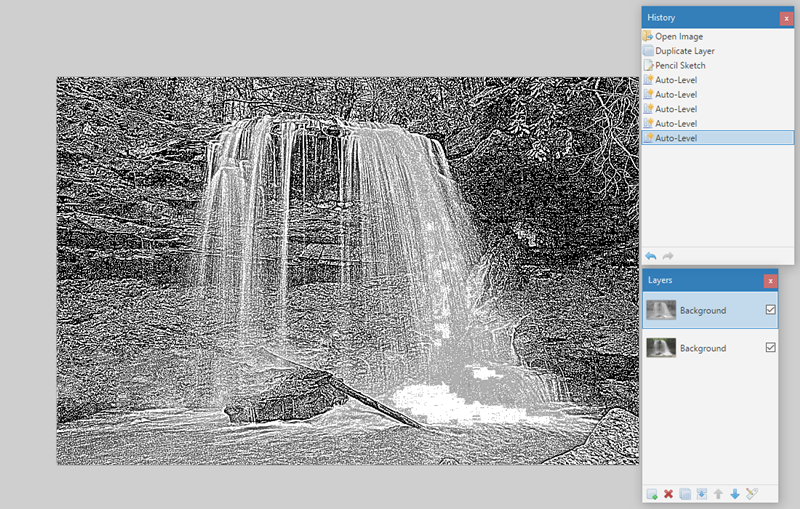
Now run autolevel until you don't notice a change after running it.
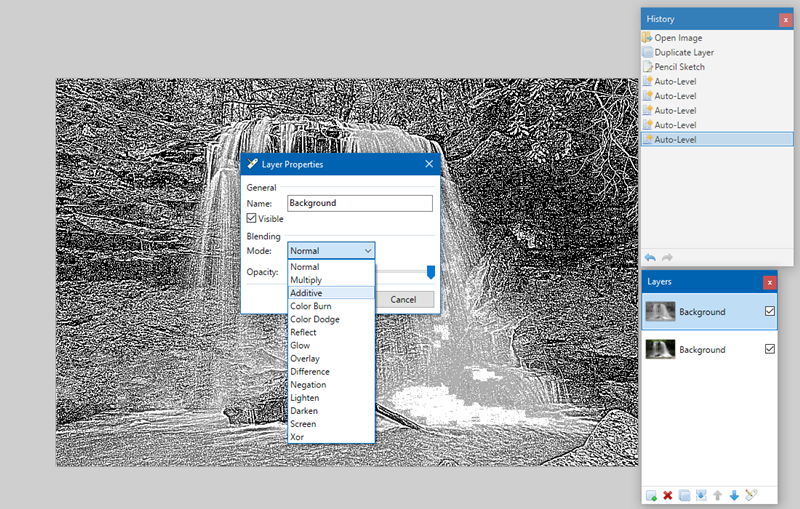
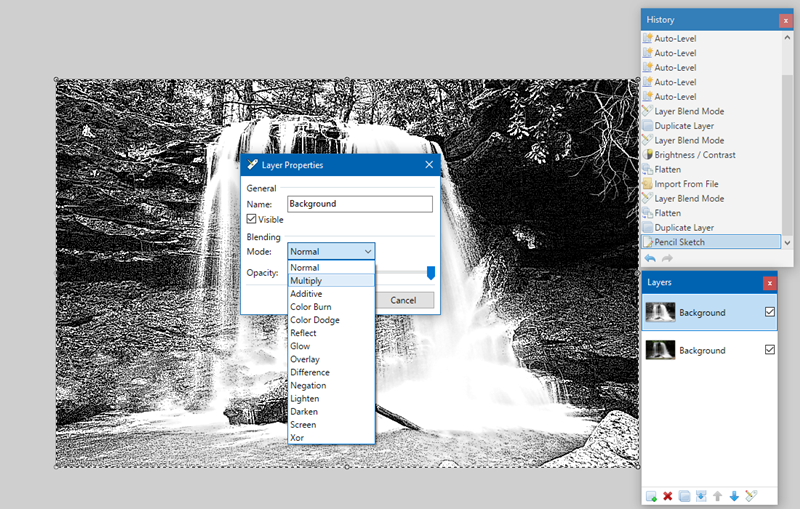
Change the blending mode to additive.
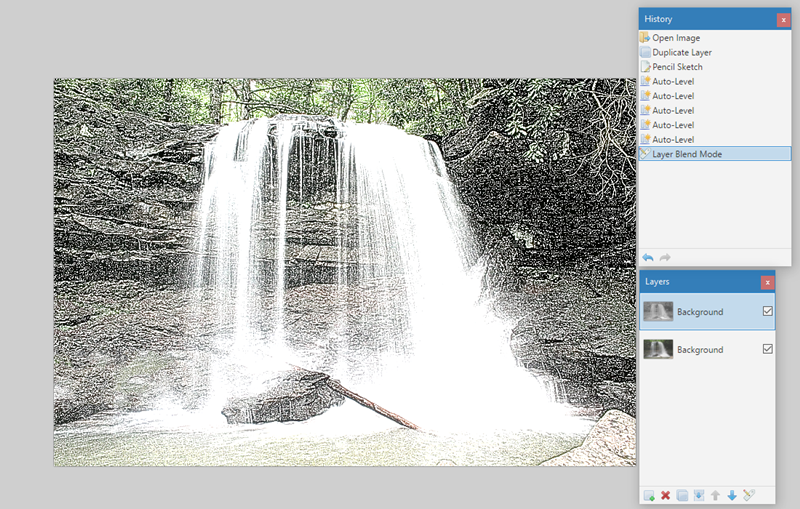
AHHH! What is that? Don't worry... It'll be fixed!
Duplicate the layer.
Set the layer to overlay.
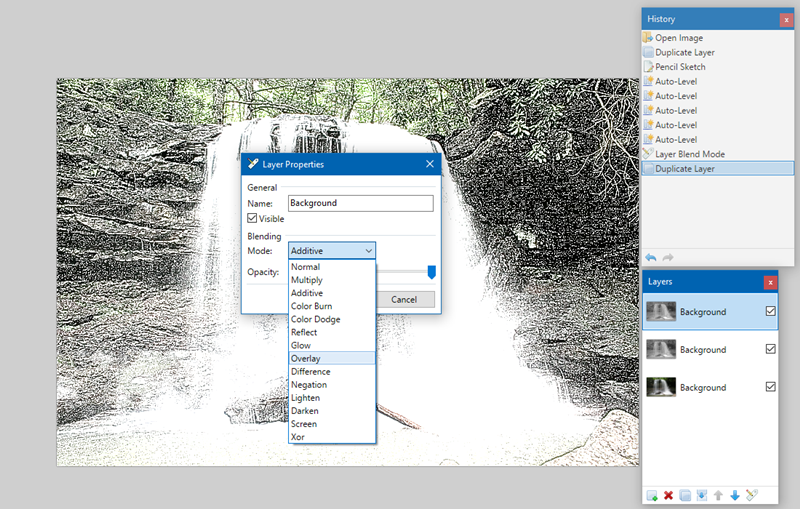
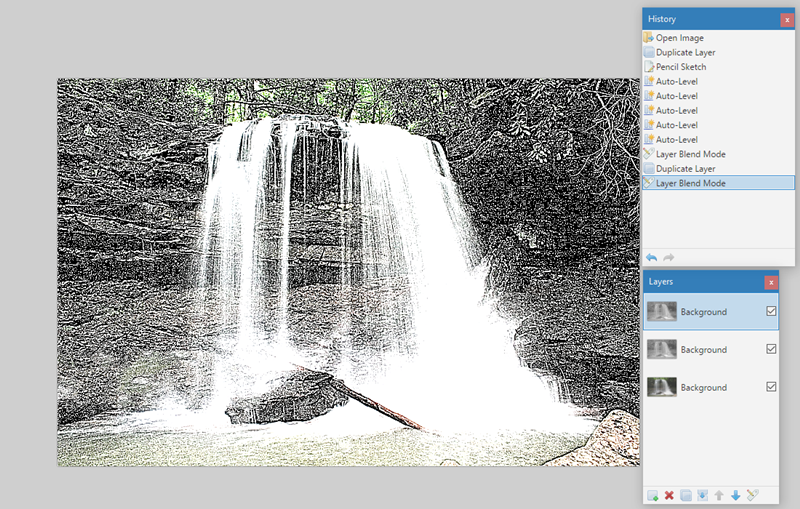
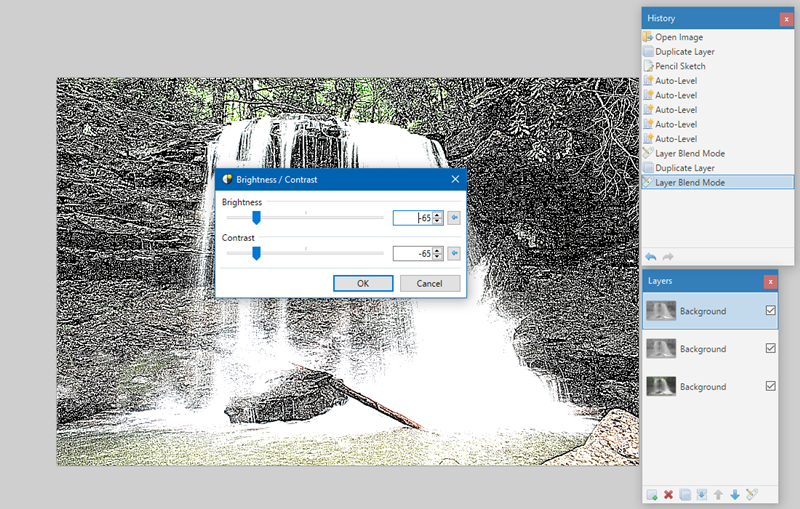
Open Brightness/Contrast and set it to a low setting for both
Flatten
Paste the original image into a new layer
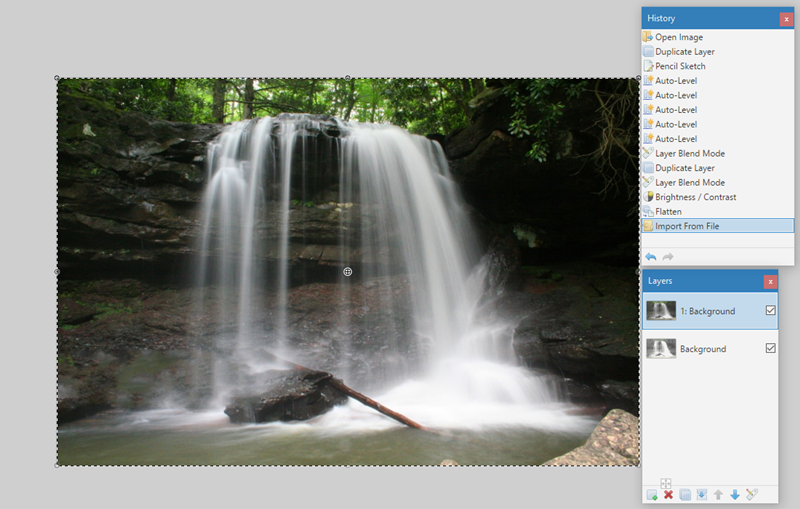
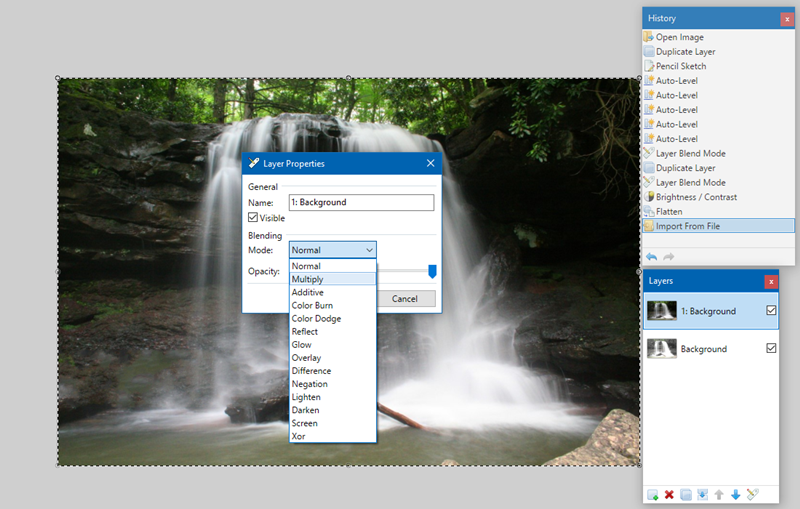
Set the blending mode to multiply
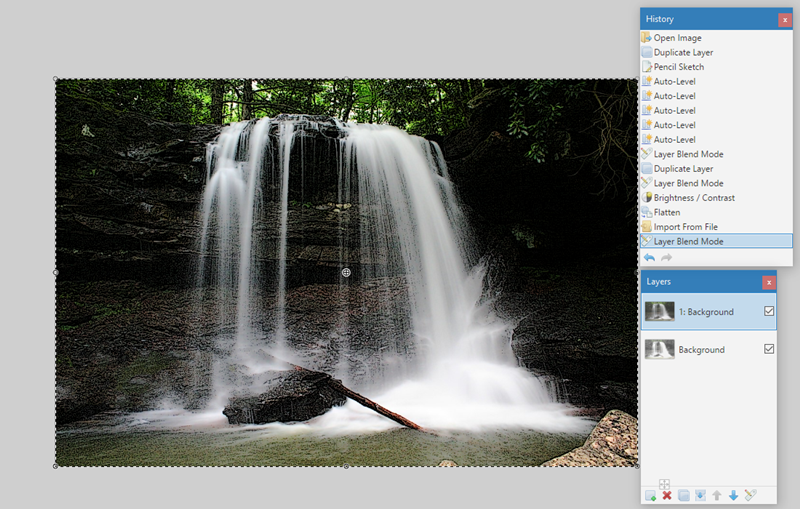
Flatten.

Much better!
The next part is optional, but can enhance the shading on some pictures.
Duplicate the layer
Run pencil sketch at the highest settings (20, 20)
Set the blending mode to multiply
Flatten the image and it should look like this:
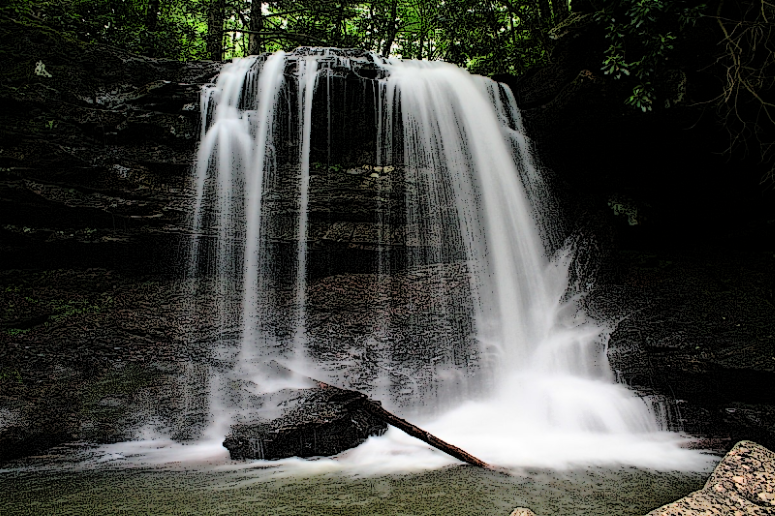
Tada! Have fun and post your results!
EDIT: some one said that the same effect is with the ink sketch... not quite. This is the same picture, but with default outline and full color...
Extremely different in my opinion....
-


Awesome tut. I like the look if you layer the original metal texture underneath.... very sleek and high tech.
-
Yeah I use layers to separate dif. components of an image. Helps to save original image if you want to try the look of something else.
-
Just a little something to clear this up so people can get on with making some cool pixel art:Pixel images are made pixel-by-pixel using only the pencil tool using a limited palette. This means that no other tools can be used and no effects or adjustments can be used. (We'll know if you cheat.)
Page 1 rule 1.
Well, modern pixel artists actually use a paintbucket on larger images for the sake of time.
-
I looked at wikipedia (I practically worship that site lol Love it!) and understood it better. It showed moving diagrams and using it made more sense afterward.
-
Have you tried the Octagonal/quad reshape/matte plugin? If you want to mess around w/ the shape try that... Doesn't curve but works w/ angles and things...
-
Hmmm... have you tried just tracing the out line with the line/curve, pencil, or brush tools? on a new layer copy VERY carefully over the lines and flatten.
-
And if you just want to resize ONE layer, (or multiple layers) use Shift+Ctrl+Z and open Rotate/Zoom. Set the 'Zoom' to what you want and hit ok. Got to the next layer (when resizing multiple layers) and hit Shift+Ctrl+Z and the hit ok. Repeat on all of the sucessive layers you want to resize.
Hope that helps!

EDIT: Oh and you can also do that for moving it with the 'Pan' option. You can also do the 'Roll/Rotate' Option or more than one option at a time. Great for consistency.
-
The best way to unblur an image is to take another image... and hold the camera still this time.
Seriously.
XD You can also just Ctrl+Z if you blurred it. If you found it that way, you're stuck w/ it.
-
http://tinyurl.com/y92q66e
Teach a man to fish ...
XD Can you make those or are they premade? I have a few friends who I could use that for!
-
Layers are your friends! Try just opening what you want to clone stamp over the other one on a layer under what you want to clone stamp on to so you can still see it, and clone stamp across the layers (when I learned I could do that I was ESTATIC!) then just delete the bottom (clone stamped FROM) image and voila!
-
If you're thinking anything like the things in Word and stuff, then yeah, layers. But you've gotta make sure whatever you're trying to send it behind is separate from the actual background, or else you'll lose it behind the background.
-
Unless i'm misunderstanding you, the OP was requesting a Tutorials+ section for pixel art, rather than a root subforum. :?
Yeah. We were actually discussing in the Umbrella for a while about it. Pixel art is so much different than all the other subforums under the Tuts section...
-
Grrr. Freezes when opened. There's a sticker on my laptop that says:
AMD Turion X2 64
Is that the prob?
-
def the second one. adds depth and an interesting touch.
-
I kinda think that's the point (duplicated houses...).
-
Something below 500X300.
[sarcasm] I'll never fit it in that! It's WAY too small! [/sarcasm]
XD that's huge.
-
Awesome. Image size?


Paint.NET is getting noticed!
in Paint.NET Discussion and Questions
Posted
Not what this says.... just took the screenshot...