


MusicManNick
-
Posts
14 -
Joined
-
Last visited
Posts posted by MusicManNick
-
-
I've tweaked up my style a bit since I've last posted.
These are some sigs I've made...


And after I made those, I tweaked my style yet again and got these.


What do you guys think?
-
I just spent a little bit of time messing with effects in Paint.net
This is the end result:

Comments And Critique Please!
b^.^d
-
added pictures

-
Heyo it has been a while since i have written a tutorial so i figured I'd write another one
This is kind of based of this tutorial: viewtopic.php?f=31&t=28214 it uses some of the same elements, but i changed quite a few parts of it and sizes and whatnot...
Requirements:
Paint.net
Outline Object Plugin viewtopic.php?f=16&t=5715&start=0
This is an example of what you can do

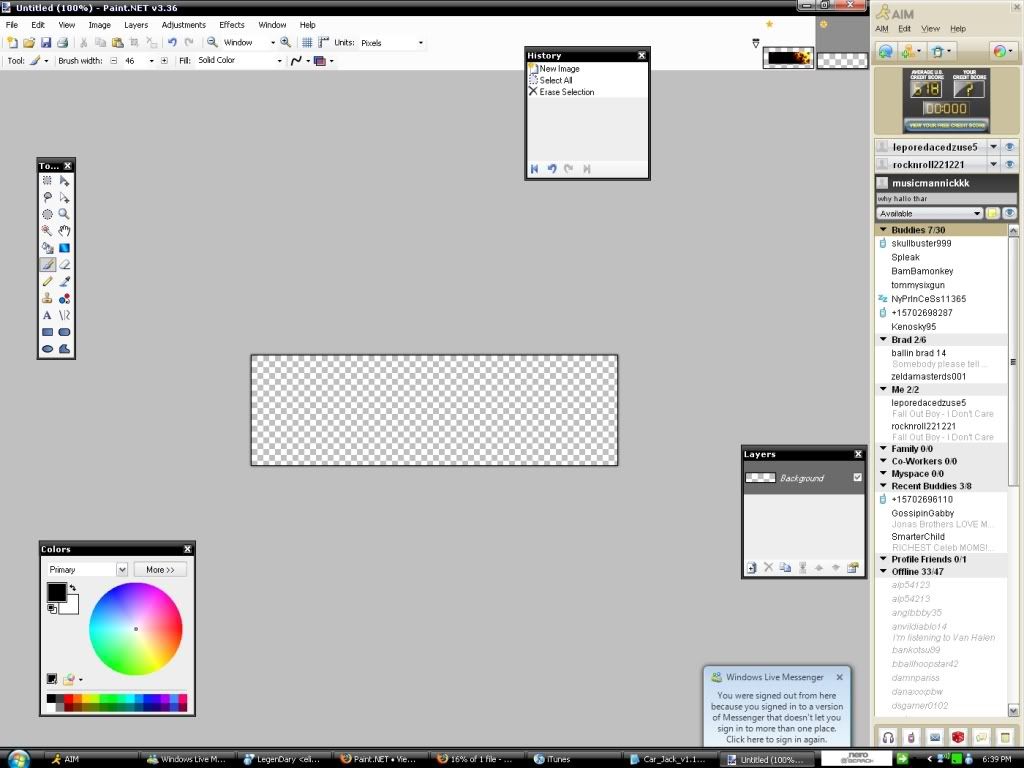
Step 1:
Create a Canvas of 500x150, hit CTRL+A and then delete it all so the whole canvas is transparent
Step 2:
Select the "Rounded Rectangle" Tool
 and pick "Draw Filled Shape" :ShapeInterior:
 Step 3:
Make a rounded rectange , with your color of choice, the one I used was #007F0E

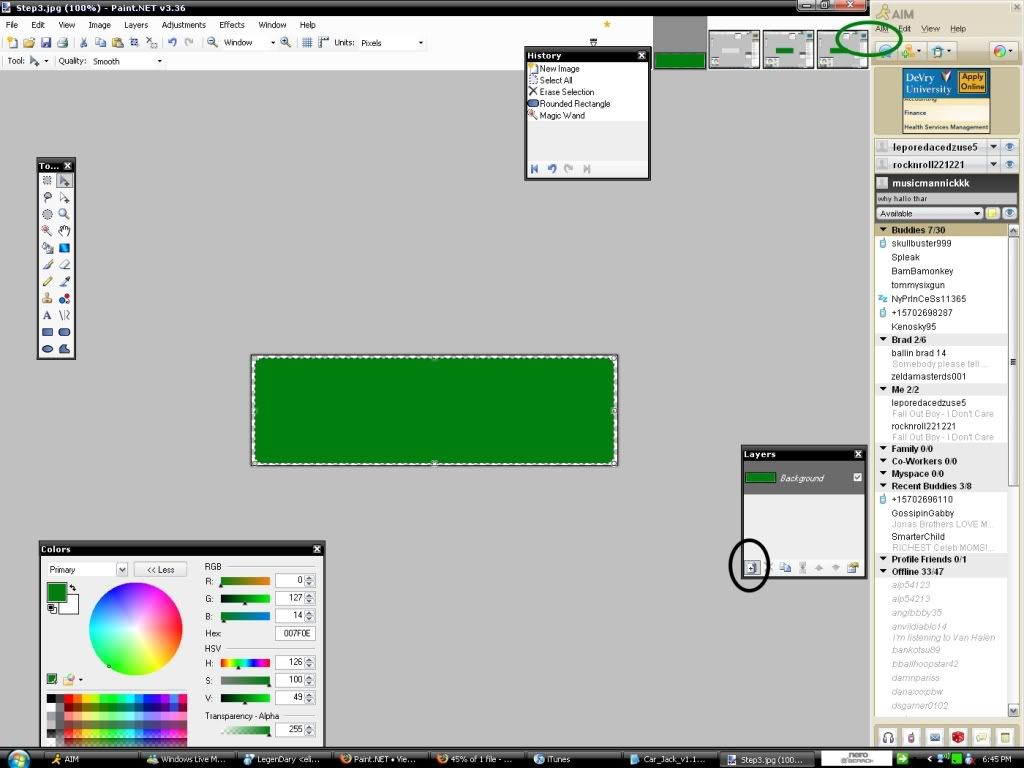
Step 4:
Use Magic Wand
 and click on the rectangle
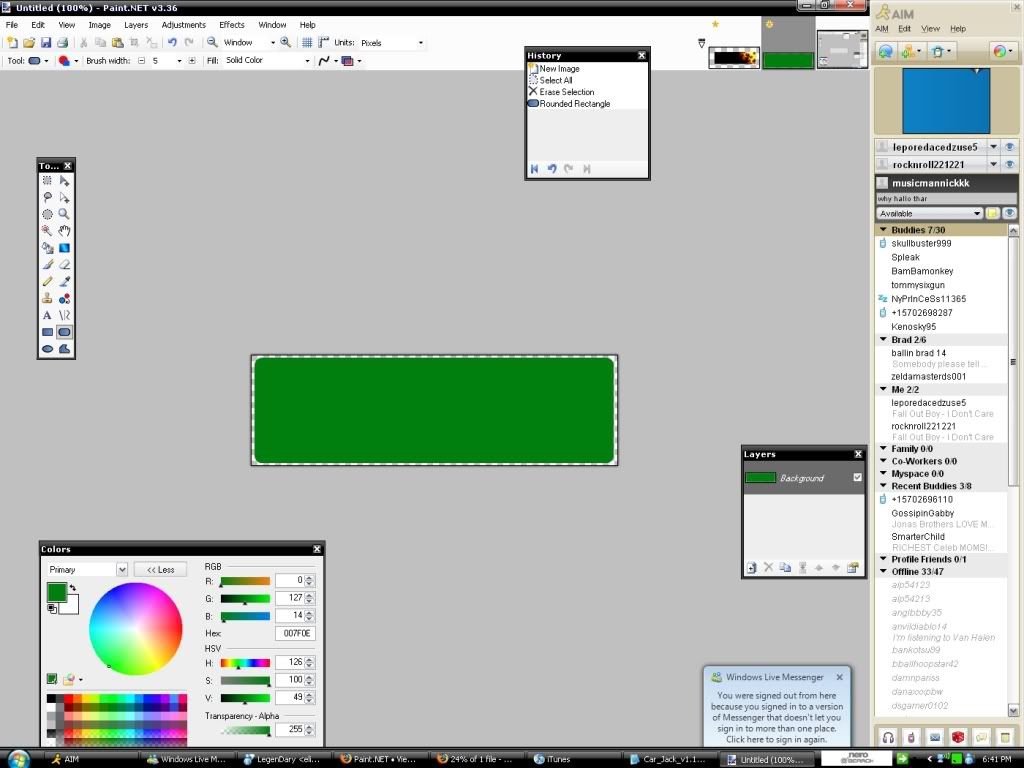
Step 5:
Create a new layer
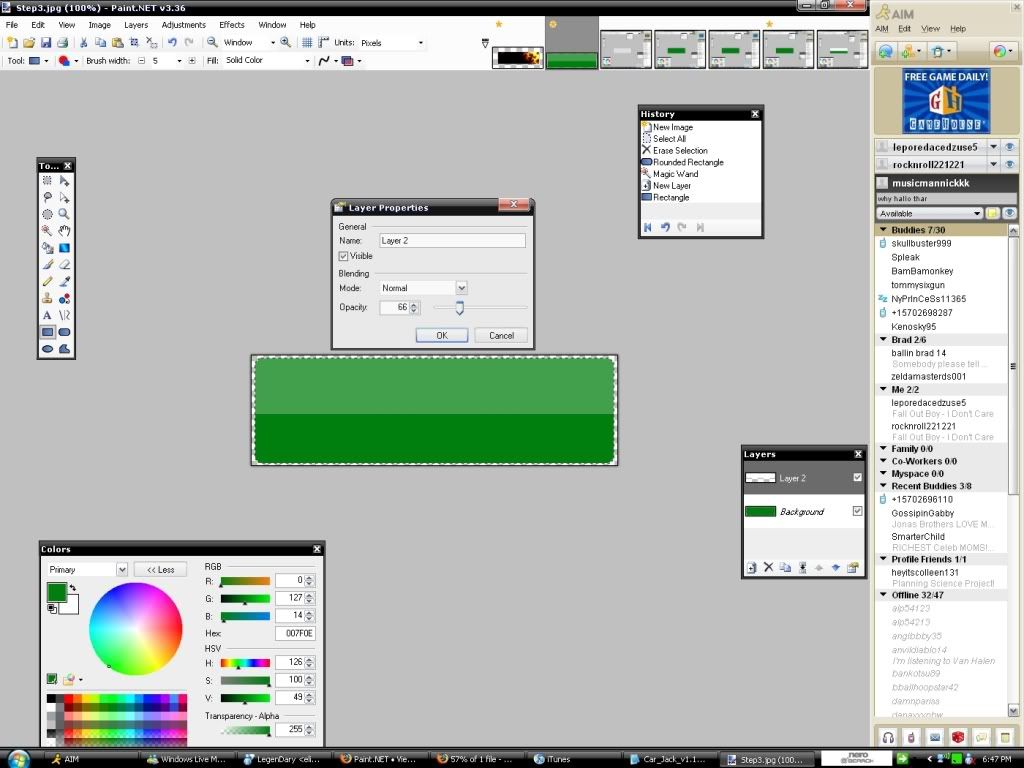
Step 6:
Now select the "Rectangle Tool"
 and draw a white rectangle going about 1/2 way down the rounded rectangle(on the new layer) and lower the opacity to about 60-70
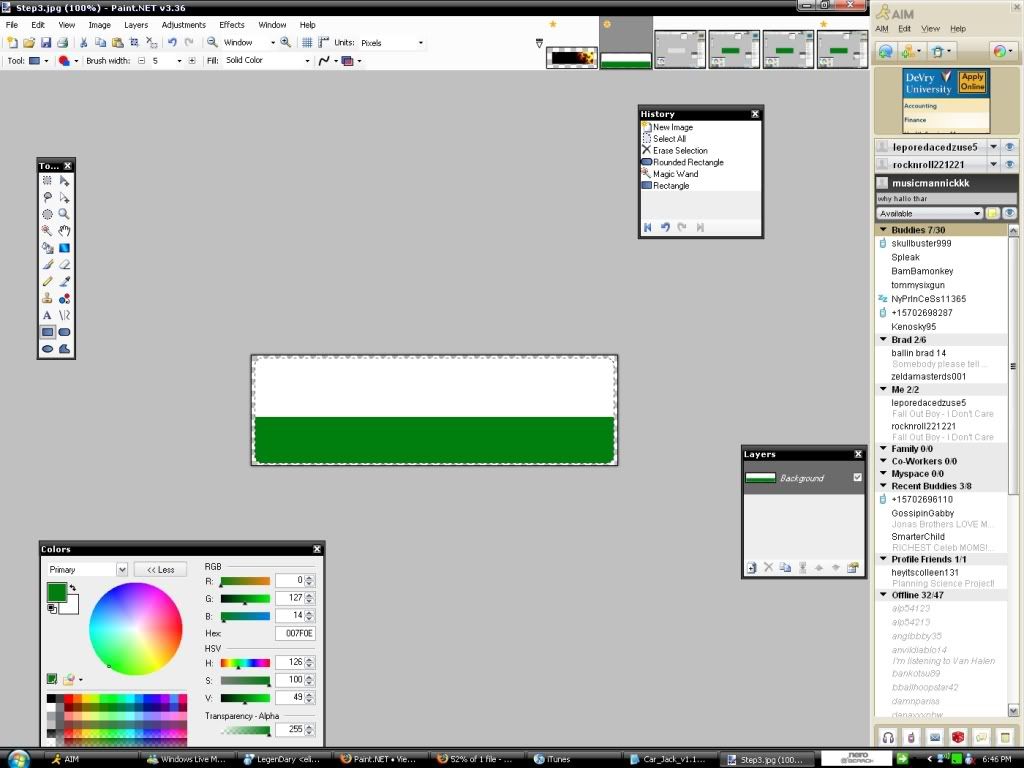
Step 7:
Now create another new layer
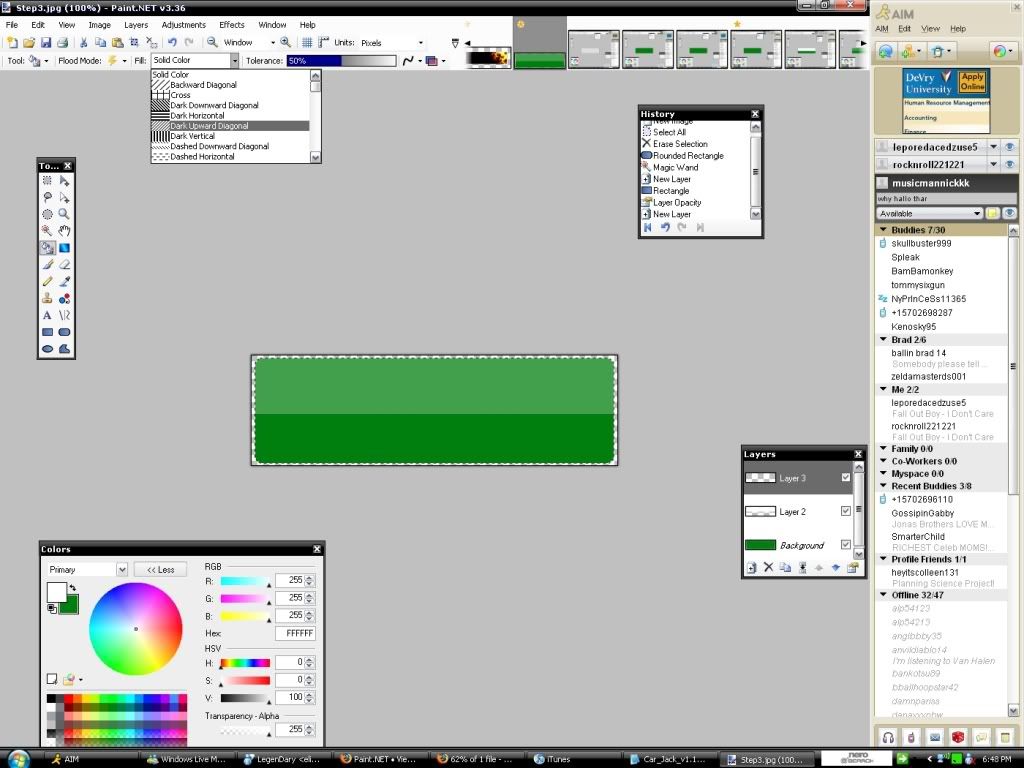
Step 8:
Select the Bucket Tool:FillSelection: and where it says "Fill:" select "Dark Upward Diagonal" and fill it with your primary color being white and your secondary color being transparent.
Step 9:
Lower the opacity of that layer to about 20-30

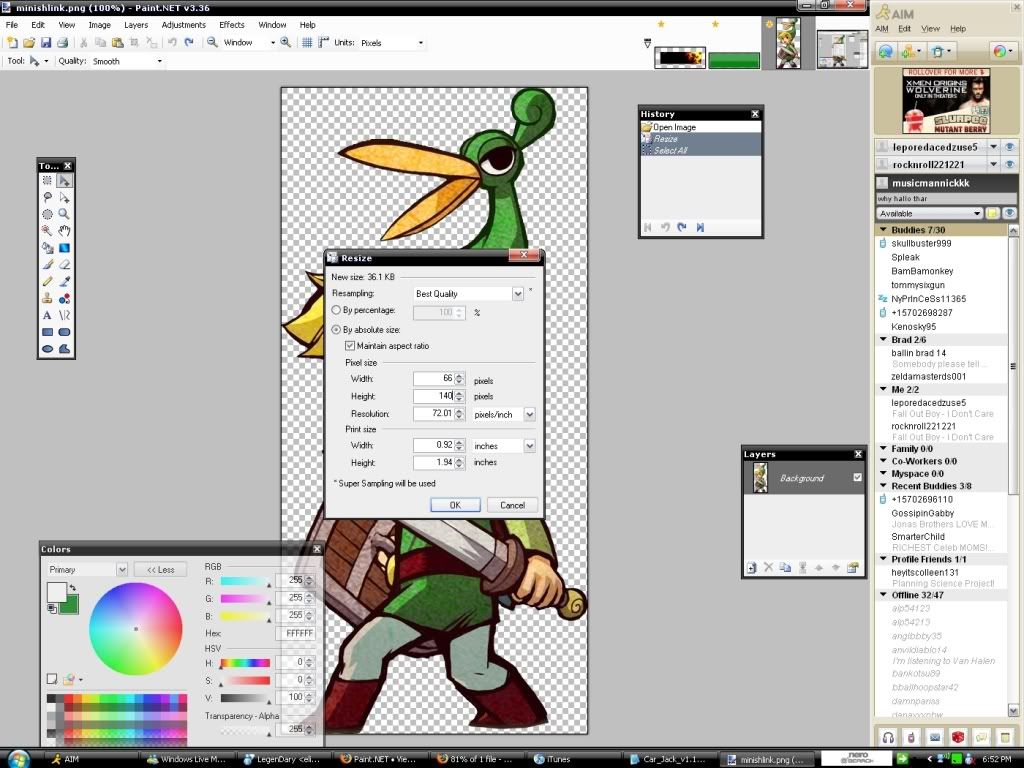
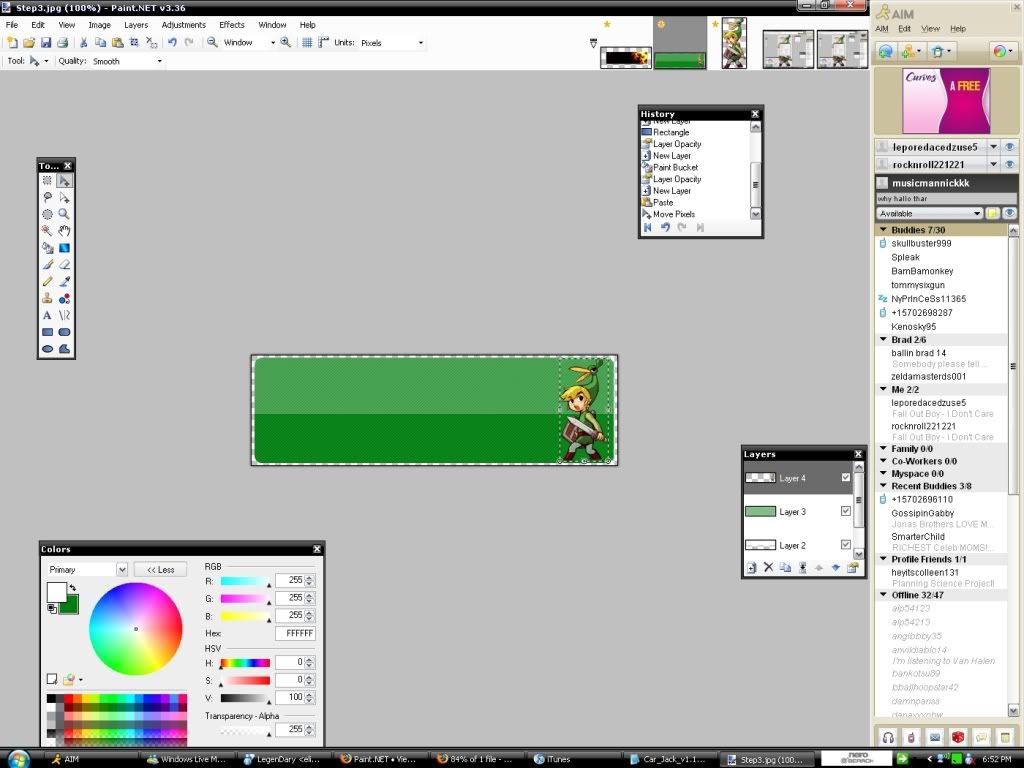
Step 10:
Now make a new layer on top of the previous 2 layers and paste in your render, i used this one: http://planetrenders.net/renders/displa ... ?pos=-3826 but first i used "resize" to make the height 150, be sure to have "Maintain Aspect Ratio" set so the width will automatically change to match the height, and past the render into the rectangle
OPTIONAL STEPS:
Step 11:
Create a new canvas, size 550x170
Step 12
Paste each layer individually onto the new canvas(Try to center it), I know this is time consuming but for the shadow and border to look right you have to do this, unless you dont want a border or shadow
Step 13:
Find a C4D(Cinema 4D) Render, i will use this one: http://planetrenders.net/renders/displa ... p?pos=-391
Select a section of it that you want and paste it into a layer underneath the render
Step 14:
Select the first layer(the one with the rounded rectangle) and use the outline object plugin, set the Width to 2 px and the Softness to 127 and hit okay
Step 15:
On the first layer select "Glow"(Effects>Photo>Glow) and set it to Radius-6 Brightness- -100 and Contrast-10
You're Done!!!
Comments and Criticism please
And Post your results when done
(PICTURES COMING SOON)
-
nice
i added a couple of effects and made it into a sig and avi
i think its a good result:


-

Thanks for this. This is my 3rd graphic I've done on paint.net
 I just added it today. I don't really get how to do the dashes, dots, etc in one of the first steps, I got arrows :? but it still looks cool to me.
to do dash dot dot click this twice...
view attatched image
click the middle part
-
heh probably
but the glow on the text seems better too
-
ok i tried both methods suggested here
i also tried it with her full name and nick name
method 1:

method 2:

i actually like the outcome from the second method better.....it seems more i dont know better
-
ah cool thanks a million dude
-
ok i fixed the title
and one more question actually
how would i make lines like come out of the text like in the heart
-
hey guys i need a little bit of help with pdn
how do i make text, like rainbow colored? cuz i got this wallpaper for my phone

and i wanted to put my girlfriend's name in the middle of it all glowy and rainbow-y to match the heart
how would i go about doing this?
-
Well this is my first tut so go easy on me
and im not sure if this is in the wrong place......if it is can some mod move it?
Step 1:
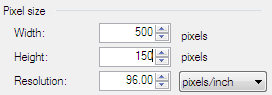
Create a new image with the Dimensions or 500x150
Step 2:
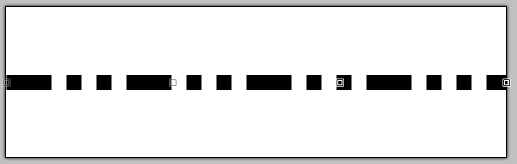
Select the Line/Curve tool and set line width to 15, then style to Dash, Dot, Dot and make the line going straight through the center
Step 3:
Invert Colours (ctrl+shift+i)
Step 4:
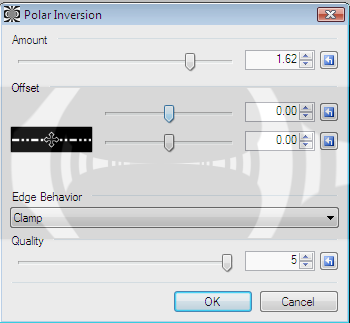
Select Efects>Distort>Polar Inversion and set Amount to 1.62, Edge Behavior to Clamp, and Quality to 5
Step 5:
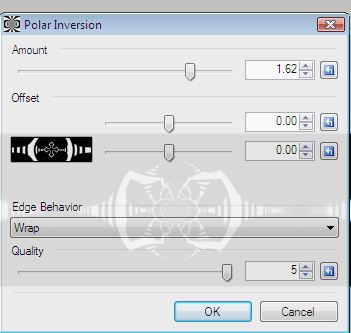
Repeat the Polar Inversion, except instead of Clamp select Wrap
Step 6:
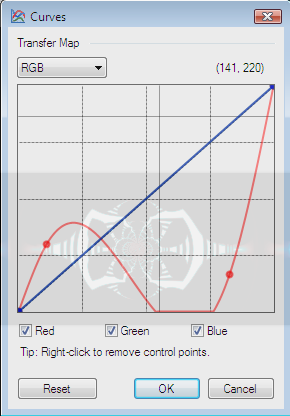
Select Adjustments>Curves and selet RGB and go wild, but this is what i chose
Step 7:
Select Effects>Photo>Glow and leave everything at default and hit Ok
Step 8:
Insert your text and you're done!
Here is my Finished Product:
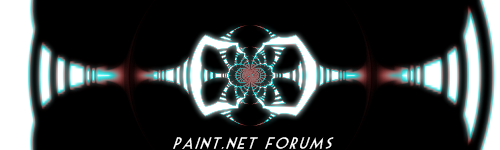
Critisisim is reccomended!

 and pick "Draw Filled Shape" :ShapeInterior:
  and click on the rectangle
 and draw a white rectangle going about 1/2 way down the rounded rectangle(on the new layer) and lower the opacity to about 60-70
Make A Sick Sig
in Tutorial Graveyard
Posted
Nice to see that people are actually reading my Tutorial!
And everyone's personal twists on this method make it all better!