


Samness!
-
Posts
16 -
Joined
-
Last visited
Posts posted by Samness!
-
-
Thanks for your kind comments, everyone
 .
. -
The 'Nebulous' tool is obviously a plugin - could you please provide a link to all of the plugins that are used?
-
Sweet tutorial, thanks for posting.

-
Gallery updated and comments appreciated.
-
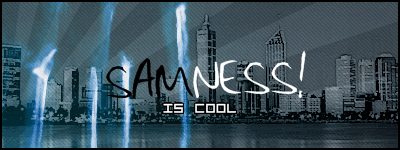
Brilliant tutorial, by the way. Here's my result.
-
You have some pretty interesting pictures on there. Nice.
-
Thanks, david.atwell. I'll remember to use the search function next time.
-
Well it's my own style of easy userbar creation, so hopefully it stays.
-
It seems a bit ordinary, to be honest.
-
This tutorial is available as a PDF. Click here to view or download it
This is a tutorial which will quickly enable you to create a userbar.
Plugins Needed
Fonts Needed
Visitor TT1 BRK - http://www.fontstock...or-TT1-BRK.html
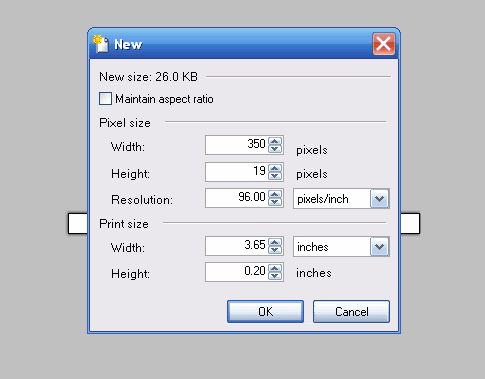
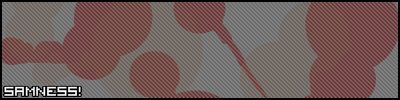
Step 1: Open up a new canvas, with the dimensions of 350 and 19 pixels.
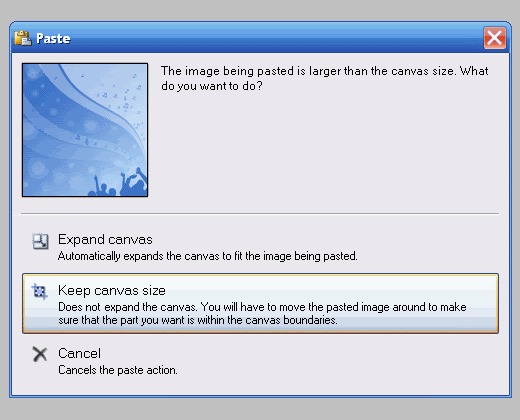
Step 2: Paste in a background image for your userbar, or use the gradient tool -
 - to make your own. I will be pasting one in.
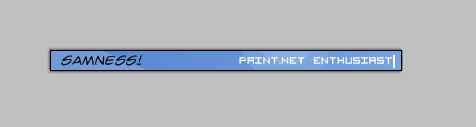
Step 3: First we will want to add some text -
 - to the left hand side of your avatar – I'm going to using my username, Samness!

Step 4: Create a new layer.

Step 5: On this new layer, choose the font Visitor TT1 BRK – Colour White, Size 9. Now we're going to be typing the text that you will see on all userbars, and this will be on the right hand side of the userbar. If usually conveys interests, so I will be typing Paint.NET Enthusiast.
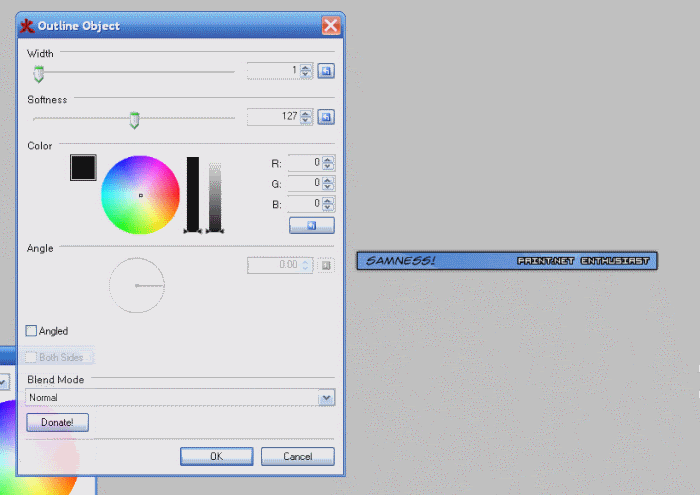
Step 6: Now to to Effects > Object > Outline Object. Set the Colour to Black and the Width to 1, and your text should now be outlined. You may also want to use Effects > Photo > Sharpen, just to make the text look a bit whiter and less blurry looking. You can now merge your layers together. :MergeDown:
Step 7: Create a new layer.
Call this layer Ellipse. Now we're going to be drawing a white ellipse that covers about a third of the image, like so.  and
and 

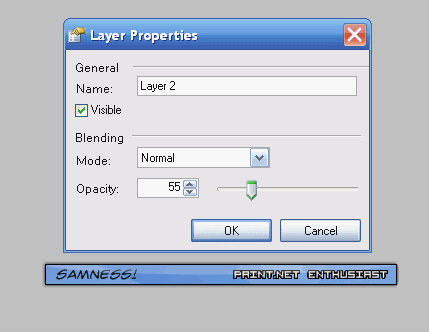
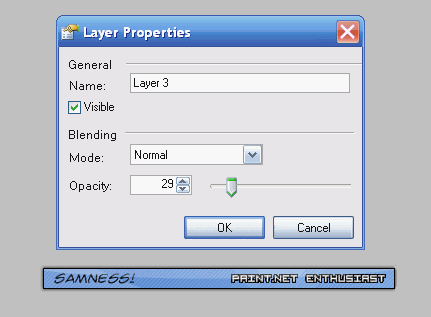
Step 8: Now reduce the opacity of that layer to anywhere in between 30 and 70, depending on what looks better.
Step 9: Now create a new layer.
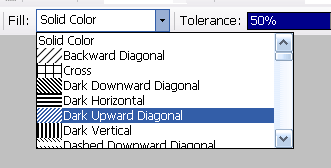
Call this layer Lines. Click on the Paint Bucket Tool. :PaintBucketTool: Up the top there should be a drop-down list with the word Fill next to it. Choose Dark Upward Diagonal from that list.
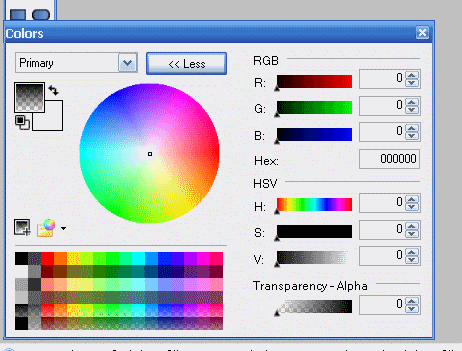
Step 10: On the Colours Palette, click on 'More'. Make your Primary Colour Black and your Secondary Colour White – make sure the Transparency-Alpha for Black is set to 0.
Step 11: Fill in your image – you should have a whole set of white lines along your image. Set the opacity of the layer to around 20-40, depending on what looks better.
Step 12: Merge the Ellipse layer with your Background layer, and then merge your Lines layer with your Background layer. :MergeDown:
Step 13: Now go to Effects > Render > Borders N' Shapes. Set the Shape to Rectangle, the Width to 1 and the Pattern to Solid. Your image should have a border around it.
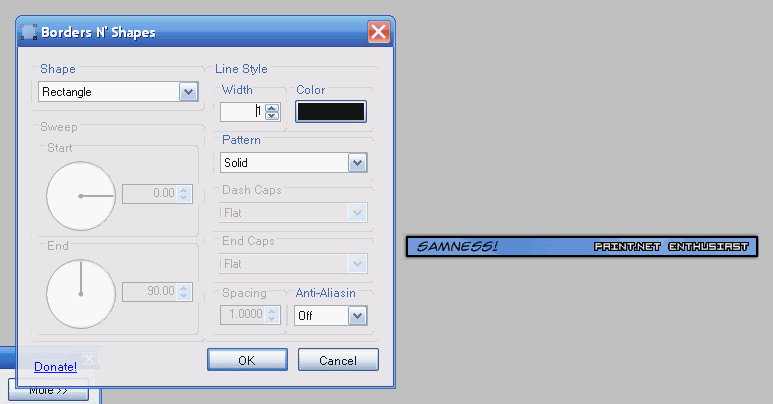
Step 14: Congratulations, you are done! Here is an example of the finished product.

I hope you enjoyed this tutorial!
-

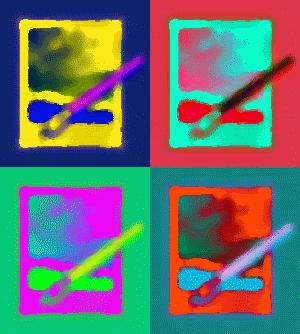
Pop Art!
Avatars and Signatures
Renders

Wallpapers
Made for Requests
Miscellaneous
Pro Userbar Tutorial
in Creations
Posted
Yt27, you should try bringing the text up a bit so it's vertically centered - and for the second one, maybe reducing the size a bit.
On Step 6, before you merge the layers together, you can try using Sharpen to make your text look less blurry looking and a bit whiter. This has been added to the tutorial, just so everyone's userbars look that much prettier .
.