


Juraiko1324
-
Posts
572 -
Joined
-
Last visited
Posts posted by Juraiko1324
-
-
Well, you could do this. What you do is print out a card, write the characters, and scan it back up to the website. It's YOUR handwriting.
Only thing is, it costs $9.95. It might be worth it if you want to fake handwriting in the most convincing way possible.
-
Haha, someone murdered Apple... :shock:
Nice job, I quite like that one.
-
Haha, someone murdered Apple... :shock:
Nice job, I quite like that one.
-
Haha, that's piece looks awesome!
And I'm always happy to inspire people.

-
Haha, that's piece looks awesome!
And I'm always happy to inspire people.
-
Thanks! ^_^
-
Thanks! ^_^
-
Grunge heart tut,with pics and video.WHAT MORE DO YOU WANT?!
Braille would be nice
Hmmm...

-
Grunge heart tut,with pics and video.WHAT MORE DO YOU WANT?!
Braille would be nice
Hmmm...
-
Nice, dunno what's goin on with the splatter on the left side though... :?
I'll edit it out, thanks.
-
PERFECT! Right down to the the shadow!

-
wow dude, I think that second one is better than my heart is! >_>
Very nice, good luck in the contest! ^_^
-
Rewritten. ZOMG. I'm sure that it's 100% correct now.
Please keep on with it!
-
Nice! ^^
I would suggest to everyone, watch the video...I think I screwed up in the text a bit...><"
I'll rewrite it tomorrow, it's no problem.

Everyone has done it right so far, so...don't worry! ^^
-
I love you
^^"
Wow, I like the Joseph one. :shock: Nice....I think I messed up in the text tut. Can someone re-write it for me? ><"
I WILL LOVE YOU UNCONDITIONALLY
by text tut she means written, not a video. Not the way your thinking.
Huh...?
-
Wow, I like the Joseph one. :shock: Nice.
...I think I messed up in the text tut. Can someone re-write it for me? ><"
I WILL LOVE YOU UNCONDITIONALLY
-
Made a text! =)
-
...I'm so lazy...

-
Okay, with this tutorial you'll get an end result like this:
(sorry, it's a .png...)
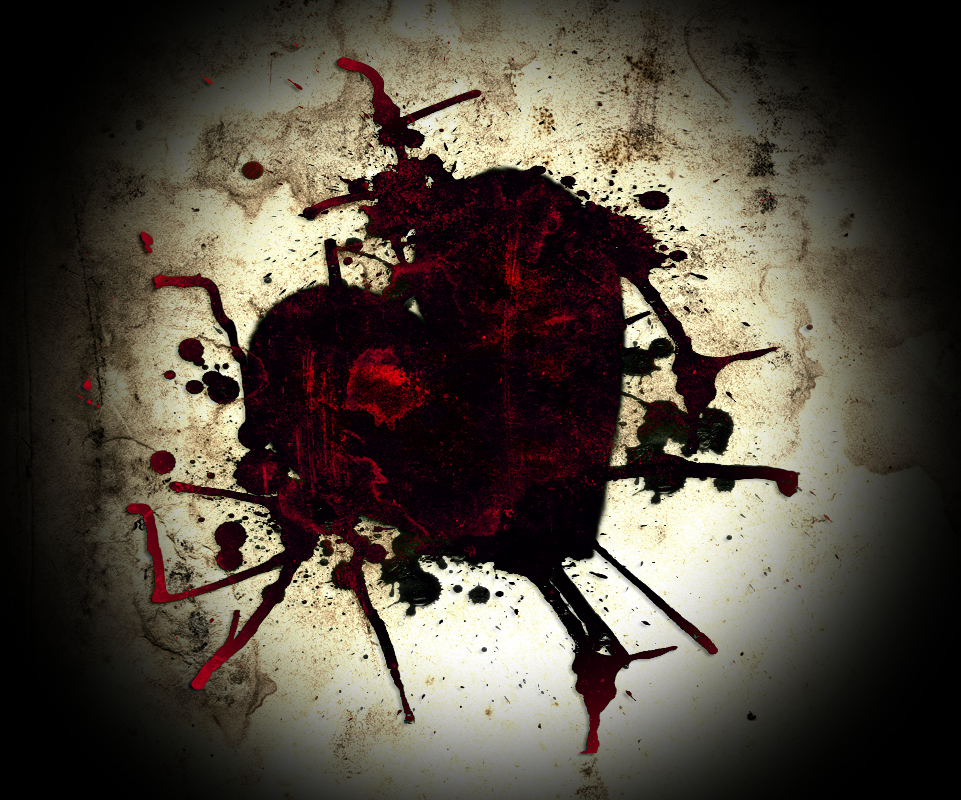
PLEASE, please post your results, and I also urge you (politely? xD) to variate it. Thanks! =)
Recorded using Camtasia.
--------------------------
TEXT TUT (BY REQUEST):
You need the following plugins:
Boltbait's Lumography Plugin
Drop Shadow Plugin
Custom Brushes Plugin (look here)(THIS PLUGIN HAS BEEN DISCONTINUED, USE THE CUSTOMBRUSHES MINI PLUGIN!
A splatter brush plugin, available here.
ABRViewer to convert the PS brushes to be made usable in PDN, tutorial for converting is here:
You'll also need parchment and heart stocks.
---------------------------------------------------------------------------------------------
---------------------------------------------------------------------------------------
1-) New image (ctrl+n) at 800x600 pixel dimensions.

2-) Open (ctrl+o) the parchment stock and select a portion of the texture, copy (ctrl+c), and paste (ctrl+v) the image onto the Background layer of the new image.

3-) Duplicate Background layer (parchment).:DuplicateLayer:

4-) Use Boltbait's Lumography with the slider set to maximum settings on the duplicated layer.

5-) New layer. :AddNewLayer:
4-) Open the heart stock, select the portion with the heart in it, and copy and paste onto layer 2 of the new image.
5-) Rotate the heart so it's an an angle, about 45 degrees.
7-) Use the color picker tool :ColorPicker: on the edge of the heart on the heart layer (layer 2).
8-) Use the custom brush effect and use the splatter brushes at size 400, with the red color that you got with the color picker. :ColorPicker:
9-) Make it look somewhat like this:

10-) Finish by clicking okay.
11-) Duplicate layer 2 (heart). :DuplicateLayer:
12-) Set the blend mode on the original layer 2 to Multiply.
13-) Set the blend mode on the duplicated layer 2 to Difference.
14-) Use the drop shadow effect with these settings:

15-) Duplicate the un-lomography'd, original background layer.
16-) On the duplicated layer, use Boltbait's Lomography at -14.
17-) Set the blend mode for the 2nd duplicated Background layer to Darken.
18-) Okay...Uhm...I never rename layers, so it gets confusing xD But bear with me:
On the duplicated background layer, the other one, which should be the 3rd layer up from the bottom at this point...set the blend mode to overlay.
Got it?

19-) Okay, and...you're done! =D Save as a .PNG with maximum quality.
Thanks!
PLEASE guys, give me credit if you do this and show someone. Not that I made it, just that you did it from a tutorial. Thanks.
Also, try playing around with the transparency and blend modes. I got some interesting effects from that.
Updated (June 19th, 2009); I just found out that the custom brushes plugin as now considered archaic, so...new link for custonbrushes mini.
-
(800x600 max dude ><")
I really like that though.
-
Winterfest, you're good. How long have you been using PDN and designing in general?
I like that new pic! =D
-
Updated; Added video tut for my grunge heart piece!
-
I made a video tutorial for my Takes Heart pic (above) here.
-
-,-
Yes, 100% PDN, background was a photo though, of parchment. Heart was done by a friend which I then edited into that with splatter custom brushes.


How do you fake handwriting?
in Paint.NET Discussion and Questions
Posted
Well, you could do this. What you do is print out a card, write the characters, and scan it back up to the website. It's YOUR handwriting.
Only thing is, it costs $9.95. It might be worth it if you want to fake handwriting in the most convincing way possible.