


Urnemanden
-
Posts
150 -
Joined
-
Last visited
Posts posted by Urnemanden
-
-
Most of you has probaly been in a jungle or seen how a jungle looks from a picture. If that is the case, then you also know that the tree trunks in a jungle is mossy and green.
What i am talking about is that i made a branch texture using paint.net, wich you can see down here:

Now i need a new tree trunk texture, because as you see that one looks a little bit - funny. How can i make a trunk texture using only Paint.NET?
-
Your style and the colours you use are very nice. I hope to see more art from you :wink:
-
Ok. Here is the final render from Re-Volt.

-
You really like to play around with Paint.NET i see. I like a lot of your recently work. Another good piece of art from you :wink:
-
If you mean the texture: Yes

If you mean the 3D render: no, i made the sign in Zmodeler 1.07b (some of it in 3ds max)
-
New Update! I made the 3D model for it!


-
Thoose ones are really good! i really liked this one!
-
Wow, thank you!

i will take a look at the LED Pixelation link now
You are very helpfull LFC4EVER
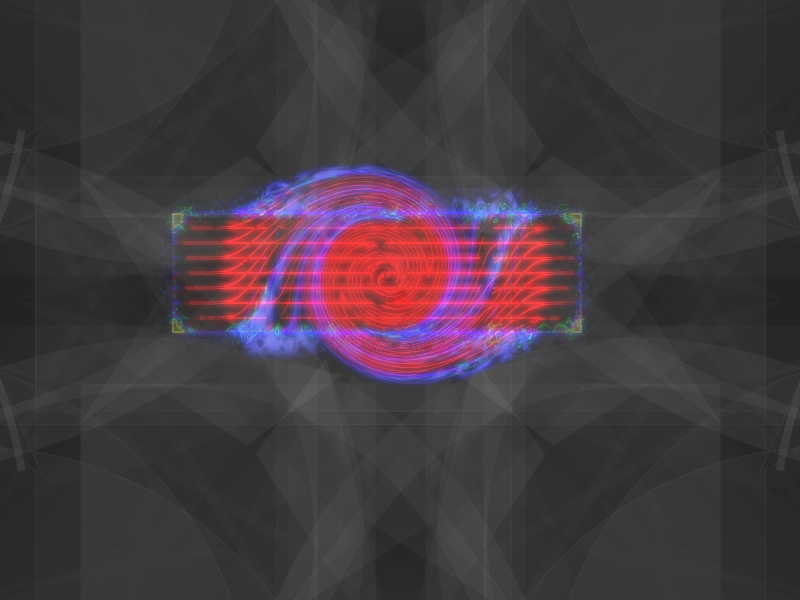
EDIT: LED's is a good idea, but every time i tried (also with different settings) i got weird results. Here is the best one i made:

But thank you for the other tip. It really helped a lot!
-
Well, if you're going for a pixeled look then I think it looks pretty good.
Edit: I forgot to add, the topic is kinda in the wrong section since this is for personal galleries and such. If you're looking for opinions/help on your work, then you might want to try the 'Image Hospital' which can be found at the top of 'The Pictorium'.
Yea, that was kinda what i was looking for. Didn't know this was in the wrong section, since my other post i made here for textures was moved to the pictorium. Anyways.
Thank you for the nice comment Overkill!
-
Ok, since no one posted (yet) i just found a small update i could do to it. I made the Turn finish, so the last arrow doesnt look weird on the upcomming 3D models.

If there is anything else, please tell! :wink:
-
You are pretty good at making things look glassy & uses your brushes. Also the fade in the sides on the font.
I really like your work! -
Hello!
I made this texture, wich i think needs some better detail. It is a texture for a "Turn" sign. I am going to re-make some of it, so i just wanted to know if anything else could be done better to it.

Do you have any suggestions, ideas or comments for it?
-
Hehe, well you combine the colours good even if you are colourblind :wink:
-
Interesting idea! But the functionality already exists. Here's how:
1. Resize the image with Image>Resize. You're going to enlarge it to a percentage equal to however many copies you want x100%.
2. Go into Layers>Rotate/Zoom and pull down the Zoom slider until you get it back to the desired size.
3. Use the Pan control to place it where you want the image to start.
4. Then click the "Tiling" check box.
Ta-daa! :-)
Aah, yes, but i would rather like the off-set. I was thinking that you can justify both by pixels and by numbers of images shown.
But thank you anyway for showing me this David Atwell.
EDIT: Lol, for some weird reason you are the only one who is replying to my topics. :wink:
-
I see your style is mostly "dark powered". You are playing around with a lot of tools to stylize your signatures and pictures, and i like that
Good work AmadeusX :wink:
-
Hello there!
I was thinking of a new plugin or something build into Paint.NET, that maybe could be made.
This one is an off-set plugin.
When you are going to see if something is seamless, or if you just want to make a pattern, then an off-set option could be very usefull. Here is an example of what i mean:
Here is my texture.

I want to offset it 4 times

I press OK, and here is my result.

What do you think about it?
-
All of these sigs look nice so far, guys.

Wow! Indeed cool & fun!
-

This is my wallpaper. It's wasn't any hard work to make, and i just have it because it is simple.
-
Good picture. It is very well made. I like the way you combine a 3D picture with Twist-looking drawings
-
Thank you for moving this topic David Atwell. But it looks like no one cares about textures, so your reply might be the last reply to the topic before people forget about it

-
Hello!
Only a week or 2 ago i began making my own textures. Here is a look:

All of them are created from scratch, and only a little bit real photo editing for roughness and shape has been used. But actually i didnt just want to upload the textures i made and show you them only, - I would like to know if you got any tips or tricks for making textures in Paint.NET, or if you tried/made any textures yourself in paint.NET. Please upload them and show me, eventually tell something about them. if you for an example made a sign with dirt on, then tell the world, how you made it dirty.
And as a start, i will begin telling about my own textures.
The banana leaf

This was the texture i made today. made the shape out of this picture, and then i filled :FillSelection: the shape with a green colour, wich i found from the original picture. Then i added a new layer :AddNewLayer: and made the Stem (look below) of the leaf, using the lasso selection & the gradient tool


To give the leaf some reality, i added some small stripes with the Line/Curve tool :LineCurveTool: , like there is on real leaves. After that, i used fragment blur and then i deleted all small lines that was outside the leaf.

Then i edited some small details, to make it look more realistic, before i did the final step.
I Created a new image
 and then i copied the leaf shape with fill over to the new image. Then i selected the whole leaf :SelectAll: and used the Outline Selection tool.
I added a new layer, and copied the original leaf over to the new layer, and then i selected the red outline on the old layer.
Then i selected the new layer, and used Gaussian Blur to give the leaf a soft outline. That was nearly all i think. :wink:
The snake plant leaf

This texture was the first one i ever made. I did in on quiet short time. This picture was what inspired me to make the texture. I made the shape myself with the line/Curve tool :LineCurveTool: and then i added some Bulge :Bulge: to it. Then i added a new layer, and copied the shape, hued
 it to Green. Then i used Gaussian blur to make it smaller and blurred, and at last, i added some roughness & light i made with the Alpha Mask tool. Later i added other details, to make give it different green variations.
The cookie sign

I made this texture for a racing track. The text in it is just an example text, wich he easily can change in the .pdn file. The sign was'nt hard to make, i started to make a square and then i made some kinds of drawings, and used effects on them, to make the square look dusty. For the Brown dust, i copied out some of the grass in this picture and then i used Black And White
 & Alpha Mask. Then i used Feather & several other effects, such as Silhuette to make it look brown instead of grey. And as final, i used Fragment to make small lines smaller.
The palmtree leaf

This was the 2nd texture i made. I made it because i needed a palmtree texture for a palmtree i made. But while i was making it, my computer frooze down, and then i didn't have the .pdn file anymore.


So there is the png with a white outline, wich i dont know how to get away. After making it, i tried to make something that looked like it, several times, but it never went out that well, as that texture you see above. I can send you the full sized one, if you may know how to fix it.
Ok. i think that was all of them
. I hope this helped a lot, but if it didn't anyway, please post a textures you made or are making, so at least i can learn something 
I would like to know all this because i am not in the expert or advanced stage making things like textures. I can't make any cool signature for my self, so i just hope that i can become good in texturing and 3D.
Thank you for reading this quiet long topic
-
Use the "Magic Wand
 " tool to make the white background transperant.
Great tutorial! i used the Button for my website,
-
I was thinking about... Why don't the forum support .pdn? i just mean, that it is the best format ever, so i think think that would need priorty A!
Example: Things can be transperant, like if you make your signature as a picture and then make a shadow to it.
-
This Tutorial is so great! i love it!
I made my own button. Check it out!


 and then i copied the leaf shape with fill over to the new image. Then i selected the whole leaf :SelectAll: and used the Outline Selection tool.
 it to Green. Then i used Gaussian blur to make it smaller and blurred, and at last, i added some roughness & light i made with the Alpha Mask tool. Later i added other details, to make give it different green variations.
 & Alpha Mask. Then i used Feather & several other effects, such as Silhuette to make it look brown instead of grey. And as final, i used Fragment to make small lines smaller.
 " tool to make the white background transperant.
Mossy trunk texture
in Paint.NET Discussion and Questions
Posted
Thank you very much all. About the tutorial: i can't find the right colour for my trunk, as i don't really know how to give it a mossy effect. making it green makes it look like it has been in a tank full of green acid :shock: . But i can still use it for making my own trunk textures for the other trees i need to make for my track.
And about the smudge plugin; it was very hard to control it so instead i deleted the black join lines by:
- duplicate layer
- selecting the leave on the new layer
- Effects -> Selection -> outline
- brush width 1 and black colour
- selecting the black colour
- Going to the old layer and delete the selection
- deleting the outlined layer
- voila
Now, i tried to update the textures but appearently the render didn't change at all, so i got nothing to view right now. Does anyone know how i can add moss and other green stuff to a tree trunk?