


ChitoDog
-
Posts
135 -
Joined
-
Last visited
Posts posted by ChitoDog
-
-
Doesn't this seem like the Exploding Planets tutorial.
IMO it's somewhat similar, but the exploding planet tutorial doesn't explode all the way. It only shows the surface cracks "as if" it's going to explode. This one is actually already exploding outwards. :?
-
Wow, thanx a lot BoltBait, I must've overlooked that part. I went ahead and added that .dll file as well and there it was, the drop shadow effect. Thanx again BoltBait, I really appreciate your help and quick response

-
I need some help installing the Vandermotten.PaintDotNetEffects.DropShadow.dll: The "Drop Shadow" effect, under the Stylize effect menu.
I tried adding it, then I close my PdN program and reopen it, but I still can't find the Drop Shadow effect nowhere in "Stylize Effect Menu". I've tried this like 3 times now, but it still won't show. I've added other plug-ins before, but this is the first one I've added that won't show anywhere in the menu. Help anyone?

-
No problem DarkShock91, I'm just returning the favor for all those who helped me when I was a total noob :oops: lol I still have a lot to learn, I mean a lot lol, but if I know something, I don't mind sharing it. 8)
-
rtargo20, from what I see, it seems like everything is opposite? Did you add the correct GIF files to the UnFREEz? I ask because it looks like the "lightning effect" frame blinks "darker" than the "normal rain" frames. Perhaps you used the "normal rain" frames as the "lightning effect" frame, and you used the "lightning effect" frame as the "normal rain" frames? Try to double check to make sure you're adding the right frames. I kind of like the last sample you posted, where all you needed to do was lower the brightness of the lightning flash frame and add a few more sets of the "normal rain" frames.
-
You're welcome rtargo20, and good luck with all your future creations 8)
-
Hey rtargo20, you have the right idea so far. What if you tried making the "lighting effect" frame a little less bright. You have to also consider the weather condition when deciding how bright you should make it. Also, try adding a few more "normal rain" frame sets between the first 2 flashes and the last third one. Other than that, it's looking pretty good for your first try :wink: .
-
Hey thanx a lot DarkShock91, appreciate that. Great tutorial btw, thanx for sharing it
-
Sorry for the amateurish question, but where is this, "Paint.NET user files folder" you speak of to be able to add the attachments? I've added plug-ins to the "Effects" folder, but can't seem to find the "user files folder". Can anybody help? :? Thanx in advance.
FOUND::
Ok, I figured it out now...how embarassing :oops: lol
I have another question though, I downloaded the "Drop Shadow" effect plug-in and added it to the "Effects" folder, restarted PdN, but when I made my font and tried to use the "Drop Shadow", I couldn't find it anywhere on my PdN. Anybody have any idea what went wrong? Help anyone? :? Thanx in advance.
-
ChitoDog, Please explain how you get the lightning into image !!
I really like it and it adds so much to the raining picture. Thanks
First of all, thanx for the compliments, rtargo20. I didn't expect anybody to ask this from me, so let me see if I can try to give you a short, simple answer lol Well, personally I chose to use the other rain tutorial from these forums found in this link:
viewtopic.php?f=15&t=1288&st=0&sk=t&sd=a
Simply because it was easier for me to understand and also because the rain has a more "watery" look to it. But it can be done with this rain tutorial in this topic as well.
Once I have my 2 "rain effect" GIF files ready to animate, I opened up any one of those GIF files in my PdN. I then go to, Adjustments >>> Curves >>> Luninosity >>> Set at about 110 (you can adjust this setting to your liking, but I personally used 110, not too bright, not too low). You then save it as a GIF file along with the other 2. Now you open up your UnFREEz. Normally, when making a "normal" rainfall animation, it only takes 2 frames. But since we're going to add a little lightning effect, we're going to need a lot more than just 2 frames lol we'll make this sample short and simple, then you can later add more frames depending on how long you want it to animate and how many times you'd like the lightning to flash. Since "normal" rain uses 1 set of two frames, right? Here, we're going to use "10" sets of 2 frames, in other words, 20 GIF files altogether. So add "5" sets first (without the "lightning effect GIF file yet), after that, you add the "lightning effect" GIF file, then you add "5" more sets of the normal rain GIF files again, giving you a total of 21 Frames. Then you set the Frame delay at 1 and the Loop Animation is "on". Then just make it and save it. That's basically it. I'd give more details and maybe even screen shots if anybody wishes, but I might get in trouble for probably posting off topic? lol I'm sure there may be other faster, easier, better ways of doing it, but this is just how I did it. Hope that helped in answering your question though, rtargo20 and thanx again for the compliments
-
Hmmm....I don't see the difference between the two. I still get somewhat dizzy when I stare at it lol :?
-

I made this along time ago using pretty much the same method.
The rain animation background you used looks pretty cool. Unfortunately, the "veitox" message is somewhat annoying. It blinks and moves up and down too fast :shock: If you would've used the "veitox" frames, either at the top or the bottom, and just made it blink in one place, it would've been much better.
-
Glaga, I really like your lightning but having trouble getting it
in at right place and please explain the "then used default glow, =D" part.
Just used luminosity curves into (65,190) then used default glow, =DI could be wrong, but I think they meant... Effects >>> Photo >>> Glow, then whatever default settings it has.
-
Alright Ash, thanx a lot, I think I'll try that on one of the planets I made with the Shape3D. Give it a nice realistic smooth animation look.
-
Changed the eyes. They're not that good, but I think it's better than the other pic.
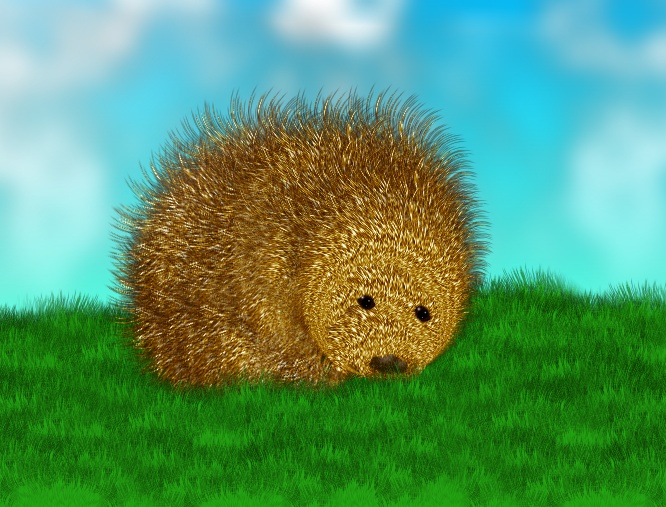
Now it looks all sad


Wow, that's really good olav.k.m
you should have the little fella copyrighted and make little childrens books out of it or something, great work! -
Thanx a lot Ash for the help, that also makes things a lot easier. There's only one more question though lol umm any possibility that you can post exactly which settings to change on Shape3D and by how much would be a good setting to change each each angle to? :? Thanx in advance Ash.
-
Is there a way to use the Shape3D's settings to make the image turn left or right little by little (once the eye is done) without distorting the quality of it, so that the eye can be animated to be turning to one side? Or do we have to create different sets of eyes at different angles THEN animate it? :?
-
Alright, thanx a lot brandon.roeder and LFC4EVER, I'll try both suggestions.

-
Nice tut, here's my shot at it with a little lightning effect. Any way to make the raindrops a little bit thicker btw? :?

-
No problem. Being new to the PDN myself, I know how the layers can get tricky sometimes.

Good looking explosion BTW.
Thanx again Dark Thoughts. I think I'm beginning to get addicted to PdN, I'm up till 6 am at times just trying out new effects :shock: lol Seems time goes by really fast when you enjoy the work you do.
-
Thanx a lot Ash and thanx also for sharing all your ideas in your tutorials.
-
Here's my shot at it while tinkering with some renders afterwards. :?

-
Thanx a lot Dark Thoughts, I had totally forgotten that I had the Layers Window hidden since I first started tinkering with PDN, (bad idea lol). No wonder I was clueless all this time about layers. :oops: but thanx for pointing it out for me, was much appreciated. By the way, here's my sample and great tutorial, Ben_R_R thanx:

-
Ok, Im fairly new to PDN and I was wondering if someone can help me understand some PDN language from this tutorial. I was doing good until I got to this part:
3} Duplicate layer
4} Top layer - Effects - Distort - Bulge +100
5} Bottom layer - Effects - Distort - Bulge -200
6} Top layer - Blend Mode - Xor
> I see where it says "Layers" when using PDN and where it says "Duplicate Later" then I click it, but I don't know how to apply steps 4, 5 and 6. How do I get to the Top Layer in order to apply the "Effects - Distort - Bulge +100", then how do I get to the Bottom layer to apply the "Effects - Distort - Bulge -200", then finally back to the Top Layer to apply the "Blend Mode - Xor"? I'm sure this is fairly easy for many of you, but like I said, I'm new and I'd like to learn more and I thought I'd practice with this tut, but just need a little help with this part
thanx so much in advance for any help given.


Align Object Plugin - Updated 06/17/2007
in Plugins - Publishing ONLY!
Posted
Wow! It's a good thing I came here and read this thread. I was having the same issue as DarkHate. Many times I've tried to center an object, but the plugin wouldn't center it and I kept wondering why. Thanx for the info people. 8)