


Martel
-
Posts
157 -
Joined
-
Last visited
Posts posted by Martel
-
-
Thank you very much Ishi and Eli
I combined both of your responses and quickly made a bend.

EDIT: Resized image to comply with max size rule
-
Is there a plugin to fold or crease image
Thanks in advance

EDIT: resized image to comply with max size rule
-
Thank you Eli,
That answers everything!
-
I need to update to circle text v1.4 (updating now)
Do you have a suggestion how to draw the circle
-
PDN Version 3.3x, 3.5
I want to draw a circle then have text within that circle.
I am using Circle text V1.2
Is there a better way to draw the circle.
Or a better way of text
My circle is not concentric so my text is not lining up.

-
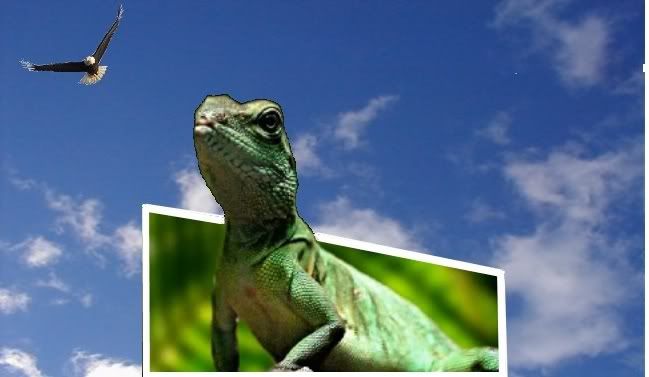
Nice,
I would like to see the tutorial on that gold picture frame and flying glass.
-
@ Rick Brewster
The issue was the blurring of the pic, the resizing part was cool.
So I figured I must of been doing it wrong.
I took it to a computer with a different program and resized it down and the result was no noticeable loss.
@ nitenurse79
Yes, I had checked the maintain aspect ratio. ( I was thinking the same thing too).
@ delpart
I think the rounding up or down of the fractions may be my answer.
I will also try other compression format instead of JPG, or GIF,
I started with my original and cropped way down

Next I applied the math to the resize as you suggested and it worked great.
I am sure there is still a loss because I can only apply whole numbers to the resize, but for this application it works.
Thanks


-
Version 3.3x, 3.5
When sizing a pic down it gets blurry or it seems the pixels are all scrunched together.
-
@Bob11
I think it looks fantastic!
-
What an excellent collection!
I know you have no tutorials but how bout a clue on the method of (abstract of the week #13)
-
mountnman
Thanks for pointing that out.
I edited the tool name
-
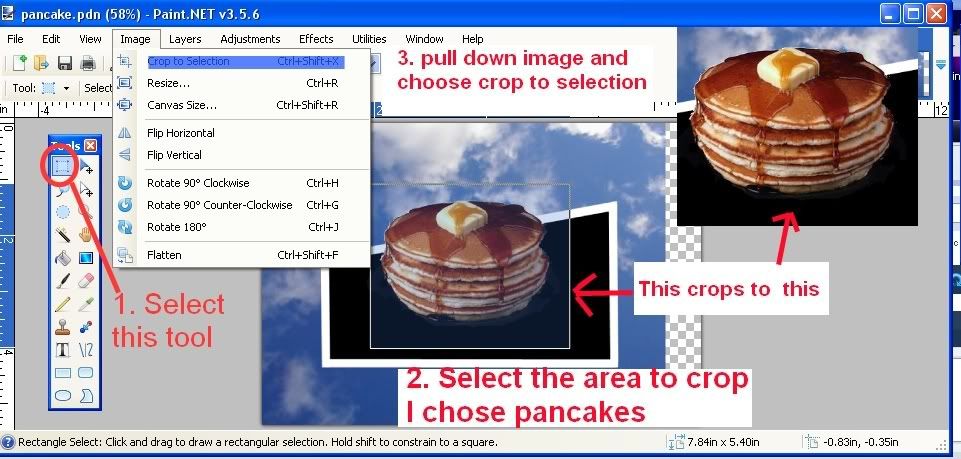
Here is how I always crop
1. select the (edit) Rectangle Select tool
2. pull a square around the area to crop
3. from the pull down menu image choose "crop to selection"
-
Yes it makes sense..pretty nifty
-
.
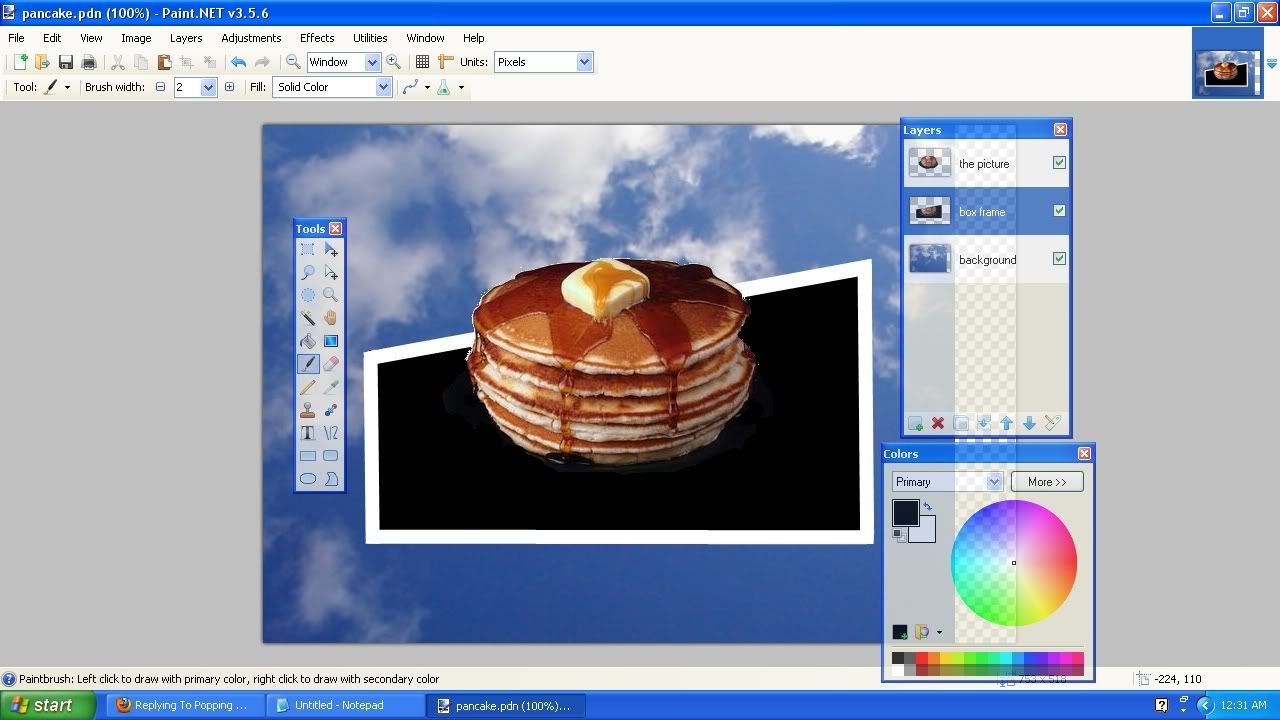
A white frame around the black box picture area would help ...
-
What is a YouTube on it?
Instead of using the eraser to separate the background use the magic wand (set it down to about somewhere between 12 and 30)
The background can be removed that way or...
I really like the remove tricky background tutorial
-
Be sure that you are on the correct layer.
The layer you are working on will be highlighted blue on the layers selector window.
Also be sure that your layers are in the order that you want.
.
.
-
yes the black box and paint bucket is good (the tut uses a slanted box to add depth) it will work square too
make sure you are on the layer with the black box.
grab the magic wand
click the black box it will become grabbed or highlighted
next
switch to the picture layer below
then invert ctrl+i
then hit del
-
ERR,
Thanks for the reply.
Could not get those to work with .NEF (Nikon Image Files)
Nikon has a codec at http://nikonimglib.com/nefcodec/
S-NEFCDC-1100WF-ALLIN-32BIT_
So far that does not make it work in PDN
-
Looking for a way to open Nikon Image Files .NEF
This link is broken
http://forums.getpaint.net/index.php?showtopic=4717
Thanks
EDIT
I don't think this is PDN
http://paint.net and several folders down it looks like PDN but is not it leads to an "am i hot or not au site"
...usually it is http://www.getpaint.net/
-
Sorry bout that EER
The previous post was
First part...
The reason the person who private messaged you is cussing may be because is frustrated with not knowing how to use the plug in.
Tell the person to post a help request in paint.Net Forum tell them to post the question in the forum.
Second part
Tell the person the answer is
the file needs to be copy/pasted into the Effects folder
And yes, The e-mailer has very sound English espically cussing, I was just trying to facilitate matters. :red:
-
I believe that the user is trying to open the .dll file with Paint.NET.
Of course the file needs to be copy/pasted into the Effects folder, not opened.
=====================================
Have the person post a help request in this thread:
the file needs to be copy/pasted into the Effects folder
-
hi im new to this software and am finding it a little confusing hopefully you can help? firstly when creating a shape on the new layer do i just draw a shape from the tools located on the left hand side and if so i have tried this but it doesnt appear as a black box. do i fill this colour in with the paint tool? also im a little confused with the term invert? could you explain what you mean please also how do you select things for deletion
1. Yes you can draw a shape on a new layer using tools like paint brush line. To get a black box change your color on the pallet to black then select the area you want to be black with the rectangular select tool, then hit backspace and it will be black, (be sure to be on the correct layer) or you can use the paint bucket to fill the box with color.
2. Invert means to change from the selected area to all other area. If you have selected areas with the wand then hit ctrl I it inverts it to the unselected area. Other words it selects the unselected area when u hit ctrl I
-
Thanks Sarkut,
I looked and there it was right at the bottom of the adjustments tab.
Works great.
Has a slider to adjust opacity.
Can select an area and adjust too.
Thanks
.
-
Hoping to select a picture or an area of a picture and make it somewhat see through.
Not totally just semi transparent to varying degrees.
Thanks in advance
Fold or crease effect
in Paint.NET Discussion and Questions
Posted
Cc4FuzzyHuggles,
Thank you for the reply,
Actually, I remember that tutorial and used it when you posted it.
I will continue to monkey with the different ways to create alternative ways.
Continuing to dig I found that mirror creates a fold effect.