


Wither
-
Posts
1,068 -
Joined
-
Last visited
-
Days Won
2
Posts posted by Wither
-
-
Ed Harvey's effects haven't been included with Paint.NET. You'll still have to download it separately and put the .dll in your Effects folder.
viewtopic.php?f=16&t=2023 (Short tutorial on where to put everything.)
Good luck in your bot-hunting!

-
Hmm... Your best bet is to get the selection with the Magic Wand or Lasso Tool and resize accordingly.
Both are sort of likely to give iffy results though. >_>
-
Paint.NET already does this.
 will resize/move the pixels in the selection.
 will resize/move the selection. Leaving the pixels untouched.
Unless you're asking for a box that resizes it for you... It doesn't do that. >_> (And I don't know how practical/possible it would be to implement)
-
For the color, you can use one of the color plugins Ed Harvey developed. viewtopic.php?f=16&t=21750
As far as batching 300+ photos... you can really only paste the logo on each one individually. Very time consuming, but maybe you can find a macro/automation program online to do it for you? (Provided the logo will be in about the same place on each image)
-
Thanks people!
Glad I could be of assistance. And especially glad to have a second tutorial stickied. To commemorate the occasion, I experimented further and added feathered erasers to the list here. Yay erasers!

-
This tutorial is available as a PDF. Click here to view or download it
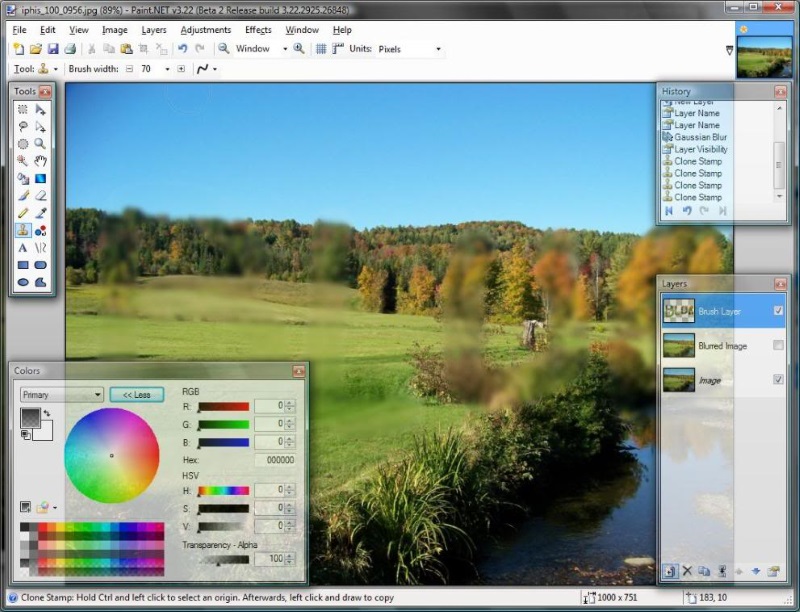
How many times has this happened to you? You're working on your picture in your favorite image editor of all time, Paint.NET, and you think to yourself, "Man, I sure wish I could have feathered brushes like they do in Photoshop! Or that other free image editor. *cough*" Well think no more! ... Oh wait... Keep thinking about other stuff, but stop thinking about this because I'm going to show you how to fake it! You'll need to use the Clone Stamp and a few layers for everything, and there's really no way to fake fancy brush shapes (that I can think of at the moment) . But this will allow you to have soft brushes and mimic an airbrush effect! Hurray! Soft Brush/Airbrush So often requested, yet until now, we could only sit back and say 'wait until 4.0'. Now, we have the opportunity of saying 'Hey, you know what? We can have soft brushes!' Granted, Photoshop's soft brushes are much more... you know... ...but Paint.NET comes pretty darn close if you use it right! First, you'll need three layers. One that has your main image (or not), one with the color you choose, and a third for your brush.
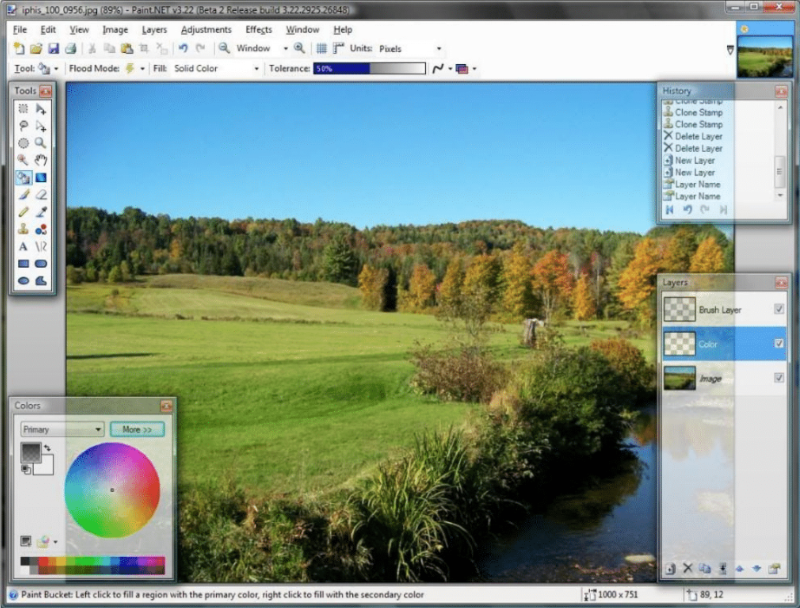
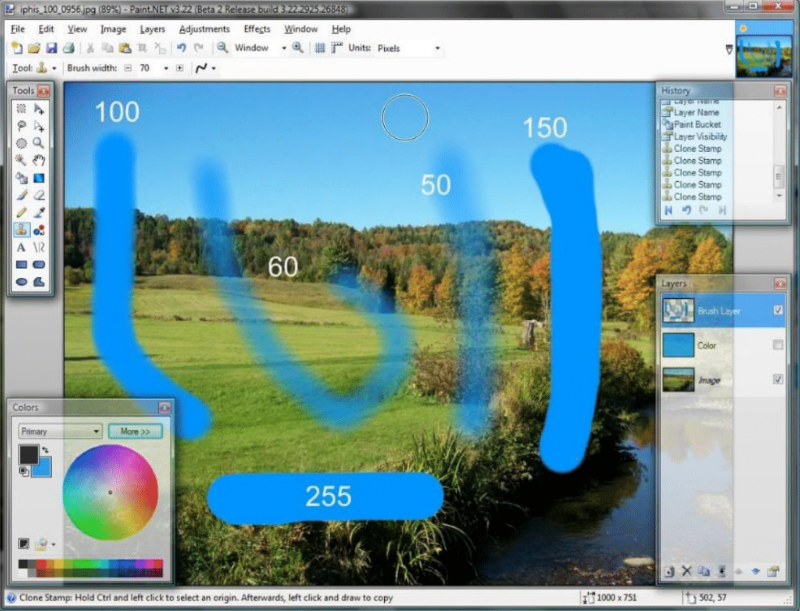
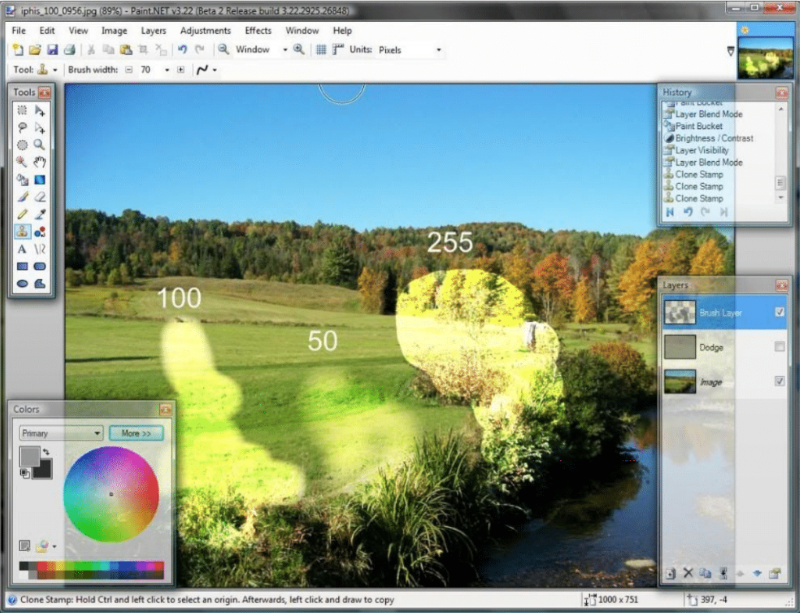
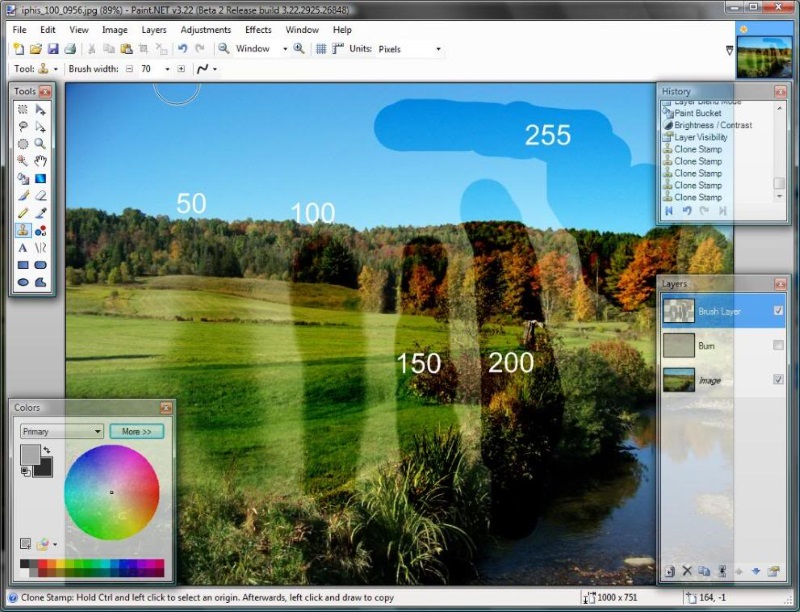
On the 'Color' layer, fill in your desired color. Take out the Clone Stamp and set your reference point on the color layer. (And hide the color layer while you're at it) Now for the interesting part: Set your primary color alpha value to something lower. The exact setting depends on your brush size and how 'soft' you want your brush to be. For the sake of example, I've shown different alpha values at the same brush size (70). To give you an idea of what you can do. If your alpha value is too low, there won't be any effect at all. Remember that. Go to the Brush Layer, line up with the reference point*, and start painting away!

*If you don't line it up, or at least get it really close, you'll get less than desirable results. Especially in the next section. Blur Tool You may be thinking, "Ok, Wither. I'll admit airbrushing colors sort of works. But surely you can't fake a Blur Tool! Paint.NET just can't do it. Never!" Well, now I get to prove you wrong! I like doing that! It's fun, and it makes me feel more intelligent. Which ongoing research suggests is a good thing. We start out much the same as last time with one key difference: Instead of adding a new layer, duplicate the existing picture.
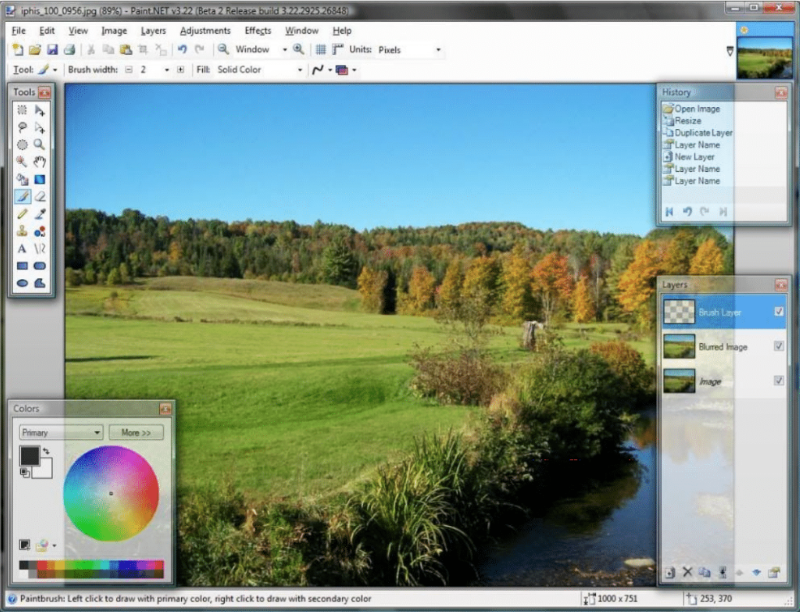
Now go to the layer you're going to blur, and use Gaussian Blur at your desired setting. It's totally up to you... I swear.
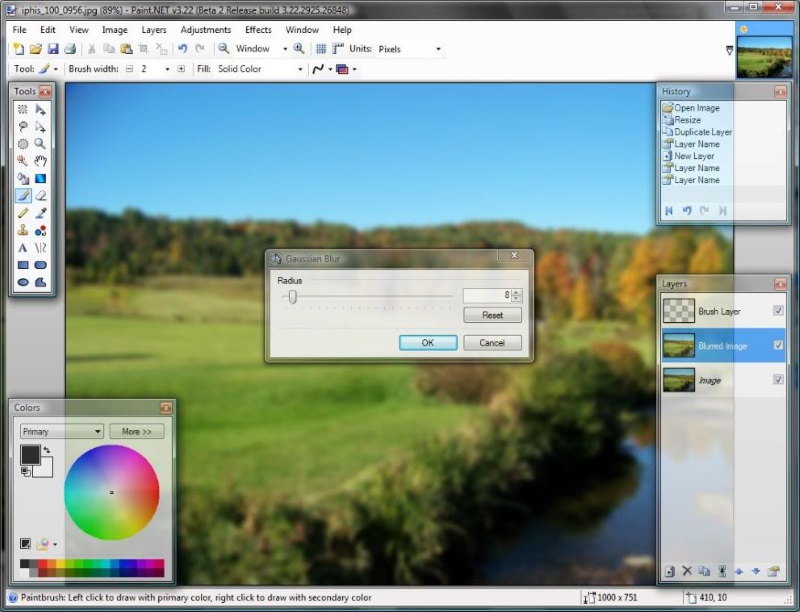
Go ahead and repeat the last few steps of the Color portion. Hide the blurred layer, set the reference point, lower the opacity, preheat to 450°... etc.
Dodge Tool Now I'm sure you're saying in your head "That's impressive, I'll admit. But I know for sure that you can't give me a Dodge Tool." Wrong again! 😉 Let's go ahead and make our extra layers (you should be getting used to this by now). Set your primary color to hex code 8C8C8C and fill the second layer up.
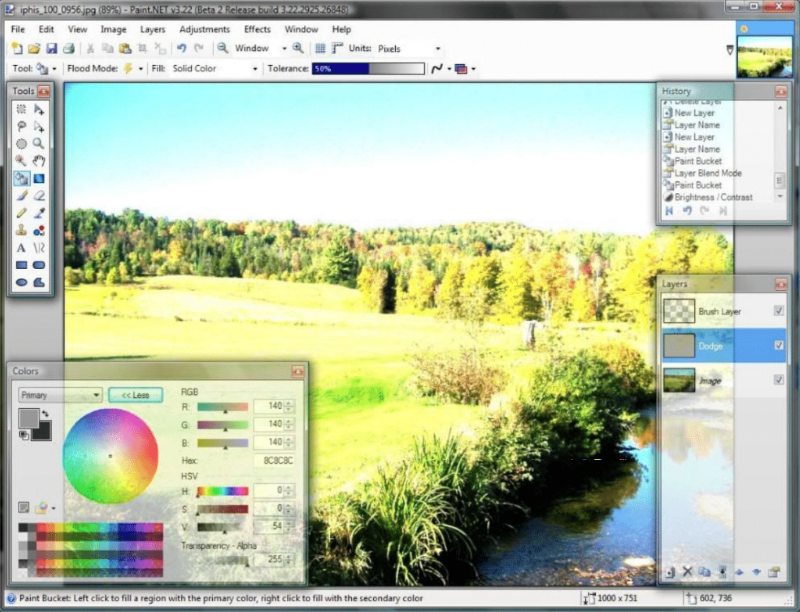
Ok, now unlike the last two times. We're going to change the blend mode of the Brush Layer. Change it to Color Dodge, of course. You were expecting me to say Xor, weren't you? Admit it!

Here we go again! It should really be habit by now. The numbers, just like in the Color section, represent the alpha value used.
Burn Tool By now you're probably saying to yourself, "I'm amazed. Paint.NET seems far less pathetic now. You showed me the wonder of the Dodge Tool. Please enlighten me further, oh wise one." Actually, if you really are saying that last part, I suggest you see a therapist... soon. >_> Well, we're almost done. You've stuck it out this far. Just a little longer, I promise! Three layers once more. Fill the middle layer with this shade of gray (hex code A5A5A5).
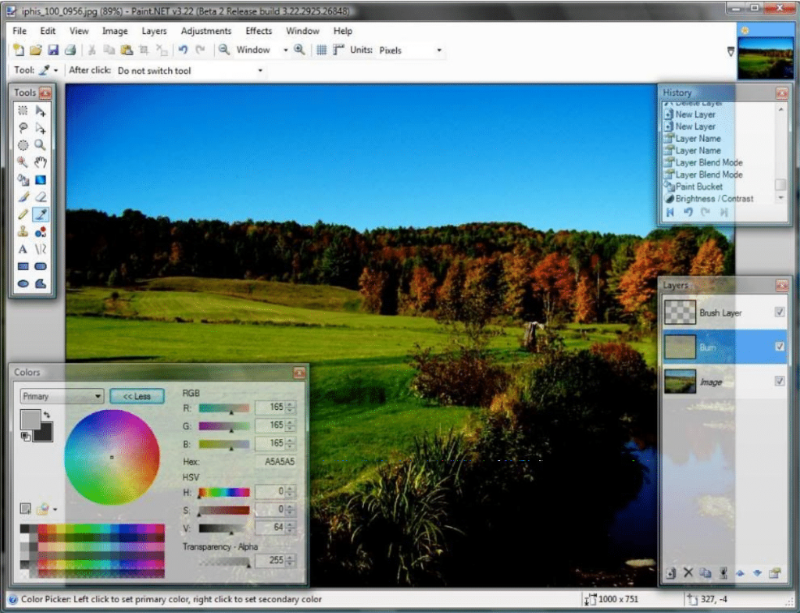
Change the Brush Layer's blend mode to Color Burn... Yes, I know it's a shock and completely unexpected but just bare with me! Don't bail out on my crazy ideas now!
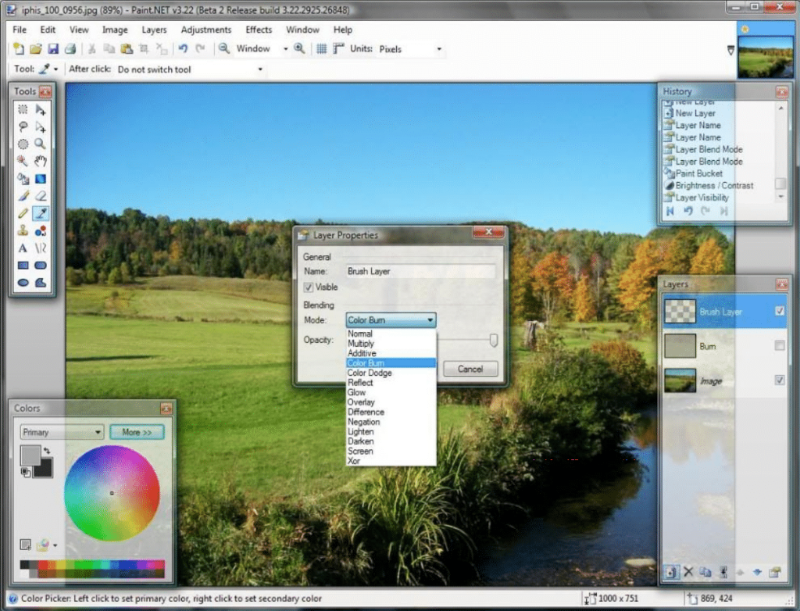
You've seen me do it in an example 3 times already... You should know exactly what to do at this point. 😉
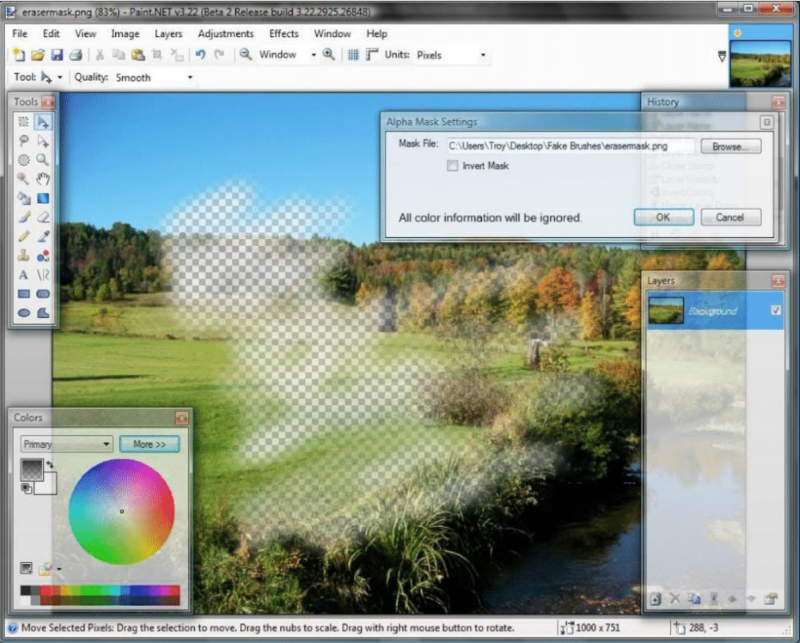
Eraser "All that other stuff is great, but we want a feathered eraser too!" the crowd shouted enthusiastically. It just so happens that you're in luck! Because it can be done... it will just take a few more steps than the other sections. You'll need the Alpha Mask plugin ([Plugin] | [Tutorial]). Faking a feathered eraser tool isn't as 'fluid' as the other mock-ups. But if you really need a feathered eraser and don't feel like turning to the alternative(s), read on. All these steps are made necessary because the clone stamp doesn't pay attention to the alpha value of the reference point. It will just ignore it entirely if it's transparent, and if it's a really low alpha color, it will simply fill in the color at full opacity. You'll have your three layers (big surprise there, eh?) Fill your middle layer with black this time.
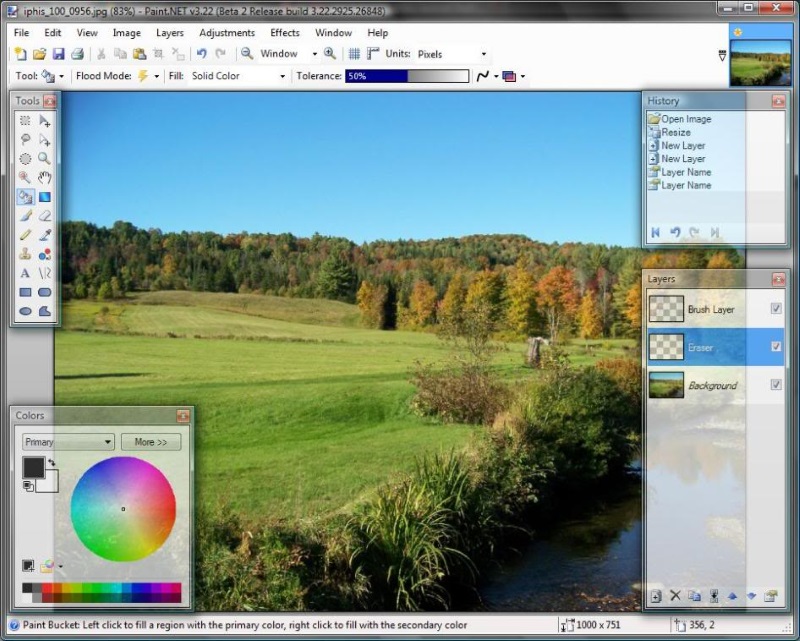
Reference point, Brush Layer, scribble, rinse, wash, repeat.

Unhide the middle layer, invert colors (so it's white) and Flatten. Save this as your mask (see the tutorial for Alpha Masking above if you don't understand. Just remember it NEEDS to be a .png to work right)
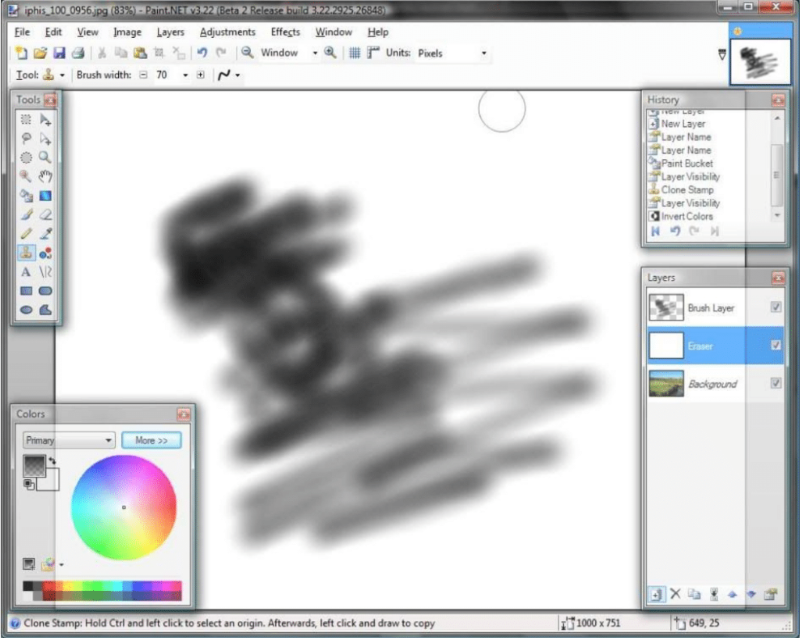
Undo the Flatten, hide/delete the "Black & White scribble layer", and load your alpha mask. It took a few steps and you may not ever need to use it... But now you know how to do it anyway!
Smudge Tool So you're probably saying, "No way it can do a Smudge Tool. Just no way.... Right?" Well... ... yeah, actually. You're right there's no way.
 At least I can't think of how at the moment. >_> ...See? I'm nice, I let you guys win every once in a while. 😉 --- So there you have it! Some of the basic tools of Photoshop... Namely, soft brushes, can be mimicked in Paint.NET. Please don't hesitate to ask me to explain anything more in depth than I have here. If you're curious, I chose those shades of gray specifically for the Burn & Dodge Tools, because that's pretty close to the affect the 'real' Burn/Dodge Tools have in Photoshop CS2. (I compared the two. I'm good like that.
  ) Of course, you should feel free to use darker/brighter grays to adjust exactly how you want your Burn/Dodge to look.
 -
 2
2
-
-
This falls under custom brushes. Which is impossible until PdN 4.0.

There is a workaround though. It's not quite as easy as the Photoshop way where you do it in a single click, but it should work for you nonetheless.
^ Click for full size. ^
1) Open your image.
2) Duplicate the layer it's on.
3) Use Gaussian Blur at whatever setting you'd like.
4) Set your primary color's alpha value to 100.
5) On the blurred layer, use the Clone Stamp tool to select your reference point.
6) Create a new layer (hide the blurred layer), and line the Clone Stamp up to the reference point and click.
You will now have your very own, feathered, blur tool!
(This can also produce something similar to a soft brush/airbrush, which is so very often requested.)
Edit: Reading this inspired me to try out some other things too and roll them all into a tutorial!
viewtopic.php?f=15&t=22096 -
Hmm... I recently tried out making a random camo pattern. I like the results, so maybe they'll work for you? (I haven't tried it on anything besides text yet, but I see no reason for it not to work.)
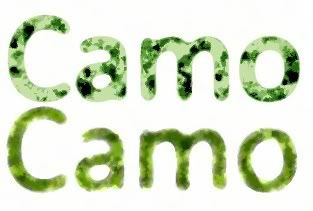
Make whatever you want 'camouflaged' on a new layer. Then add noise (add lots of noise if you want it 'extra' white). Apply the Oil Painting effect :OilPainting:. Lastly, use Median on it.
Here's a ScriptLab script for it. The top one was made by running the script, untouched, on about four layers, setting them all to Multiply, then merging them all into one. The bottom was made by removing the extra five(?) Add Noises and using the script once on a single layer. ... Hope it helps.
-
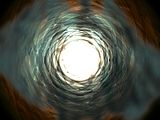

Started out playing with MadJik's new Sine Curve plugin. ... Then I started doing all kinds of other stuff to it. haha
-

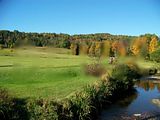
How are those? They were made, almost exclusively, by resizing the logo and changing the layer blend mode for the layer it was on. For the 'Overlay' version, I also dropped the brightness 125% so that the white wouldn't appear through it.
... To leave parts of the image white would not only be difficult, it also wouldn't look very attractive.
At least not in my opinion.
Edit: I forgot the white outline you were asking about.

---
I, personally, like how the 'Multiply' version of that came out. So here's the two variations of it.


Hope all that helps.
~Wither
-
Just kidding. I'm dying inside.
Well... it's tasteful inversion at least. Not just "draw sum lyns and use poler invurshun ekwul artz". >_>
---
@ Everyone else - They're all really cool so far. Such subtle uses, but it's a profound effect.
-
That was a lot of fun. I'm so thankful for Ed Harvey's PI+. o__o
No stock images.
-
emm... i didn't really fallow the tut but hows it?
(p.s. the dingbet in the middle is just there for the fun of it)
It's like it's been deactivated. Neat.
-
Um... like motion blur that follows a 'path'?
... Maybe it's possible, though I'm no coder... And I'm not sure how you'd be able to make it 'Smudge-y' and not just a curved motion blur.
(On a related sidenote, curved motion blur would be pretty cool.)
... A hex upon my desire to doublecheck posts that have nothing wrong with them before pressing Submit. >

-
Hmm... I don't know how the Smudge tool (which is more of a brush than an effect) could be made into a plugin.
Smudge is made useful mostly because it acts according to what direction you move your brush to distort the image.
I'm not 100% certain, but I'm pretty sure (let's say 99.9999%) a plugin couldn't follow the actions of your mouse in such a way.
I need to type faster >_>
-
I don't really know if it's vital. But here's the screen(s) you're looking for.

-

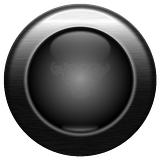
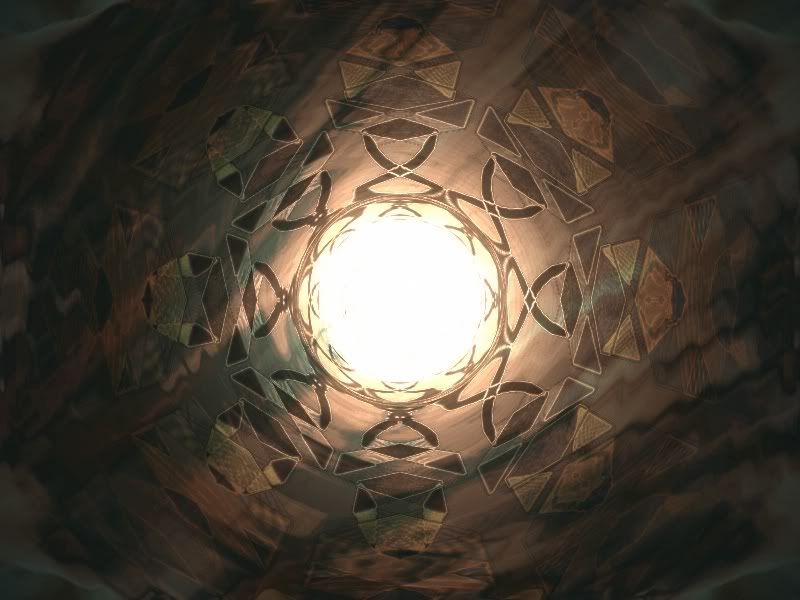
I'm determined to make glass... Come Hell or high water I'm getting glass!
I decided to try something more uniquely shaped than a ball.
-
i dont mind the look of the brushed metal, but i really do want it to 'shine', i want it to look like the paint if you did a google search on a car, i no it wont look perfect but iono, sometimes im to picky lol
The only way to simulate shine, regardless of what it's on, is to add reflections (if there's scenery around) and/or highlights (where the light would be hitting it)
Ace Jon's method is probably the way to go. You'll just have to 'eyeball' it and make sure the highlights/reflections (and even shadows) all fit the contour of the car.
(Brushed metal will make your car look all scratched. Like mine.
 )
) -

I doodled this abomination (which is not to be taken seriously. I couldn't draw if my life depended on it. :wink:)
It seems that many of us thought alike, as I come back from doodling this to find the exact same thing said... twice.
It's a simple light -> dark gradient with some highlights. I added a small amount of noise on a new layer and motion blurred it to give it a tiny bit of texture.
Since your car isn't a box, it will likely look much better if you try it.
-
I agree with Ash. (The only real difference is the shadow. The Ps tutorial explains how to make it, and it's one of the few steps that can transfer over without changing anything.)
My first leap into abstract... or something. It's lovingly entitled DMA... because it doesn't mean anything. >_>
-
The UI for Color Filter shouldn't be too complicated. Just slide the top slider to the general color shade you want, then slide the middle slider (Filter Density) to where you need it. If it's not quite the right shade, press Ctrl + Shift + U and try adjusting the saturation from there.
Edit: This should help illustrate how to use them.

The first rectangle is a simple light gray <--> dark gray gradient.
The second is that same gradient with Color Filter applied (at those settings).
And the third is the Color Filter gradient with increased Saturation.
-
Does anything besides the color of the plates change? Because I believe it may be easiest to stack 10 of the gray meters, then use Curves or one of Ed Harvey's color effects to change the gray to the appropriate color. That would certainly save you from having to stack a similar image several times over.
(One stack with multiple color changes)
-
...and that did it!

It's odd. I tried it before, but it didn't make any appreciable difference. Must've had it set too low or something. >_>
-
@ Expiration - That's pretty sweet. If you're going for realism, real paint wouldn't fade out quite like that.
----
Another Ps conversion attempt. [link]
I'm having trouble making the edge less apparent without making it fuzzy.

 will resize/move the pixels in the selection.
 will resize/move the selection. Leaving the pixels untouched.


Attamachment quata has been reached?
in Paint.NET Discussion and Questions
Posted
I say this, beyond the shadow of doubt, if you had said all these a month ago.
You certainly would have won the Pauly Shore award. *cough*