


Deborah
-
Posts
89 -
Joined
-
Last visited
Posts posted by Deborah
-
-
It sounds to me like you need an administrator password to delete things on your computer. Am I right in assuming you're trying to delete the drop shadow .dll?
Paint.net itself has no password requirements.
-
Re: the checkered background:
The checkered backgorund indicates a transparent area. If you put the pint image in a new layer over a background, the background will show through wherever the checkered area was.
-
Anwyways, I also thought that perhaps threads like Rate the Sig of the Poster Above You and its Avatar equivalent should be moved to the new pictorium.
Maybe the various contest threads (sig of the week, monthly skinning, etc.) should also be put in the new pictorium?
-
That zombie looks wonderfully horrible.
-
The downside of the Conditional Hue/Sat UI is that you can't select shades (black/white/gray). For that reason I prefer the current UI. Great plugin.
-
What you need to do is go through the tutorials section and find some tutorials for what you need to do. Even if you can't find a tutorial that does exactly what you want, you can almost always find one that you can adapt a little bit it get the result you're looking for.
Here are some tutorials that you might be interested in:
-
It's a good idea although tbh right now, i prefer the pictorium as it is.
Me too. I like being able to scroll through the pages of images instead of having to go through multiple threads. Oh well.
For the individual user threads, it would be nice if it could show them with the most recent post first. Otherwise whenever someone goes to a users thread, we'll always see their oldest stuff first and may never make it to see the newer (and better) work lower in the thread.
-
The setting in the layer properties is called Opacity.
Less opacity = more transparency
-
-
Something I made on the flight home....water splashy thing.
Turn it upside down and you have an awesome icicle.
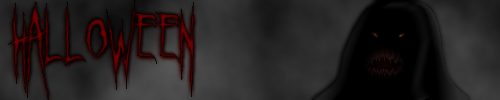
A simple Halloween sig. I'm not entirely happy with the eyes - I want them to be more, well, "creepy" and maybe a little more subtle. Does anyone have any suggestions?
-
Ctrl-Y is re-do.
This is standard for some windows programs.
-
I took a look at some of your photos Domesticfix. Wow, they're fantastic.
-
I don't know about a tutorial, but to make it easy there's a plugin to add water to your image.
http://paintdotnet.forumer.com/viewtopic.php?f=16&t=2911
Just install this plugin (see the top of the plugin forum for instructions) and use it to quickly add reflected water and ripples to your picture.
-
And if you want to rotate the selection, just select the
 Move Selection tool (after you have a selection), then RIGHT-click and drag the mouse. This will let you free rotate it.
 -
This is a grayscale pallet I made for when I'm working in black and white. The lightness values go up by about 3/100 for each step, which is where I can see a difference between the shades.
Spoiler; Paint.NET Palette File ; Lines that start with a semicolon are comments ; Colors are written as 8-digit hexadecimal numbers: aarrggbb ; For example, this would specify green: FF00FF00 ; The alpha ('aa') value specifies how transparent a color is. FF is fully opaque, 00 is fully transparent. ; A palette must consist of ninety six (96) colors. If there are less than this, the remaining color ; slots will be set to white (FFFFFFFF). If there are more, then the remaining colors will be ignored. FF000000 FF070707 FF0F0F0F FF161616 FF1E1E1E FF262626 FF2D2D2D FF353535 FF3D3D3D FF444444 FF4C4C4C FF545454 FF5B5B5B FF636363 FF6B6B6B FF727272 FFFFFFFF FFE5E5E5 FFDDDDDD FFD6D6D6 FFCECECE FFC6C6C6 FFBFBFBF FFB7B7B7 FFAFAFAF FFA8A8A8 FFA0A0A0 FF999999 FF919191 FF898989 FF828282 FF7A7A7A 80000000 80070707 800F0F0F 80161616 801E1E1E 80262626 802D2D2D 80353535 803D3D3D 80444444 804C4C4C 80545454 805B5B5B 80636363 806B6B6B 80727272 80FFFFFF 80E5E5E5 80DDDDDD 80D6D6D6 80CECECE 80C6C6C6 80BFBFBF 80B7B7B7 80AFAFAF 80A8A8A8 80A0A0A0 80999999 80919191 80898989 80828282 -
http://paintdotnet.forumer.com/viewtopic.php?f=15&t=5805&hilit=explosion
BOOM!
Found this with a simple search
-
You need to select Window > Reset Window Locations
That will make all of your windows visible again. (Tools and Colors)
-
Sine Waves is a plugin that can be found here: http://paintdotnet.forumer.com/viewtopic.php?t=5663
(Put the .dll you get there in the Program Files > Paint.NET > Effects folder and re-start Paint.NET to install the plugin).
I used it with these settings:
Amplitude: 5
Horizontal period: 0
Vertical period: 1
Angle of start: 0
Anti-alias: 2
You should play around with the "Amplitude" and "Angle of start" for the sand.
When you're using motion blur, make sure the "centered" checkbox is un-checked to make it go in one direction.
When using blurs, it will get less detailed, but I just added more noise to the section I blurred and it went right back to the sandy look it had before.
(Blur steps usually went: Blur -> Add Noise -> Blur -> Add Noise)
-
What type of file are you saving it as?
-
Thanks! I'd like to see what you come up with.
-
Is this sort of what you're looking for?
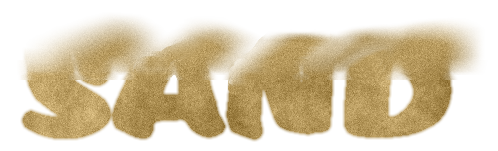
I got this by doing various iterations of :AddNoise: Add noise and :MotionBlur: Motion Blur, plus a Sine Waves
There was a little bit of Splinter and Clone stamp to clean things up a bit too.
Let me know if you need some more detail. I'm sure with a little work, you could come up with something much better than this.
-
There's a more precise way, but it's more complicated and takes longer.
The Alpha Mask plugin: http://paintdotnet.forumer.com/viewtopic.php?t=2178
And a tutorial on how to use it: http://cmdsketchpad.com/tutorial.php?tutid=3
-
If, for some reason, you have to try to do this in MS Paint, you could switch the background colour to black and the option for selection background to transparent. This icon:

That would let you put in the top image, but would not get rid of the black in the bottom one.
You are MUCH better off using Paint.NET though.
-
Do you mean a black edge around the whole picture?
Some image viewers put a black border around images, just to show you where the edges of the image are. This is not part of the actual picture. Try opening it in a web browser - do you still see the boundary?
(If you have it, you could also try MS Office Picture Manager, it does not show the edges of the image with a border).
If this is not the answer, can you post a Print Screen of your screen showing the black boundary?
 Move Selection tool (after you have a selection), then RIGHT-click and drag the mouse. This will let you free rotate it.
red eye removal
in Paint.NET Discussion and Questions
Posted
If you look in the "Effects" menu, under "Photo" there is a "Red Eye Removal" effect.