


snospmiS
-
Posts
205 -
Joined
-
Last visited
Posts posted by snospmiS
-
-
We also could do things like this!

 Very cool!
 Nice use of your Plugins. x)
-
Somehow I can't see any images from the tut...
It must be just me :?
damn...=/ Are u still in Hong Kong? :? *cough*
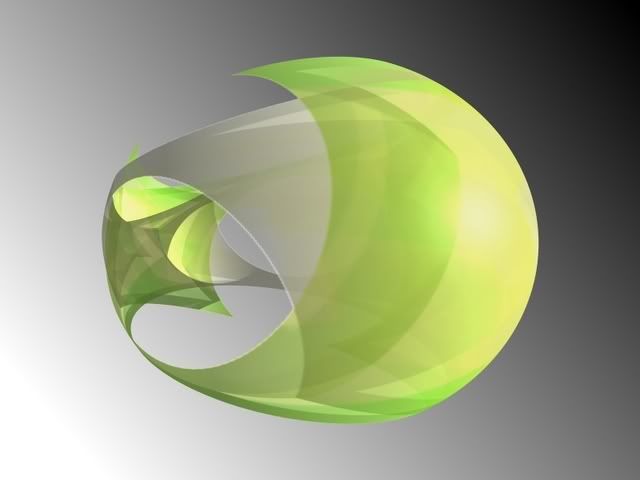
As a test: Are u able to see the yellow Orb with your banana in it? =D

In this case, i used Photobucket...i hope it works >.<
i know...the reflection isn't still very realistic
i get to 1.2 draw a black anti alias circle and somehow you missed a part to tell us i get a white cicrle nothing more how do we make black I tried filling with blck and works but when i get to the invert colors i end up with a totally white image ??? and the center plugin doesnt work for me.
You have to set the Primary Color to black (000000), then u can draw a black circle! =) And if u Flatten the image (Step 2.1) before inverting the colors, the image won't just be totally white.
If the Align Object-Plugin don't work, u should contact moc426 , as he wrote the plugin.
Good luck! =)
ps.: @ Paint_boy, Rec, FrEaK, Bowie, GangstaCrab and FireFly --> Thank u so much! =)
Perhaps i'll upgrade my tut on how to put things in the Orb etc...even it's not that kind of complicated.
-
Ahh! I see!!
I'm gonna try this tomorrow! Thanks! =)
-
@ BB Thanks! =) I love the Alpha Mask-Plugin! ^.^
I could see this getting sticky'd!Hehe...that would be totally phat! XD
@ moc426 Thanks a lot! =)
@ MadJik Thx! =D and yes...you're right, but in the end i got a bit lazy and didn't spent much time on the reflection...apart from that, i don't like the result of the Reflection-Plugin in this image =/ it doesn't look very realistic either and so i tried sth different.
@ spongey437 Thank you! =) Nice Orb!
-
This tutorial is available as a PDF. Click here to view or download the PDF
(A large part of this tut got lost due to the forum update...I'm currently working on it >.<)
-> m'kay...I recreated the main part of the tut...only the addition about putting objects in the orb etc is missing, I'll do that later...*sigh*
============================================================================================
EDIT by ASH: I have taken the whole tut from the old forum, and copied it here.
============================================================================================
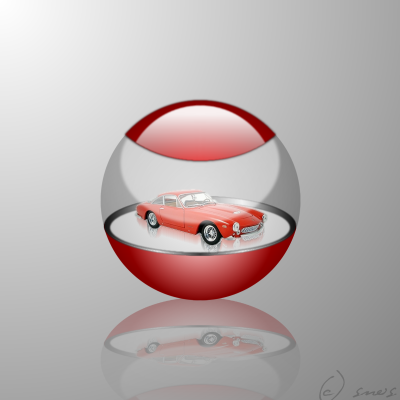
After MadJik postet this image in the pictorium, Ash replied with a Photoshop Tutorial for Kiosk Orbs. Well...I took pleasure in the small orbs and tried to create one with PdN! ^^ Unfortunately, the Photoshop tut was a little bit tricky and it took me nearly two days (of the weekend) to get a satisfying result...so I decided to do a PdN-Tut on it! 😃 ...my first...chrm, chrm...
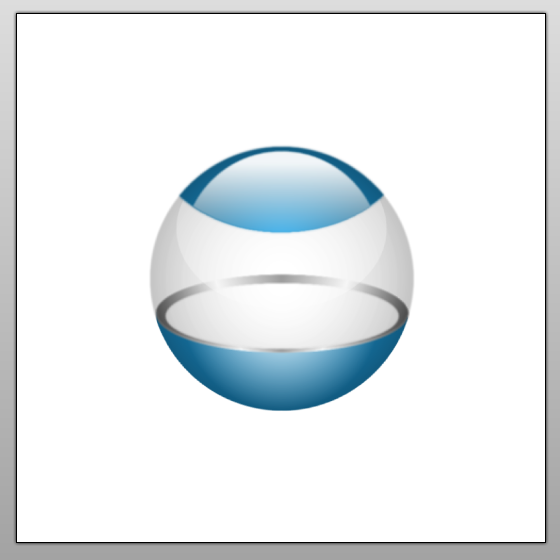
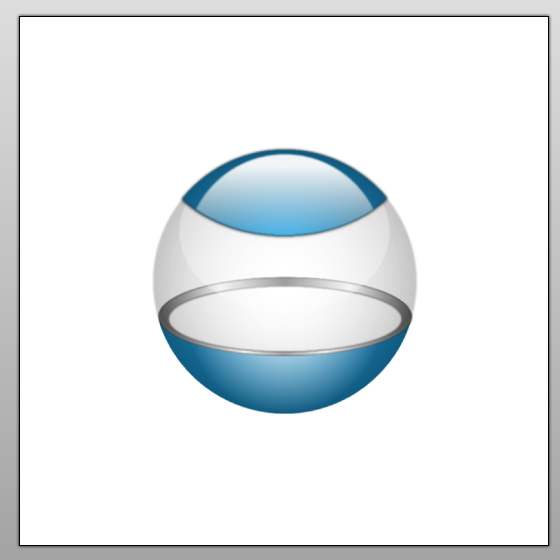
What U Will Get!
What U Need!
• Align Object Plugin - moc426
• Alpha Mask Import Plugin - Illnab1024
• Feather Plugin - BoltBait
Right, so let's go!
Step 1
...build the foundations.
1.1) Start with an :CanvasSize: Canvas of 800x800 pixels [strg.] + [shift] + [R], background filled white (FFFFFF).
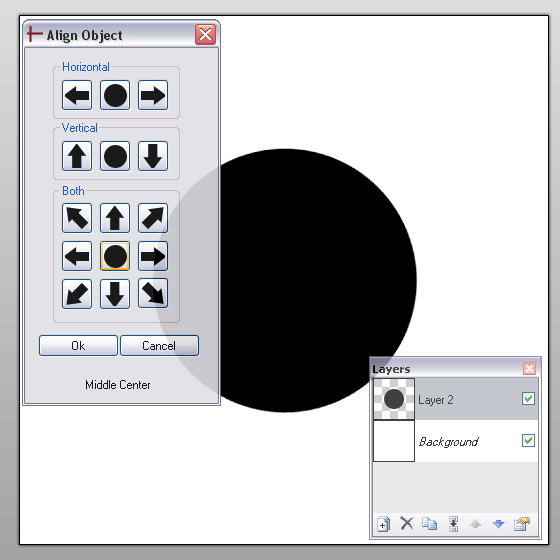
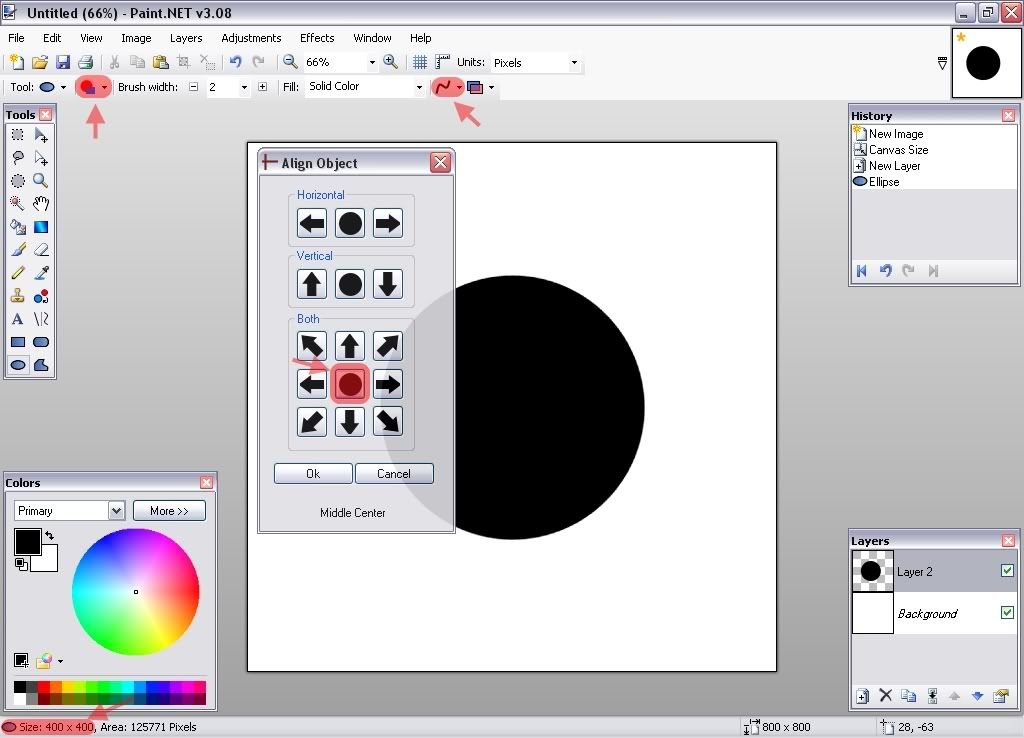
1.2) :AddNewLayer: Add a new layer [strg.] + [shift] + [N] ("Layer 2") on which you'll draw a black (00000) circle. Use the
 Ellipse-Tool with :ShapeInterior: Draw Filled Shape ( :AntiAliasingOn: Antianalising Enabeled) and hold [shift] in order to draw a black, perfectly symmetric circle with 400x400 pixels.
1.3) Now use the
 Align Object-Plugin (Effects -> Align Object...) to center the circle in the middle of the picture.
-> [ click ] <-
Step 2
...create an Alpha Mask.
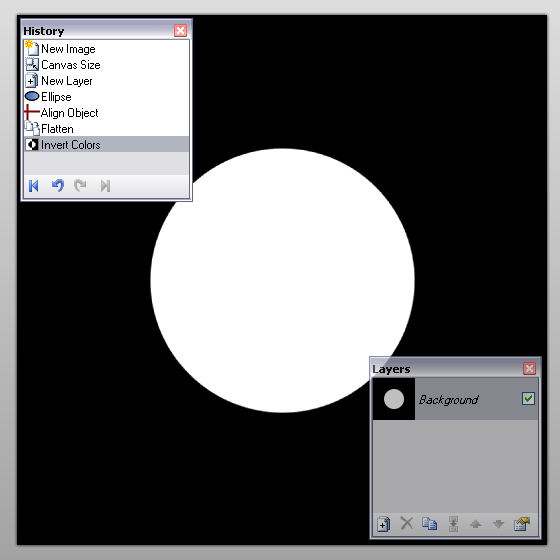
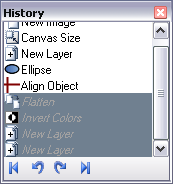
2.1) :Flatten: Flatten the image [strg.] + [shift] + [F].
2.2) :InvertColors: Invert colors [strg.] + [shift] + .
2.3) :SaveAs: Save the image [strg.] + [shift] + (file format: png) to create the Alpha Mask we’ll use later.
-> [ click ] <-
Step 3
...color the body of the orb.
3.1) :Undo: Undo till “Flatten”.
3.2) Take the
 Magic Wand-Tool, set the Tolerance to 0% and click outside the circle on "Layer 2", then hit [strg.] + to :InvertSelection: Invert the selection, so you’ve selected the entire circle.
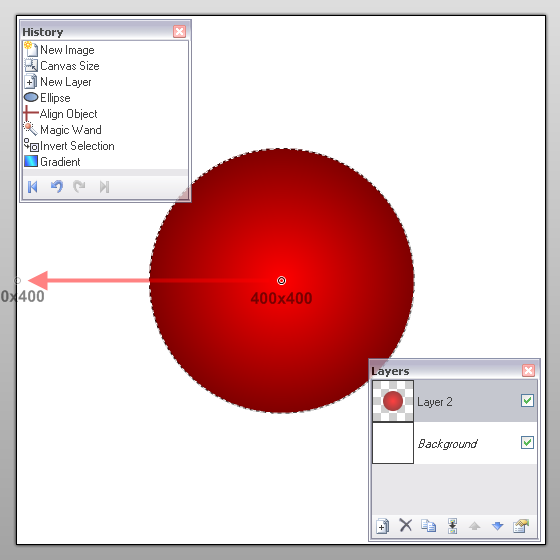
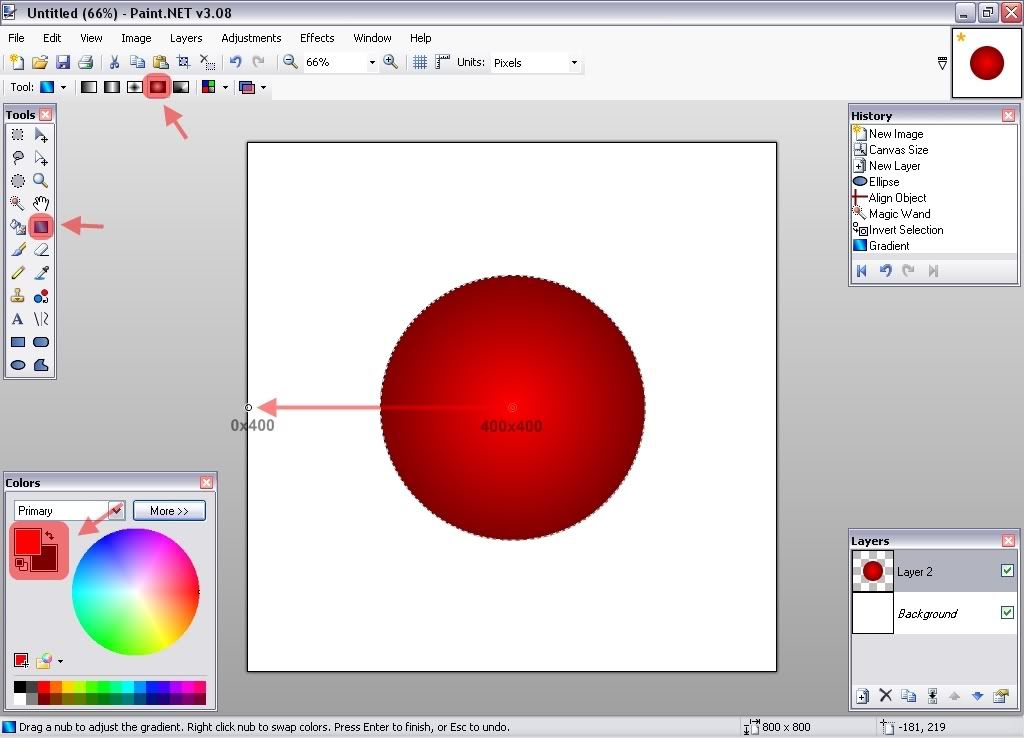
3.3) Take the
 Gradient-Tool on
  Radial, set the Secondary Color to black (000000) and the Primary as you wish (i chose red (FF0000)). Now start the Gradient on "Layer 2" with a left click on
  400,400 and take it to 0,400.
-> [ click ] <-
3.4) :Deselect: Deselect [strg.] + [D] and use the
 Alpha Mask-Plugin (Effects -> Alpha Mask...) to soften the edges. Browse to the .png image we just made in Step 2.3.
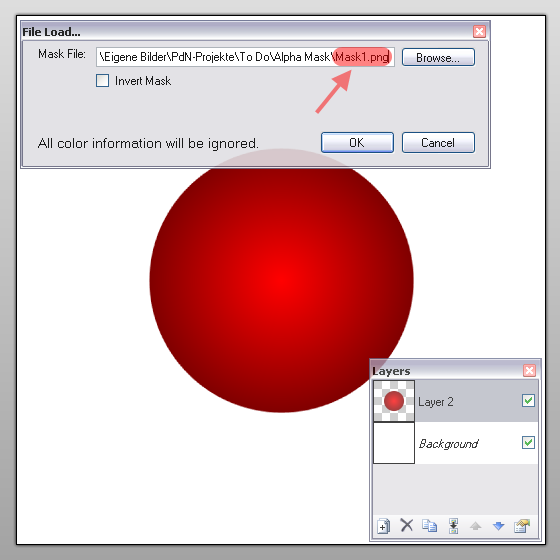
You can additionally give the circle a :RadialBlur: Radial Blur (Effects -> Blurs -> Radial Blur...) at about 4 degrees to perfectly soften. 😃
Step 4
...create the "metallic circlet".
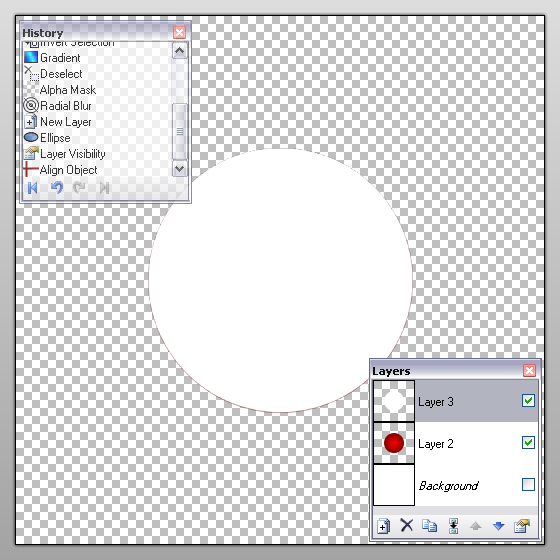
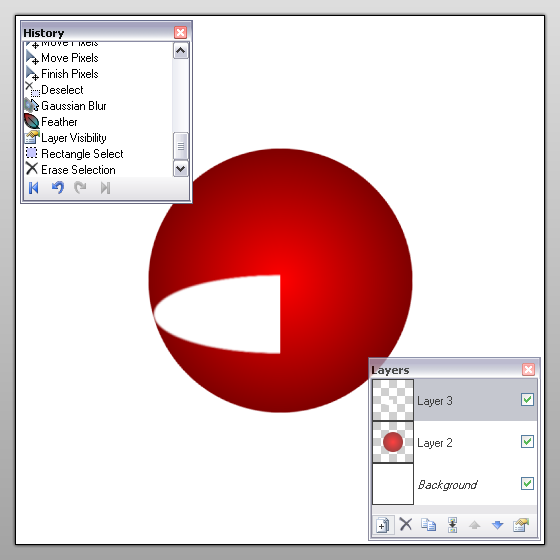
4.1) :AddNewLayer: Add a new layer [strg.] + [shift] + [N] ("Layer 3"). Afterwards, just do the same like in Step 1.2/Step 1.3, only with a white circle -> Use the
Ellipse-Tool with :ShapeInterior: Draw Filled Shape ( :AntiAliasingOn: Antianalising Enabeld) and hold [shift] in order to draw a white circle with 400x400 pixel. Again, use the Align Object-Plugin to center the circle in the middel of the picture.
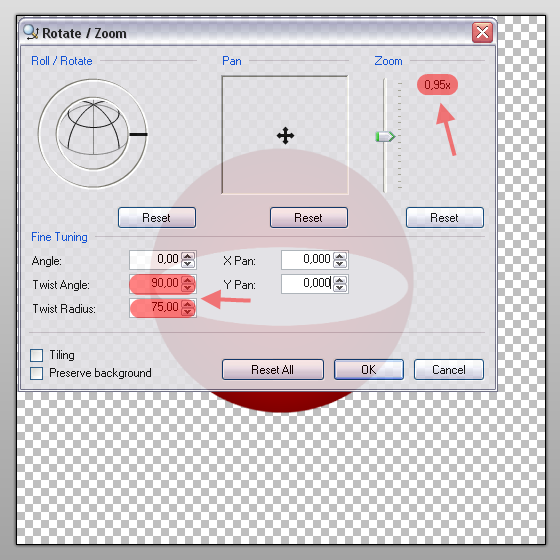
4.2) Go to
 Rotate / Zoom [Ctrl] + [shift] + [Z]
--> Angle: 0,00 | Twist Angle: 90,00 | Twist Radius: 75,00 | X Pan: 0,00 | Y Pan: 0,00 | Zoom: 0,95x
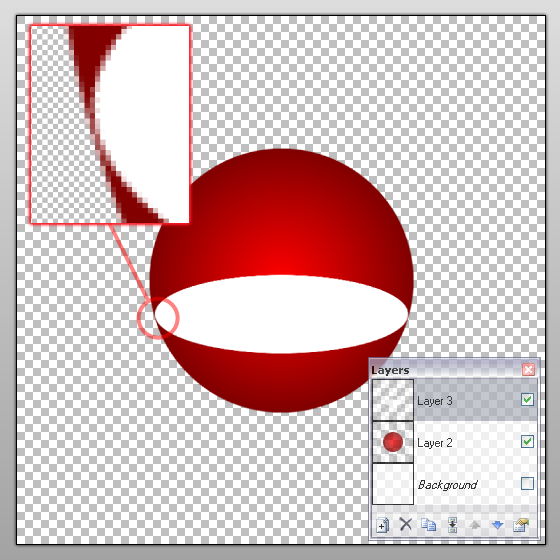
4.3) Select "Layer 3" and move the circle with the
 Move Selected Pixels-Tool downwards, so that it fits with the red circle. (Of course, you may could do this in Step 4.2 with the Y Pan of the Rotate / Zoom)
Step 5
...create a second Alpha Mask.
5.1) We gonna create a second Alpha Mask, we'll need later. Due to that you should blur the white circle a bit. Add a :GaussianBlur: Gaussian Blur (Effects -> Blurs -> Gaussian Blur...) at about 2 pixels and
 Feather (Effects -> Feather...) it a bit. (Amount ~ 1)
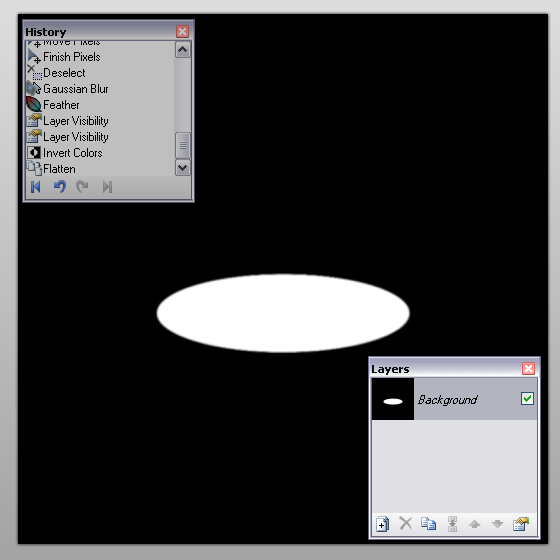
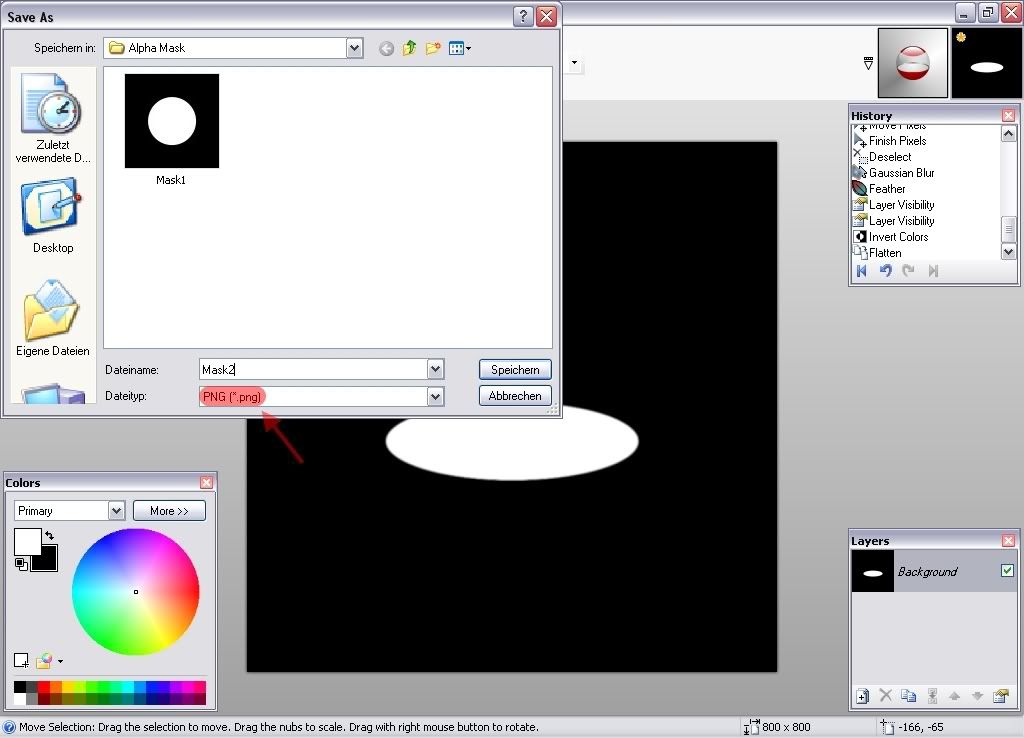
5.2) :InvertColors: Invert the color [strg.] + [shift] + of the "Background" (thus he should be black), make "Layer 2" :Properties: invisible
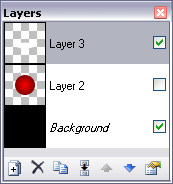 and :Flatten: Flatten [strg.] + [shift] + [F]. Then :SaveAs: Save the image [strg.] + [shift] + as a png-file, so we can use it later as an Alpha Mask.
-> [ click ] <-
Step 6
...back to the "metallic circlet".
6.1) :Undo: Undo till "Invert Colors".
6.2) Go to "Layer 3", select half of the image (400x800) with the
 Rectangle Select and delete.
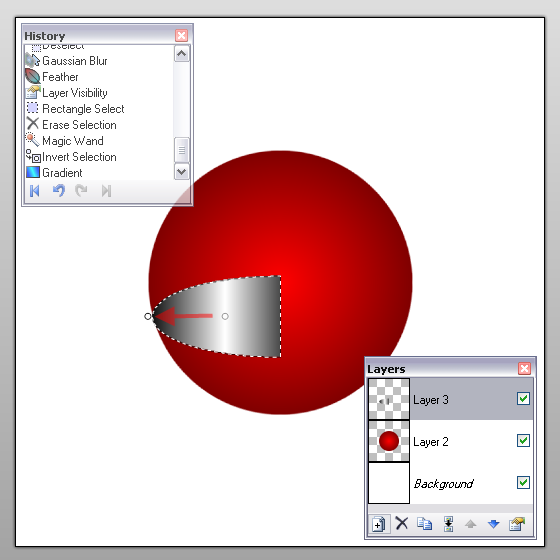
6.3) Select the outside of the "half ellipse" with the
Magic Wand-Tool (Tolerance 0%) and press [strg.] + to :InvertSelection: Invert the selection.
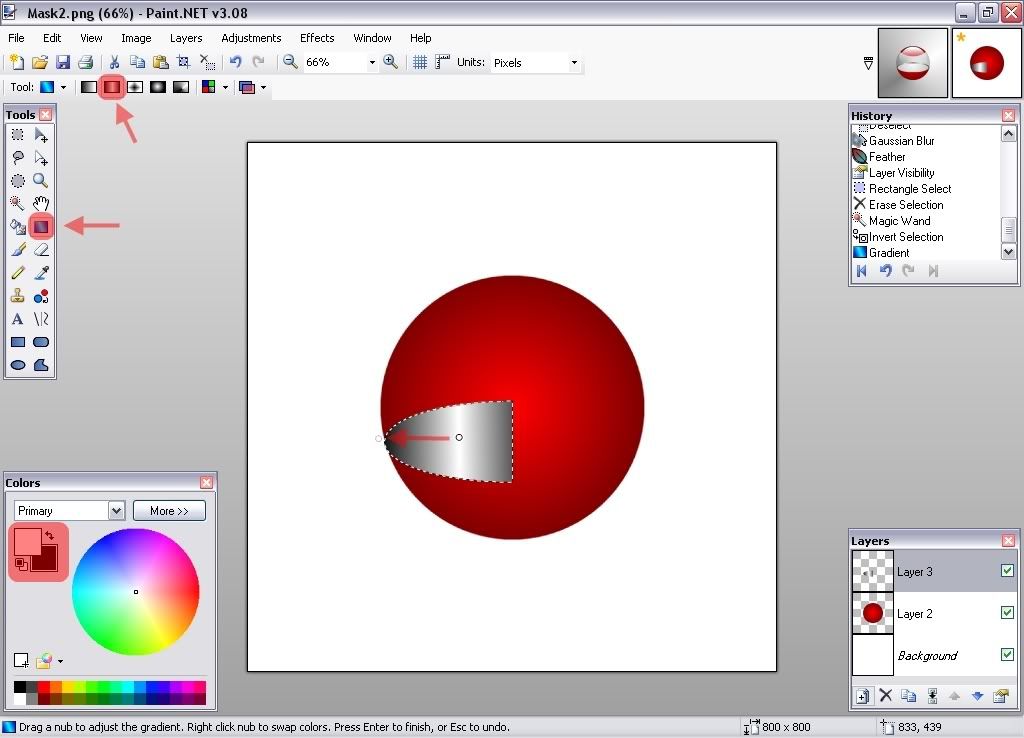
6.4) Now set your Primary Color to white (FFFFFF) and your Secondary Color to black (000000), take the
Gradient-Tool on  Linear (Reflected) and start the gradient at about the middle of the ellipse and draw it till the end of the circle.
-> [ click ] <-
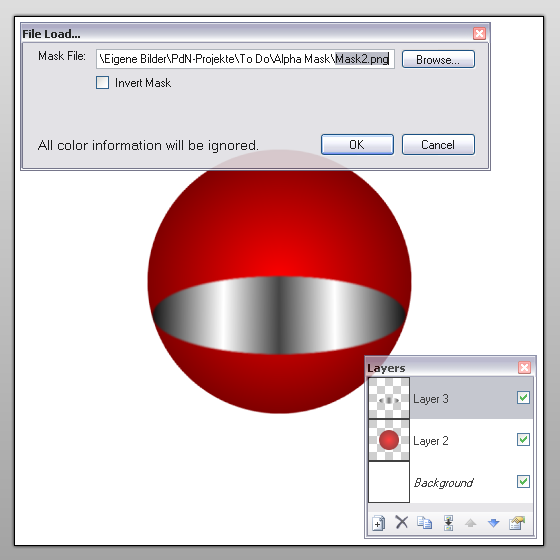
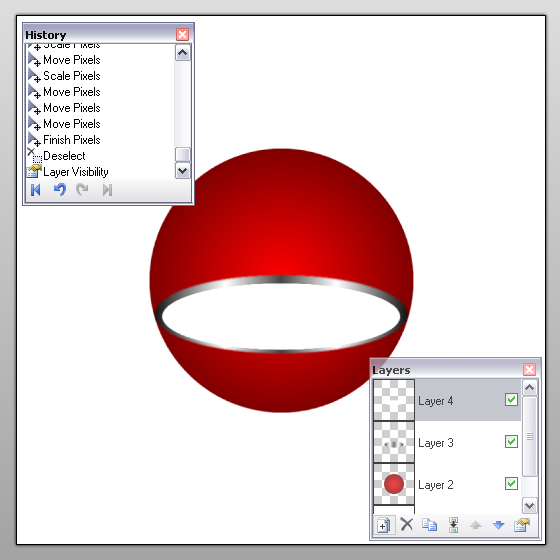
6.5)
 Duplicate "Layer 3" [strg.] + [shift] + [D], :Horiz: Flip it horizontal and
  Merge layer down [strg.] + [M]. Now use the Alpha Mask-Plugin to soften the edges, browse to the Mask we made in Step 5.2.
6.6) Repeat Step 4.1: :AddNewLayer: Add a new layer [strg.] + [shift] + [N] ("Layer 4"), use the
Ellipse-Tool with :ShapeInterior: Draw Filled Shape ( :AntiAliasingOn: Antianalising Enabeld) and hold [shift] in order to draw a white circle with 400x400 pixel and center the circle with the aid of the Align Object-Plugin in the middel of the picture.
6.7) Go to
Rotate / Zoom [strg.] + [shift] + [Z] and apply the same values like in Step 4.2, excepting the Zoom:
-> Angle: 0,00 | Twist Angle: 90,00 | Twist Radius: 75,00 | X Pan: 0,00 | Y Pan: 0,00 | Zoom: 0,81x

6.8.) Select "Layer 4" [strg.] + [A] and move & stretch the white ellipse with the
Move Selected Pixel-Tool in such a way that it looks sth like this:
6.9) In order to soften the edges add a :GaussianBlur: Gaussian Blur at about 2 pixels and
Feather it a bit. (Amount ~ 1)
Step 7
...we need some reflection.
7.1) :AddNewLayer: Add a new layer [strg.] + [shift] + [N] ("Layer 5"), go to "Layer 2", select all and copy [strg.] + [A] & [strg.] + [C] and paste it in "Layer 5" [strg.] + [V]. (Yeah i know...duplicating layer 2 and moving it up would amount to the same thing.
 )
)
7.2) Take the
Magic Wand-Tool (Tolerance 0%), select the outside of the circle and hit [strg.] + to :InvertSelection: Invert the selection. Take the Gradient-Tool on :LinearGradient: Linear. Set the Primary Color to white and the Secondary to complete transparent.
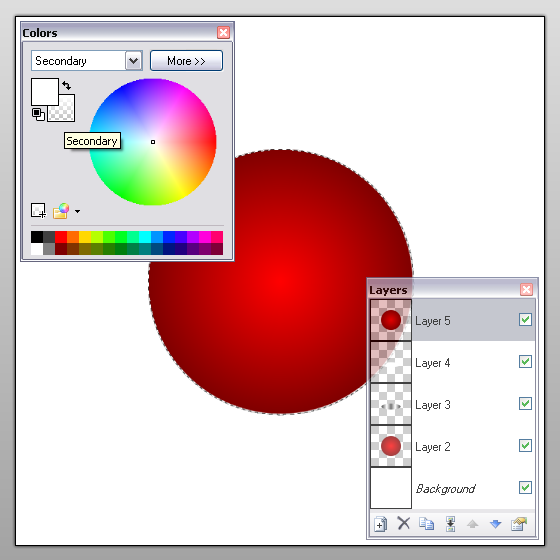
-> [ click ] <-
7.3) Start the gradient at about
400,225 and draw it till 400,400.
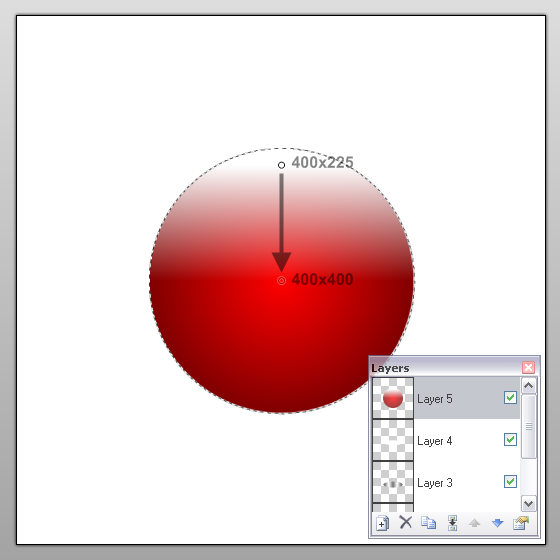
7.4) Use the
Alpha Mask-Plugin to smoothe the edges (take the Mask we made in Step 2.3), also give the circle a :RadialBlur: Radial Blur at about 4 degrees.
7.5) Select the whole "Layer 5" [strg.] + [A], take the
Move Selected Pixel-Tool, grab one of the edges from the selection and squeeze the circle (holding [shift]) to 600x600 pixel Bounding rectangle size.
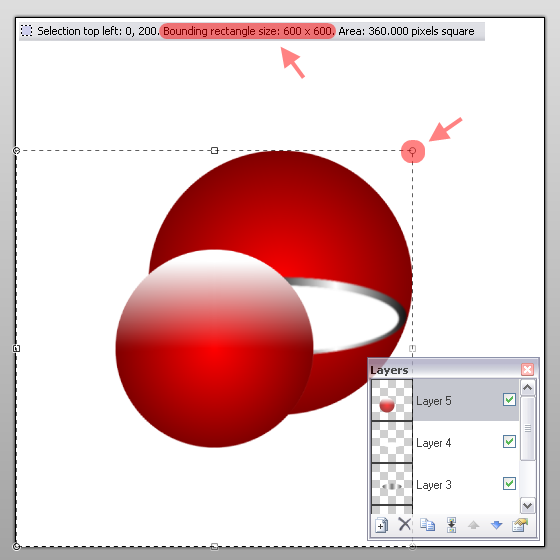
Center the small circle a little bit below the top of the big circle and go on with the next step.
7.6) Take the
 Ellipse Select-Tool and draw a circle (holding [shift]) with 400x400 pixel, then take the
  Move Selection-Tool and squeeze the top of the circle down to 400x300 pixel. Take the selection with the Move-Selection-Tool and place it centered above the big circle, so that about a fourth of the circle is selected.

<
7.7) :InvertSelection: Invert the selection [strg.] + and press delete. After that, soften the reflection by adding a :GaussianBlur: Gaussian Blur (about 2) and
Feather (about 1). Turn the :Properties: Opacity of "Layer 5" [F4] to 240.

Step 8
...a vitrine for the Kiosk Orb.
8.1) Go to "Layer 2" and use the
 Eraser-Tool in order to delete the area around the edges from "Layer 3".
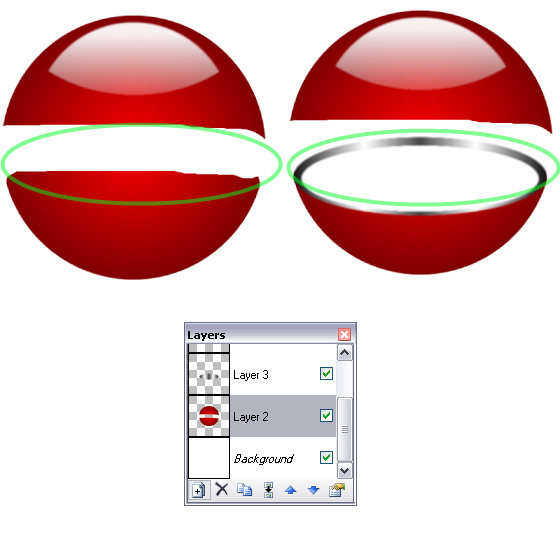
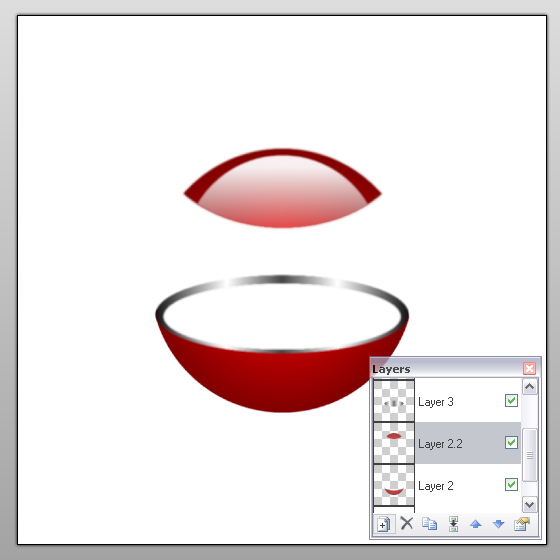
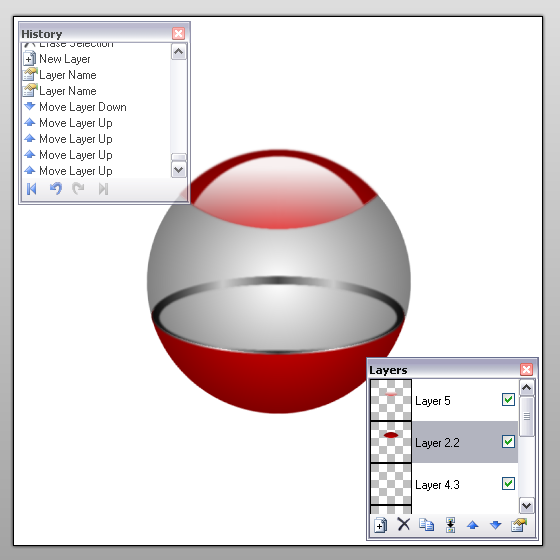
8.2)
Duplicate [strg.] + [shift] + [D] "Layer 2" and :Properties: name it "Layer 2.2". 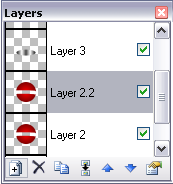 On "Layer 2" erase the top part of the circle and on "Layer 2.2" erase the bottom part of the circle. ->
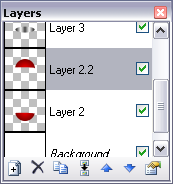
8.3) Go to "Layer 3", take the
Magic Wand-Tool, turn the tolerance to 69%, select the area outside the metallic ellipse and hit [strg.] + to :InvertSelection: Invert the selection.

Go to "Layer 2" and hit delete.
8.4) On "Layer 2.2", just do the same like in Step 7.6: Create an ellipse with 400x300 pixels and place it at the top of the circle in such a way that it fits with the reflection.
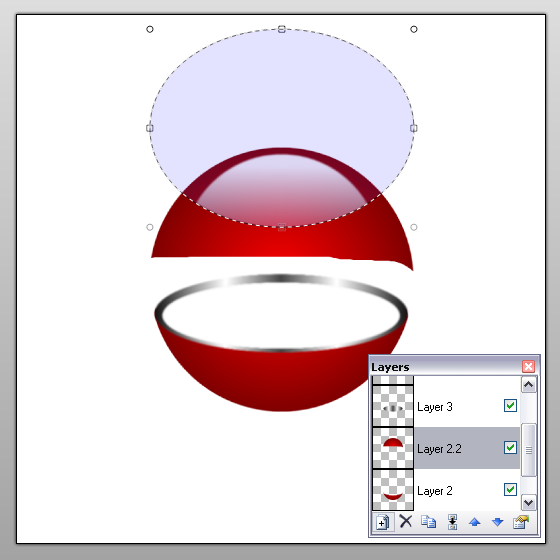
Press [strg.] + and hit delete.
Feather "Layer 2.2" with a value of 5 and add a :GaussianBlur: Gaussian Blur at about 2 degrees.
8.5) :AddNewLayer: Add a new Layer [strg.] + [shift] + [N], :Properties: name it "Layer 4.2" and :Down: Move it down between "Layer 4" and "Layer 5".

Afterwards repeat Step 1.2/1.3: Use the
Ellipse-Tool with :ShapeInterior: Draw Filled Shape ( :AntiAliasingOn: Antianalising Enabeld) and hold [shift] in order to draw a black circle with 400x400 pixels and center it with the Align Object-Plugin. Smoothe the edges with a :RadialBlur: Radial Blur at about 4.
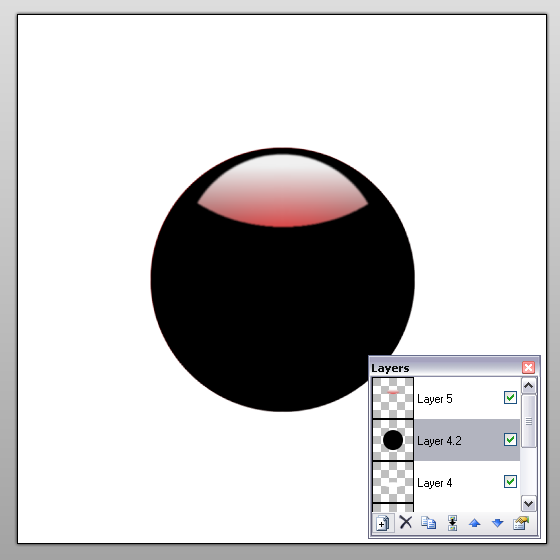
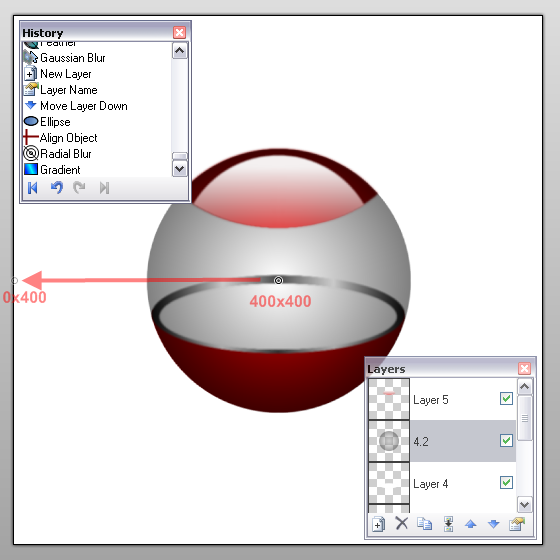
8.6) On "Layer 4.2", take the
Gradient-Tool on Radial and :AlphaChannel: Transparency Mode. Draw the gradient with the right mouse button from 400,400 to 0,400.
-> [ click ] <-
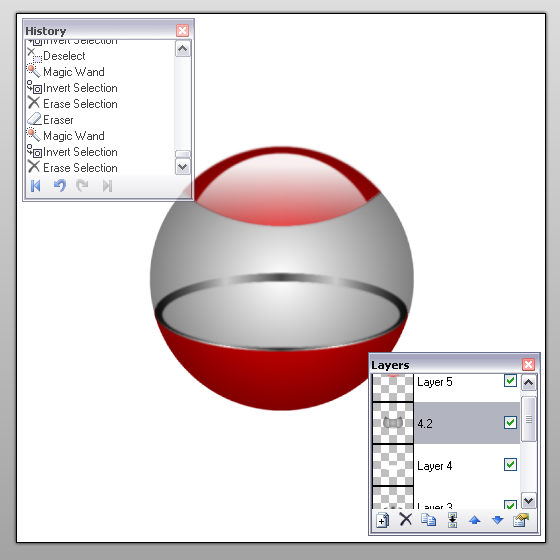
8.7) Go to "Layer 2.2", take the
Magic Wand-Tool, set the tolerance to 56%, select the oustide of the top, press [strg.] + , go back to "Layer 4.2" and hit delete.
8.8.) Go to "Layer 2", take the
Magic Wand-Tool, set the tolerance to 0%, select the oustide of the bottom, press [strg.] + , go back to "Layer 4.2" and hit delete.
Step 9
...some reflection on the glass.
9.1) :AddNewLayer: Add a new layer [strg.] + [shift] + [N], :Properties: name it "Layer 4.3" and :Down: Move it down between "Layer 4.2" and "Layer 5". Move "Layer 2.2" :Up: Up between "Layer 4.3" and "Layer 5".
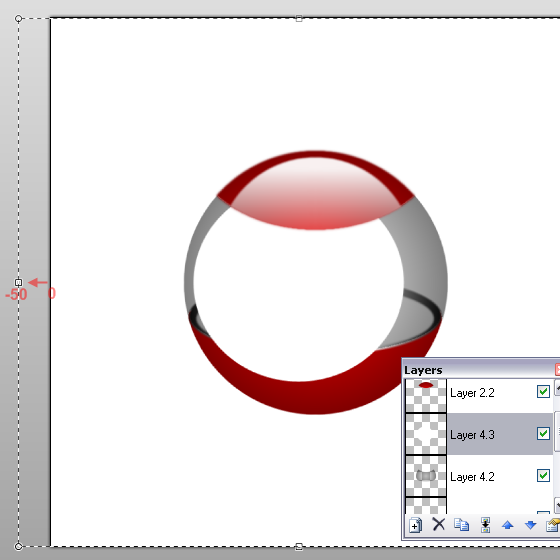
9.2) Use the
Ellipse-Tool to create a white circle (300x300) and center it with the Align-Plugin. Select all [strg.] + [A], take the Move Selected Pixel-Tool and stretch the side from 0,400 to -50,400.
9.3) Center the image with the Align Object-Plugin, select all [strg.] + [A], take the
Move Selected Pixel-Tool, grab the bottom of the selection and squeeze the height from 400x800 to 400x650.
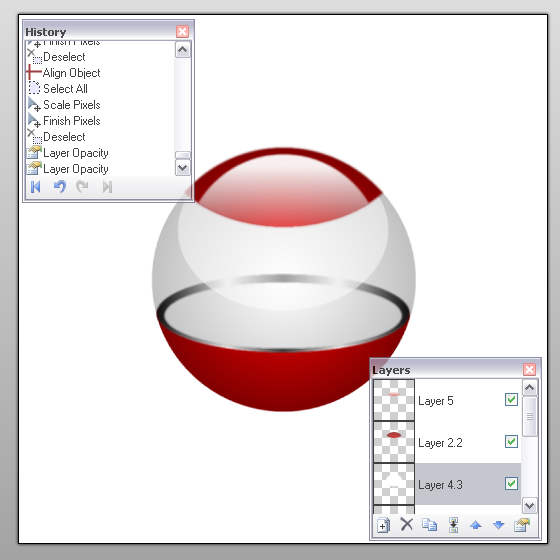
Change the :Properties: Opacity from "Layer 4.3" to 80.
Change the :Properties: Opacity from "Layer 4.2" to 125.
Step 10
...the bottom part of the Orb wants also a reflection...very last step.
10.1) Go to "Layer 2", take the
Magic Wand-Tool (tolerance 0%), select the outside of the bottom and hit [strg.] + .
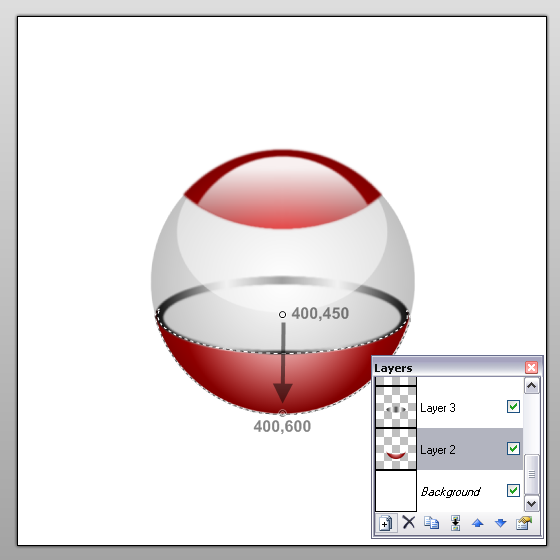
10.2) Take the
Gradient-Tool, set to Radial, Primary Color white and Secondary Color complete transparent (like in Step 7.2). Now draw a gradient from 400,450 to 400,600.
Done!
Adding a few Drop Shadows and reflections you should get sth like this:
As you can see, the central difficulty was to get all smooth but however not to blurry...hope u like it! 😃 and yeah...my english isn't quite perfect x)
______________________________________________________________________________
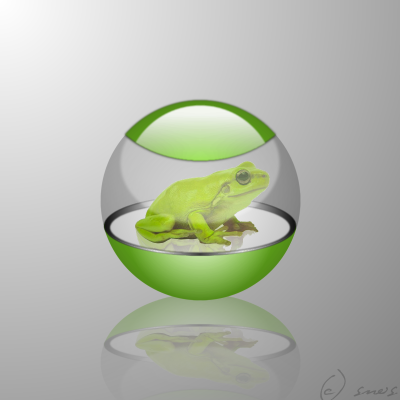
As a few users asked how to put things in the Orb, i'll gonna upgrade my tut a bit. ^^
Step 11
...adding some Drop Shadows.
As far as u did all the steps down till Step 10.2 u should received sth like this:
11.1) Now, go to "Layer 2.2" and add a Drop Shadow. (by Crazy Man Dan ) Offset X = 0 ; Offset Y = 1 ; Blur Radius = 3 ; Color = black
11.2) Go to "Layer 4" and add a Drop Shadow. Offset X = 0 ; Offset Y = 0 ; Blur Radius = 0 ; Color = black
11.3) Go to "Layer 3" and add a Drop Shadow. Offset X = 0 ; Offset Y = 0 ; Blur Radius = 0 ; Color = black
Step 12
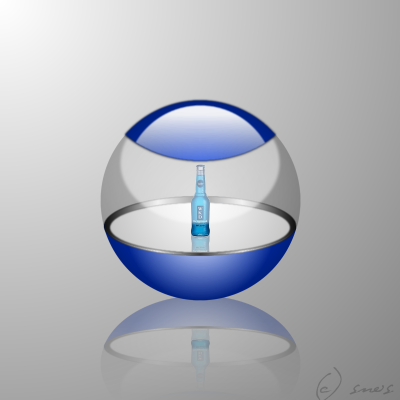
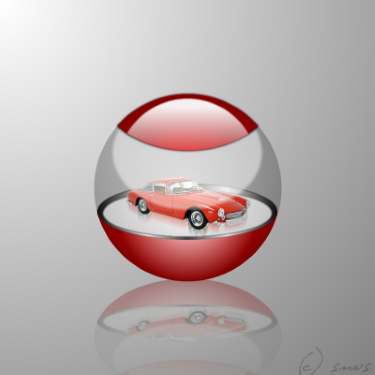
...sth for sale x).
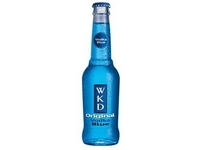
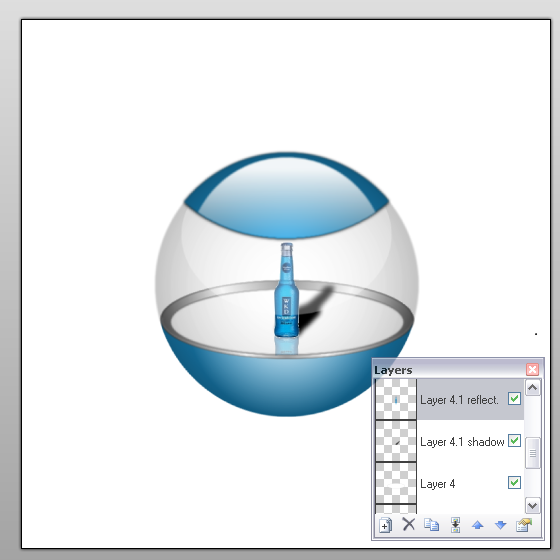
12.1) :AddNewLayer: Add a new layer [strg.] + [shift] + [N], :Properties: name it "Layer 4.1" and :Down: Move it down between "Layer 4" and "Layer 4.2". Choose an article for your Orb (for instance such a bottle: ) and paste it in "Layer 4.1". Of course u have to take care, that the background of your article is transparent.
Experiment with some reflections (Reflection Plugin by Boltbait ) and shadows for the article and the Orb and you'll get nice results! Have fun! 😃
-
Really cool! =)
-
Should work now!
-
1st try (with the right plug-in
) :
my server is down -.- maybe u aren't abel to see the image for awhile...
edit: fixed
-

signs like # cause trouble ^^
do i have 2 put a "s" after the "cause" ?! o.O i really should improve my english xD
erm...btw...Ash and MadJik, these are upsetting!!
->
-
5. Rect2Pol Plugin @ default.
I guess u didn't meant the Polar2Rect-Plugin, did u? :?
Edit
yeah...u didn't xD i just wonderd becaus I mixed up the Polar2Rect- and the Rect2Pol-Plugin ^^' thanks to your website i finally found the right one...so, i keep on working =D
-
Very nice tut! =)
You also get very neat results by using Alpha Masks!
Have a look:

my server is down -.- maybe u aren't abel to see the image for awhile...
-
No sweat! =D my english teacher said that's colloquial and means sth like "no problem"
-
-
cool i would realy like to see a tutorial about it ( i realy need this for a movie i am making
me2 =D
The selective colorization? Or something else?
Err...I meant (and i guess Aron did too) Ash's image of this flying bullet in slow motion.
-
cool i would realy like to see a tutorial about it ( i realy need this for a movie i am making
me2 =D
-
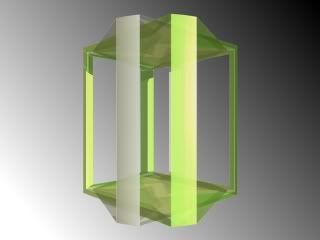
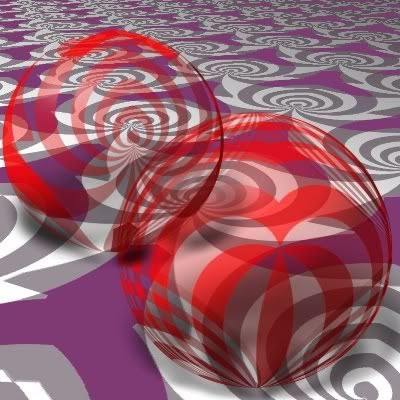
Gemstones:
• 1st try

• 2nd try

hmm...still not quite happy with it, but i'll keep on messing around!
-
Very nice tut! I love your gems, they just look awesome!
I tried for nearly an hour but just ended up with this:
Not quite happy with it...=/
How did u get this great glowing shadow? oO
-
[...]
B1. (Neg blend) Not it, but another Nice effect!

[...]
looks just great! oO
-
[...]
B1. (Neg blend) Not it, but another Nice effect!
[...]
looks just great! oO
-
1.) Create an image with to layers.
2.) Paste any pictures in each layer, they only have to overlap a bit.

->

3.) Apply the Gradient-Tool on the top layer, set it to linear and transparency mode.
->

You should get sth like this...
->

...two pictures blending each other, don't they?
i hope i could help a bit ^^' ...despite it's nearly the same like Rick Brewster tut, Ash posted...
-
1.) Create an image with to layers.
2.) Paste any pictures in each layer, they only have to overlap a bit.
->
3.) Apply the Gradient-Tool on the top layer, set it to linear and transparency mode.
->
You should get sth like this...
->
...two pictures blending each other, don't they?
i hope i could help a bit ^^' ...despite it's nearly the same like Rick Brewster tut, Ash posted...
-
-
-
*g* i'm happy with this =D
 Ellipse-Tool with :ShapeInterior: Draw Filled Shape ( :AntiAliasingOn: Antianalising Enabeled) and hold


 Rotate / Zoom [Ctrl] + [shift] + [Z]


Kiosk Orbs!
in Creations
Posted
It sounds like u use the Gradient in the :AlphaChannel: Transparency Mode.
Take care that the Gradient is set to :AllColorChannels: Color Mode and that only the Secondary Color is complete transparent!
I hope this helps.