


jart23
-
Posts
15 -
Joined
-
Last visited
Posts posted by jart23
-
-
everybody loves fiery text................this tut is so cool

I have a version of this tut....i will post soon.
thank you to all whom have posted info on this tut, and to the creator of the tutorial. good work everyone, and practice, practice, practice.........plus do not forget to experiment
-
everybody loves fiery text................this tut is so cool
I have a version of this tut....i will post soon.
thank you to all whom have posted info on this tut, and to the creator of the tutorial. good work everyone, and practice, practice, practice.........plus do not forget to experiment
-
ok... I get the basics of it, but I still dont know how to get my background black like some of the others have done in thier works of art. I'll show two examples of what I've done.
This is what I had when going by the tut as I understood it

This I done in the same mannor, and had the same background as above, but I used a brush and pencil to get the background black. The hand was a symbol from a .ttf font
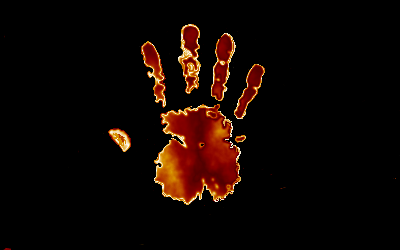
I donno if that what I did to the second was the same as others have done to thier pics, or if I was missing a step or two in my work on both. I must say that the tut for the "exploding planet" was more informative in the usage and steps of "how to do". Does anyone have an easier explaination to the step by step on this tut?
EDIT: please dont get me wrong... I think that the tut is great, and I've learnd a lot from it, but I somehow just dont know how many sheets I should do when doing all discribed in it. Also... a lot of times when I merge the layers down again, I get no effects from the lower images when merged. But I'll keep experienting with it and see how things work
I find the easiest way to get the background to be black is by using two layers at first.
it says to make the text layer ...white on black....yes this is true, but I found that by making your first layer all black....then adding a new layer which is where you will put your white text, on the new layer. then follow the tutorial as it goes just keep in mind the added step
-
ohhh not bad.....hmm so how did you do it ....hey maybe now some people will get together and make a sweet plugin effect? (I will start to try codelab) just because so many people would like a lens flare effect plugin.
-
ahh very true i just checked it, and the programs being sold for almost 5 bucks were paint.net ( older version), Blender, and NVU..all of which can be downloaded for free. uhh what a sneek. well feel bad for those that don't know and warn your friends that shop e-bay for stufff like that......I myself always back check everything....
-
well I e-bay often. and you always research what your buying, details should say what it is exactly, plus the sellers rating!. the person selling stuff like that on e-bay was just being slick....technically good selling if peoples are silly enough to buy a link and not know it...,, uhhh major bummer! hope they didn't pay much! It always sucks to get ripped off!
-
the person or pic would have to be on one layer( bottom layer), then create a new layer( top layer)..and make your bubble in that top layer. you will have to pick the right blending mode for the layer i think overlay is the one
-
well copy and paste usually works for me...if you want to save the code some place special..open up a text doc and paste the code in there and save it where ever you want...then if you want to change the code or use it you can copy it and paste it in codelab. you can get codelab in the forums look under plugins
-
Ok thanks a lot, i got it working now... ha ha
-
Any help is appreciated. I have a pic to use but I am not sure how to use it...my avatar is fine but I would like to use a sig to
-
Yeah a lens flare plugin would be very cool....You could make one manually but it would be nicer to just click and bam there it is...hmm maybe I will try codelab and make one...
-
Yes...always resize all at once. I find it best, though not always easy to...make the picture the size I want it to be for its use. The picture format will play a role in this to. I like lossless formats depending on the program used to create the pic. such as .ai, .psd, .tif, bla bla bla just stay away from editing the same .jpeg or .jpg over and over again you will end up with bad quality and bad color as well. and if for some reason you do have to edit you reaized pic again.....I would say don't, start from the original pic....
-
This was and is such a good tutorial.! Here is what I managed to get, and I think I will be using this one on my website for the header. I should make some tuts...

-
 Nice tut easy to follow, here is what I got. and I think I will do another.

Feather Plugin (Now with Source)
in Plugins - Publishing ONLY!
Posted
cool thanks for the update, can always use good plugins