


Rei
-
Posts
27 -
Joined
-
Last visited
Posts posted by Rei
-
-
Otsu's method is a famous algorithm which uses brightness distribution in an image to determine the ideal threshold to turn the image black & white.
Before :

After:

This is typically useful for automatic image processing.
Eli found some interesting properties for this effect that you can check out here.
Download :
It will be installed under Effects\Stylize.
For more information on the plugin itself, please go to the development thread.
Many thanks to MJW who helped me make this a viable plugin.
-
 3
3
-
-
A tiny suggestion for the first line:
static readonly int NB_LEVEL_GRAY = 256;
a const would be more appropriate than a static readonly in this case.const int NB_LEVEL_GRAY = 256;
Not that a makes any real difference.Thanks! I'll integrate that in the next version. I was suspecting there was a better modifier that I didn't know of for this.
-
Updated to 1.2.
For some reason, all the beginning of my post (up to the download section) disappears sometimes when I edit my post, and a bunch of links to the Wikipedia page of Otsu just fill the post. It's the third time that this happens, so I'm not redoing it until the final release, unless I find a way to view older versions.
-
Rectangle[] selectionRectangles = EnvironmentParameters.GetSelection(src.Bounds).GetRegionScansInt();
Wow, awesome, thanks! Iterating over this is going to be so much better! Hope I get to work on this soon.
-
@MJW
Ahah, you're right about the threshold being computed on the wrong pixels. However, I fail to see why it wouldn't be possible to limit a plugin's ability to read pixels to the selection. Ignoring the problem of non-rectangular selections, if you consider the src Surface to be the selection rather than the whole image, then 0 is effectively selection.Left and selection.Top. I'll trust you however that this is not the case.
-
I'd be happy to translate the pseudo-code into C# if you'd prefer not to do it yourself. I can either post it here or PM it to you.
No thanks, it's very nice of you but I'd rather do it on my own, I need the practice. It's a very interesting article, it may really come in handy! Thanks for bringing my attention to it.
-
1
-
-
If you select and apply the effect one side at a time you get different results.
If I understand correctly, you mirror the image and run the effect on each half individually? If that's the case, you're probably not selecting exactly half of the image, therefore the color distribution is different, and the threshold is slightly different.
If you're doing this on 2 separate images, it's surprising. It could be that PDN doesn't create perfect mirrors, but most likely it's my implementation that's slightly affected by the order in which pixels are analyzed.
In any case, the way the plugin handles selections is wrong, so that should be fixed.
I realized that might be a problem as I was copy/pasting/editing, but ended up forgetting about it. I'll try to get a decent version up by next week (going to be busy in the meantime).
I also found that if you add some grain and run the Otsu's effect some detail can be more vissible. Perhaps an option can be added to add some grain.[...]
Do you know what type of images can take advantage of this effect?
The results of adding grain are very interesting, however I most likely won't add a grain option. This is because Otsu's method is mostly used in automatic image analysis (typically to extract parts of an image), and the results created by the grain effect are counterproductive in this case. However, if you find an interesting application for this, feel free to write a tutorial.
A couple of details, the effects icon is not showing. And, perhaps the effect could be renamed to Otsu's Threshold Method.
Yeah, I don't have an icon yet, I'm trying to think of a good icon idea, and the only one I have looks terrible using PDN's RGB colorspace, I'll try it with Photoshop's Lab colorspace when I have the opportunity. As for the name, "Otsu's method" seems to be standard, but "Otsu's Thresholding" is more explicit and sounds better, thanks for the idea, I'll integrate that into the next update.
Thanks MJW and Eli for all the advice and the time you put into this.
EDIT :
I just tried running Otsu's Method on a circular selection in the middle of the image, and it worked as intended. I suspect selection management is integrated into the plugin API (or maybe CodeLab). I'll still see what happens when I integrate proper selection management in my code, though.
EDIT 2 :
@Eli : I Haven't been able to reproduce the differing results you've described when performing Otsu's Method on two separate identical mirrored images. I suspect the differences you've observed come from inexact selections modifying slightly the color distribution, and therefore changing the threshold.
-
Download :
It will be installed under Effects\Stylize.
Algorithm by Nobuyuki Otsu
Code ported from ImageJ plugin by me
Original Java code by Hugo MARTIN
Made with the CodeLab plugin for Paint.NET
Source code :Hidden Content:
static readonly int NB_LEVEL_GRAY = 256;
bool isFirst = true;
int threshold;

byte getGrayscaleValue(ColorBgra pixel){
    return (byte) (0.2126*pixel.R + 0.7152*pixel.G + 0.0722*pixel.;
}

int getOtsuThreshold(Surface src){
    int otsuThreshold = 0;

    /**
     * Otsu threshold determination
     */
    double nbPixels = 0;
    double[] probabilities = new double[NB_LEVEL_GRAY];

    Rectangle[] selectionRectangles = EnvironmentParameters.GetSelection(src.Bounds).GetRegionScansInt();
    foreach(Rectangle r in selectionRectangles){
        nbPixels += r.Width*r.Height;
        for(int i=r.Top;i<r.Bottom;i++)
            for(int j=r.Left; j<r.Right; j++)
                if(src[j,i].A==0) //if the pixel is transparent, don't count it in the total pixels and don't add it to the histogram
                    nbPixels-=1;
                else
                    probabilities[getGrayscaleValue(src[j, i])] += 1;
    }
    for(int i=0; i<NB_LEVEL_GRAY; i++){
        probabilities[i]/=nbPixels;
    }


    /**
     * interclass variance maximisation
     */
    double max = 0;
    for(int i=0; i<NB_LEVEL_GRAY; i++){
        double w1=0, w2=0, u1=0, u2=0;
        for(int j=0; j<i; j++){
            w1 += probabilities[j];
            u1 += j*probabilities[j];
        }

        u1/=w1;
        w2 = 1-w1;

        for(int j=i; j<NB_LEVEL_GRAY; j++){
            u2 += j*probabilities[j];
        }
        u2/=w2;

        double value= w1*w2*(u1-u2)*(u1-u2);
        if(max<value){
            otsuThreshold = i;
            max = value;
        }
    }

    return otsuThreshold;
}

void Render(Surface dst, Surface src, Rectangle rect){
    if (isFirst){ //we don't need to compute the threshold at every call
        threshold = getOtsuThreshold(src);
        isFirst=false;
    }

    ColorBgra CurrentPixel;
    for (int y = rect.Top; y < rect.Bottom; y++){
        if (IsCancelRequested) return;
        for (int x = rect.Left; x < rect.Right; x++){
            CurrentPixel = src[x,y];
            if(getGrayscaleValue(CurrentPixel)<threshold)
                CurrentPixel.R=CurrentPixel.G=CurrentPixel.B=0;
            else
                CurrentPixel.R=CurrentPixel.G=CurrentPixel.B=255;
            dst[x,y] = CurrentPixel;
        }
    }
}
Changelog :Hidden Content:
1.2
Threshold determination doesn't take transparent pixels into account anymore
1.1
Fixed a bug with selections
Increased speed drastically by computing the threshold only once
(Thanks MJW for pointing those out)
1.0
Original release
If you use the code above or the original Java code, please give credit to Hugo Martin and provide a link to his GitHub. -
One of my favorite plugins. Great work. Also, photos need to be reuploaded.
EDIT :
Here are some photo comparisons, since the ones provided by OP are broken. In all compressed images, maximum level of compression (5/5) was used.
Audi A5 before (321 KB in PNG):
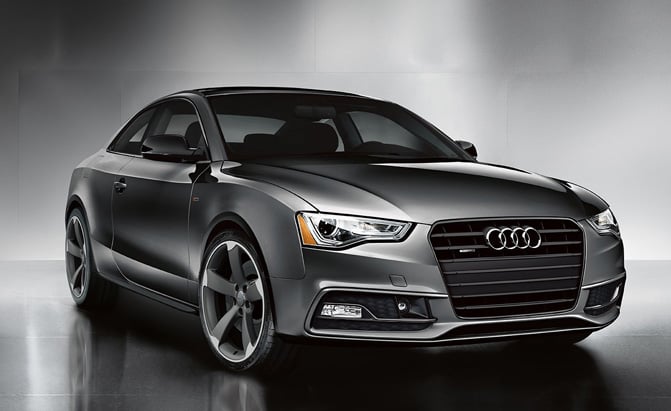
Audi A5 after PNG Preprocessor (185 KB = 57.6% of original size)

Audi A5 High-Quality JPEG : 41.59 KB
Lena Söderberg before (1.77 MB)
Lena Söderberg after (978.2 KB = 55.3%)
Lena Söderberg High-Quality JPEG : 134 KB
"Pub" by GUWEIZ on DeviantArt (1.45 MB)
"Pub" by GUWEIZ after (790 KB = 54.5%)
"Pub" High-Quality JPEG : 242.15 KB
A page in the manga Nisekoi before (264 KB)
The same page after (176 KB = 66.7 %)
Manga page High-Quality JPEG : 183.49 KB
A transparency gradient before (179 KB) :

Transparency gradient after (56.6 KB = 31.6%) :

Transparency gradient High-Quality JPEG : Not Applicable (JPEG doesn't encode transparency)
In conclusion, I have found that color images such as photos or complex pieces of artwork can be compressed to about 55% of the original size on average, whereas simpler grayscale images can be compressed to 65% of the original file size. The only noticeable deteriorations I have found are transparency gradients and dark gradients.
This compression method gets results that can be comparable to high-quality JPEG for much less noticeable deteriorations.
-
I just checked in today and saw this plugin hit 1000 downloads!
 I'm surprised and glad it helped out so many people. This was just an introduction to basic C# syntax for me, and I'm happy it became more than that to >1k users. Have fun using it
-
@Eli
Thanks! Speaking of being back, some friends and I are going to write a playing-card detection plugin for ImageJ soon, and I'll try to port it to Paint.NET afterwards.-
1
-
-
@Rei...I use this plugin all the time. Thank you so much for making it!
You're very welcome! Glad to know it's helpful! Don't hesitate to leave suggestions if you feel something is missing.
I never thought this plug-in would get over 15 downloads and a couple comments, so I'm surprised and humbled at all the attention it got.
-
As OP's answer isn't very clear about Windows Ink, here's a more in-depth explanation :
Windows Ink is a Microsoft feature that allows some tablet users (depending on the brand and model of the tablet) to write by hand in text boxes. It opens window similar to the on-screen keyboard, but that detects handwriting and converts it (badly) to text.
When Windows Ink is activated (which is the default behavior), movements smaller than about 3mm are not detected. This is very annoying, especially when drawing details.
Windows Ink appeared in Windows XP with the Tablet PC Settings, a set of default drivers for tablets. The only way to deactivate it was finding the service and disabling it.
In June 2013, Wacom released a driver update allowing users to deactivate Windows Ink in the configuration window.
And that's pretty much everything about Windows Ink. -
Alternatively, if you're not afraid of history being cleared, you can restart pdn.
-
I see you've posted the source code, but I'm not seeing any sort of license. Please let us know what freedoms, if any, are available to us in relation the code.
Done, thanks.
-
This is amazing. Did you come up with the algorithm yourself?
-
2 thumbs up, TR!
-
1
-
-
Hey, you're actually giving the answer I need. Thanks !
Cheerio !
Oh, great!
-
Thanks for the prompt reply Rei
No problem~ if you have any suggestions or feedback, please do leave a comment
-
Where does the Windows Batch File go please ?
You put both files on your desktop and double-click the .bat. Or you put the dll file in Program Files\paint.net\Effects and the bat in the recycle bin.
-
Puzzled. How to install another file ? In effects folder or somewhere else ?
I'm not sure what you mean. If you're wondering which submenu you can find the effect after installation; it should be Effects\Render.
Sometimes I find the transparent gradient tool a bit tricky to use (lol), so I'm sure this plugin will come in handy!
Perhaps an option to pan the effect would also be useful!
Great to know it's useful!
I'll try working on a panning system ; but in the meantime you can select the area you want to fade ; since this works by selection : it will fade from the center to the edge of the selection. You might be able to make do with that until I implement the panning. Thanks for the idea!
EDIT : Implemented panning
-
Thanks
Strangely, I thought I added the zip with the dll and a .bat that installs it ; but it's obviously not there. Something must've gone wrong, I'll try it again.
If you are, there are a few nice features you can include in the source before compiling. See http://www.boltbait.com/pdn/codelab/help/buildingdll.asp (under heading DEFAULTS).
Thanks, I'll do that next time, but I already have the zip on my desktop, so I won't go through the whole recompiling process.
EDIT : OK, I added the dll to my first post. Thanks for pointing that out, Ego.
-
It can indeed. I didn't even see that option, and feel like an idiot for having gone through all that.
Meh, at least I got some experience out of it.That being said, it seems to me the transparency gain over distance to center can't be tampered with, so I guess this still can be useful... -ish.

 I'm surprised and glad it helped out so many people. This was just an introduction to basic C# syntax for me, and I'm happy it became more than that to >1k users. Have fun using it
Radial Fade
in Plugins - Publishing ONLY!
Posted
@ingwer I watched the video, and albeit not understanding german well, I think you did a great job showcasing Radial Fade! I'm honored, thank you for your work!